

I remember the first time I tried to bake a fancy layer cake. It was for my sister’s birthday, and honestly, it was a bit of a disaster. The layers slumped, the frosting curdled, and I almost cried right there in the kitchen. But then, I stumbled upon this magical combination: white chocolate and raspberries. It just clicked. The sweet, creamy white chocolate with that bright, tangy burst of raspberry? Oh, it’s a match made in dessert heaven, truly. This White Chocolate Raspberry Dream Cake isn’t just a recipe, it’s a sweet memory, a triumph over kitchen chaos, and a hug in cake form that I just have to share.
My first attempt at the raspberry filling was… eventful. I decided to “wing it” with the cornstarch, thinking more is always better, right? Wrong. I ended up with a raspberry jelly brick that could probably stop a door from closing. My husband just laughed, bless his heart. Now, I measure everything for that filling, because nobody wants a fruit-flavored hockey puck in their White Chocolate Raspberry Dream Cake!

Ingredients for Your White Chocolate Raspberry Dream Cake
Cake Batter Essentials
- All-Purpose Flour: This is our sturdy foundation, hon. Don’t go swapping it for self-rising unless you know what you’re doing, or you’ll get a wonky texture. I’ve been there, trust me.
- Granulated Sugar: For that essential sweetness in our White Chocolate Raspberry Dream Cake. I once tried to cut it down too much, and the cake just tasted… sad. Stick to the recipe for a happy cake!
- Unsalted Butter: Make sure it’s softened! Like, really softened. Not melted, not rock hard. It makes all the difference in creaming for that light, fluffy crumb. I swear by good quality butter, you can taste it.
- Large Eggs: Room temperature, please! They emulsify better and give a more consistent batter. I used cold ones once in a rush, and the batter looked a little curdled. Oops!
- Buttermilk: This is key for moisture and a tender crumb. Don’t have it? You can make a quick substitute with regular milk and a splash of lemon juice or vinegar. I’ve done it in a pinch, and it worked, kinda, but real buttermilk is always better.
White Chocolate Buttercream
- White Chocolate: Use good quality baking chocolate, not those candy melts! I learned that the hard way when my frosting tasted like plastic. Ghirardelli or Lindt are my go-to’s.
- Powdered Sugar: Sift it! Honestly, just do it. Saves you from lumpy frosting, which I’ve battled too many times.
- Heavy Cream: For that rich, dreamy texture. Don’t even think about using half-and-half if you want a stable, pipeable buttercream.
Raspberry Filling & Garnish
- Fresh Raspberries: The star of our show! Their tartness cuts through the sweetness beautifully. I always buy a little extra because, well, snacking while baking is a must.
- Raspberry Jam/Preserves: Adds an extra layer of raspberry goodness and helps stabilize the fresh fruit. A good quality one makes a huge difference.
- Lemon Juice: Just a tiny bit to brighten up the raspberry filling. It really makes the fruit sing, you know?
Crafting Your White Chocolate Raspberry Dream Cake
- Prep the Pans & Preheat:
- First things first, get those cake pans ready. Grease and flour two 8-inch round cake pans I usually trace the bottoms with parchment paper too, for extra insurance against sticking. Nothing worse than a beautiful cake stuck to the pan, honestly! Then, preheat your oven to 350°F (175°C). The kitchen starts to warm up, and you can already smell the promise of cake, a truly lovely feeling.
- Whip Up the Cake Batter:
- In a large bowl, cream together the softened butter and granulated sugar until it’s light and fluffy. This is where you really want to get some air in there, like a good arm workout! Then, beat in the room temperature eggs, one at a time, mixing well after each addition. I always forget to scrape down the sides of the bowl, and then I find hidden pockets of unmixed butter later. Don’t be like me, scrape those sides!
- Combine Dry & Wet Ingredients:
- In a separate bowl, whisk together your flour, baking powder, and a pinch of salt. Gradually add the dry ingredients to the wet mixture, alternating with the buttermilk, starting and ending with the flour. Mix just until combined, overmixing is the enemy of a tender cake! The batter should be smooth and smell faintly sweet, a sign that our White Chocolate Raspberry Dream Cake is on its way.
- Bake the White Chocolate Raspberry Dream Cake:
- Divide the batter evenly between your prepared pans. Pop them into the preheated oven and bake for 25-30 minutes, or until a wooden skewer inserted into the center comes out clean. My oven sometimes bakes unevenly, so I usually rotate the pans halfway through. Once they’re done, the kitchen will smell absolutely divine a warm, buttery aroma that makes your heart happy. Let them cool in the pans for about 10 minutes before carefully inverting them onto a wire rack to cool completely. Patience is a virtue here, truly.
- Make the Raspberry Filling:
- While the cakes cool, let’s get that vibrant raspberry filling going. In a small saucepan, combine fresh raspberries, raspberry jam, a squeeze of lemon juice, and a tiny bit of cornstarch mixed with water to create a slurry. Cook over medium heat, stirring gently, until the mixture thickens slightly. You want it to be a spreadable consistency, not a solid brick like my first attempt! Let it cool completely. This tart and sweet filling is what makes our White Chocolate Raspberry Dream Cake sing!
- Assemble Your Dream Cake:
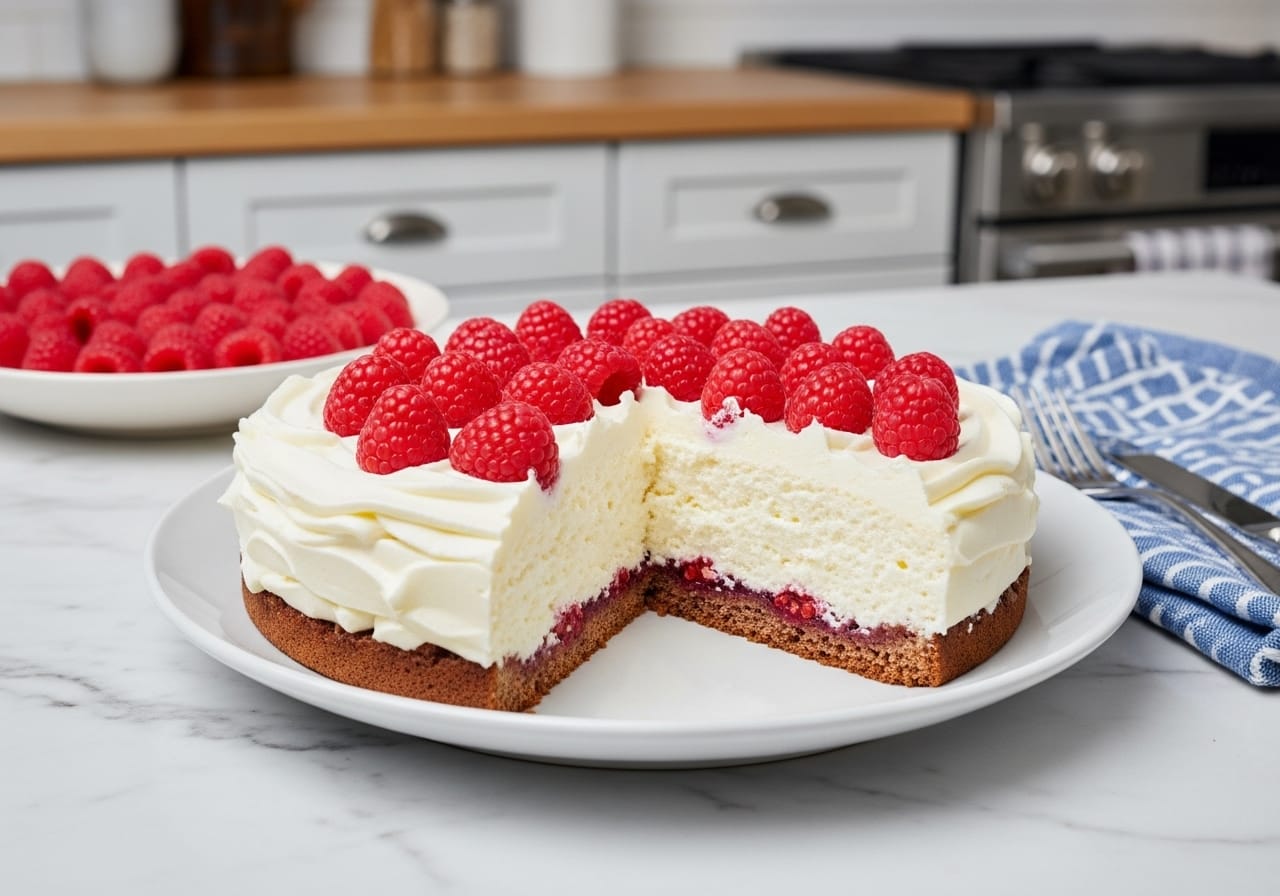
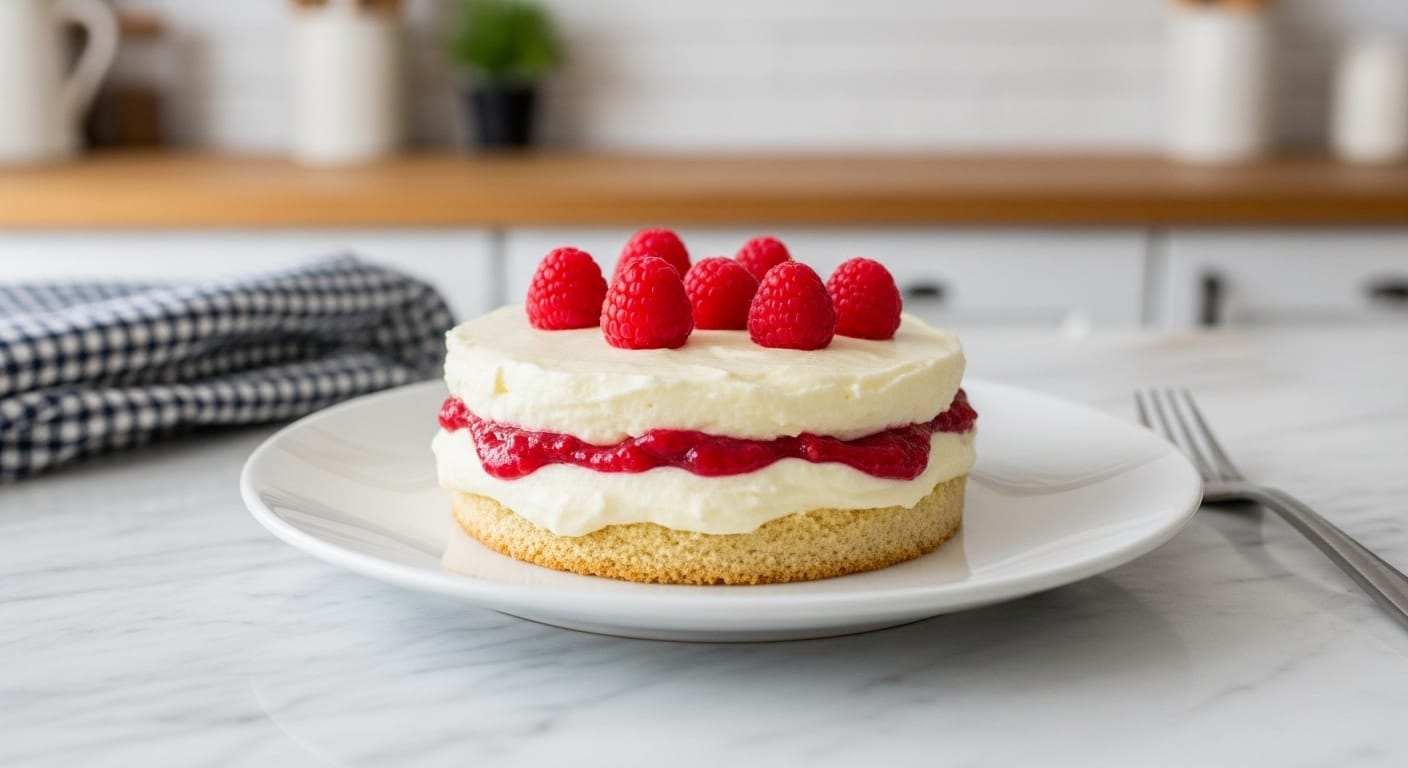
- Once the cakes are completely cool (this is important, folks, or your frosting will melt!), level them if needed. Place one cake layer on your serving plate. Spread an even layer of the cooled raspberry filling over it, leaving a small border. Then, pipe a dam of white chocolate buttercream around the edge of the first layer to hold in the filling. Place the second cake layer on top, and then frost the entire White Chocolate Raspberry Dream Cake with the remaining white chocolate buttercream. Decorate with fresh raspberries. It’s a beautiful sight, honestly, all those vibrant colors!
One time, I was baking this White Chocolate Raspberry Dream Cake for a potluck and my oven decided to have a moment. The temperature was all over the place! I had to stand there, watching it like a hawk, adjusting as I went. It was a bit stressful, but seeing everyone’s faces light up when they tasted it? Totally worth the oven drama. It just reminds me that even when things go a little sideways, the heart you put into it shines through.
Storage Tips for White Chocolate Raspberry Dream Cake
So, you’ve got leftover White Chocolate Raspberry Dream Cake? Lucky you! For short-term storage, like a day or two, I just keep it covered at room temperature. A cake dome works wonders, or just loosely cover it with plastic wrap. If you need it to last longer, say up to 4-5 days, pop it in the fridge. I usually put it in an airtight container to prevent it from drying out or absorbing fridge smells nobody wants a garlic-flavored cake, right? Let it come to room temperature for about 30 minutes before serving for the best texture. I microwaved a slice once, hoping to warm it up, and the white chocolate frosting got a little oily. So, don’t do that, lol. Freezing is also an option! Wrap individual slices tightly in plastic wrap, then foil, and they’ll be good for up to a month. Thaw in the fridge overnight.
Ingredient Substitutions for White Chocolate Raspberry Dream Cake
Life happens, and sometimes you don’t have exactly what the recipe calls for. I get it! For the buttermilk, if you’re out, you can make your own: just add a tablespoon of white vinegar or lemon juice to a measuring cup, then fill the rest with regular milk (any kind, honestly, I’ve used whole and 2%) to make 1 cup. Let it sit for 5-10 minutes until it curdles slightly. I tried this once with almond milk, and it worked, kinda, but the tang wasn’t quite the same. If fresh raspberries are hard to find, frozen ones work for the filling, just make sure to thaw them first and drain any excess liquid. For the white chocolate, please use a good baking bar! Chips can be hit or miss for melting smoothly. I once used some cheap candy melts for the frosting, and it tasted waxy never again. Experiment a little, but know your limits, friend!
Serving Your White Chocolate Raspberry Dream Cake
This White Chocolate Raspberry Dream Cake is a showstopper all on its own, but a few little touches can make it extra special. I love serving it with a dollop of freshly whipped cream, maybe infused with a tiny bit of vanilla extract, just to add another layer of creamy goodness. A small scattering of extra fresh raspberries on the side always looks beautiful and adds that fresh burst of flavor. For drinks, a light sparkling wine or a cup of your favorite herbal tea pairs wonderfully. This cake and a cozy rom-com on a Friday night? Yes, please. Or, for a more elegant affair, a strong espresso cuts through the sweetness just right. It’s truly versatile for any mood or occasion!
Cultural Backstory of White Chocolate Raspberry Dream Cake
While the specific combination of white chocolate and raspberry isn’t tied to one ancient culinary tradition, the concept of a rich, fruit-layered cake has roots in European patisserie, especially French and British baking. Think of classic génoises and sponges, often paired with fruit curds and creams. My own connection to this flavor profile started during a trip to Paris, where I had a small tart with these very flavors. It wasn’t a cake, but the pairing just captivated me! I came home determined to recreate that magic in a way that felt like my kitchen, with all its quirks and little triumphs. This White Chocolate Raspberry Dream Cake is my homage to that memory, blending classic techniques with my own home-cook sensibility.
So there you have it, my White Chocolate Raspberry Dream Cake! It’s been through a few iterations in my kitchen, from jelly bricks to perfect layers, and honestly, every little mistake just made me love it more. It’s a joy to make and even more of a joy to share. I hope you give it a try and maybe even have your own little kitchen adventures with it. Don’t forget to tell me how it goes I love hearing about your baking escapades!
Frequently Asked Questions about White Chocolate Raspberry Dream Cake
- → Can I make this White Chocolate Raspberry Dream Cake ahead of time?
Oh, absolutely! I often bake the cake layers a day in advance, wrap them tightly, and keep them at room temperature. You can even make the raspberry filling and white chocolate buttercream the day before. Just assemble the cake on the day you want to serve it!
- → What if I don’t have fresh raspberries for the White Chocolate Raspberry Dream Cake?
No worries at all! Frozen raspberries work perfectly for the filling. Just let them thaw completely and drain any excess liquid before you cook them down. I’ve used them many times when fresh ones weren’t in season, and it works great.
- → My white chocolate buttercream is too runny/too stiff! Help!
Ah, the classic frosting dilemma! If it’s too runny, pop it in the fridge for 15-20 minutes, then re-whip. If it’s too stiff, add a tiny splash of heavy cream, a teaspoon at a time, until it reaches your desired consistency. I’ve had both happen, and patience is key!
- → How long does this White Chocolate Raspberry Dream Cake last?
If stored properly (covered at room temp or in an airtight container in the fridge), it usually lasts 3-4 days. Honestly, in my house, it rarely makes it past day two! The flavors actually meld wonderfully overnight.
- → Can I add other fruits to the White Chocolate Raspberry Dream Cake?
You totally can! I’ve experimented with a mix of berries blueberries and strawberries work nicely with the white chocolate. Just be mindful of their water content. Blackberries would also be a delicious, slightly more tart option!

White Chocolate Raspberry Dream Cake: Rich & Fruity
- Prep Time: 40 Minutes
- Cook Time: 30 Minutes
- Total Time: 1 Hour 10 Minutes
- Yield: 12 Servings 1x
- Category: AllRecipes
Description
White Chocolate Raspberry Dream Cake combines creamy white chocolate and tangy raspberries in a moist, delightful bake. Perfect for any sweet craving!
Ingredients
- Cake Batter Essentials:
- 2 ½ cups (300g) all-purpose flour
- 1 ½ teaspoons baking powder
- ½ teaspoon salt
- 1 cup (226g) unsalted butter, softened
- 2 cups (400g) granulated sugar
- 4 large eggs, room temperature
- 1 cup (240ml) buttermilk, room temperature
- 2 teaspoons vanilla extract
- White Chocolate Buttercream:
- 1 ½ cups (340g) unsalted butter, softened
- 4 cups (480g) powdered sugar, sifted
- 8 oz (226g) good quality white chocolate, melted and cooled
- ½ cup (120ml) heavy cream
- 1 teaspoon vanilla extract
- Pinch of salt
- Raspberry Filling & Garnish:
- 2 cups (250g) fresh raspberries, plus more for garnish
- ½ cup (160g) raspberry jam or preserves
- 1 tablespoon fresh lemon juice
- 1 tablespoon cornstarch mixed with 2 tablespoons cold water (slurry)
Instructions
- Prep the Pans & Preheat:: First things first, get those cake pans ready. Grease and flour two 8-inch round cake pans – I usually trace the bottoms with parchment paper too, for extra insurance against sticking. Nothing worse than a beautiful cake stuck to the pan, honestly! Then, preheat your oven to 350°F (175°C). The kitchen starts to warm up, and you can already smell the promise of cake, a truly lovely feeling.
- Whip Up the Cake Batter:: In a large bowl, cream together the softened butter and granulated sugar until it’s light and fluffy. This is where you really want to get some air in there, like a good arm workout! Then, beat in the room temperature eggs, one at a time, mixing well after each addition. I always forget to scrape down the sides of the bowl, and then I find hidden pockets of unmixed butter later. Don’t be like me; scrape those sides!
- Combine Dry & Wet Ingredients:: In a separate bowl, whisk together your flour, baking powder, and a pinch of salt. Gradually add the dry ingredients to the wet mixture, alternating with the buttermilk, starting and ending with the flour. Mix just until combined; overmixing is the enemy of a tender cake! The batter should be smooth and smell faintly sweet, a sign that our White Chocolate Raspberry Dream Cake is on its way.
- Bake the White Chocolate Raspberry Dream Cake:: Divide the batter evenly between your prepared pans. Pop them into the preheated oven and bake for 25-30 minutes, or until a wooden skewer inserted into the center comes out clean. My oven sometimes bakes unevenly, so I usually rotate the pans halfway through. Once they’re done, the kitchen will smell absolutely divine – a warm, buttery aroma that makes your heart happy. Let them cool in the pans for about 10 minutes before carefully inverting them onto a wire rack to cool completely. Patience is a virtue here, truly.
- Make the Raspberry Filling:: While the cakes cool, let’s get that vibrant raspberry filling going. In a small saucepan, combine fresh raspberries, raspberry jam, a squeeze of lemon juice, and a tiny bit of cornstarch mixed with water to create a slurry. Cook over medium heat, stirring gently, until the mixture thickens slightly. You want it to be a spreadable consistency, not a solid brick like my first attempt! Let it cool completely. This tart and sweet filling is what makes our White Chocolate Raspberry Dream Cake sing!
- Whip the White Chocolate Buttercream:: In a large bowl, beat the softened butter until light and fluffy. Gradually add the sifted powdered sugar, alternating with the heavy cream, until smooth. Beat in the cooled melted white chocolate, vanilla extract, and a pinch of salt. Mix until the buttercream is light, fluffy, and spreadable. Don’t overmix or it might get too soft; I’ve done that, and it’s a pain to fix!
- Assemble Your Dream Cake:: Once the cakes are completely cool (this is important, folks, or your frosting will melt!), level them if needed. Place one cake layer on your serving plate. Spread an even layer of the cooled raspberry filling over it, leaving a small border. Then, pipe a dam of white chocolate buttercream around the edge of the first layer to hold in the filling. Place the second cake layer on top, and then frost the entire White Chocolate Raspberry Dream Cake with the remaining white chocolate buttercream. Decorate with fresh raspberries. It’s a beautiful sight, honestly, all those vibrant colors!


