
Introduction
Growing up, Easter was a magical time filled with colorful egg hunts and sweet surprises. One of my fondest memories is helping my mom whip up a batch of Rice Krispie Easter Eggs, a nice treat that never failed to bring joy to our family gatherings. Whether you’re juggling work calls or soccer practice, this recipe for Rice Krispie Easter Eggs is your new best friend. It combines nostalgia with simplicity, making it a perfect activity to share with your kids or to enjoy solo while you enjoy in some well-deserved ‘me time.’
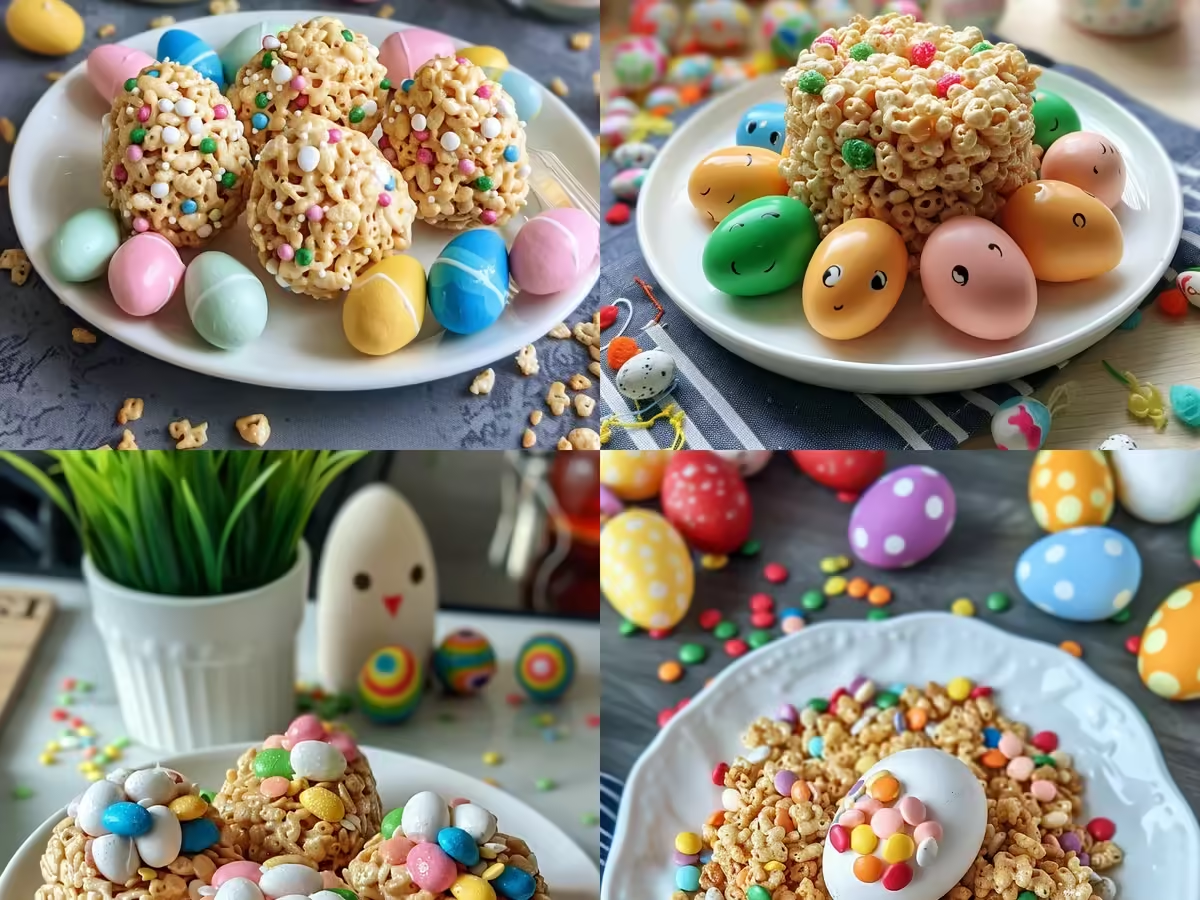
In just a few simple steps, you can transform crispy rice cereal into charming, egg-shaped delights that are perfect for any Easter celebration. These treats not only look adorable but also taste heavenly, with a mix of buttery sweetness and marshmallowy goodness. Each bite is a reminder of those carefree childhood days, making this recipe a timeless favorite. So, roll up your sleeves and get ready to create a batch of Rice Krispie Easter Eggs that will have everyone hopping with joy!

Why You’ll Love Rice Krispie Easter Eggs
As a child, nothing excited me more than the arrival of Easter, especially when it came to indulging in sweet treats. These Rice Krispie Easter Eggs are a nice twist on a classic favorite, combining nostalgia with creativity. Whether you’re juggling work calls or soccer practice, this recipe is your new best friend, making it easy to whip up a batch that’ll impress everyone at your holiday gathering.
This recipe is like a cozy blanket for your taste buds, enveloping you in a sweet, crunchy goodness. Imagine biting into a crispy shell that gives way to a soft, marshmallowy center. Not only does it save time, but it also allows you to customize each egg with your favorite colors and toppings, making them a perfect project for family bonding. Plus, no more 6 PM panic—these treats come together faster than a microwave meal!
With a nice crunch and endless possibilities for personalization, Rice Krispie Easter Eggs are not just a treat; they are a celebration. So gather your loved ones and get ready to create something magical together!
Ingredients For Rice Krispie Easter Eggs
As a child, nothing excited me more than the arrival of Easter, especially the sweet treats that came along with it. Rice Krispie Easter Eggs are a nice twist on the classic crispy treat, bringing joy and nostalgia to any celebration. Whether you’re juggling work calls or soccer practice, this recipe is your new best friend. With just a handful of simple ingredients, you can create these colorful, festive delights that will bring smiles to faces young and old.
To whip up these nice Rice Krispie Easter Eggs, you’ll need the following:
- 3 tablespoons butter – This is your golden base, bringing rich flavor and a touch of sweetness.
- 1 package (10 oz) mini marshmallows – These fluffy gems melt down beautifully, creating that iconic sticky mixture.
- 6 cups Rice Krispies cereal – The star of the show, providing that satisfying crunch in every bite.
- Food coloring – Choose your favorite shades to make your eggs pop with color, adding a festive touch.
- Chocolate (optional) – Melted chocolate can be drizzled or dipped for an extra layer of sweetness.
Let’s spice things up! Want to add a twist? Consider these fun options:
- Sprinkles – Because who doesn’t love a little extra sparkle? These can improve your eggs to a whole new level of fun.
- Peanut butter – If you’re a fan of that nutty flavor, swirl in some peanut butter for a deliciously creamy texture.
- Mini candies – Think M&Ms or jellybeans for a sweet surprise inside each egg—your secret’s safe with me!
With these ingredients in hand, you’re ready to create an Easter treat that’s not just tasty, but also a nice experience for you and your family. Get ready to enjoy the magic of Rice Krispie Easter Eggs!
How To Make Rice Krispie Easter Eggs
Making Rice Krispie Easter Eggs is one of those nice activities that transports you back to childhood. I still remember my own attempts at crafting these colorful treats with my family, each egg filled with gooey marshmallow goodness. Whether you’re juggling work calls or soccer practice, this recipe is your new best friend. These Rice Krispie Easter Eggs are not only fun to make, but they also add a festive touch to your celebrations!
- Start by measuring out your ingredients. You’ll need:
- 3 tablespoons of butter
- 1 package (10 ounces) of mini marshmallows
- 6 cups of Rice Krispies cereal
- Food coloring (optional, for a festive touch)
- Chocolate or candy melts (for coating)
- Sprinkles (for decoration)
- Remove the saucepan from heat and add a few drops of food coloring if desired. Stir until the color is evenly distributed.
- Next, gradually add the Rice Krispies cereal to the marshmallow mixture. Use a spatula to fold the cereal in until it’s well coated. It will be sticky, so be patient!
- Once mixed, allow the mixture to cool slightly, then grease your hands with a bit of butter. Grab a handful of the mixture and mold it into the shape of an egg. Repeat until you’ve formed all the eggs.
- Now comes the best part—decorating! Melt your chocolate or candy melts according to the package instructions. Dip each Rice Krispie egg into the melted chocolate, ensuring it’s fully coated. This adds a nice crunch and sweetness!
- After dipping, sprinkle your favorite toppings over the wet chocolate. Think colorful sprinkles or crushed candies for that extra flair.
- Let the decorated eggs cool and harden on a baking sheet lined with parchment paper. Once set, they’re ready to impress!
Making Rice Krispie Easter Eggs is not only a fun activity but also a sweet way to celebrate Easter with family and friends. You’ll find that these treats are a hit, appealing to both kids and adults alike. Enjoy the process, and don’t forget to share your creations!
Expert Tips and Tricks
- Prep Ahead: To save time, consider prepping your ingredients the night before. Chop your veggies and measure out spices so that when you’re ready to cook, everything is at your fingertips. It’s like having a sous-chef on call!
- Temperature Matters: When making your Rice Krispie Easter Eggs, ensure your pan is hot before adding ingredients. This step helps to lock in flavors and gives your dish that perfect sizzle—think of it as a warm welcome for your flavors!
- Season Gradually: Start with a pinch of salt and taste as you go. You can always add more, but you can’t take it out once it’s in. Trust your taste buds; they know what they like!
- Resting Time: After cooking, allow your Rice Krispie Easter Eggs to rest for a few minutes. This waiting period helps the flavors mix together beautifully—like a well-balanced choir of taste!
- Garnish for Flair: A little garnish can improve your dish from everyday to extraordinary. Fresh herbs, a sprinkle of cheese, or a drizzle of balsamic can transform your Rice Krispie Easter Eggs into a feast for the eyes.
- Experiment with Textures: Don’t shy away from mixing textures. Whether it’s crunchy toppings or creamy sauces, contrasting textures can add dimension to your Rice Krispie Easter Eggs, making each bite exciting.
- Use Quality Ingredients: The better the ingredients, the better the flavors. Choose fresh produce and high-quality oils—this isn’t just cooking; it’s an art form!
- Stay Organized: Keep your workspace tidy. A clean kitchen leads to a clear mind, making the cooking process smoother. Plus, it’s easier to find that elusive spice jar!
Equipment Needed
When it comes to making Rice Krispie Easter Eggs, having the right equipment can make all the difference. Imagine whisking up a batch of sweet, gooey treats while your kids excitedly wait to decorate them. Whether you’re juggling work calls or soccer practice, this recipe is your new best friend. To ensure you have a smooth and enjoyable experience, here’s a rundown of the essential tools you’ll need to whip up these nice treats.
- Large Mixing Bowl: A big bowl is essential for combining the melted marshmallows and Rice Krispies without making a mess. Look for one that can hold at least 8 cups of ingredients.
- Microwave-Safe Bowl: You’ll need a bowl that can withstand the heat for melting your butter and marshmallows. A glass or silicone bowl works perfectly.
- Spatula: A sturdy spatula is your best friend for mixing everything together. Choose one with a silicone head to scrape every last bit from the bowl.
- Measuring Cups and Spoons: Precision is key in baking. Make sure you have a set of measuring cups and spoons to get the ratios just right.
- Wax Paper or Parchment Paper: Line your baking sheet with wax or parchment paper to prevent sticking when shaping your eggs.
- Egg Molds: While optional, using silicone egg molds helps create the perfect shape for your Rice Krispie Easter Eggs, making them look extra festive.
- Microwave: If you don’t have a stovetop, a microwave is an excellent tool for melting your ingredients quickly and efficiently.
- Cooling Rack: Let your finished eggs cool on a rack to keep them from getting soggy.
With these tools at your side, creating Rice Krispie Easter Eggs will be a breeze. The right equipment not only streamlines the process but also enhances the fun of making these sweet treats!
Variations and Substitutions
Whether you want to make your Rice Krispie Easter Eggs a little different or you need to accommodate dietary restrictions, there are plenty of creative variations and substitutions to consider. This flexibility not only keeps your meals exciting but can also cater to everyone at the table. Here are some tasty options:
- Dietary-Friendly Tweaks: If you’re looking to make your Rice Krispie Easter Eggs dairy-free, consider swapping out cream for coconut milk. It adds a subtle sweetness and creamy texture that your dairy-free friends will adore!
- Protein Options: Not a fan of traditional protein sources? Try using chickpeas or lentils for a plant-based alternative that packs a protein punch. If you prefer meat, chicken or shrimp can easily take center stage in this dish.
- Seasonal Twists: Embrace the flavors of the season! Adding roasted butternut squash in fall transforms your Rice Krispie Easter Eggs into a warm, hearty meal that feels like Thanksgiving in a bowl. In summer, fresh zucchini or tomatoes can brighten up the dish.
- Herb Substitutions: Fresh herbs improve the taste immensely. If you can’t find basil, try parsley or cilantro for a different, yet equally nice taste. They can bring a fresh twist to your Rice Krispie Easter Eggs.
- Spice Level Adjustments: Want to kick it up a notch? Add a pinch of red pepper flakes or a dash of hot sauce for a spicy kick. Conversely, if you’re serving picky eaters, tone down the heat for a milder flavor.
- Grain Swaps: Instead of traditional pasta or rice, experiment with quinoa or cauliflower rice. These options not only add unique textures but also provide a health boost, making your Rice Krispie Easter Eggs a lighter meal.
With these variations and substitutions, your Rice Krispie Easter Eggs can adapt to any occasion or dietary need, ensuring that everyone at the table enjoys a delicious meal. So, get creative and make this dish your own!
Serving and Storage Suggestions
When it comes to enjoying your delicious Rice Krispie Easter Eggs, presentation and proper storage can improve your experience. Whether you’re hosting a cozy dinner party or enjoying a quiet meal at home, these tips will help you savor every bite while keeping your leftovers fresh for later.
- Serving: For an inviting presentation, scoop your Rice Krispie Easter Eggs into vibrant, shallow bowls. A sprinkle of fresh herbs on top not only adds color but also enhances the flavor, making it look as good as it tastes!
- Garnishes: Consider adding a drizzle of olive oil or a dash of freshly cracked black pepper just before serving. These finishing touches can transform your dish into a great dish.
- Pairings: Serve your Rice Krispie Easter Eggs with a side of garlic bread or a crisp green salad. They complement the dish perfectly, creating a well-balanced meal that delights the senses.
- Storage: If you have leftovers, allow the Rice Krispie Easter Eggs to cool completely before transferring it to an airtight container. This will help maintain its freshness and flavors for your next meal.
- Refrigeration: Store in the fridge for up to 3-4 days. Just remember to reheat gently on the stove or in the microwave, adding a splash of broth or water if it seems dry.
- Freezing: Want to save some for another day? Freeze it in individual portions for quick, easy meals. Just make sure to label your containers with the date, so you know when to enjoy them!
- Thawing: When you’re ready to dig in, thaw the frozen Rice Krispie Easter Eggs overnight in the fridge for best results. This will preserve its texture and flavor, making it taste almost as good as fresh!
By following these serving and storage suggestions, you can enjoy Rice Krispie Easter Eggs in multiple nice ways, ensuring that every bite is as satisfying as the first.
Conclusion
At the end of the day, this recipe isn’t just dinner—it’s sanity saved. Whether you’re navigating a busy week or simply craving comfort food, Rice Krispie Easter Eggs is your go-to solution. Imagine the aroma wafting through your kitchen as you prepare this dish; it’s like a warm hug that wraps around you and your loved ones. The beauty of Rice Krispie Easter Eggs lies in its versatility—it adapts to your taste buds and lifestyle seamlessly.
Moreover, this recipe invites creativity. Feel free to experiment with seasonal ingredients or dietary tweaks, and watch how it transforms into something uniquely yours. With every bite, you’ll discover layers of flavor that not only satisfy hunger but also bring joy to your table. Remember, cooking is not just about feeding the body; it’s about nurturing the soul.
So gather your family, share laughs, and savor each moment as you enjoy Rice Krispie Easter Eggs. After all, every meal is an opportunity to create memories. Here’s to many more delicious dinners and happy gatherings ahead! Your kitchen adventures are just beginning, and this recipe is the perfect companion on your culinary journey.
Print
Rice Krispie Easter Eggs
Description
Delicious and fun Rice Krispie treats shaped like Easter eggs, perfect for a festive celebration.
Ingredients
- 3 tablespoons unsalted butter
- 1 package (10 oz) miniature marshmallows
- 6 cups Rice Krispies cereal
- Food coloring (optional)
- Chocolate melts or candy coating (for decorating)
- Sprinkles (optional)
Instructions
- In a large saucepan, melt the butter over low heat.
- Add the miniature marshmallows and stir until completely melted.
- Remove from heat and add the Rice Krispies cereal, mixing until well coated.
- If desired, divide the mixture into separate bowls and add food coloring to create different colored treats.
- Let the mixture cool slightly, then shape it into egg shapes with your hands.
- Once shaped, let them cool completely.
- Melt the chocolate melts or candy coating according to package instructions.
- Dip the cooled Rice Krispie eggs into the melted chocolate and decorate with sprinkles.
- Allow the chocolate to set before serving.
Notes
- Store in an airtight container to keep them fresh.
- Make sure the mixture is cool enough to handle before shaping into eggs.
- Experiment with different colors and decorations for a fun variety.
Nutrition
- Serving Size: 1 egg
- Calories: 150
- Sugar: 10g
- Sodium: 50mg
- Fat: 5g
- Saturated Fat: 3g
- Unsaturated Fat: 2g
- Trans Fat: 0g
- Carbohydrates: 24g
- Fiber: 0g
- Protein: 1g
- Cholesterol: 10mg


