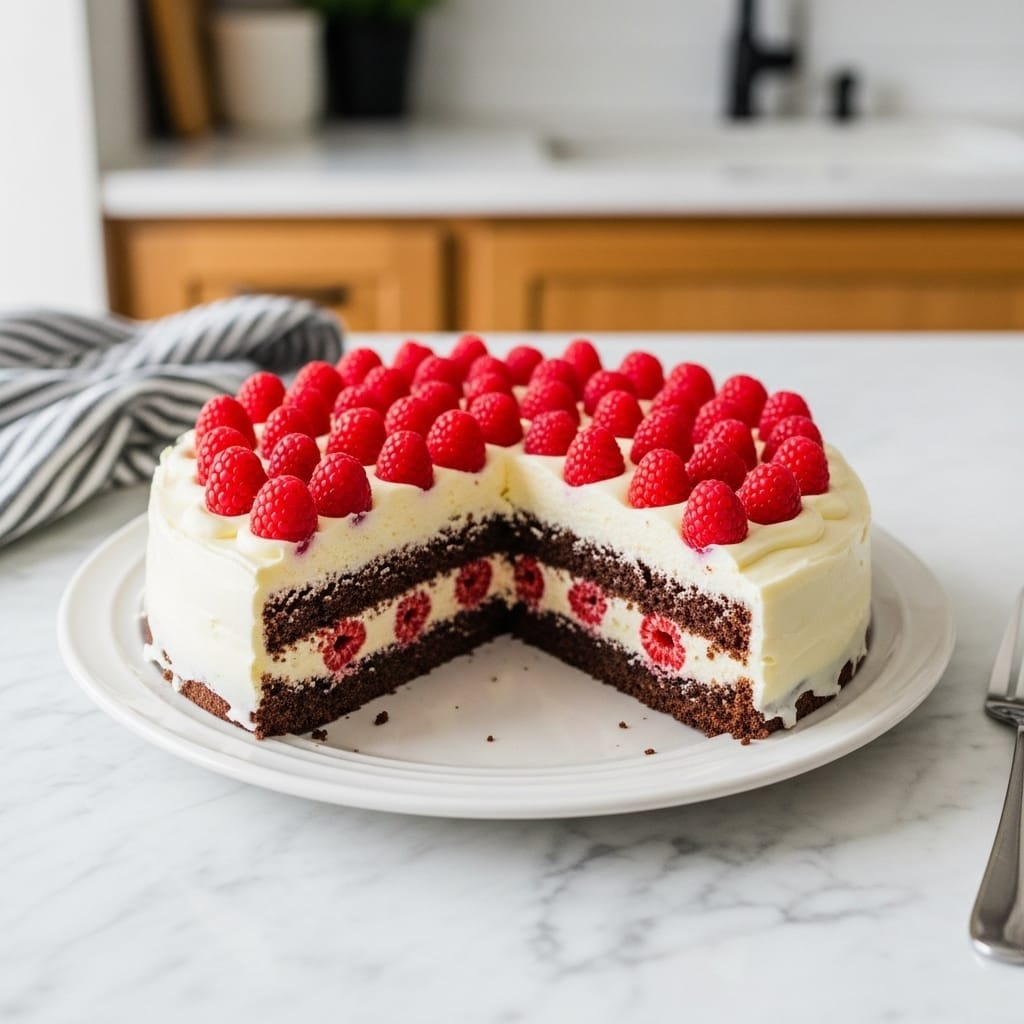
I remember the first time I attempted a Raspberry White Chocolate Cake. It was for my sister’s birthday, and honestly, I was feeling a bit ambitious. I usually stick to chocolate chip cookies, you know? But she kept raving about this flavor combo, so I thought, ‘Why not?’ The kitchen, bless its heart, looked like a flour bomb went off, and I might have, just might have, burned the first batch of white chocolate (oops!). But then, that sweet, slightly tangy smell started filling the air, and I knew I was onto something special. This isn’t just a cake, it’s a memory, a little bit of kitchen chaos, and a whole lotta love in every single bite. The way the tart raspberries cut through the creamy white chocolate? Oh, it’s a dream, hon.
My second attempt at this Raspberry White Chocolate Cake was for a potluck, and I was so proud of the perfectly leveled layers. Then, as I was carrying it out the door, my cat, Mittens, decided to rub against my leg, and I nearly dropped the whole thing! A slight tilt, a tiny smudge on the side, but it was still delicious. Everyone still raved about it, smudged frosting and all. It just goes to show, sometimes the imperfections make it even more real, right?
Raspberry White Chocolate Cake Ingredients
- All-Purpose Flour: This is your cake’s backbone, giving it structure. Don’t go for anything fancy here, just good old AP flour. I once tried cake flour, thinking it’d be extra light, but it actually made it a bit too delicate for my clumsy frosting hands.
- Granulated Sugar: Sweetness, pure and simple. It also helps with moisture. If you try to cut back too much, you’ll end up with a dry cake, and nobody wants that.
- Unsalted Butter: Creamy, rich flavor for both the cake and the buttercream. Make sure it’s softened for the cake and buttercream, otherwise, you’ll have lumpy bits, and that’s just a headache.
- Large Eggs: Binds everything together and adds richness. I always use room temperature eggs, it really makes a difference in the cake’s texture, helping it mix evenly.
- Whole Milk: Moisture, plain and simple. Honestly, don’t use skim milk, it just doesn’t give the same lush texture. I tried that once, and the cake was… fine, but not this cake.
- Baking Powder: Our leavening agent! This is what makes the cake rise and get all fluffy. Make sure yours isn’t expired, or you’ll have a dense, sad cake.
- Vanilla Extract: The soul of the cake! Use good quality stuff, trust me. It elevates all the other flavors. I always add a tiny bit more than the recipe calls for because, well, vanilla is just that good.
- Fresh Raspberries: The star of the show for the filling and garnish. Their tartness is crucial. I always pick through them carefully, finding a squishy one in your filling is a real bummer.
- Cornstarch: Thickener for that lovely raspberry filling. It prevents a watery mess. I once forgot to mix it with a little water first, and let’s just say I had some cornstarch clumps. Live and learn!
- Lemon Juice: Brightens up the raspberry filling and keeps it from being overly sweet. A little squeeze goes a long way.
- Powdered Sugar: Essential for that smooth, dreamy white chocolate buttercream. Sift it, hon, or you’ll be fighting lumps forever.
- White Chocolate: The other star! Use good quality white chocolate chips or a bar. It really makes a difference in the flavor of your Raspberry White Chocolate Cake. I once used some cheap candy melts, and it tasted… artificial. Never again!
- Heavy Cream: For a truly decadent buttercream. It makes it light and fluffy. Don’t skimp here, it’s worth it.
Instructions for Your Raspberry White Chocolate Cake
- Prep the Cake Pans:
- First things first, get your cake pans ready. I usually use two 8-inch round pans. Grease them well with butter, then dust ’em with flour. Tap out the excess, alright? This step is a non-negotiable for me because I’ve had cakes stick before, and honestly, peeling a beautiful cake from the pan is heartbreaking. Sometimes I even line the bottom with parchment paper for extra insurance. It’s a little extra effort, but it saves so much stress later, believe me.
- Whip Up the Cake Batter:
- In a large bowl, cream together your softened butter and granulated sugar until it’s light and fluffy. This takes a few minutes, so don’t rush it! Then, beat in the eggs one at a time, making sure each is fully incorporated before adding the next. I always make sure my eggs are at room temperature, it really helps prevent the batter from curdling. In a separate bowl, whisk together your dry ingredients: flour, baking powder, and a pinch of salt. Gradually add the dry mixture to the wet mixture, alternating with the whole milk, starting and ending with the dry. Don’t overmix, hon, just mix until it’s just combined. Overmixing makes for a tough cake, and we want tender!
- Bake Those Beautiful Layers:
- Divide the batter evenly between your prepared cake pans. I usually eyeball it, but if you’re a perfectionist, a kitchen scale works wonders here. Pop them into a preheated oven, usually around 350°F (175°C), and bake for about 25-30 minutes, or until a toothpick inserted into the center comes out clean. Oh, and your kitchen will start smelling absolutely heavenly at this point! I always set a timer, but I also keep an eye on them, because every oven is a little different, you know?
- Whip Up the Raspberry Filling:
- While your cakes are cooling, let’s get that gorgeous raspberry filling going. In a small saucepan, combine fresh raspberries, granulated sugar, and lemon juice. Bring it to a simmer over medium heat, stirring occasionally. In a separate tiny bowl, whisk together cornstarch with a tablespoon or two of cold water to create a slurry. Pour this into the simmering raspberry mixture and stir until it thickens. It should look glossy and vibrant. Remove it from the heat and let it cool completely. I usually pop it in the fridge to speed things up a bit, because a warm filling will melt your buttercream, and that’s a disaster I’ve lived through!
- Make the White Chocolate Buttercream:
- Now for the star frosting! Melt your white chocolate gently, either in a microwave in short bursts or over a double boiler, then let it cool slightly. In a large bowl, beat softened unsalted butter until it’s light and fluffy. Gradually add powdered sugar, a cup at a time, beating well after each addition. This is where a stand mixer is your best friend, trust me. Pour in the cooled melted white chocolate, vanilla extract, and heavy cream. Beat until the buttercream is smooth, creamy, and spreadable. If it feels too stiff, add a tiny bit more cream, too soft, a bit more powdered sugar. It should be dreamy and ready for your Raspberry White Chocolate Cake!
- Assemble Your Raspberry White Chocolate Cake:
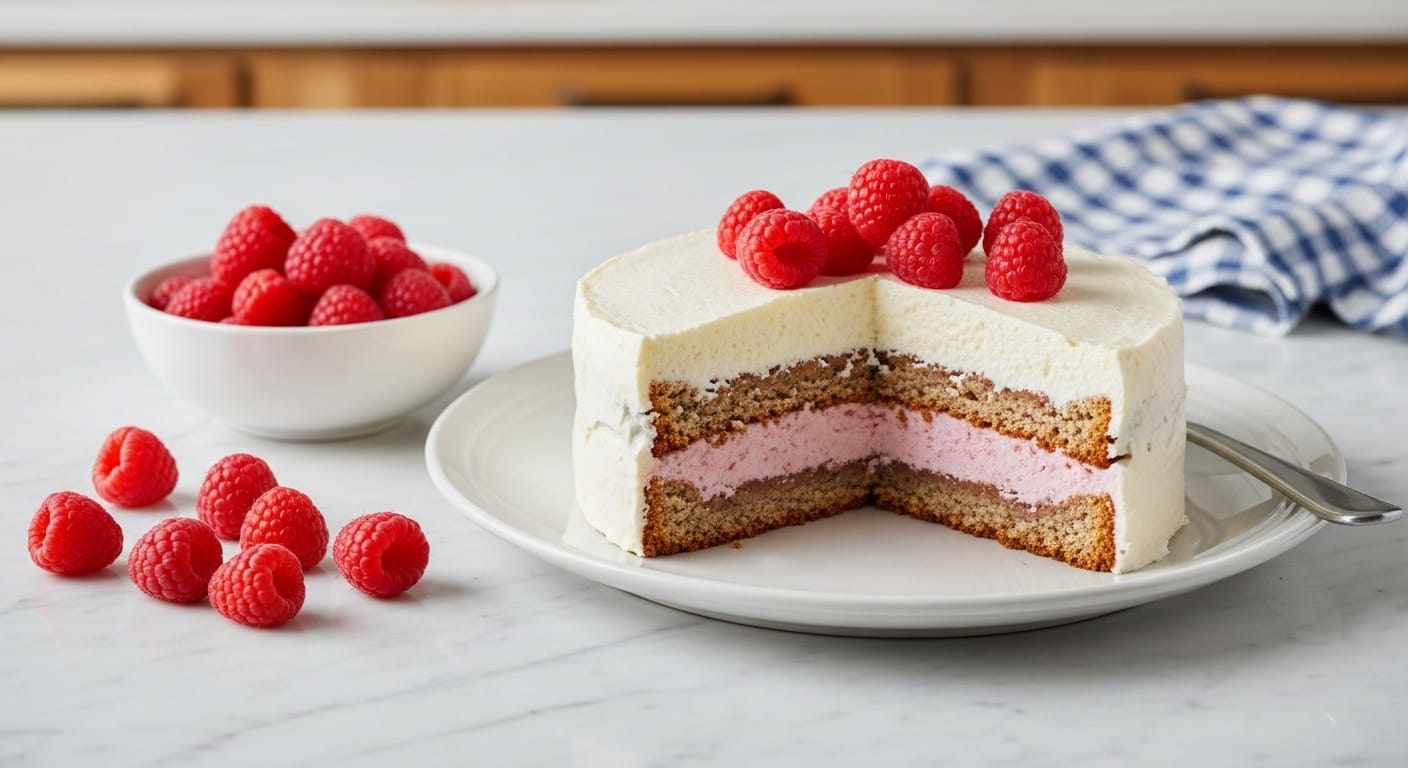
- Once your cake layers are completely cool (this is critical, hon!), place one layer on your serving plate. Spread about half of the raspberry filling evenly over the top, leaving a small border. Then, pipe or spread a generous layer of white chocolate buttercream over the filling. Carefully place the second cake layer on top. Repeat with the remaining raspberry filling and buttercream. Finally, frost the sides of the cake with the remaining buttercream. I love to decorate with fresh raspberries and some white chocolate shavings for that extra ‘wow’ factor. It looks so elegant, and honestly, the taste is just divine.
Baking this Raspberry White Chocolate Cake always brings me back to simpler times, when the biggest worry was whether my cake would rise evenly. There’s something so therapeutic about the process, from creaming the butter to seeing those beautiful layers come together. It’s not always perfect, sometimes a layer cracks, or the frosting isn’t as smooth as I hoped, but the joy of sharing it with loved ones, seeing their faces light up? That’s what it’s all about, really.
Storing Your Raspberry White Chocolate Cake
This Raspberry White Chocolate Cake holds up surprisingly well, but you gotta treat it right! If you’ve got leftovers (which is rare in my house, honestly), cover the cake loosely with plastic wrap or store slices in an airtight container. It’ll keep beautifully in the fridge for up to 3-4 days. I’ve found that letting it come to room temperature for about 20-30 minutes before serving really brings out the flavors of both the cake and the buttercream. I once tried to microwave a slice to ‘speed up’ the warming process, and let’s just say the buttercream got a little greasy and the raspberries were… well, not their best. So, don’t do that lol. Freezing slices works too! Just wrap them tightly in plastic wrap and then foil, and they’ll be good for about a month. Thaw in the fridge overnight.
Ingredient Substitutions for Raspberry White Chocolate Cake
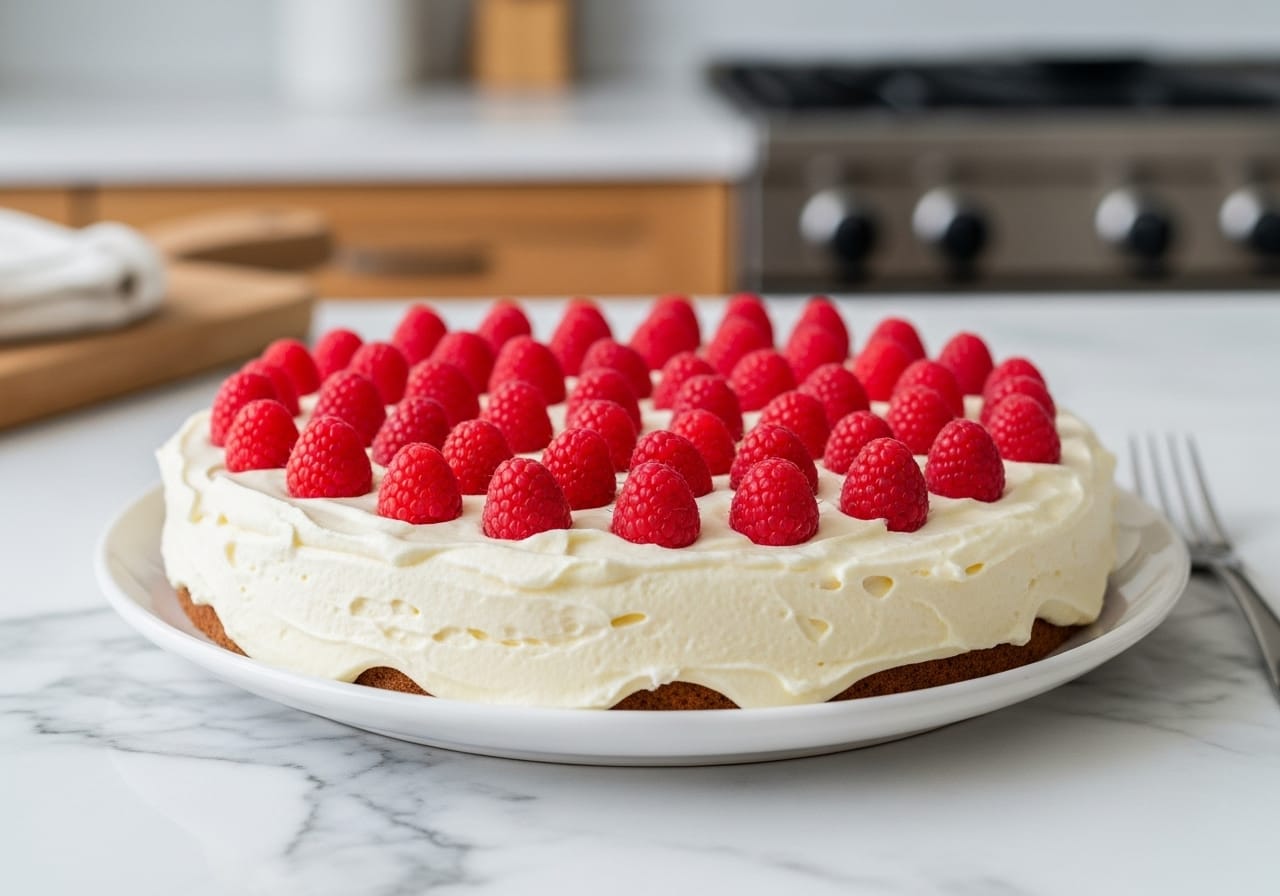
Life happens, and sometimes you don’t have exactly what the recipe calls for. For the cake layers, if you’re out of whole milk, 2% milk works fine, but I wouldn’t go lower fat than that, you lose some richness. No fresh raspberries? Frozen ones are a perfectly acceptable swap for the filling! Just thaw them first and drain any excess liquid before cooking. I tried making the filling with strawberries once, and it was good, but it didn’t have that distinct tartness that makes this Raspberry White Chocolate Cake so special. For the white chocolate, good quality white chocolate chips are fine if you can’t find a bar, but avoid those ‘white baking morsels’ that aren’t real chocolate, they just don’t melt or taste the same. I’ve made that mistake, and the buttercream texture was off.
Raspberry White Chocolate Cake Serving Ideas
This Raspberry White Chocolate Cake is a showstopper all on its own, but a few simple additions can make it even more special. I love serving slices with a light dusting of powdered sugar, or maybe a few extra fresh raspberries scattered on the plate. A tiny dollop of freshly whipped cream on the side is always a welcome touch, especially for those who want a little extra something. For drinks, a crisp glass of sparkling rosé or even just a good cup of hot tea makes for a lovely pairing. This cake and a quiet evening with a good book? Yes please. Or maybe a celebratory dinner with friends, followed by this beautiful dessert. It’s versatile like that, fitting almost any mood or occasion.
Cultural Backstory of Raspberry White Chocolate Cake
While the exact origins of the Raspberry White Chocolate Cake as a specific combination aren’t tied to one ancient culture, the concept of layering cakes with fruit and rich creams has roots in European patisserie traditions, especially French and Austrian baking. My own connection to this flavor profile started with a small bakery I stumbled upon during a trip to Paris. They had a tiny tart with this exact combination, and it was just magic. I spent weeks trying to recreate that feeling in a larger, more celebratory format when I got back home. This cake, for me, isn’t just a recipe, it’s a piece of that memory, a sweet reminder of discovery and the joy of bringing those flavors home to my own kitchen. It’s a modern classic, really, blending traditional techniques with beloved contemporary flavors.
And there you have it, my Raspberry White Chocolate Cake. It’s a labor of love, a little bit messy, and utterly delicious. Every time I bake it, I’m reminded of those first attempts, the laughs, and the pure joy of creating something beautiful from scratch. I hope you give it a try in your own kitchen, don’t worry about it being perfect. Just have fun with it! I’d love to hear how your version turns out.
Raspberry White Chocolate Cake: Frequently Asked Questions
- → Can I make the Raspberry White Chocolate Cake ahead of time?
Absolutely! You can bake the cake layers a day in advance and wrap them tightly. The raspberry filling can also be made a day ahead. Just store everything separately in the fridge, then assemble closer to when you want to serve it. It saves a lot of stress!
- → What if I don’t have fresh raspberries for this Raspberry White Chocolate Cake?
No worries, hon! Frozen raspberries work wonderfully for the filling. Just let them thaw completely and drain any excess liquid before you start cooking them down. For garnish, you might want to find fresh ones, but the filling will be just fine with frozen.
- → My buttercream seems too runny for my Raspberry White Chocolate Cake, what happened?
Ah, that’s usually because the butter was too soft, or the white chocolate was still too warm when you added it. Pop the bowl in the fridge for 15-20 minutes, then beat it again. It usually stiffens right up. I’ve had that happen more times than I care to admit!
- → How long does this Raspberry White Chocolate Cake last?
Once assembled and stored properly in an airtight container in the fridge, this beautiful cake will stay fresh and delicious for about 3-4 days. I always find it tastes best on day two, actually, when all the flavors have had a chance to meld together.
- → Can I use a different fruit in this Raspberry White Chocolate Cake recipe?
You can experiment, sure! Blackberries or even a mixed berry blend could work in the filling. Just be aware that the flavor profile will change, and you might lose that specific tart-sweet balance that makes the raspberry so special with the white chocolate.

Raspberry White Chocolate Cake: A Rich & Sweet Treat
- Prep Time: 45 Minutes
- Cook Time: 30 Minutes
- Total Time: 1 Hour 15 Minutes
- Yield: 12 Servings 1x
- Category: Breakfast
Description
Layers of tender vanilla cake, tart raspberry filling, and creamy white chocolate buttercream. This Raspberry White Chocolate Cake is a delightful bake!
Ingredients
- For the Cake Layers:
- 2 ½ cups all-purpose flour
- 2 cups granulated sugar
- 1 cup (2 sticks) unsalted butter, softened
- 4 large eggs, room temperature
- 1 cup whole milk, room temperature
- 1 tbsp baking powder
- 2 tsp vanilla extract
- ½ tsp salt
- For the Raspberry Filling:
- 2 cups fresh raspberries (or frozen, thawed)
- ½ cup granulated sugar
- 2 tbsp cornstarch
- 1 tbsp fresh lemon juice
- For the White Chocolate Buttercream:
- 1 ½ cups (3 sticks) unsalted butter, softened
- 4 cups powdered sugar, sifted
- 8 oz good quality white chocolate, melted and cooled
- ½ cup heavy cream
- 1 tsp vanilla extract
- Finishing Touches:
- Fresh raspberries
- White chocolate shavings
Instructions
- Prep the Cake Pans:: First things first, get your cake pans ready. I usually use two 8-inch round pans. Grease them well with butter, then dust ’em with flour. Tap out the excess, alright? This step is a non-negotiable for me because I’ve had cakes stick before, and honestly, peeling a beautiful cake from the pan is heartbreaking. Sometimes I even line the bottom with parchment paper for extra insurance. It’s a little extra effort, but it saves so much stress later, believe me.
- Whip Up the Cake Batter:: In a large bowl, cream together your softened butter and granulated sugar until it’s light and fluffy. This takes a few minutes, so don’t rush it! Then, beat in the eggs one at a time, making sure each is fully incorporated before adding the next. I always make sure my eggs are at room temperature; it really helps prevent the batter from curdling. In a separate bowl, whisk together your dry ingredients: flour, baking powder, and a pinch of salt. Gradually add the dry mixture to the wet mixture, alternating with the whole milk, starting and ending with the dry. Don’t overmix, hon, just mix until it’s just combined. Overmixing makes for a tough cake, and we want tender!
- Bake Those Beautiful Layers:: Divide the batter evenly between your prepared cake pans. I usually eyeball it, but if you’re a perfectionist, a kitchen scale works wonders here. Pop them into a preheated oven, usually around 350°F (175°C), and bake for about 25-30 minutes, or until a toothpick inserted into the center comes out clean. Oh, and your kitchen will start smelling absolutely heavenly at this point! I always set a timer, but I also keep an eye on them, because every oven is a little different, you know?
- Whip Up the Raspberry Filling:: While your cakes are cooling, let’s get that gorgeous raspberry filling going. In a small saucepan, combine fresh raspberries, granulated sugar, and lemon juice. Bring it to a simmer over medium heat, stirring occasionally. In a separate tiny bowl, whisk together cornstarch with a tablespoon or two of cold water to create a slurry. Pour this into the simmering raspberry mixture and stir until it thickens. It should look glossy and vibrant. Remove it from the heat and let it cool completely. I usually pop it in the fridge to speed things up a bit, because a warm filling will melt your buttercream, and that’s a disaster I’ve lived through!
- Make the White Chocolate Buttercream:: Now for the star frosting! Melt your white chocolate gently, either in a microwave in short bursts or over a double boiler, then let it cool slightly. In a large bowl, beat softened unsalted butter until it’s light and fluffy. Gradually add powdered sugar, a cup at a time, beating well after each addition. This is where a stand mixer is your best friend, trust me. Pour in the cooled melted white chocolate, vanilla extract, and heavy cream. Beat until the buttercream is smooth, creamy, and spreadable. If it feels too stiff, add a tiny bit more cream; too soft, a bit more powdered sugar. It should be dreamy and ready for your Raspberry White Chocolate Cake!
- Assemble Your Raspberry White Chocolate Cake:: Once your cake layers are completely cool (this is critical, hon!), place one layer on your serving plate. Spread about half of the raspberry filling evenly over the top, leaving a small border. Then, pipe or spread a generous layer of white chocolate buttercream over the filling. Carefully place the second cake layer on top. Repeat with the remaining raspberry filling and buttercream. Finally, frost the sides of the cake with the remaining buttercream. I love to decorate with fresh raspberries and some white chocolate shavings for that extra ‘wow’ factor. It looks so elegant, and honestly, the taste is just divine.

