
You know how some recipes just stick with you? Like, they pop into your head at the weirdest times, maybe when you’re staring blankly at the grocery store’s exotic fruit section? That’s exactly how the Passion Fruit Mirror Glaze Cake happened for me. I first stumbled upon a picture of a mirror-glazed cake years ago, and honestly, I thought, “No way could I ever make something that shiny and perfect.” It looked like it belonged in a fancy patisserie, not my slightly-chaotic, flour-dusted kitchen. But then, a friend brought over some ridiculously vibrant passion fruit from her garden, and a lightbulb just pinged. The tartness, the tropical smell… it just screamed “mirror glaze me!”
My first attempt at a mirror glaze, oh boy. I had visions of a perfectly smooth, reflective surface, but ended up with something that looked more like a melted tie-dye shirt. I’d rushed the cooling, I think, and the glaze was way too hot. It just slid right off, taking half the frosting with it! My kitchen looked like a tropical fruit explosion, honestly. But hey, it tasted incredible even in its messy glory, and that’s when I knew this Passion Fruit Mirror Glaze Cake was a keeper, even if it took a few tries to get the “mirror” part right.

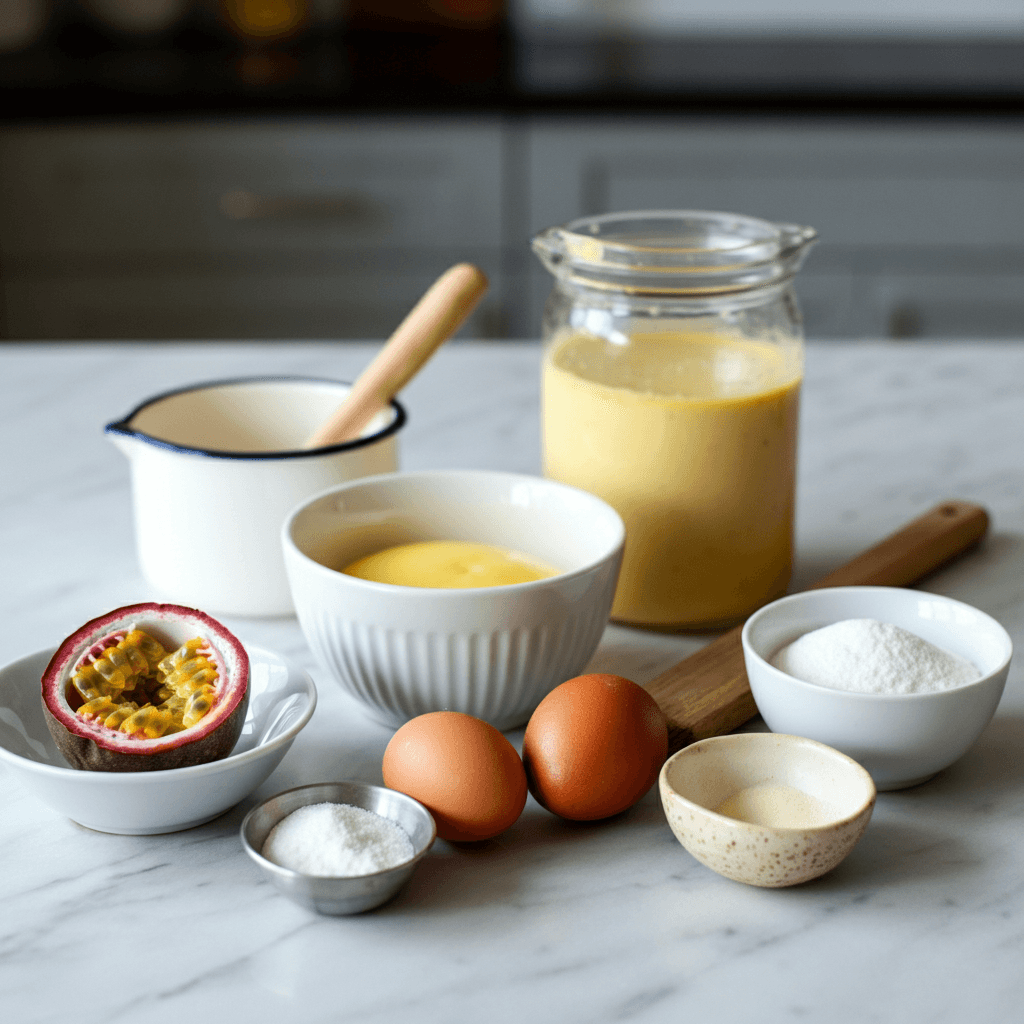
Ingredients
- All-Purpose Flour: This is your cake’s backbone, hon. Don’t go using cake flour unless you adjust, you want a bit of structure here.
- Granulated Sugar: For sweetness, obviously! But it also helps keep the cake moist. I’ve tried reducing it, and it just doesn’t hit the same.
Eggs (large): These give lift and richness. I usually grab organic ones, they just seem to bake better for me. Room temp is key, don’t use cold eggs straight from the fridge!
Unsalted Butter: Creamy goodness! Make sure it’s softened, not melted, or your cake might turn out dense. I once forgot to soften it and tried to microwave it, ended up with a butter puddle and a sad cake batter. Oops.
Whole Milk: Don’t use skim milk, just don’t. Whole milk adds that lushness and tenderness to the crumb. It’s a small detail, but it makes a big difference in this cake.
- Fresh Passion Fruit: This is the star, the whole reason we’re here! The pulp, seeds and all, brings that incredible tangy punch. I always smell them for ripeness a good one is wrinkly and smells intensely tropical.
- Gelatin Sheets (or powder): Essential for the mirror glaze’s shine and set. I prefer sheets, they dissolve so smoothly, but powder works too if you bloom it right.
- White Chocolate: For the glaze. It gives it that opaque, smooth finish. Use a good quality one, not those waxy baking chips, seriously.
- Heavy Cream: In the glaze, it adds richness and helps with the texture. Don’t skimp!
Instructions
- Bake the Vanilla Sponge:
- First things first, preheat that oven to 350°F (175°C) and get your cake pans ready, usually two 8-inch rounds. Grease and flour them, or use parchment circles, whatever works for your sanity! Cream together your softened butter and sugar until it’s light and fluffy, like a cloud. Then beat in the eggs one at a time, making sure each is fully incorporated before adding the next. This is where I always get impatient, but trust me, it pays off for a tender cake. Sift your dry ingredients flour, baking powder, a pinch of salt and alternate adding them with the milk. Don’t overmix, just until combined!
- Craft the Tangy Passion Fruit Curd:
- This curd is honestly the heart of this dessert. Whisk your passion fruit pulp, sugar, eggs, and a touch of butter in a saucepan over medium-low heat. Keep whisking, like you’re stirring a magical potion, until it thickens enough to coat the back of a spoon. You’ll feel it, it gets silky. Don’t let it boil, or you’ll end up with scrambled eggs I learned that one the hard way, oops! Strain it through a fine-mesh sieve to get rid of the seeds, unless you like them, which I kinda do sometimes. Let it cool completely, then chill it in the fridge until firm.
- Assemble Your Cake Layers:
- Once your cakes are cooled, level them if they domed a bit a serrated knife works wonders. I usually just eyeball it, honestly. Spread a generous layer of chilled passion fruit curd between your cake layers. Then, give the whole cake a thin “crumb coat” of your favorite vanilla buttercream or ganache. This seals in all those loose crumbs and gives you a smooth canvas for the mirror glaze. Pop it in the fridge or freezer for at least 30 minutes to firm up. Don’t skip this, it’s crucial for a clean glaze!
- Prepare the Passion Fruit Mirror Glaze:
- This is the fun, slightly nerve-wracking part! Bloom your gelatin sheets in cold water (or dissolve powder). Gently heat the passion fruit pulp (strained), sugar, and glucose syrup until the sugar dissolves. Take it off the heat, stir in the bloomed gelatin until totally melted. Then pour this hot mixture over your white chocolate and heavy cream in a heatproof bowl. Let it sit for a minute, then emulsify with an immersion blender, making sure not to incorporate too many air bubbles tilt the blender, don’t lift it! You want it super smooth and glossy. Strain it again for good measure.
- Achieve the Perfect Glaze Pour:
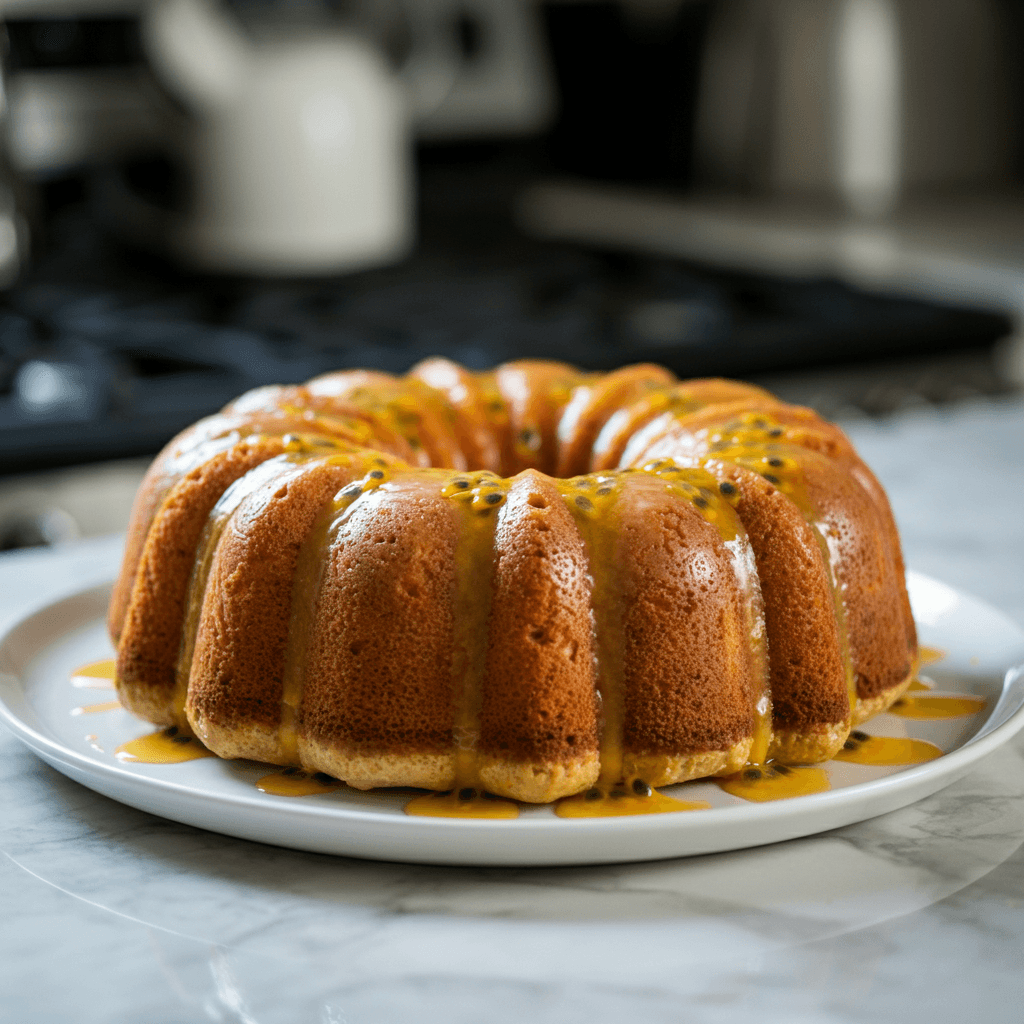
- Now, for the magic! Let your Passion Fruit Mirror Glaze cool to between 90-95°F (32-35°C). This temperature is critical, too hot, it’ll slide off, too cold, it’ll be too thick and clumpy. Place your chilled, crumb-coated cake on a wire rack over a baking sheet (to catch the drips, trust me, there will be drips!). Pour the glaze slowly and evenly over the top, starting from the center and working your way out, letting it cascade down the sides. Don’t touch it, just let gravity do its thing! It should look incredibly shiny and vibrant. I always hold my breath during this step, honestly.
- Chill and Garnish Your Masterpiece:
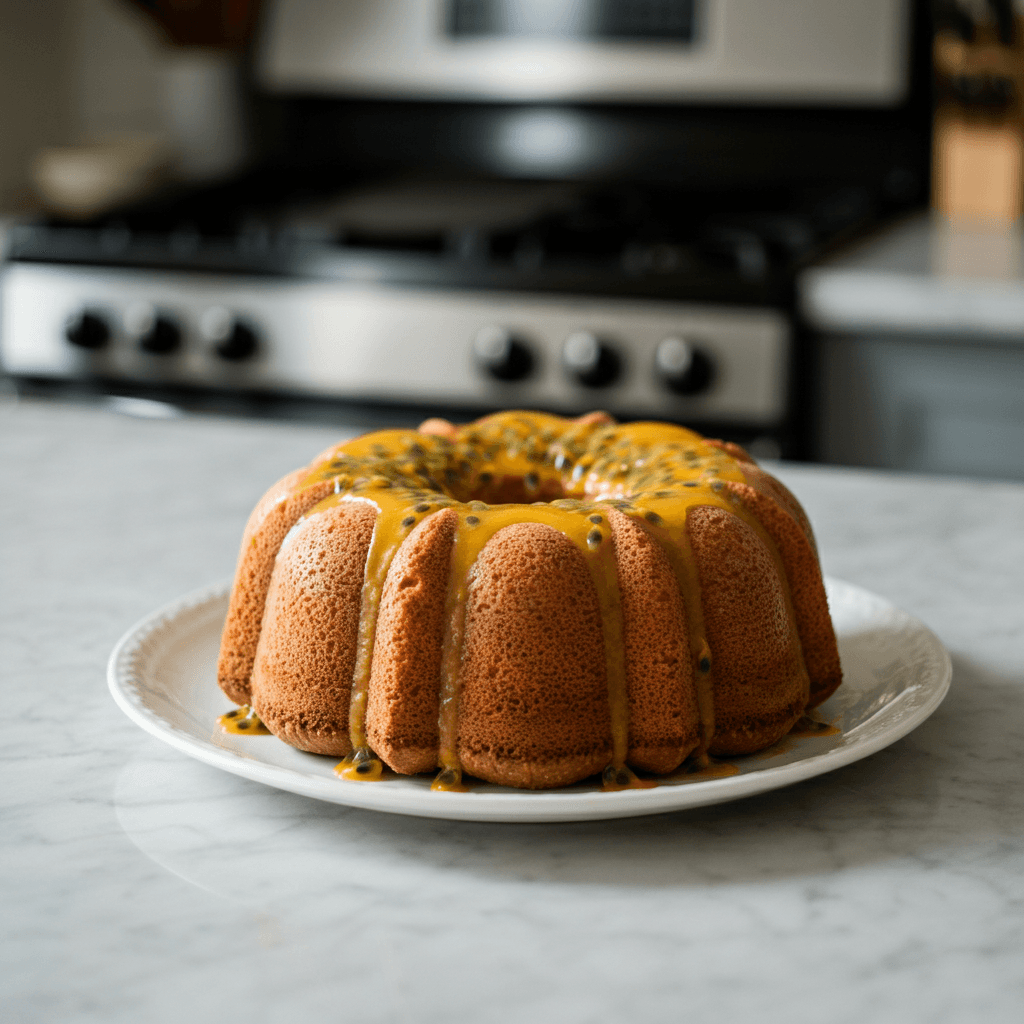
- Once your cake is fully glazed, let it sit for a few minutes to set a bit, then carefully transfer it to a serving plate. I use two wide spatulas for this, being super gentle. Pop it back into the fridge for at least an hour to let the glaze firm up completely. When it’s ready, you can garnish it with fresh passion fruit halves, maybe some delicate white chocolate curls, or even a few edible flowers if you’re feeling fancy. The contrast of the shiny glaze and fresh fruit is just stunning. Every time I see the finished cake, I still get a little gasp!
There’s something so rewarding about seeing this cake come together. It’s not just a dessert, it’s a little project, a testament to patience and a love for bright, happy flavors. I remember one time, my niece saw it and thought it was made of glass! Her little eyes just lit up. Moments like that, they make all the kitchen chaos worth it, every single time.
Passion Fruit Mirror Glaze Cake Storage Tips
Okay, so storing this beauty is pretty straightforward, but you gotta be careful with that glossy finish. I usually keep any leftover Passion Fruit Mirror Glaze Cake in an airtight container in the fridge. That mirror glaze, while sturdy, can get a little condensation on it if it’s exposed to too much humidity or temperature fluctuations. I once left a slice out on the counter overnight (oops!), and while it was still delicious, the glaze lost some of its pristine shine. It holds up really well for about 3-4 days in the fridge. If you’ve got extra passion fruit curd, that can be stored separately in a jar for up to a week. Freezing? I haven’t tried freezing a fully glazed cake, honestly. The texture of the glaze might change, but the cake layers themselves would probably freeze fine wrapped tightly for up to a month. Just thaw in the fridge.
Passion Fruit Mirror Glaze Cake Ingredient Substitutions
Look, I’m all about using what you have, especially if a sudden craving hits! If fresh passion fruit is hard to find, you can absolutely use frozen passion fruit pulp just make sure it’s unsweetened. I’ve tried that, and it worked, maybe not quite as vibrant, but still delicious. For the white chocolate in the glaze, you could try a high-quality milk chocolate for a different flavor profile, but it won’t give you that bright, opaque mirror finish. As for the cake itself, you could swap out the vanilla for a lemon sponge if you want to lean into more citrus. I haven’t tried gluten-free flour with this specific recipe, but I’d imagine a 1:1 baking blend would work, though the texture might be slightly different. Experiment, that’s what baking is all about!
Serving Your Passion Fruit Mirror Glaze Cake
This Passion Fruit Mirror Glaze Cake is a showstopper all on its own, but a few little touches can make it even more special. I love serving it slightly chilled, which keeps the glaze firm and the curd tangy. A simple dollop of freshly whipped cream on the side is never a bad idea, honestly. For drinks, a crisp, dry sparkling wine or even a chilled glass of iced tea complements the tropical flavors beautifully. If it’s a special occasion, pairing it with some fresh berries raspberries or blueberries adds another layer of freshness and color. This cake and a quiet evening with a good book? Yes please. Or a big family gathering, it fits any mood!
The Story Behind This Passion Fruit Mirror Glaze Cake
The concept of a mirror glaze cake, with its almost magical shine, really took off in the early 2010s, especially with Russian pastry chefs making it an art form. But for me, the passion fruit part of this Passion Fruit Mirror Glaze Cake is what makes it truly personal. My grandmother used to grow the most incredible passion fruit vines when I was a kid. I remember climbing on a rickety chair (don’t tell my mom!) to pick the wrinkly ones, then cracking them open and just scooping out the pulp with a spoon. That intense, sweet-tart flavor, it just brings back so many sunny memories. This cake is my way of bringing a little piece of that tropical sunshine and childhood joy into my adult kitchen, with a modern twist!
Honestly, every time I make this Passion Fruit Mirror Glaze Cake, it feels like a little triumph. From the first messy pour to that glorious, shiny finish, it’s a journey! I hope you give it a try and feel that same sense of accomplishment and pure, tangy joy. Don’t forget to share your own kitchen adventures, even the oops moments, with me!
Frequently Asked Questions
- → Is making a Passion Fruit Mirror Glaze Cake really hard?
Honestly, it looks harder than it is! The mirror glaze requires precision with temperature, but the cake and curd are pretty straightforward. Don’t be scared, just take it step by step, and you’ll do great!
- → Can I use bottled passion fruit juice instead of fresh pulp?
You can, but I’d recommend unsweetened pulp if possible. Bottled juice might be too thin or overly sweet, affecting the balance of the curd and glaze. I tried a sweetened one once, and it was just too much, had to adjust the sugar big time.
- → My mirror glaze isn’t shiny. What went wrong?
Most likely, your glaze temperature was off, or you incorporated too many air bubbles when blending. It needs to be between 90-95°F for that perfect pour. Also, make sure your cake is super cold, it helps the glaze set instantly and stay reflective.
- → How long does Passion Fruit Mirror Glaze Cake last?
It keeps well in an airtight container in the fridge for about 3-4 days. The glaze might lose a tiny bit of its super shine after a couple of days, but the flavors will still be fantastic. Mine never lasts that long anyway, ha!
- → Can I make mini Passion Fruit Mirror Glaze Cakes?
Absolutely! You can bake the sponge in smaller molds or even cupcakes, then glaze them individually. It’s a bit more fiddly with the pouring, but super cute for individual servings. I love how mini desserts look!
Passion Fruit Mirror Glaze Cake: A Bright Dessert
- Prep Time: 60 Minutes
- Cook Time: 30 Minutes
- Total Time: 2 Hours 30 Minutes (plus chilling)
- Yield: 10-12 Servings 1x
- Category: Home
Description
Brighten your day with this stunning Passion Fruit Mirror Glaze Cake! Layers of vanilla sponge, tangy passion fruit curd, and a glossy mirror glaze.
Ingredients
- Vanilla Sponge Cake:
- 2 ½ cups all-purpose flour
- 2 tsp baking powder
- ½ tsp salt
- 1 cup unsalted butter, softened
- 2 cups granulated sugar
- 4 large eggs, room temperature
- 1 cup whole milk
- 2 tsp vanilla extract
- Passion Fruit Curd:
- 1 cup fresh passion fruit pulp (about 10–12 passion fruits), strained
- ½ cup granulated sugar
- 3 large egg yolks
- 4 tbsp unsalted butter, cut into cubes
- Mirror Glaze:
- 5 gelatin sheets (or 2 ½ tsp powdered gelatin)
- ½ cup water (if using powdered gelatin to bloom)
- ½ cup fresh passion fruit pulp, strained
- ¾ cup granulated sugar
- ¼ cup glucose syrup (or light corn syrup)
- ½ cup heavy cream
- 7 oz good quality white chocolate, chopped
- Optional: yellow or orange food coloring
- Garnish & Finishing Touches:
- Fresh passion fruit halves
- White chocolate curls or shavings
- Edible flowers (optional)
Instructions
- Bake the Vanilla Sponge:: First things first, preheat that oven to 350°F (175°C) and get your cake pans ready, usually two 8-inch rounds. Grease and flour them, or use parchment circles, whatever works for your sanity! Cream together your softened butter and sugar until it’s light and fluffy, like a cloud. Then beat in the eggs one at a time, making sure each is fully incorporated before adding the next. This is where I always get impatient, but trust me, it pays off for a tender cake. Sift your dry ingredients – flour, baking powder, a pinch of salt – and alternate adding them with the milk. Don’t overmix, just until combined!
- Craft the Tangy Passion Fruit Curd:: This curd is honestly the heart of this dessert. Whisk your passion fruit pulp, sugar, eggs, and a touch of butter in a saucepan over medium-low heat. Keep whisking, like you’re stirring a magical potion, until it thickens enough to coat the back of a spoon. You’ll feel it, it gets silky. Don’t let it boil, or you’ll end up with scrambled eggs – I learned that one the hard way, oops! Strain it through a fine-mesh sieve to get rid of the seeds, unless you like them, which I kinda do sometimes. Let it cool completely, then chill it in the fridge until firm.
- Assemble Your Cake Layers:: Once your cakes are cooled, level them if they domed a bit – a serrated knife works wonders. I usually just eyeball it, honestly. Spread a generous layer of chilled passion fruit curd between your cake layers. Then, give the whole cake a thin “crumb coat” of your favorite vanilla buttercream or ganache. This seals in all those loose crumbs and gives you a smooth canvas for the mirror glaze. Pop it in the fridge or freezer for at least 30 minutes to firm up. Don’t skip this, it’s crucial for a clean glaze!
- Prepare the Passion Fruit Mirror Glaze:: This is the fun, slightly nerve-wracking part! Bloom your gelatin sheets in cold water (or dissolve powder). Gently heat the passion fruit pulp (strained), sugar, and glucose syrup until the sugar dissolves. Take it off the heat, stir in the bloomed gelatin until totally melted. Then pour this hot mixture over your white chocolate and heavy cream in a heatproof bowl. Let it sit for a minute, then emulsify with an immersion blender, making sure not to incorporate too many air bubbles – tilt the blender, don’t lift it! You want it super smooth and glossy. Strain it again for good measure.
- Achieve the Perfect Glaze Pour:: Now, for the magic! Let your Passion Fruit Mirror Glaze cool to between 90-95°F (32-35°C). This temperature is critical; too hot, it’ll slide off; too cold, it’ll be too thick and clumpy. Place your chilled, crumb-coated cake on a wire rack over a baking sheet (to catch the drips, trust me, there will be drips!). Pour the glaze slowly and evenly over the top, starting from the center and working your way out, letting it cascade down the sides. Don’t touch it, just let gravity do its thing! It should look incredibly shiny and vibrant. I always hold my breath during this step, honestly.
- Chill and Garnish Your Masterpiece:: Once your cake is fully glazed, let it sit for a few minutes to set a bit, then carefully transfer it to a serving plate. I use two wide spatulas for this, being super gentle. Pop it back into the fridge for at least an hour to let the glaze firm up completely. When it’s ready, you can garnish it with fresh passion fruit halves, maybe some delicate white chocolate curls, or even a few edible flowers if you’re feeling fancy. The contrast of the shiny glaze and fresh fruit is just stunning. Every time I see the finished cake, I still get a little gasp!


