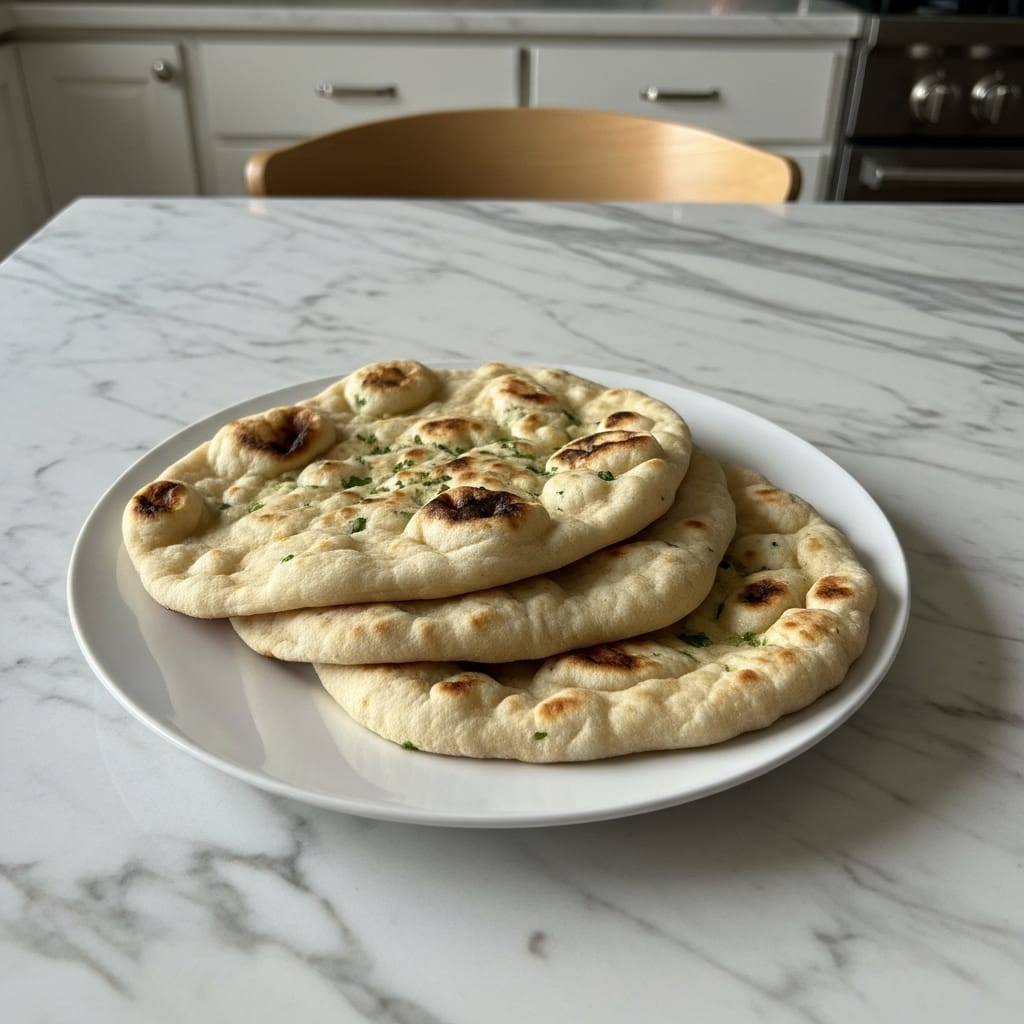
Have you ever craved that warm, fluffy naan bread you get at your favorite Indian restaurant? Well, you’re in luck! Making naan at home is not only simple but also incredibly rewarding. This easy homemade naan bread recipe will guide you through the process, ensuring you can enjoy fresh naan right from your kitchen.
What is Naan Bread?
Naan is a type of leavened flatbread that originates from South Asia. Traditionally, it’s cooked in a tandoor, which gives it a unique texture and flavor. Naan is soft, chewy, and often served with various dishes, like curries and stews. It can be plain or flavored with ingredients like garlic, herbs, or even cheese. Have you ever tried dipping naan in a rich, spicy sauce? It’s a match made in heaven!
Why Make Naan at Home?
Making naan at home has its perks. First, it’s fresh and warm, straight from your oven. There’s something special about the smell of baking bread that fills your kitchen. Plus, you can customize it to your liking. Want to add some garlic or herbs? Go for it! The first time I made naan, I accidentally added too much garlic—but it turned out to be a happy accident! It was delicious and became a family favorite.
Another reason to make naan at home is the satisfaction of creating something from scratch. It’s a fun activity to do with family or friends. You can even turn it into a little cooking party! So, gather your ingredients, roll up your sleeves, and let’s get started on this easy homemade naan bread recipe.
Ingredients for Easy Homemade Naan Bread Recipe
Making naan bread at home is a delightful experience. It’s not just about the taste; it’s about the joy of creating something delicious from scratch. To get started, you’ll need a few key ingredients. Let’s break them down so you can whip up this tasty bread in no time!
Essential Ingredients
First things first, here are the essential ingredients you’ll need for your easy homemade naan bread:
- All-purpose flour: This is the base of your naan. It gives the bread its structure.
- Yeast: Active dry yeast works best. It helps the naan rise and become fluffy.
- Warm water: This activates the yeast. Make sure it’s not too hot; otherwise, it can kill the yeast.
- Yogurt: Plain yogurt adds moisture and a slight tang to the bread.
- Salt: A little salt enhances the flavor of your naan.
- Oil: Vegetable oil or melted butter adds richness to the dough.
With these ingredients, you’re well on your way to making delicious naan. It’s simple, right? Just mix them together, and you’re almost there!
Optional Ingredients for Flavor Variations
Now, if you want to jazz up your naan, consider adding some optional ingredients. Have you ever wondered how to make your naan stand out? Here are some fun ideas:
- Garlic: Minced garlic can be mixed into the dough or brushed on top for a flavorful twist.
- Herbs: Fresh herbs like cilantro or parsley can add a fresh taste. Just chop them finely and mix them in.
- Spices: A pinch of cumin or coriander can give your naan a warm, aromatic flavor.
- Cheese: Adding shredded cheese inside the naan creates a gooey, cheesy delight.
- Sun-dried tomatoes: If you’re feeling adventurous, toss in some chopped sun-dried tomatoes for a burst of flavor.
These optional ingredients can take your naan from ordinary to extraordinary. It’s worth noting that experimenting in the kitchen can lead to some happy accidents. The first time I made this, I accidentally added too much garlic—but it turned out to be a happy accident!
Step-by-Step Instructions for Easy Homemade Naan Bread Recipe
If you’ve ever craved warm, fluffy naan bread, you’re in for a treat! Making naan at home is easier than you might think. With just a few simple ingredients and some patience, you can whip up this delicious bread. Let’s dive into the step-by-step instructions for an easy homemade naan bread recipe that will impress your family and friends.
Preparing the Dough
The first step in making naan is preparing the dough. This process is straightforward and fun, especially if you enjoy getting your hands a little messy in the kitchen!
Mixing Dry Ingredients
Start by gathering your dry ingredients. You’ll need all-purpose flour, yeast, sugar, and salt. In a large mixing bowl, combine 2 cups of flour, 1 teaspoon of sugar, 1 teaspoon of salt, and 1 teaspoon of instant yeast. It’s important to mix these well. This ensures that the yeast activates properly when you add the wet ingredients. Have you ever wondered why sugar is included? It helps the yeast to bloom, giving your naan that lovely rise!
Adding Wet Ingredients
Next, it’s time to add the wet ingredients. Pour in ¾ cup of warm water and ¼ cup of yogurt. The yogurt adds a nice tang and helps keep the naan soft. Mix everything together until a shaggy dough forms. You might need to adjust the water slightly, depending on your flour. If the dough feels too dry, add a bit more water. If it’s too sticky, sprinkle in a little more flour. It’s all about finding that perfect balance!
Kneading the Dough
Once your dough comes together, it’s time to knead. Turn the dough out onto a floured surface and knead it for about 5 to 7 minutes. You want it to be smooth and elastic. If you’ve never kneaded dough before, it’s a bit like giving it a mini workout! Just fold, push, and turn until it feels right. Trust me, the effort is worth it!
Letting the Dough Rise
After kneading, place the dough in a lightly greased bowl and cover it with a clean kitchen towel. Let it rise in a warm spot for about 1 to 2 hours, or until it doubles in size. This is the perfect time to clean up your kitchen or maybe even prepare a delicious curry to go with your naan. The aroma of rising dough is simply delightful, isn’t it?
Shaping the Naan
Once your dough has risen, it’s time to shape the naan. Punch down the dough to release any air bubbles. Then, divide it into equal portions—about 6 to 8 pieces. Roll each piece into a ball and let them rest for about 10 minutes. This resting period makes the dough easier to roll out. When you’re ready, take a ball and flatten it with your hands. Then, use a rolling pin to roll it out into an oval or teardrop shape. Don’t worry about making them perfect; a little rustic charm adds character!
Cooking Methods for Naan
Now that your naan is shaped, it’s time to cook it! You have a few options here, depending on what you have available. Each method gives a slightly different texture and flavor.
Stovetop Cooking
For stovetop cooking, heat a cast-iron skillet or non-stick pan over medium-high heat. Once hot, place the rolled naan in the pan. Cook for about 1-2 minutes on one side until bubbles form, then flip it over. Cook for another minute or so until it’s golden brown. You can brush it with melted butter or ghee for extra flavor. It’s worth noting that the first naan might take a bit longer, but you’ll get the hang of it quickly!
Oven Baking
If you prefer baking, preheat your oven to 500°F (260°C) and place a baking stone or an inverted baking sheet inside. Once hot, place the naan on the stone or sheet and bake for about 2-3 minutes. You’ll know it’s ready when it puffs up and gets those lovely brown spots. This method gives you a nice, chewy texture.
Grill Cooking
Grilling naan is another fantastic option! Preheat your grill to medium-high heat. Brush the naan with a little oil and place it directly on the grill grates. Cook for about 1-2 minutes on each side. The grill adds a smoky flavor that’s simply irresistible. Have you ever tried adding herbs or garlic to the dough? It’s a game-changer!
And there you have it! Your easy homemade naan bread is ready to enjoy. Serve it warm with your favorite dishes, or just enjoy it on its own. Happy cooking!
Tips for Perfecting Your Easy Homemade Naan Bread Recipe
Making naan bread at home can be a delightful experience. With just a few simple ingredients, you can create soft, fluffy naan that rivals what you find in restaurants. However, there are some tips and tricks to keep in mind to ensure your naan turns out perfectly every time. Let’s dive into some helpful advice that will make your naan-making journey a breeze!
Common Mistakes to Avoid
Even the most seasoned cooks can make mistakes. Have you ever wondered why your naan didn’t puff up like it should? One common mistake is not letting the dough rest long enough. Resting allows the gluten to relax, which is crucial for that soft texture. Aim for at least an hour, or even longer if you can wait!
Another pitfall is using cold ingredients. Make sure your yogurt and water are at room temperature. This helps the yeast activate properly. Speaking of yeast, check its freshness. Expired yeast can lead to flat naan, and nobody wants that!
Lastly, don’t skip the cooking method. Cooking naan on a hot skillet or tandoor is key. If your pan isn’t hot enough, the naan won’t get those lovely charred spots. So, crank up the heat and get ready to impress!
Storing and Reheating Naan
Once you’ve made your delicious naan, you might wonder how to store it. If you have leftovers, wrap them in foil or place them in an airtight container. They’ll stay fresh for about two to three days at room temperature. But if you want to keep them longer, consider freezing them. Just stack the naan with parchment paper in between each piece, then place them in a freezer bag. They can last up to three months!
When it’s time to enjoy your naan again, reheating is simple. You can pop it in a hot skillet for a minute on each side. This method brings back that fresh, warm texture. Alternatively, you can use an oven. Just wrap the naan in foil and heat it at 350°F for about 10 minutes. It’s worth noting that you should avoid microwaving naan, as it can turn rubbery.
So, whether you’re enjoying your naan fresh or reheated, these tips will help you savor every bite. Happy cooking!
Nutritional Information for Easy Homemade Naan Bread Recipe
When you whip up a batch of easy homemade naan bread, it’s not just about the delightful taste and fluffy texture. Understanding the nutritional content can help you enjoy it even more. Here’s a quick look at what you’re getting in each serving. This information is based on a standard serving size of 100 grams of naan bread.
| Nutrient | Amount per 100g |
|---|---|
| Calories | 250 |
| Carbohydrates | 50g |
| Protein | 8g |
| Fat | 5g |
| Fiber | 2g |
As you can see, naan bread is a good source of carbohydrates, making it a perfect accompaniment to your favorite dishes. The protein content is decent too, which can help keep you feeling full. And let’s not forget about the fiber, which is always a plus for digestion!
Why Naan Bread is a Great Choice
Have you ever wondered why naan bread is so popular? It’s not just the taste; it’s also versatile! You can pair it with curries, use it for wraps, or even enjoy it on its own. Plus, making it at home means you can control the ingredients. This way, you can tweak the recipe to suit your dietary needs or preferences.
For instance, if you’re looking to cut down on calories, you might consider using whole wheat flour instead of all-purpose flour. It adds a nutty flavor and boosts the fiber content. What’s more, you can experiment with herbs and spices in the dough. Imagine the aroma of garlic naan wafting through your kitchen!
Tips for Making the Best Naan
When making naan, a few tips can help you achieve that perfect texture. First, make sure your dough is soft and pliable. If it feels too sticky, add a little more flour. On the other hand, if it’s too dry, a splash of water can help. It’s all about finding that sweet spot!
Another key point is to let the dough rise properly. This step is crucial for achieving that fluffy texture we all love. After kneading, cover the dough and let it rest in a warm place. You’ll be amazed at how much it expands!
Lastly, don’t be afraid to get creative. Why not toss in some sun-dried tomatoes or sprinkle red pepper flakes if you’re feeling adventurous? The possibilities are endless, and each variation can bring a new twist to your meals.
So, the next time you’re in the mood for something delicious, remember this easy homemade naan bread recipe. It’s not just a side dish; it’s a delightful addition to your culinary repertoire!
FAQs about Easy Homemade Naan Bread Recipe
Making naan bread at home can be a delightful experience. It’s soft, fluffy, and pairs perfectly with many dishes. However, you might have some questions about the process or ingredients. Let’s dive into some frequently asked questions to help you out!
Can I use whole wheat flour for naan?
Absolutely! Whole wheat flour can be used to make naan. It gives the bread a nuttier flavor and a denser texture. However, keep in mind that the naan may not be as soft as when using all-purpose flour. If you want to try it, you might consider mixing whole wheat flour with all-purpose flour for a lighter result. Have you ever tried that combination? It can be a fun experiment!
How do I make naan without yeast?
If you’re looking to skip the yeast, you can still enjoy delicious naan! One popular method is to use baking powder or baking soda as a leavening agent. Simply mix your flour with yogurt and a bit of baking powder. This will give you a nice rise without the wait for yeast to activate. It’s quick and easy! Plus, the yogurt adds a lovely tang. Have you ever made naan this way? It’s surprisingly simple!
Can I freeze homemade naan?
Yes, you can freeze homemade naan! Just make sure to let it cool completely before wrapping it tightly in plastic wrap or aluminum foil. You can also place parchment paper between each naan to prevent them from sticking together. When you’re ready to enjoy them, simply reheat in the oven or on a skillet. It’s a great way to have fresh naan on hand whenever you crave it. Isn’t that convenient?
What can I serve with naan bread?
Naan is incredibly versatile! You can serve it with a variety of dishes. Think about pairing it with rich curries, like butter chicken or paneer tikka masala. It’s also fantastic with lentil dishes, such as dal. If you’re in the mood for something lighter, try it with a fresh salad or a yogurt dip like raita. The possibilities are endless! What’s your favorite dish to enjoy with naan?
How long does homemade naan last?
Homemade naan can last for about 2 to 3 days at room temperature if stored in an airtight container. If you want to keep it longer, freezing is the best option. Just remember to reheat it properly to bring back that soft texture. It’s worth noting that naan tends to dry out if left out too long, so enjoy it fresh when you can! Have you ever had leftover naan? It’s hard to resist!
Conclusion
Making naan bread at home is not just easy; it’s a delightful experience that fills your kitchen with warmth and delicious aromas. This easy homemade naan bread recipe is perfect for anyone, whether you’re a seasoned cook or just starting out. With simple ingredients and straightforward steps, you can whip up soft, fluffy naan that pairs beautifully with your favorite dishes.
Recap of Easy Homemade Naan Bread Recipe
To recap, the process begins with mixing flour, yeast, yogurt, and a pinch of salt. After kneading the dough, let it rise until it doubles in size. Then, divide the dough into small balls and roll them out. Cooking them on a hot skillet gives you that lovely char and texture. It’s truly a straightforward method that yields fantastic results. Plus, the satisfaction of making your own naan is hard to beat!
Encouragement to Experiment with Variations
Now, here’s where the fun really begins! Have you ever wondered how you could jazz up your naan? Why not toss in some sun-dried tomatoes or sprinkle red pepper flakes if you’re feeling adventurous? You could even brush the naan with garlic butter right after cooking for an extra flavor kick. The possibilities are endless!
As a matter of fact, the first time I made this naan, I accidentally added too much garlic—but it turned out to be a happy accident! It was a hit at dinner, and now it’s a regular request from my family. So, don’t be afraid to play around with herbs, spices, or even cheese. Each variation can bring a new twist to your meal.
In conclusion, making naan at home is not just about following a recipe; it’s about enjoying the process and making it your own. So roll up your sleeves, gather your ingredients, and get ready to create something delicious. Happy cooking!


