
Introduction to a classic Boston Cream Pie
Growing up, Sunday dinners were always a big deal in my house, but nothing topped the excitement of dessert. One particular treat stole the show: a classic Boston Cream Pie. As the sweet aroma of vanilla custard and rich chocolate filled the air, I knew it was going to be a special evening. Whether you’re juggling work calls or soccer practice, this recipe for a classic Boston Cream Pie is your new best friend. It’s not just a cake; it’s a nostalgic experience that brings comfort and joy in every slice.
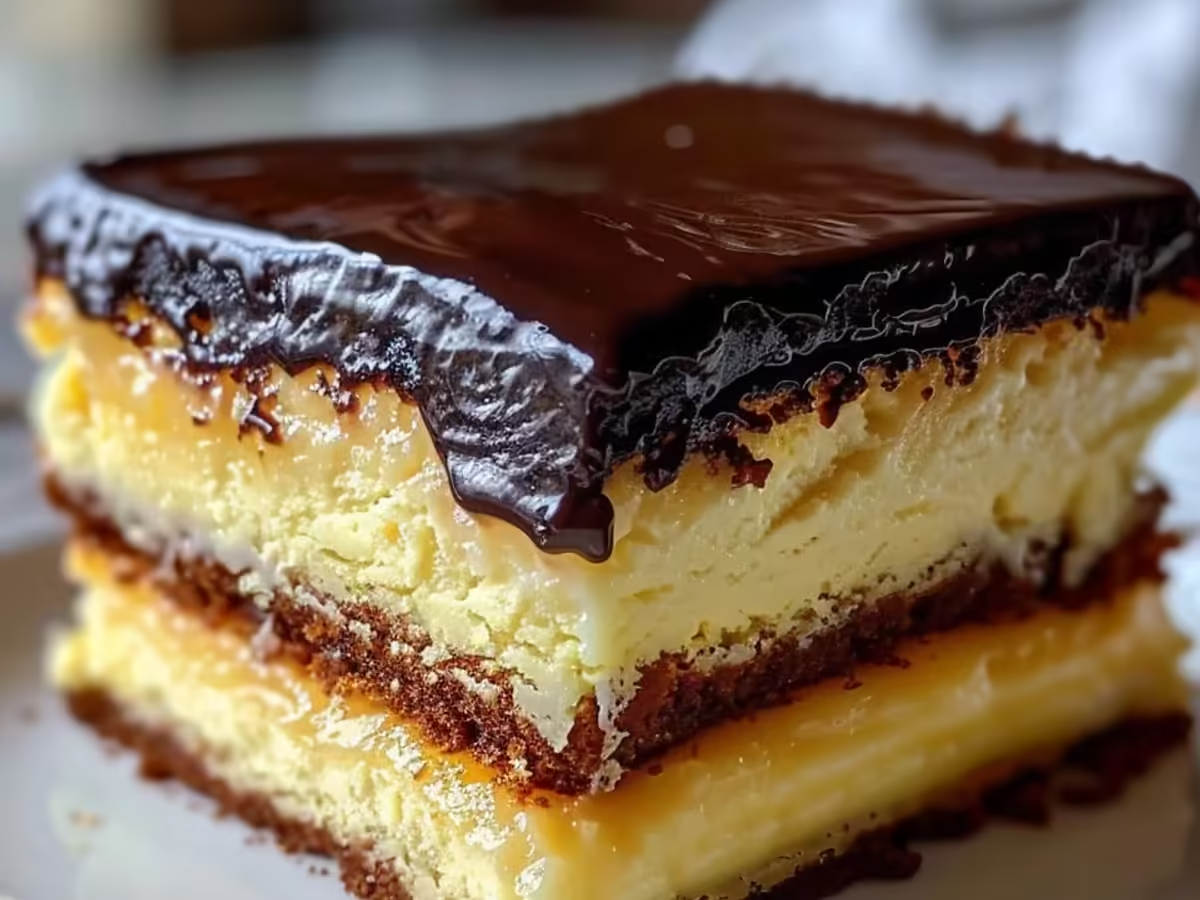
This delightful dessert features soft layers of vanilla cake, luscious custard filling, and a glossy chocolate ganache on top. It’s a harmonious blend of textures and flavors that makes it irresistible. If you’re looking to impress guests or just enjoy yourself, this classic Boston Cream Pie is the excellent choice. Get ready to dive into a recipe that’s both easy to make and deeply satisfying, sure to become a beloved staple in your home.

Why You’ll Love This a classic Boston Cream Pie
Picture this: a lazy Sunday afternoon, and the aroma of vanilla and chocolate fills your kitchen. That’s the magic of a classic Boston Cream Pie. Whether you’re juggling work calls or soccer practice, this recipe is your new best friend. It’s a delightful dessert that combines the rich flavors of custard and chocolate, all nestled between layers of fluffy cake. This classic Boston Cream Pie is like a cozy blanket for your taste buds, wrapping you in comfort with every bite.
Not only does it save time, but it also impresses anyone lucky enough to share a slice. No more 6 PM panic-dinner’s ready faster than a microwave meal. With simple ingredients and straightforward steps, you’ll whip up this cake and feel like a baking pro. Plus, its decadent chocolate glaze provides that wow factor, making every occasion feel special. Dive into this classic Boston Cream Pie and discover why it’s a beloved treat that never goes out of style!
Ingredients for a classic Boston Cream Pie
When I think of a classic Boston Cream Pie, I’m transported back to family gatherings where this dessert took center stage. The rich layers of cake, creamy custard, and glossy chocolate ganache create a symphony of flavors that dance on your palate. Whether you’re juggling work calls or soccer practice, this recipe is your new best friend. Let’s dive into the essential ingredients that make this classic Boston Cream Pie a showstopper.
- All-purpose flour: The backbone of your cake, providing structure and a soft crumb that melts in your mouth.
- Sugar: Sweetening things up, this ingredient balances the richness of the custard and ganache.
- Baking powder: Your secret leavening agent, ensuring the cake rises beautifully for that excellent slice.
- Milk: Adds moisture to the cake, creating a tender texture that pairs wonderfully with the creamy filling.
- Eggs: These little powerhouses bind everything together, contributing to the cake’s fluffiness and richness.
- Butter: Creamy and decadent, it enriches both the cake and the custard, lending a luxurious flavor.
- Vanilla extract: A splash of this fragrant essence elevates the flavor profile, bringing warmth and depth to the cake.
- Heavy cream: Essential for the ganache, it gives a silky texture that makes each bite irresistible.
- Chocolate: Choose high-quality dark or semi-sweet chocolate for a rich, glossy ganache that shines.
- Custard powder: For a quick fix, you can substitute homemade custard with instant custard powder-just add milk and mix!
- Dark rum: A splash of this can add a delightful depth to the ganache-your secret’s safe with me!
- Almond extract: Swap out some of the vanilla for almond extract for a nutty twist that surprises and delights.
- Alternative sweeteners: If you’re looking for a healthier option, consider substituting sugar with honey or maple syrup.
With these ingredients assembled, you’re well on your way to creating a classic Boston Cream Pie that will impress your family and friends. The combination of flavors and textures is sure to make this dessert a cherished favorite in your kitchen!
How to Make a classic Boston Cream Pie
Making a classic Boston Cream Pie is like taking a delightful trip down memory lane. I still remember my grandmother pulling this decadent dessert out of the oven, the rich aroma of vanilla wafting through the kitchen. Whether you’re juggling work calls or soccer practice, this recipe is your new best friend. It’s a true showstopper, combining fluffy cake, luscious pastry cream, and smooth chocolate ganache. Get ready to impress your family and friends with this timeless treat!
- Prepare the Cake Layers
Start by preheating your oven to 350°F (175°C). Grease and flour two 9-inch round cake pans. In a large mixing bowl, combine 1 cup of sugar and 1/2 cup of softened butter. Beat until creamy, about 2-3 minutes. Then, add 2 large eggs, one at a time, mixing well after each addition. Next, stir in 1 teaspoon of vanilla extract. In another bowl, whisk together 1 1/2 cups of all-purpose flour, 1 3/4 teaspoons of baking powder, and 1/2 teaspoon of salt. Gradually add the dry ingredients to the wet mixture, alternating with 1/2 cup of milk, until smooth. Pour the batter evenly into the prepared pans and bake for 25-30 minutes or until a toothpick inserted into the center comes out clean. - Make the Pastry Cream
While the cakes are baking, it’s time to whip up the pastry cream. In a saucepan, mix 2 cups of milk and 1/2 cup of sugar over medium heat. In a separate bowl, whisk together 1/4 cup of cornstarch and 4 large egg yolks until smooth. Once the milk mixture is hot, gradually whisk it into the egg yolk mixture to temper the eggs. Return this mixture to the saucepan and cook over low heat, stirring constantly until it thickens, around 5-7 minutes. Remove from heat, stir in 1 teaspoon of vanilla, and let it cool completely. - Prepare the Chocolate Ganache
To create the rich chocolate ganache, heat 1 cup of heavy cream in a small saucepan until it begins to simmer. Remove it from heat and pour it over 6 ounces of chopped semi-sweet chocolate in a bowl. Let it sit for a minute, then whisk until smooth and glossy. This step adds a luxurious touch to your classic Boston Cream Pie! - Assemble the Cake
Once the cakes have cooled, place one layer on a serving plate. Spread the cooled pastry cream evenly on top. Carefully place the second cake layer on top of the cream. Now, pour the chocolate ganache over the top, allowing it to drip down the sides for that classic look. Let it set for about 30 minutes before slicing; this will help the ganache firm up. - Serve and Enjoy
Slice your classic Boston Cream Pie into wedges and serve it to your eager guests. Each bite is a delightful combination of fluffy cake, creamy filling, and rich chocolate. Enjoy the compliments as they savor this delightful dessert!
Following these steps will lead you straight to a tasty classic Boston Cream Pie that will be the star of any gathering. So gather your ingredients, roll up your sleeves, and let’s get baking!
Tips for Success
When it comes to mastering a classic Boston Cream Pie, a few insider tips can elevate your dessert from good to unforgettable. Whether you’re prepping for a special occasion or just treating yourself, these pointers will ensure your pie emerges perfectly every time.
- Pro tip: Let your Boston Cream Pie chill in the refrigerator for at least two hours before serving. This resting period allows the flavors to meld beautifully and ensures a clean slice.
- Underseason? A pinch of salt in your pastry cream can bring out the sweetness and enhance the overall flavor profile. Don’t be shy!
- Use quality chocolate: The ganache on your Boston Cream Pie should be rich and glossy. Opt for high-quality dark chocolate for a decadent finish.
- Don’t rush the layers: Allow the cake to cool completely before assembling. If it’s even slightly warm, the cream could melt and make a mess.
- Serve with flair: Garnish each slice with a dollop of whipped cream or fresh berries. It adds color and an extra touch of elegance to your presentation.
By integrating these tips, you’ll create a classic Boston Cream Pie that not only looks impressive but also delights the taste buds. Happy baking!
Equipment Needed
Making a classic Boston Cream Pie is all about simplicity and accessibility. Whether you’re a seasoned baker or a weekend warrior in the kitchen, having the right tools can make all the difference. Here’s what you’ll need to whip up this delightful dessert:
- Mixing Bowls: A good set of mixing bowls in various sizes is essential-opt for glass or stainless steel for easy mixing.
- Measuring Cups and Spoons: Accurate measurements are key, so grab your trusty measuring cups and spoons.
- Electric Mixer: A hand mixer speeds up the process, but a whisk works too-just think of it as a mini workout!
- 9-inch Round Cake Pans: These are excellent for baking the cake layers. If you only have one pan, just bake in batches.
- Cooling Rack: Let your cake layers cool evenly and avoid sogginess-this is a must-have!
- Saucepan: A medium saucepan is needed for making the creamy custard filling. A non-stick option simplifies cleanup.
- Spatula: Use a rubber spatula for folding in ingredients and spreading frosting smoothly.
With these essential tools on hand, you’re all set to create your own classic Boston Cream Pie. Each tool plays a role in ensuring your dessert turns out perfectly, so gather them before you start baking!
Variations
When it comes to a classic Boston Cream Pie, the traditional recipe is already a delightful treat. However, if you’re feeling adventurous or need to cater to specific dietary preferences, there are plenty of creative variations to explore. Whether you’re juggling work calls or soccer practice, these twists on the classic Boston Cream Pie are sure to impress while keeping your baking routine exciting.
- Dietary-Friendly Tweaks: For a dairy-free version, swap the heavy cream for coconut milk. Not only does it maintain the creamy texture, but it also adds a subtle tropical flavor that will have your taste buds dancing.
- Gluten-Free Delight: Replace all-purpose flour with a gluten-free blend or almond flour. This adjustment ensures that everyone can enjoy a slice of this classic Boston Cream Pie without worry.
- Chocolate Lovers Unite: Elevate the chocolate ganache by infusing it with espresso or flavored extracts like almond or orange. This twist adds a depth of flavor, making your pie truly unique.
- Seasonal Twists: In fall, add roasted pumpkin puree to the pastry cream for a seasonal twist that’s reminiscent of Thanksgiving. It’s like having two beloved desserts in one!
- Fruit-Infused Options: Layer in fresh berries such as raspberries or strawberries between the cake layers for a burst of freshness. The tartness of the fruit beautifully complements the sweet cream and chocolate.
- Mini Boston Cream Pies: For bite-sized treats, bake the cake in muffin tins and assemble mini versions. These are excellent for parties or as a fun treat for kids, making the classic Boston Cream Pie even more accessible.
- Nutty Crunch: Sprinkle chopped nuts, like almonds or hazelnuts, on top of the ganache. This not only adds a delightful crunch but also enhances the overall flavor profile.
These variations of a classic Boston Cream Pie allow you to customize your dessert to suit your taste or dietary needs. Feel free to mix and match these ideas, and watch as your dessert transforms into something uniquely yours!
Print
Boston Cream Pie: Discover the Ultimate Recipe Today!
- Prep Time: 30 minutes
- Cook Time: 30 minutes
- Total Time: 1 hour
- Yield: 8 servings 1x
- Category: Dessert
- Cuisine: American
Description
A classic Boston Cream Pie is a delightful dessert consisting of a rich custard filling sandwiched between two layers of sponge cake, topped with a glossy chocolate ganache.
Ingredients
- 1 cup all-purpose flour
- 1 cup sugar
- 1/2 cup unsalted butter
- 1/2 cup milk
- 3 large eggs
- 1 tablespoon baking powder
- 1 teaspoon vanilla extract
- 1 cup heavy cream
- 1/2 cup sugar (for custard)
- 2 tablespoons cornstarch
- 1 teaspoon vanilla extract (for custard)
- 4 oz semisweet chocolate
- 1/4 cup unsalted butter (for ganache)
Instructions
- Preheat the oven to 350°F (175°C).
- In a mixing bowl, cream together the butter and sugar until light and fluffy.
- Add eggs one at a time, mixing well after each addition, followed by vanilla.
- In a separate bowl, combine flour and baking powder; gradually add to the creamed mixture alternately with milk.
- Pour batter into two greased 9-inch round cake pans.
- Bake for 25-30 minutes or until a toothpick inserted in the center comes out clean.
- Let cakes cool in pans for 10 minutes before transferring to wire racks to cool completely.
- To make custard, heat milk in a saucepan until just boiling. In a bowl, whisk together sugar, cornstarch, and egg yolks. Slowly whisk in hot milk, then return to the saucepan.
- Cook over medium heat, stirring constantly until thickened. Remove from heat and stir in vanilla.
- Once cooled, fill one layer of cake with custard, top with the second layer, and refrigerate.
- For the ganache, melt chocolate and butter together in a bowl over hot water. Stir until smooth.
- Pour ganache over the top of the cake, allowing it to drip down the sides.
Notes
- Ensure the cakes are completely cooled before adding custard and ganache.
- This dessert is best served chilled.
- Can be stored in the refrigerator for up to 3 days.
Nutrition
- Serving Size: 1 slice
- Calories: 350
- Sugar: 25 grams
- Sodium: 150 mg
- Fat: 20 grams
- Saturated Fat: 10 grams
- Carbohydrates: 40 grams
- Fiber: 1 gram
- Protein: 4 grams
- Cholesterol: 100 mg


