
Introduction
Growing up, the aroma of sweets wafting through the house was always a sign that something special was in the works. My grandmother’s kitchen was a magical place, filled with laughter and the irresistible scent of caramelizing sugar. Among her many nice confections, Vanilla Pecan Pralines held a special place in my heart. Whether you’re juggling work calls or soccer practice, this recipe is your new best friend. It combines the rich, nutty flavor of pecans with the warm embrace of vanilla, creating a treat that feels like a hug in every bite.
These pralines are not just a sweet indulgence; they’re a simple way to improve your dessert game. With just a handful of ingredients, you can whip up a batch that impresses friends and family alike. Imagine serving these shiny, nut-studded candies at your next gathering—everyone will be reaching for seconds! Plus, they make for a thoughtful homemade gift, perfect for holidays or as a sweet surprise. So grab your apron and let’s dive into the world of Vanilla Pecan Pralines. You’re about to create something truly nice!

Why You’ll Love Vanilla Pecan Pralines
Picture this: a rainy afternoon, and you’re craving something sweet. That’s when Vanilla Pecan Pralines come to the rescue like a warm hug on a chilly day. Whether you’re juggling work calls or soccer practice, this recipe is your new best friend. These nice treats combine the warmth of vanilla with the crunch of pecans, creating a flavor explosion that dances on your palate. With just a few ingredients, you can whip up these heavenly bites in no time.
No more 6 PM panic—dinner’s ready faster than a microwave meal! Not only does it save time, but it also fills your home with an irresistible aroma that beckons everyone to the kitchen. The rich, creamy texture of the pralines melts in your mouth, while the pecans add a satisfying crunch that keeps you coming back for more. They’re perfect for sharing, although you might just want to keep them all to yourself!
In a world where dessert can feel like a chore, Vanilla Pecan Pralines turn the ordinary into extraordinary. So, gather your ingredients and prepare for a sweet adventure that you and your loved ones will cherish.
Ingredients For Vanilla Pecan Pralines
Imagine standing in your kitchen, the sweet aroma of caramel filling the air. This is what you can expect when making Vanilla Pecan Pralines. Whether you’re juggling work calls or soccer practice, this easy recipe is your new best friend. Let’s dive into the essential ingredients that make this treat irresistible and mouthwateringly nice.
To create your delicious Vanilla Pecan Pralines, you’ll need a handful of simple ingredients that pack a punch of flavor:
- 1 cup granulated sugar – This is the base for your praline, transforming into that golden, rich caramel.
- 1/2 cup light brown sugar – It adds a hint of molasses flavor, giving depth to the sweetness.
- 1/2 cup heavy cream – Rich and creamy, this ingredient helps achieve that smooth texture.
- 1/4 cup unsalted butter – The butter adds richness and a velvety finish to your pralines.
- 1 teaspoon pure vanilla extract – This is the star ingredient, providing that warm, inviting aroma.
- 1 cup pecans – Toasted or raw, these nuts add a nice crunch and earthy flavor.
If you’re feeling adventurous, consider these fun variations for your Vanilla Pecan Pralines:
- Sea salt – A sprinkle on top can enhance the sweetness, creating a perfect sweet-salty balance.
- Chocolate chips – Mixing in some chocolate can create a rich twist that chocoholics will adore.
- Walnuts or almonds – Not a pecan fan? You can substitute these nuts for a different taste.
With these ingredients in hand, you’re ready to embark on your sweet praline-making journey. Each component plays a crucial role in creating a treat that’s not just a dessert but a moment of joy!
How To Make Vanilla Pecan Pralines
Making vanilla pecan pralines is a nice experience that fills your kitchen with the warm, sweet aroma of caramelized sugar and toasted nuts. Whether you’re juggling work calls or soccer practice, this recipe is your new best friend. The process is straightforward and incredibly rewarding. The rich, buttery flavor of pecans combined with a hint of vanilla creates a treat that feels like a hug for your taste buds. Let’s dive into how to whip up these tasty candies that will impress everyone around you!
Before you start cooking, gather all your vanilla pecan pralines ingredients. You’ll need:
- 1 cup of pecan halves, toasted
- 1 cup of granulated sugar
- 1/2 cup of heavy cream
- 1/4 cup of unsalted butter
- 1 teaspoon of pure vanilla extract
- Pinch of salt
Make sure your pecans are toasted for that extra crunch and flavor. If you’re short on time, a quick toast in the oven or skillet will do the trick!
Before you start cooking, set up your work area. Line a baking sheet with parchment paper to prevent sticking, and keep your spatula handy. You’ll want everything within reach as the magic happens.
In a medium saucepan, combine the sugar, heavy cream, and butter over medium heat. Stir the mixture continuously until the sugar dissolves completely. This should take about 5 minutes. Once it’s bubbling, let it cook without stirring until it reaches the soft ball stage (around 240°F on a candy thermometer).
Once your mixture hits the right temperature, remove it from the heat and stir in the vanilla extract, toasted pecans, and a pinch of salt. This is where the magic really happens—the sweet aroma will fill your kitchen. Stir until the pecans are well coated.
Using a spoon, drop dollops of the mixture onto your prepared baking sheet. Allow them to cool completely at room temperature. As they cool, they will harden into delicious, chewy pralines. This step takes about 30 minutes, so you can relax while waiting for your treats to set!
And there you have it—your homemade vanilla pecan pralines are ready to be enjoyed! They make fantastic gifts or nice snacks for yourself. Plus, the process is so simple that you’ll want to make these again and again.
Expert Tips and Tricks
- Patience is key: After preparing your Vanilla Pecan Pralines, let them cool completely before serving. This resting period allows the flavors to meld beautifully, making each bite a nice experience. Trust me—good things come to those who wait!
- Perfect the sugar game: When cooking the sugar, keep an eye on it. It can go from beautifully golden to burnt in seconds. Use a candy thermometer for precision; aim for the soft-ball stage at 235°F to 240°F for that perfect chewy texture.
- Chop pecans wisely: For a more intense flavor, lightly toast the pecans before adding them to the mixture. The warmth will enhance their nutty aroma and give your Vanilla Pecan Pralines an irresistible crunch.
- Use fresh vanilla: Opt for real vanilla extract instead of imitation for a richer flavor. The deep, aromatic notes of pure vanilla improve your pralines from good to unforgettable.
- Don’t rush the cooling: Allow the pralines to set on parchment paper without disturbing them. This will ensure they hold their shape and develop that signature glossy finish.
- Experiment with flavors: Want to switch it up? Try adding a pinch of sea salt or a dash of cinnamon to the mix for an extra layer of flavor. These subtle enhancements can make your Vanilla Pecan Pralines stand out.
- Storage secrets: To keep your pralines fresh, store them in an airtight container. They’ll stay delicious for up to two weeks—if they last that long!
- Make it a family affair: Get the kids involved! Let them help with measuring ingredients or decorating the pralines. It’s a fun way to bond and create lasting memories while whipping up this nice treat.
Equipment Needed
When you’re ready to dive into making delicious Vanilla Pecan Pralines, having the right equipment at your fingertips makes all the difference. Whether you’re juggling work calls or soccer practice, this recipe is your new best friend, and the right tools will streamline your process. Here’s what you’ll need to whip up this nice treat!
- Heavy-bottomed saucepan: A sturdy pan is essential for evenly distributing heat, preventing your sugar from burning. Look for a thick base that can handle high temperatures.
- Wooden spoon: You’ll need a trusty wooden spoon to stir your mixture. It’s perfect for scraping the sides of the pan and ensuring everything is well combined.
- Measuring cups and spoons: Precision is key in candy-making. Make sure you have a set of dry measuring cups for your sugar and pecans, along with measuring spoons for your vanilla and other flavors.
- Candy thermometer: This tool is crucial for achieving the perfect consistency in your pralines. It ensures you reach the right temperature for that ideal chewy texture.
- Parchment paper: Line your baking sheet with parchment paper to prevent sticking. This simple step makes cleanup a breeze and helps your pralines maintain their shape.
- Baking sheet: A flat baking sheet will be your canvas for shaping the pralines. Make sure it’s large enough to accommodate all the candies you’ll create.
- Cooling rack: After your pralines have set, a cooling rack allows air to circulate, helping them harden evenly. This step is vital for achieving that perfect crunch.
- Spatula: A silicone spatula can help you transfer the pralines from the baking sheet to your storage container without any fuss.
With these essential tools in hand, you’re all set to create mouthwatering Vanilla Pecan Pralines. Each piece of equipment plays a role in making sure your pralines turn out just right, so gather everything before you start. Now, let’s move on to how to make these nice treats!
Variations and Substitutions
When it comes to making your Vanilla Pecan Pralines, the beauty lies in its versatility. Whether you’re juggling work calls or soccer practice, this recipe is your new best friend, allowing you to tailor it to suit your tastes and dietary needs. Here are some creative variations and substitutions to keep things exciting:
- Dietary-Friendly Tweaks: If you’re looking for a dairy-free option, consider swapping out regular cream for coconut milk. The result is a creamy, dreamy texture that your dairy-free crew will cheer for!
- Protein Swaps: Not a tofu fan? Chicken works too—your secret’s safe with me! For a plant-based alternative, chickpeas or lentils can also add heartiness and protein.
- Vegetable Variations: Feel free to mix and match your vegetables! Fresh spinach can replace kale, or you could add in seasonal veggies like zucchini or bell peppers for a colorful twist.
- Herb Options: Swap fresh basil for cilantro or parsley. Each herb brings a distinct taste, transforming the dish without much effort.
- Seasonal Twists: Add roasted squash in fall—it’s like Thanksgiving in a bowl. In the summer, toss in fresh corn or cherry tomatoes for a burst of sweetness.
- Gluten-Free Options: If gluten is a concern, simply replace regular pasta with gluten-free noodles. It’s an easy swap that doesn’t compromise flavor or texture.
- Spice Level: Want a kick? Add crushed red pepper flakes or a dash of hot sauce. Conversely, if you prefer milder flavors, skip the spice altogether.
With these variations and substitutions, your Vanilla Pecan Pralines can evolve to fit any occasion or preference. So, don’t hesitate to get creative and make it your own!
Serving and Storage Suggestions
Once your delicious Vanilla Pecan Pralines is ready, it’s time to think about how to serve and store it like a pro! Here are some helpful tips to ensure your meal shines at the table and remains fresh for later enjoyment.
- Serving Suggestions: Serve your Vanilla Pecan Pralines hot, garnished with fresh herbs or a sprinkle of cheese to improve its visual appeal. Consider pairing it with a side salad for a burst of freshness, or crusty garlic bread to soak up every last bit of sauce.
- Portion Control: If you’re feeding a crowd or want to enjoy it throughout the week, portion your Vanilla Pecan Pralines into individual servings. This makes it easy to grab a quick meal when life gets hectic.
- Storage Tips: Allow your Vanilla Pecan Pralines to cool completely before transferring it to airtight containers. This helps maintain its flavor and texture while preventing moisture buildup.
- Refrigeration: Store in the fridge for up to 3-4 days. Just remember to reheat gently to keep the integrity of your dish intact—nobody wants a rubbery experience!
- Freezing for Later: If you want to stash some away for a rainy day, freeze the Vanilla Pecan Pralines in portions. Use freezer-safe bags or containers, and label each with the date. Future you will be grateful for a quick meal option!
- Thawing and Reheating: When ready to enjoy frozen Vanilla Pecan Pralines, thaw it overnight in the fridge. Reheat gently on the stove or in the microwave, adding a splash of water or broth if it seems dry.
By following these serving and storage suggestions, your Vanilla Pecan Pralines will not only be a hit on the table but also a nice meal waiting for you later in the week! Enjoy your culinary creation!
Conclusion
At the end of the day, this recipe isn’t just dinner—it’s sanity saved. Vanilla Pecan Pralines has the magical ability to turn chaotic evenings into something delicious and satisfying. Whether you’re juggling work calls or soccer practice, having this dish in your repertoire is like having a reliable friend always ready to help. Imagine the aroma wafting through your kitchen, inviting your family to the table, and sparking joy in every bite.
Moreover, this recipe is adaptable, allowing you to make it your own with simple tweaks. Feel free to experiment with seasonal ingredients or dietary-friendly swaps. Not only does Vanilla Pecan Pralines save you time, but it also offers the comfort of a home-cooked meal without the fuss. As you gather around the table, you’ll realize that meals like this are what create lasting memories. So grab your apron and get ready to whip up a nice dish that will make everyone smile!
Print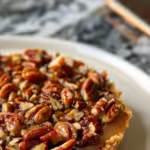
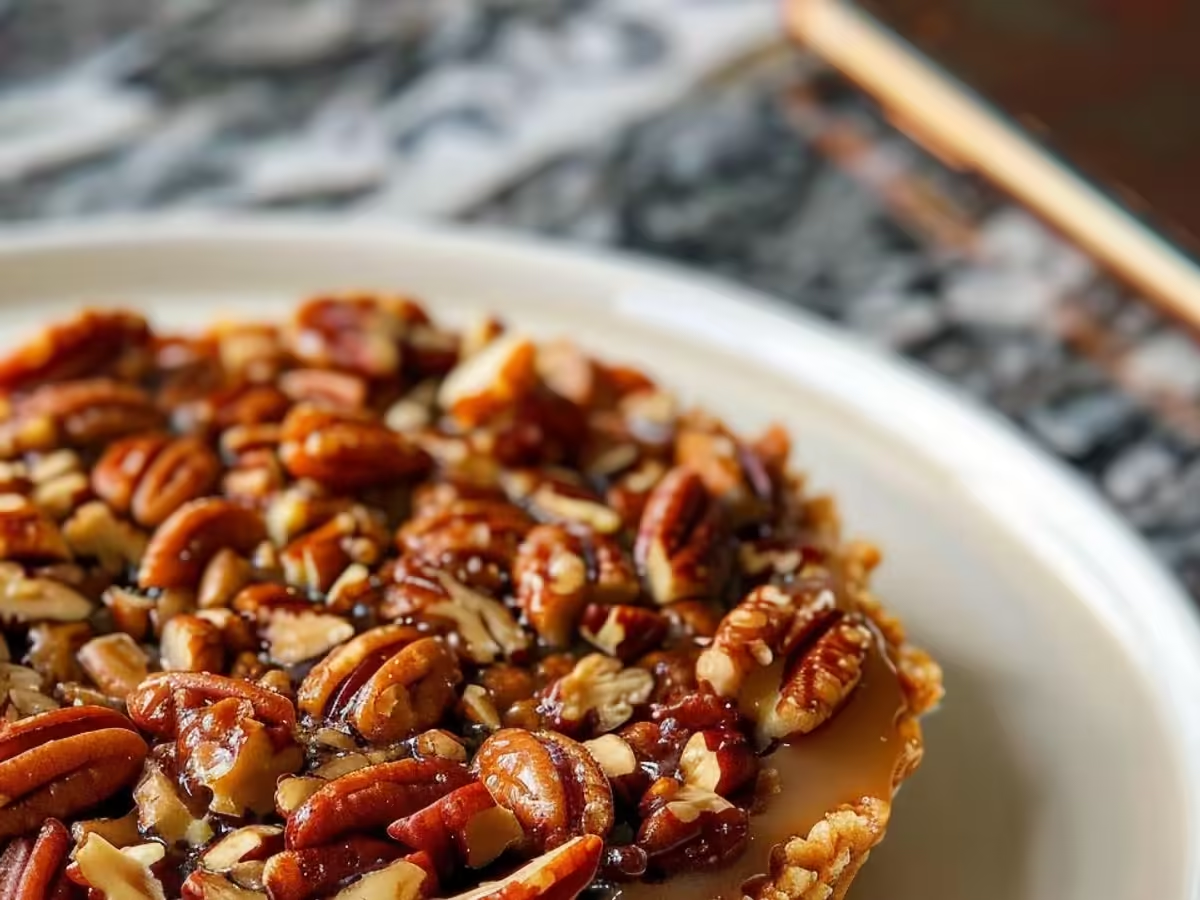
Vanilla Pecan Pralines
Description
Deliciously sweet and crunchy vanilla pecan pralines that are perfect for gifts or as a sweet treat.
Ingredients
- 1 cup pecans, chopped
- 1 cup granulated sugar
- 1/2 cup heavy cream
- 1/4 cup unsalted butter
- 1 teaspoon vanilla extract
- 1/4 teaspoon salt
Instructions
- Prepare a baking sheet by lining it with parchment paper.
- In a medium saucepan, combine sugar, cream, and butter over medium heat.
- Stir until the sugar dissolves and the mixture comes to a boil.
- Once boiling, stop stirring and let it cook for about 5-7 minutes until it reaches a soft ball stage (238°F).
- Remove from heat and stir in the vanilla extract, chopped pecans, and salt.
- Drop spoonfuls of the mixture onto the prepared baking sheet.
- Allow the pralines to cool completely before serving.
Notes
- Store in an airtight container to maintain freshness.
- For a richer flavor, toast the pecans before adding them to the mixture.
Nutrition
- Serving Size: 1 praline
- Calories: 150
- Sugar: 20g
- Sodium: 50mg
- Fat: 8g
- Saturated Fat: 4g
- Unsaturated Fat: 4g
- Trans Fat: 0g
- Carbohydrates: 18g
- Fiber: 1g
- Protein: 2g
- Cholesterol: 15mg


