
Honestly, some of my favorite kitchen memories are born from a little chaos and a lot of sugar. These turkey shaped sugar cookies? They started as a desperate attempt to distract my niece and nephew one Thanksgiving when dinner was, let’s just say, running behind. I remember flour everywhere, giggles echoing, and a distinct moment where I thought, “Oh, this is either going to be a disaster or pure magic.” Turns out, it was both! These aren’t just cookies, they’re little edible hugs, reminders of sticky fingers and belly laughs. They’re a simple way to bring that homemade, heart-felt touch to any fall gathering, especially Thanksgiving. The smell of vanilla and butter baking just fills the house, you know?
One year, I got a little too ambitious with the orange food coloring for the turkey feathers. Let’s just say my first batch of turkey shaped sugar cookies looked more like fiery phoenixes than anything else! My husband, bless his heart, tried to be diplomatic, but even he couldn’t hold back a chuckle. It’s those little oops moments that make baking so real, though, right? You learn, you laugh, and you end up with a story (and hopefully, a delicious cookie).

Ingredients for Turkey Shaped Sugar Cookies
Base Ingredients
- Unsalted Butter: Honestly, use good quality butter. It makes all the difference in the world for these turkey shaped sugar cookies. And please, for the love of all things delicious, let it soften on the counter. Don’t try to microwave it, I did that once and ended up with melted mess.
- Granulated Sugar: The sweetness backbone! I once tried to cut down too much on sugar for a batch of cookies and they just didn’t spread right. Stick to the recipe here, it’s a good balance.
- Large Egg: Binds everything together. I always use a large egg, smaller ones can throw off the moisture balance a bit, and you want that perfect cookie texture.
- Vanilla Extract: Don’t skimp on this! A good quality vanilla makes these turkey shaped sugar cookies sing. I’ve tried imitation before, and it’s just not the same. It’s worth the splurge, trust me.
Decorating Delights
- All-Purpose Flour: My kitchen’s best friend! It gives these cookies their structure. Make sure to measure it properly too much makes them tough, too little makes them spread. I usually spoon it into the measuring cup then level it off.
- Baking Powder: Just a touch for a little lift, keeps them from being too dense. I once forgot it entirely, and my cookies were like little hockey pucks. Oops!
- Salt: Balances the sweetness and really brings out all the flavors. Don’t skip it, it’s a flavor booster, not just for savory dishes!
- Powdered Sugar: The star of our icing show! Sift it, seriously. I didn’t once, and my icing was lumpy. It’s a small step that makes a huge difference.
- Milk (any kind): Just a splash to thin out the icing. I usually use whole milk because that’s what we have, but almond milk works just as well if you’re out.
- Food Coloring: For those vibrant turkey feathers! I keep a basic set of gel colors on hand, they’re so much better than liquid ones for intense colors.
Make It Special
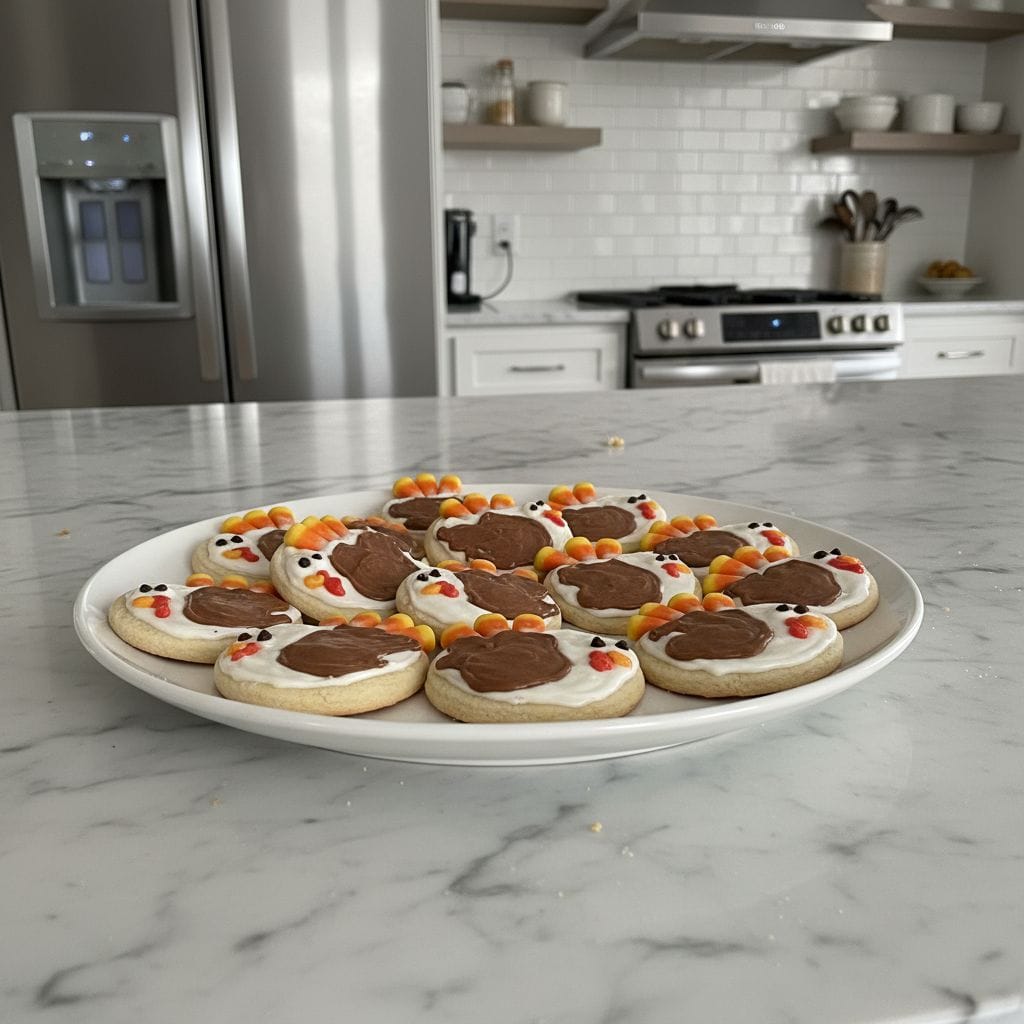
- Candy Eyes: These are optional, but they add so much personality to your turkey shaped sugar cookies! I found some tiny ones at the craft store once, and they were a game changer.
- Sprinkles: Any fall-themed sprinkles work! Or, honestly, whatever you have on hand. It’s about having fun, right?
Instructions for Turkey Shaped Sugar Cookies
- Creaming the Goodness:
- First up, grab your softened butter and granulated sugar. Pop them into a large mixing bowl, or your stand mixer if you’re lucky enough to have one, and beat them together until they’re light and fluffy. This usually takes me about 2-3 minutes. You want that pale, airy texture, it’s what gives these turkey shaped sugar cookies their melt-in-your-mouth quality. I always make sure to scrape down the sides of the bowl a couple of times here, just to make sure everything gets perfectly combined. It’s so satisfying to watch it transform!
- Adding the Wet Bits:
- Next, crack in that large egg and pour in the vanilla extract. Keep beating until everything is just combined. Be careful not to overmix at this stage, we’re just coaxing the egg and vanilla into the butter mixture, not whipping air into it like a meringue. I’ve definitely overmixed before, and it can make the cookies a bit tougher. You want a smooth, creamy consistency here. It should smell wonderfully sweet already, honestly, I always sneak a little sniff.
- The Dry Team Joins In:
- In a separate bowl, whisk together your all-purpose flour, baking powder, and salt. Then, gradually add this dry mixture to your wet ingredients, mixing on low speed until just combined. Stop as soon as you see no more streaks of flour. Overmixing with flour develops the gluten too much, and we want tender turkey shaped sugar cookies, not chewy ones! This is where I always get flour dust on my nose, a clear sign of a successful baking session, I think.
- Chilling Out Time:
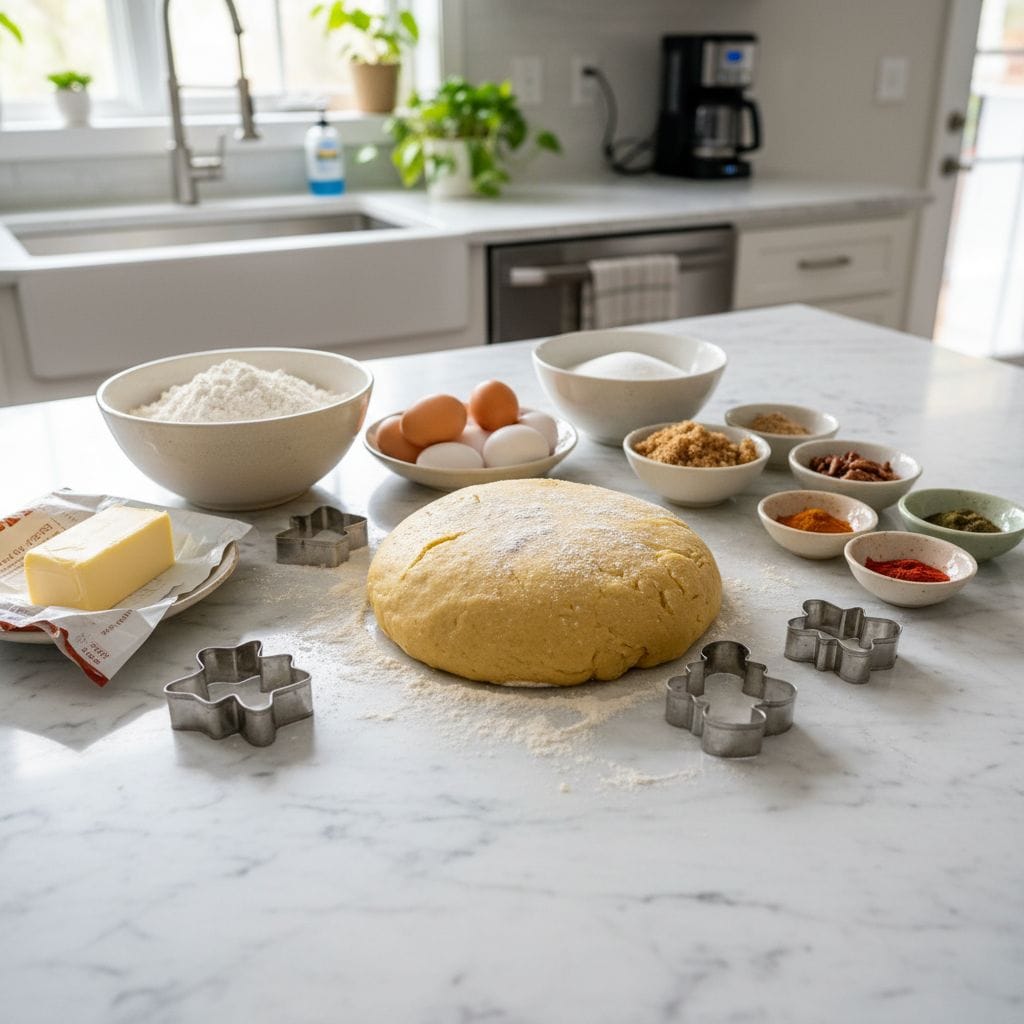
- Now for the waiting game! Gather your dough into a ball, flatten it into a disc, wrap it tightly in plastic wrap, and pop it into the fridge for at least 30 minutes. Honestly, I usually let it chill for an hour, sometimes even overnight if I’m prepping ahead. This chilling step is non-negotiable for good turkey shaped sugar cookies, it helps prevent spreading and makes the dough easier to handle. Trust me, trying to roll out warm dough is an exercise in frustration!
- Rolling and Cutting Fun:
- Once chilled, preheat your oven to 375°F (190°C). Lightly flour a clean surface and your rolling pin. Roll out your dough to about 1/4 inch thickness. Now for the fun part: grab your turkey shaped cookie cutters! Cut out your cookies and carefully transfer them to a baking sheet lined with parchment paper. Don’t crowd them, give those little turkeys some space to breathe. I always have a little scrap dough left over, which I re-roll and cut again, sometimes making tiny little bonus cookies.
- Baking and Decorating:
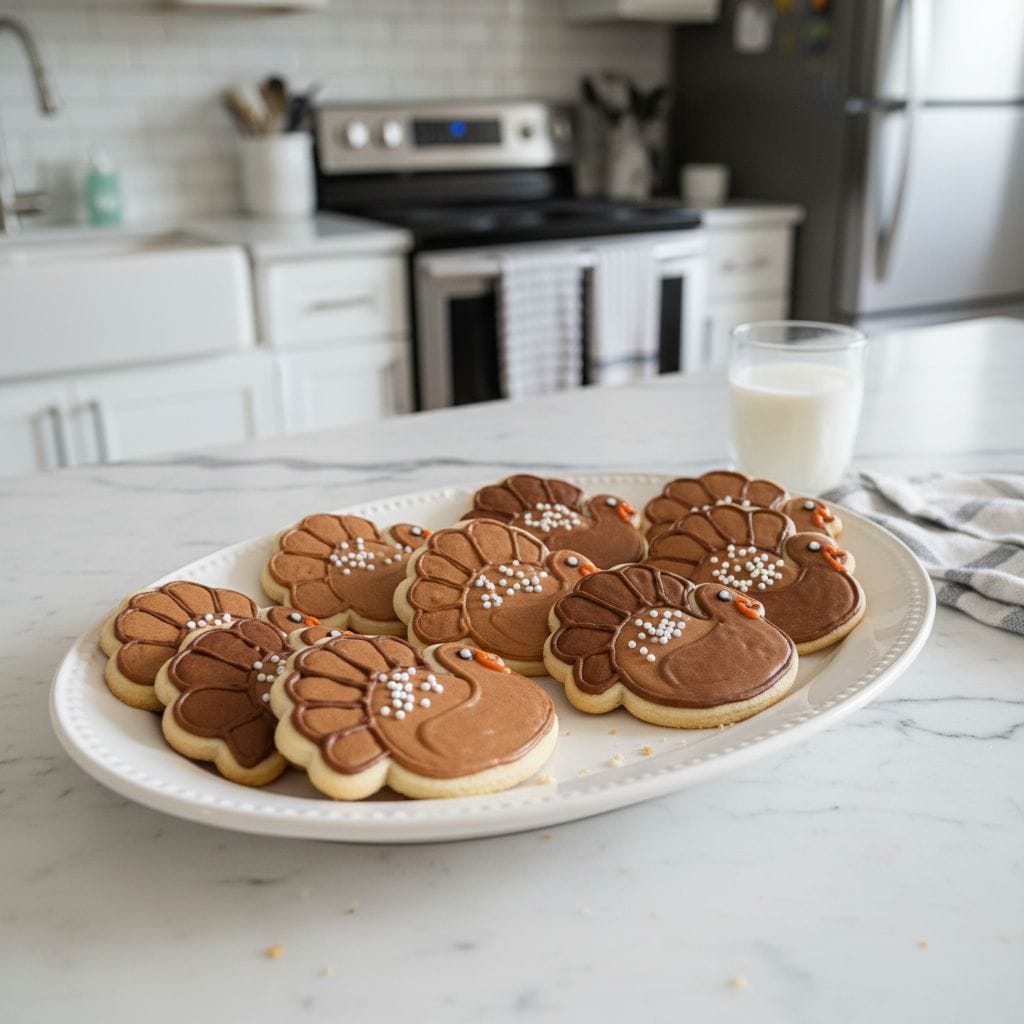
- Bake for 8-10 minutes, or until the edges are lightly golden. They should still look a little soft in the middle, they’ll firm up as they cool. Let them cool completely on the baking sheet before moving them to a wire rack. While they cool, whisk together your powdered sugar and milk for the icing. Divide it into small bowls and use food coloring to create your desired feather colors (red, orange, yellow, brown). Once the turkey shaped sugar cookies are cool, get decorating! Add candy eyes and sprinkles if you like. This is where the real artistry happens!
Making these turkey shaped sugar cookies always feels like a little mini-celebration. It’s a reminder of those simple, joyful moments in the kitchen, even when things get a bit messy. The kids love helping with the decorating, and honestly, seeing their proud faces with their slightly-lopsided, heavily-sprinkled turkeys? That’s what it’s all about for me. It’s not just baking, it’s making memories.
Turkey Shaped Sugar Cookies: Ingredient Substitutions
Life happens, and sometimes you’re missing an ingredient! For butter, honestly, there’s no perfect swap in terms of flavor and texture for these turkey shaped sugar cookies, but if you’re in a pinch, a good quality plant-based butter substitute can work, though the taste might be slightly different. I tried shortening once, and the cookies were a bit too crisp for my liking. If you don’t have vanilla extract, a tiny pinch of almond extract can offer a different, but still pleasant, flavor, though it won’t be the classic sugar cookie taste. For the milk in the icing, any dairy or non-dairy milk works fine water works too if you’re really out, but the milk gives a creamier texture. Don’t be afraid to experiment a little, but know that sometimes it’s a “it worked… kinda” situation!
Serving Suggestions
These turkey shaped sugar cookies are practically begging to be the centerpiece of your fall dessert table! Of course, they’re perfect on their own with a cup of coffee or tea, especially on a crisp autumn afternoon. But for Thanksgiving, I love arranging them on a big platter alongside pumpkin pie and apple crisp. They also make the cutest little edible place cards if you write names on them with edible markers. Honestly, a plate of these, a cozy blanket, and a good book? Yes please. They just scream comfort and celebration, and they’re always the first thing to disappear at family gatherings. The kids especially love them with a glass of cold milk after a day of playing outside.
Turkey Shaped Sugar Cookies: Cultural Backstory
While the humble sugar cookie has roots stretching back centuries, becoming popular in America in the 1700s, turning them into specific shapes like these turkey shaped sugar cookies is a deeply personal and cultural tradition tied to holidays. For me, these cookies are intrinsically linked to Thanksgiving. It’s not just about the recipe, it’s about the feeling of gathering, the warmth of family, and adding a little handmade touch to a meal that’s all about gratitude. My grandmother always had some kind of festive cookie, and carrying on that tradition, even with a modern twist, feels really special. It’s about creating new memories around old customs, making the holiday truly your own with a bit of flour and frosting.
There’s something truly magical about seeing a plate of these turkey shaped sugar cookies, all bright and festive, ready to be shared. Each one, a little imperfect in its own way, tells a story of a happy kitchen and a lot of love. They truly bring a smile to everyone’s face, honestly. I hope you give them a whirl and let them bring a little extra cheer to your table. Don’t forget to tell me about your own cookie adventures!
Frequently Asked Questions about Turkey Shaped Sugar Cookies
- → Can I make the dough for these turkey shaped sugar cookies ahead of time?
Absolutely! I often make the dough a day or two in advance. Just wrap it tightly in plastic and keep it in the fridge. It actually makes it easier to roll out, honestly, so it’s a great prep-ahead step!
- → What if I don’t have a turkey shaped cookie cutter?
No worries at all! You can use any fall-themed cutters you have leaves, pumpkins, even circles. Or, you could freehand some turkey shapes with a knife if you’re feeling adventurous! They’ll still be delicious turkey shaped sugar cookies!
- → My turkey shaped sugar cookies spread too much! What did I do wrong?
Oh, I’ve been there! Usually, it’s either the butter was too warm, the dough wasn’t chilled enough, or too much flour wasn’t added. Make sure your butter is just softened, and really give that dough time in the fridge!
- → How long do these turkey shaped sugar cookies stay fresh?
Once decorated and fully set, they’ll stay lovely in an airtight container at room temperature for about 3-5 days. If you want them longer, freeze the undecorated cookies and frost them later. I usually eat them all before then, though, lol!
- → Can I use royal icing instead of powdered sugar icing?
Definitely! Royal icing gives a harder, more professional finish, which is great for intricate details. I usually opt for the simpler powdered sugar icing for these turkey shaped sugar cookies because it’s quicker and I’m all about rustic charm!

Turkey Shaped Sugar Cookies: My Festive Fall Treat
- Prep Time: 30 Minutes
- Cook Time: 10 Minutes
- Total Time: 40 Minutes
- Yield: 24 Servings 1x
- Category: Lunch
Description
Whip up charming turkey shaped sugar cookies! This simple recipe brings festive cheer to your Thanksgiving table with easy steps and a touch of homemade warmth.
Ingredients
- Base Ingredients:
- 1 cup (2 sticks) unsalted butter, softened
- 1 ½ cups granulated sugar
- 1 large egg
- 2 teaspoons vanilla extract
- Decorating Delights:
- 3 cups all-purpose flour
- 1 teaspoon baking powder
- ½ teaspoon salt
- 3 cups powdered sugar
- 3–4 tablespoons milk (any kind)
- Food coloring (red, orange, yellow, brown)
- Make It Special:
- Candy eyes (optional)
- Fall-themed sprinkles (optional)
Instructions
- Creaming the Goodness:: First up, grab your softened butter and granulated sugar. Pop them into a large mixing bowl, or your stand mixer if you’re lucky enough to have one, and beat them together until they’re light and fluffy. This usually takes me about 2-3 minutes. You want that pale, airy texture; it’s what gives these turkey shaped sugar cookies their melt-in-your-mouth quality. I always make sure to scrape down the sides of the bowl a couple of times here, just to make sure everything gets perfectly combined. It’s so satisfying to watch it transform!
- Adding the Wet Bits:: Next, crack in that large egg and pour in the vanilla extract. Keep beating until everything is just combined. Be careful not to overmix at this stage; we’re just coaxing the egg and vanilla into the butter mixture, not whipping air into it like a meringue. I’ve definitely overmixed before, and it can make the cookies a bit tougher. You want a smooth, creamy consistency here. It should smell wonderfully sweet already, honestly, I always sneak a little sniff.
- The Dry Team Joins In:: In a separate bowl, whisk together your all-purpose flour, baking powder, and salt. Then, gradually add this dry mixture to your wet ingredients, mixing on low speed until just combined. Stop as soon as you see no more streaks of flour. Overmixing with flour develops the gluten too much, and we want tender turkey shaped sugar cookies, not chewy ones! This is where I always get flour dust on my nose, a clear sign of a successful baking session, I think.
- Chilling Out Time:: Now for the waiting game! Gather your dough into a ball, flatten it into a disc, wrap it tightly in plastic wrap, and pop it into the fridge for at least 30 minutes. Honestly, I usually let it chill for an hour, sometimes even overnight if I’m prepping ahead. This chilling step is non-negotiable for good turkey shaped sugar cookies; it helps prevent spreading and makes the dough easier to handle. Trust me, trying to roll out warm dough is an exercise in frustration!
- Rolling and Cutting Fun:: Once chilled, preheat your oven to 375°F (190°C). Lightly flour a clean surface and your rolling pin. Roll out your dough to about 1/4 inch thickness. Now for the fun part: grab your turkey shaped cookie cutters! Cut out your cookies and carefully transfer them to a baking sheet lined with parchment paper. Don’t crowd them; give those little turkeys some space to breathe. I always have a little scrap dough left over, which I re-roll and cut again, sometimes making tiny little bonus cookies.
- Baking and Decorating:: Bake for 8-10 minutes, or until the edges are lightly golden. They should still look a little soft in the middle; they’ll firm up as they cool. Let them cool completely on the baking sheet before moving them to a wire rack. While they cool, whisk together your powdered sugar and milk for the icing. Divide it into small bowls and use food coloring to create your desired feather colors (red, orange, yellow, brown). Once the turkey shaped sugar cookies are cool, get decorating! Add candy eyes and sprinkles if you like. This is where the real artistry happens!


