

I remember the first time I made Soft & Chewy Peanut Butter Blossoms. It was a snow day, probably fifth grade, and my grandma was showing me how to bake. The kitchen smelled like roasted peanuts and melting chocolate, a scent that still brings me right back to her cozy, slightly cluttered counter. We actually used too much flour that day, and the first batch was a bit crumbly. Even those “oops” cookies were devoured! This recipe isn’t just about ingredients, it’s about those warm, fuzzy feelings, you know? It’s a little hug in cookie form, a simple pleasure that just hits different.
Honestly, I’ve had my share of kitchen chaos with these. One time, I got distracted by a cat video (don’t judge!) and baked them a smidge too long. They still tasted good, but they lost some of that signature soft & chewy texture. Another time, I ran out of granulated sugar and tried using all brown sugar. The cookies spread like crazy, a flat, delicious disaster! It’s all part of the baking journey, right?

Ingredients
Cookie Base
- Unsalted Butter: Use unsalted butter, softened. And please, for the love of all that is delicious, don’t try to substitute with margarine. I tried that once in a pinch, and the cookies just didn’t have that rich, creamy flavor. It’s the foundation for our soft & chewy peanut butter blossoms, so don’t skimp here, hon!
- Creamy Peanut Butter: Creamy peanut butter is a must for these Soft & Chewy Peanut Butter Blossoms. I always use a classic brand like Jif or Skippy, the natural, oilier ones tend to make the cookies spread too much. I learned that after a very flat batch one holiday season!
Granulated Sugar & Brown Sugar: Both granulated and brown sugar are essential. The white sugar helps with crisp edges, while brown sugar ensures that beautiful chewiness. I once accidentally swapped their amounts, and let me tell you, the texture was… unexpected. Sticky, but not in a good way!
Large Egg: Just one large egg, to bind everything together. I always let mine come to room temperature, it mixes into the batter so much smoother. I’ve forgotten this step more times than I care to admit, and the dough always feels a bit lumpy then.
All-Purpose Flour: All-purpose flour, plain and simple. Don’t pack it into the measuring cup, spoon it in and level it off. I once added too much, thinking “more flour, more cookie!” and ended up with dry, dense little pucks instead of soft & chewy peanut butter blossoms.
Flavor Boosters
- Baking Soda: This little powerhouse helps our cookies rise just right and get that characteristic texture. I always make sure mine isn’t expired. I had a batch of flat cookies once, and after a frantic search, realized my baking soda was older than dirt!
- Salt: Just a pinch, but it makes all the difference! It balances the sweetness and really brings out the peanut butter flavor. I’m a bit heavy-handed with salt in most things, but for these, a quarter teaspoon is spot on. Trust me on this.
Vanilla Extract: Pure vanilla extract adds such a lovely depth of flavor. I splurge on the good stuff because you can really taste the difference. Once, I ran out and skipped it, the cookies were fine, but they lacked that ‘something special,’ you know?
Finishing Touch
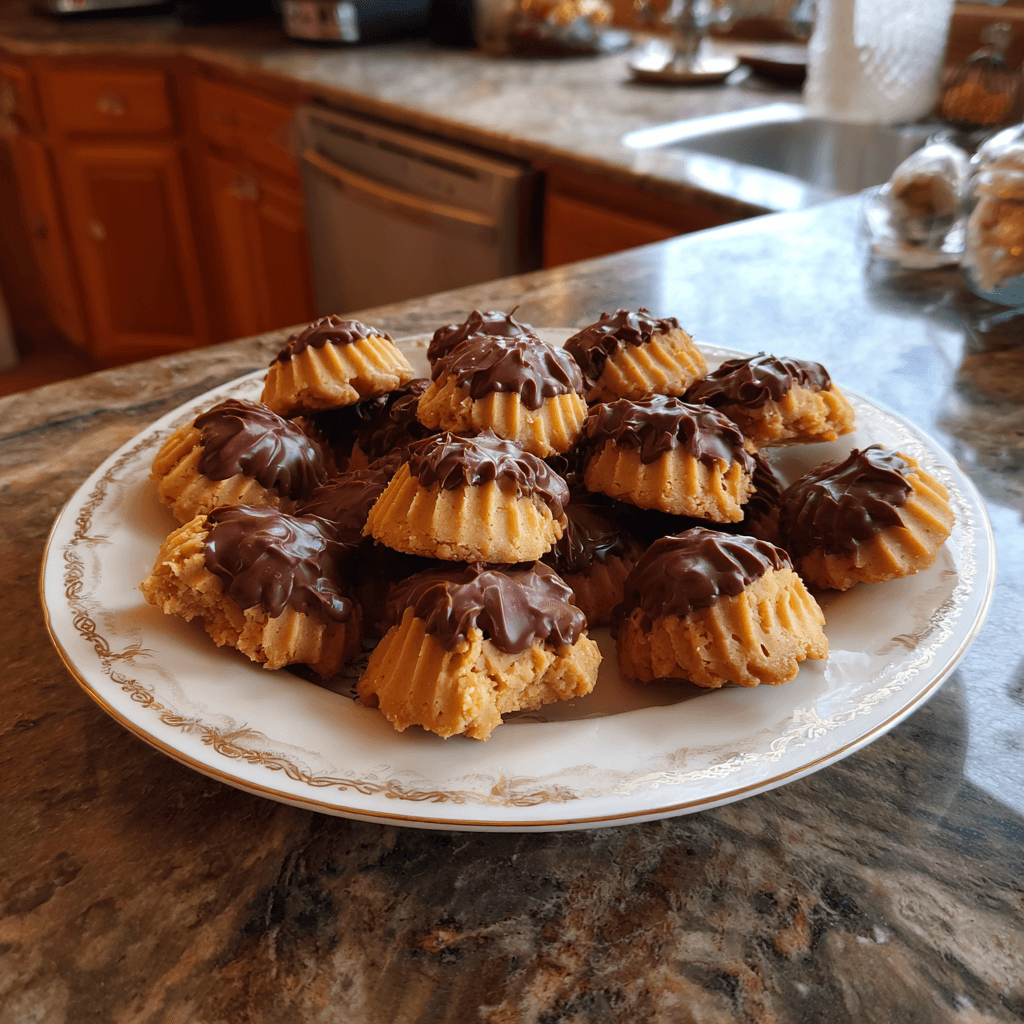
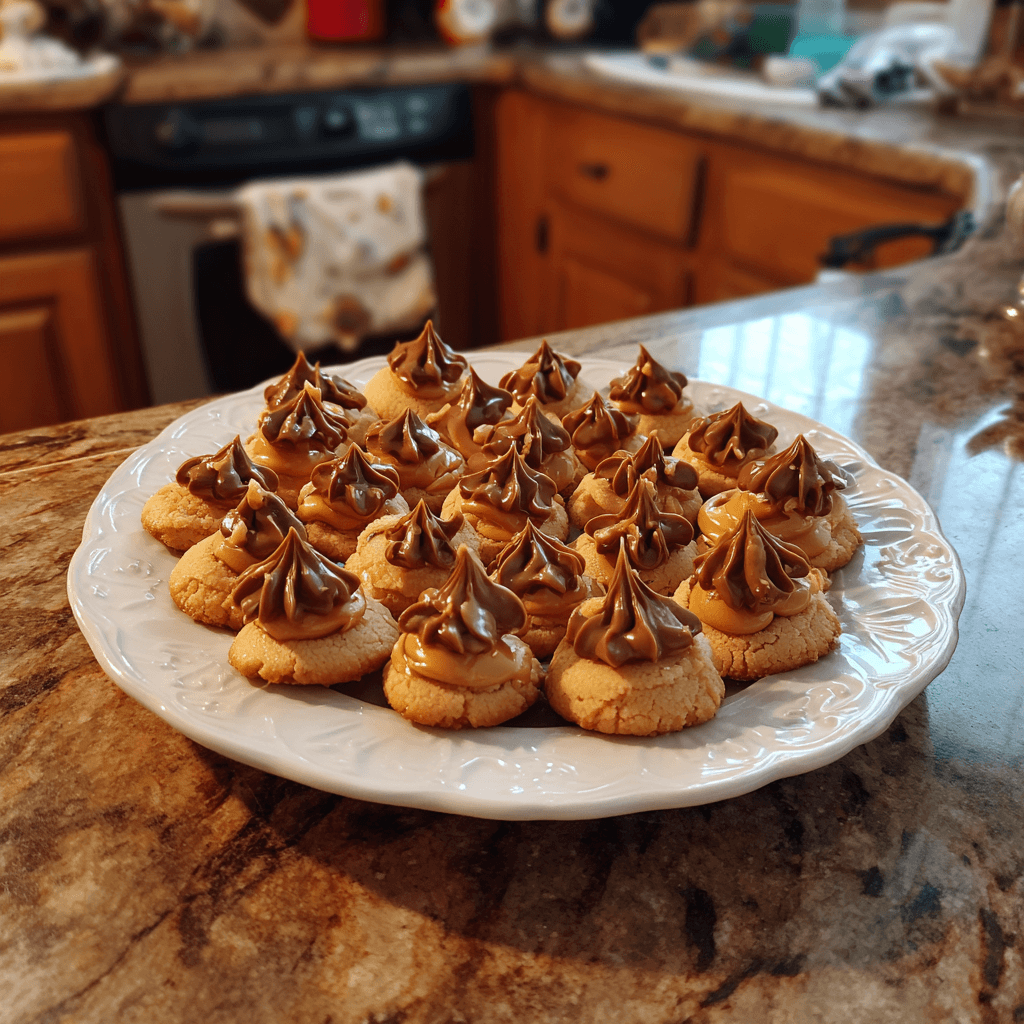
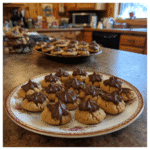
- Hershey’s Kisses: The iconic finishing touch! Hershey’s Kisses are traditional, but I’ve also used mini Reese’s peanut butter cups for an extra peanut-y kick. Just make sure they’re unwrapped and ready to press into those warm Soft & Chewy Peanut Butter Blossoms as soon as they come out of the oven!
Instructions
- Prep Your Space:
- First things first, let’s get that oven preheating to 375°F (190°C). And please, for your sanity and mine, line your baking sheets with parchment paper. I’ve had cookies stick to the pan more times than I can count, and trying to pry them off usually just results in a sad, broken mess. While the oven warms up, you can feel the anticipation building, that sweet aroma just around the corner, honestly!
- Cream the Wet Ingredients:
- In a big mixing bowl, cream together your softened butter, creamy peanut butter, granulated sugar, and brown sugar until it’s light and fluffy. This is where the magic starts! I usually beat it for about 2-3 minutes, scraping down the sides of the bowl a couple of times. Don’t rush this step, it’s what gives our Soft & Chewy Peanut Butter Blossoms that wonderful texture. You’ll see it turn pale and airy, a real transformation.
- Add Egg and Vanilla:
- Now, crack in that room-temperature egg and add the vanilla extract. Beat them into the creamy mixture until everything is just combined. I always get a little nervous here, hoping I haven’t overmixed! The batter will look smooth and glossy, a beautiful, rich peanut butter color. Resist the urge to taste test too much raw dough, even though it smells absolutely divine, I know it’s tempting!
- Combine Dry and Wet:
- In a separate, smaller bowl, whisk together your all-purpose flour, baking soda, and salt. Then, gradually add these dry ingredients to your wet mixture, mixing on low speed until just combined. This is crucial for achieving truly soft & chewy peanut butter blossoms, overmixing here will develop the gluten too much, leading to tough cookies. Stop as soon as you don’t see any streaks of flour, even if it looks a little shaggy.
- Roll and Sugar-Coat:
- Roll the dough into small, 1-inch balls. I usually use a small cookie scoop to keep them uniform, it really helps with even baking. Then, roll each ball in extra granulated sugar. This gives them that characteristic sparkle and a lovely little crunch on the outside. I always make sure my hands are clean and slightly floured for this step, it just makes things easier and less sticky, trust me.
- Bake and Finish:
- Place the sugared dough balls about 2 inches apart on your prepared baking sheets. Pop them into the preheated oven and bake for 8-10 minutes. You’re looking for edges that are just set and lightly golden, but the centers should still look soft and slightly underdone. That’s the secret to our Soft & Chewy Peanut Butter Blossoms! As soon as they come out, immediately press a chocolate kiss into the center of each warm cookie. Let them cool on the baking sheet for a few minutes before transferring to a wire rack. Seriously, don’t touch them too soon, or that chocolate might melt right off!
There’s something so satisfying about pulling a tray of these Soft & Chewy Peanut Butter Blossoms from the oven, the chocolate kisses just barely melted and gleaming. My kids always rush in, eyes wide, trying to sneak one before they’ve even cooled. It’s a sweet, sticky mess sometimes, with chocolate smudges on little faces, but those are the moments I wouldn’t trade for anything. Pure joy, really.
Soft & Chewy Peanut Butter Blossoms: Storage Tips
Honestly, these Soft & Chewy Peanut Butter Blossoms are best enjoyed within a day or two, but they do store pretty well. I keep them in an airtight container at room temperature for up to 5-7 days. I once tried freezing some unwrapped ones, and the chocolate kisses got a little weird and chalky after thawing so don’t do that! If you want to freeze them, wrap each cookie individually in plastic wrap before putting them in a freezer-safe bag. They’ll last for about a month that way, though I haven’t personally had a batch last that long in my house, haha! Just let them thaw on the counter for a bit before diving in.
Soft & Chewy Peanut Butter Blossoms: Ingredient Swaps
I’ve tried a few swaps in my time, some worked, some… kinda. For the peanut butter, if you only have natural, stir it really well and maybe add an extra tablespoon of flour to help with spreading. I tried almond butter once, and while tasty, it changed the flavor profile quite a bit not quite the classic Soft & Chewy Peanut Butter Blossoms vibe. If you’re out of granulated sugar for rolling, a mix of cinnamon and brown sugar works for a different, spiced twist. And for the chocolate kisses, mini Reese’s cups or even a dollop of Nutella pressed into the warm cookie are fun variations. I even used white chocolate kisses once, and they looked so pretty, but my family missed the classic milk chocolate.
Soft & Chewy Peanut Butter Blossoms: Serving Suggestions
My absolute favorite way to enjoy Soft & Chewy Peanut Butter Blossoms is still warm from the oven with a tall, cold glass of milk. It just transports me back to childhood! But they’re also fantastic with a strong cup of coffee or even a mug of hot cocoa on a chilly evening. For a casual dessert spread, I love pairing them with a simple vanilla ice cream the contrast of warm cookie and cold ice cream is just divine. Honestly, they’re perfect for any occasion, from a casual afternoon snack to a holiday cookie platter. They disappear fast, so make a big batch!
Cultural Backstory
The history of Soft & Chewy Peanut Butter Blossoms is a sweet one, rooted deeply in American home baking. They first appeared in the late 1950s, a delightful creation from a home baker named Freda Smith, who won a Pillsbury Bake-Off contest with her recipe. It quickly became a staple in cookbooks and holiday cookie exchanges. For me, they represent that comforting, nostalgic era of simple, joyful baking. Growing up, these cookies were a sign that the holidays were truly here, a familiar taste that always brought a smile. It’s not just a cookie, it’s a piece of culinary history that many of us share a personal connection with.
Baking these Soft & Chewy Peanut Butter Blossoms always fills my kitchen with the happiest smells and my heart with a bit of nostalgia. They’re such a simple cookie, but they carry so much warmth and joy. I truly hope you give them a try and make some sweet memories of your own. Don’t forget to share your cookie creations with me I love seeing your kitchen adventures!
Soft & Chewy Peanut Butter Blossoms FAQs
- → Why did my Soft & Chewy Peanut Butter Blossoms spread too much?
Oh, I’ve been there! Usually, it’s because your butter was too soft, or you used natural peanut butter that’s oilier. Sometimes, the oven temperature might be a bit off too. I always keep an oven thermometer handy to check!
- → Can I use crunchy peanut butter for these Soft & Chewy Peanut Butter Blossoms?
You can, but it will change the texture quite a bit. You won’t get that super smooth, soft & chewy interior. I’ve tried it, and while it’s still tasty, it’s a different cookie experience. Stick to creamy for the classic blossom!
- → My chocolate kisses keep melting completely. What am I doing wrong?
Ah, this happens if you press them in too early or if the cookies are too hot when they come out. Wait about 1-2 minutes after taking the tray out of the oven before pressing. I learned this after many melted, sad chocolate puddles!
- → How long do Soft & Chewy Peanut Butter Blossoms last?
In my house? Not long at all, haha! But seriously, stored in an airtight container at room temperature, they’re good for about 5-7 days. They tend to get a bit drier after that, so eat them up!
- → Can I make the dough for these Soft & Chewy Peanut Butter Blossoms ahead of time?
Absolutely! You can make the dough, roll it into balls, and even sugar-coat them. Then, just pop them in an airtight container in the fridge for up to 2-3 days. Bake when you’re ready for fresh cookies!
Soft & Chewy Peanut Butter Blossoms A Classic Treat
- Prep Time: 20 Minutes
- Cook Time: 10 Minutes
- Total Time: 30 Minutes
- Yield: 36 Servings 1x
- Category: Mediterranean Diet Recipes
Description
Soft & Chewy Peanut Butter Blossoms: a cozy, classic, perfectly sweet cookie. Relive memories with this comforting recipe!
Ingredients
- Cookie Base:
- 1/2 cup (1 stick) unsalted butter, softened
- 1/2 cup creamy peanut butter (like Jif or Skippy)
- 1/2 cup granulated sugar
- 1/2 cup packed light brown sugar
- 1 large egg, room temperature
- 1 3/4 cups all-purpose flour
- Flavor Boosters:
- 1 teaspoon baking soda
- 1/4 teaspoon salt
- 1 teaspoon vanilla extract
- Finishing Touch:
- About 36 Hershey’s Kisses, unwrapped
- 1/4 cup granulated sugar (for rolling)
Instructions
- Prep Your Space:: First things first, let’s get that oven preheating to 375°F (190°C). And please, for your sanity and mine, line your baking sheets with parchment paper. I’ve had cookies stick to the pan more times than I can count, and trying to pry them off usually just results in a sad, broken mess. While the oven warms up, you can feel the anticipation building, that sweet aroma just around the corner, honestly!
- Cream the Wet Ingredients:: In a big mixing bowl, cream together your softened butter, creamy peanut butter, granulated sugar, and brown sugar until it’s light and fluffy. This is where the magic starts! I usually beat it for about 2-3 minutes, scraping down the sides of the bowl a couple of times. Don’t rush this step; it’s what gives our Soft & Chewy Peanut Butter Blossoms that wonderful texture. You’ll see it turn pale and airy, a real transformation.
- Add Egg and Vanilla:: Now, crack in that room-temperature egg and add the vanilla extract. Beat them into the creamy mixture until everything is just combined. I always get a little nervous here, hoping I haven’t overmixed! The batter will look smooth and glossy, a beautiful, rich peanut butter color. Resist the urge to taste test too much raw dough, even though it smells absolutely divine, I know it’s tempting!
- Combine Dry and Wet:: In a separate, smaller bowl, whisk together your all-purpose flour, baking soda, and salt. Then, gradually add these dry ingredients to your wet mixture, mixing on low speed until just combined. This is crucial for achieving truly soft & chewy peanut butter blossoms; overmixing here will develop the gluten too much, leading to tough cookies. Stop as soon as you don’t see any streaks of flour, even if it looks a little shaggy.
- Roll and Sugar-Coat:: Roll the dough into small, 1-inch balls. I usually use a small cookie scoop to keep them uniform; it really helps with even baking. Then, roll each ball in extra granulated sugar. This gives them that characteristic sparkle and a lovely little crunch on the outside. I always make sure my hands are clean and slightly floured for this step, it just makes things easier and less sticky, trust me.
- Bake and Finish:: Place the sugared dough balls about 2 inches apart on your prepared baking sheets. Pop them into the preheated oven and bake for 8-10 minutes. You’re looking for edges that are just set and lightly golden, but the centers should still look soft and slightly underdone. That’s the secret to our Soft & Chewy Peanut Butter Blossoms! As soon as they come out, immediately press a chocolate kiss into the center of each warm cookie. Let them cool on the baking sheet for a few minutes before transferring to a wire rack. Seriously, don’t touch them too soon, or that chocolate might melt right off!


