
My first Red Velvet Cake? Oh, what a memory! I was maybe ten, peeking over Grandma Rose’s shoulder as she mixed something that looked like magic. The way the red batter swirled, the faint cocoa scent it felt like a secret. Years later, trying to recreate that magic in my own kitchen, I’ve had my share of flour explosions and frosting mishaps, but honestly, every crumb of this cake takes me back to that warm, happy place. It’s more than just a dessert, it’s a hug, a little piece of joy from my kitchen to yours.
I remember one time, I was so focused on getting the red just right, I completely forgot the cocoa powder! The cake came out… pink. A very sad, slightly sweet pink cake. My family still teases me about my “Pink Velvet Fiasco.” Now, I double-check every ingredient, especially that cocoa, because a proper Red Velvet Cake needs that subtle chocolate depth!

Ingredients
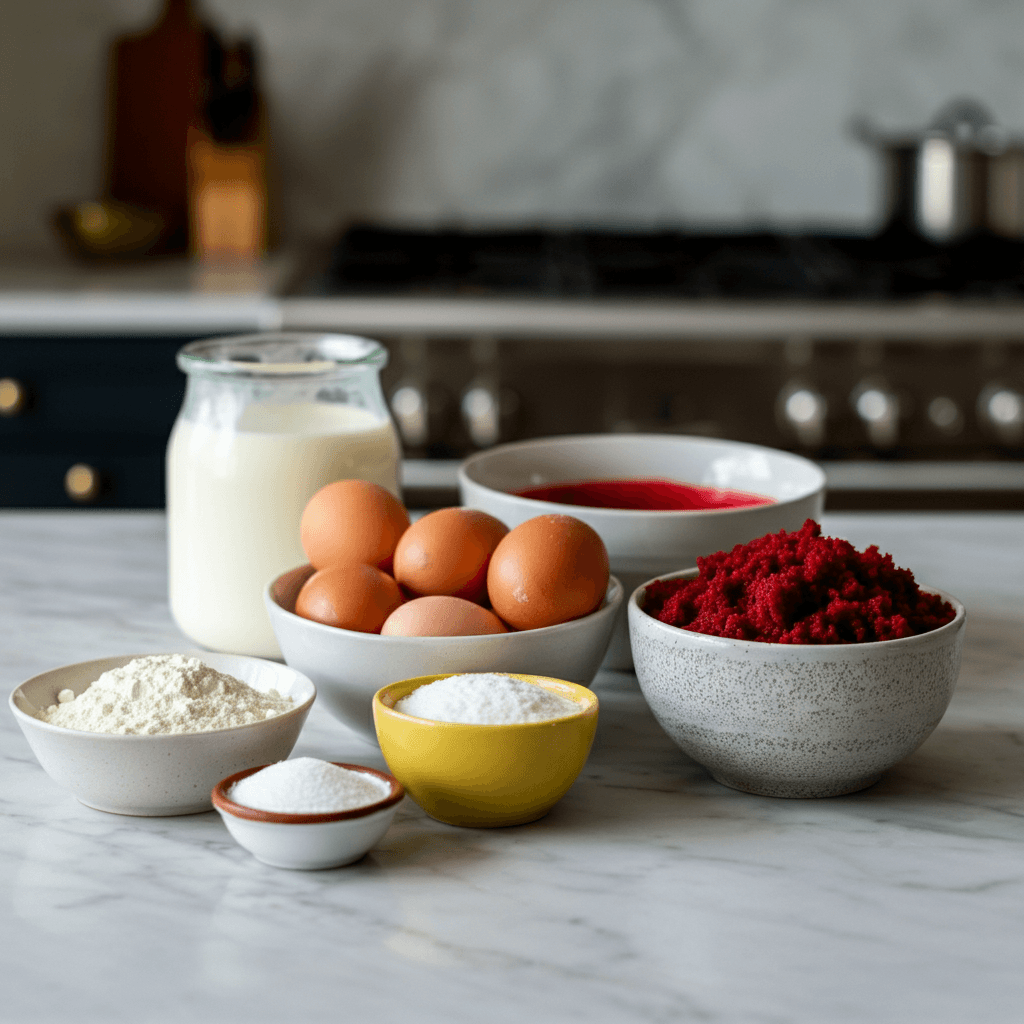
- All-Purpose Flour: This is your cake’s backbone, giving it structure. Honestly, I always sift it, even when I’m in a hurry, because it makes the cake so much lighter.
- Granulated Sugar: Sweetness, obviously, but it also helps keep the cake moist. Don’t skimp here, hon, it’s a dessert after all!
- Unsweetened Cocoa Powder: This is what gives this Red Velvet Cake its subtle chocolate flavor and helps deepen that red color. I use natural cocoa, Dutch-processed can sometimes make the red look a bit murky.
- Baking Soda: Our leavening agent! It reacts with the acidic ingredients (buttermilk, vinegar) to give the cake its glorious rise.
- Salt: Just a pinch, but it balances all the sweet flavors. I always forget this in other recipes, but not for my Red Velvet Cake!
- Large Eggs: Binders and richness providers. Make sure they’re at room temperature, it helps them incorporate better into the batter, I swear.
- Buttermilk: The secret to that tender crumb and tangy flavor. Don’t use skim milk, just don’t. If you don’t have it, you can make a quick substitute, but proper buttermilk is worth it for this cake.
- Vegetable Oil: For moisture! It keeps the cake soft and tender for days. I’ve tried butter, but oil just gives a better texture here.
- Vanilla Extract: Enhances all the other flavors. I’m a vanilla fiend, so I usually add a little extra splash.
- Red Gel Food Coloring: This is where the vibrant red comes from! Gel coloring works best for a deep hue without thinning the batter. I’ve had liquid coloring disasters, trust me.
- White Vinegar: Reacts with the baking soda for an extra lift and a touch of tang, which is classic for a Red Velvet Cake.
- Cream Cheese: Softened, for that signature tangy, creamy frosting. Don’t use the low-fat stuff, it just doesn’t work the same.
- Unsalted Butter: Softened, the other half of our dreamy frosting.
- Powdered Sugar: Sifted, for a smooth, lump-free frosting. I’ve skipped sifting once, and the lumps were real!
Instructions
- Prep Your Pans & Oven:
- First things first, get those cake pans ready. I usually grab two 9-inch round pans, grease ’em up good, and then dust ’em with a bit of flour. Honestly, I’ve skipped this step once or twice, and let me tell you, prying a cake out of a pan is not a fun kitchen workout. Preheat your oven to 350°F (175°C) too, don’t be like me and forget! This sets the stage for a beautiful Red Velvet Cake.
- Whisk the Dry Ingredients:
- In a big bowl, whisk together your all-purpose flour, granulated sugar, unsweetened cocoa powder, baking soda, and a pinch of salt. This is where the magic starts to happen, getting all those dry bits evenly distributed. I always give it an extra whisk, because clumpy flour is just no fun and can mess with the texture of your Red Velvet Cake. We want smooth sailing!
- Mix the Wet Ingredients:
- In another bowl, combine your room temperature eggs, buttermilk, vegetable oil, vanilla extract, and that vibrant red gel food coloring. This is where the Red Velvet Cake gets its signature hue! I’ve experimented with different red food colorings, and honestly, gel works best for that deep, rich color without making the batter too thin. Don’t be shy with the red make it pop!
- Combine Gently:
- Slowly add the wet ingredients to the dry ingredients, mixing on low speed until just combined. Don’t overmix, hon! Overmixing can lead to a tough cake, and we want a tender, fluffy Red Velvet Cake. I usually stop as soon as I see no more streaks of flour. You’ll see that gorgeous red color really start to shine through.
- Add the Vinegar Boost:
- Now for the secret ingredient: white vinegar! Stir it in gently. This reacts with the baking soda to give the Red Velvet Cake its signature rise and a little tang. I always wonder how something so simple makes such a difference. Pour the batter evenly into your prepared pans. The batter will be a glorious, deep red, ready for baking!
- Bake to Perfection:
- Pop those pans into the preheated oven and bake for about 25-30 minutes, or until a wooden skewer inserted into the center comes out clean. My kitchen smells absolutely divine at this stage that sweet cocoa and vanilla aroma, oh my! Let them cool in the pans for about 10 minutes before transferring to a wire rack to cool completely. Patience is key for this Red Velvet Cake.
- Whip Up the Cream Cheese Frosting:
- While the cakes cool, let’s make that dreamy cream cheese frosting. In a stand mixer, beat softened cream cheese and unsalted butter until light and fluffy. Gradually add powdered sugar, vanilla extract, and a pinch of salt. Beat until smooth and creamy. This is my favorite part, tasting little spoonfuls along the way, oops! This frosting is essential for a classic Red Velvet Cake.
- Assemble Your Masterpiece:
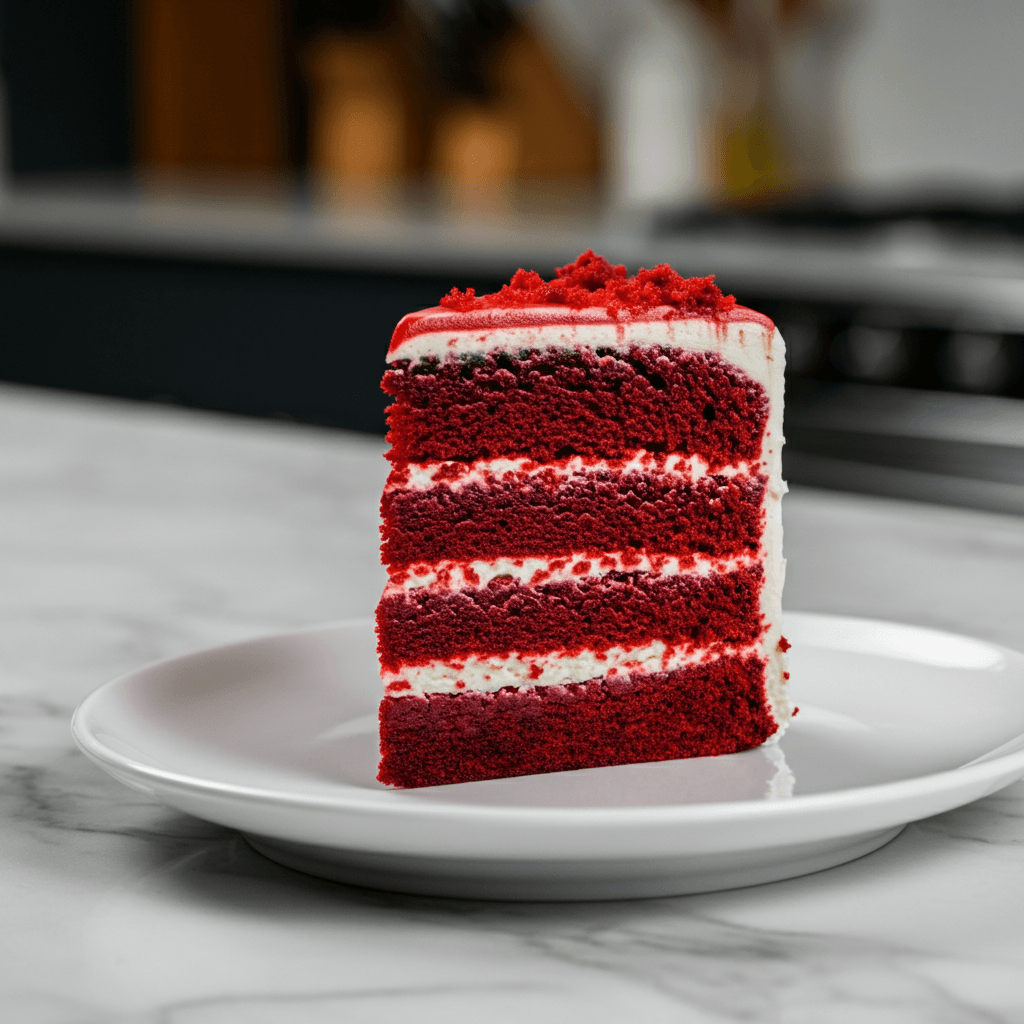
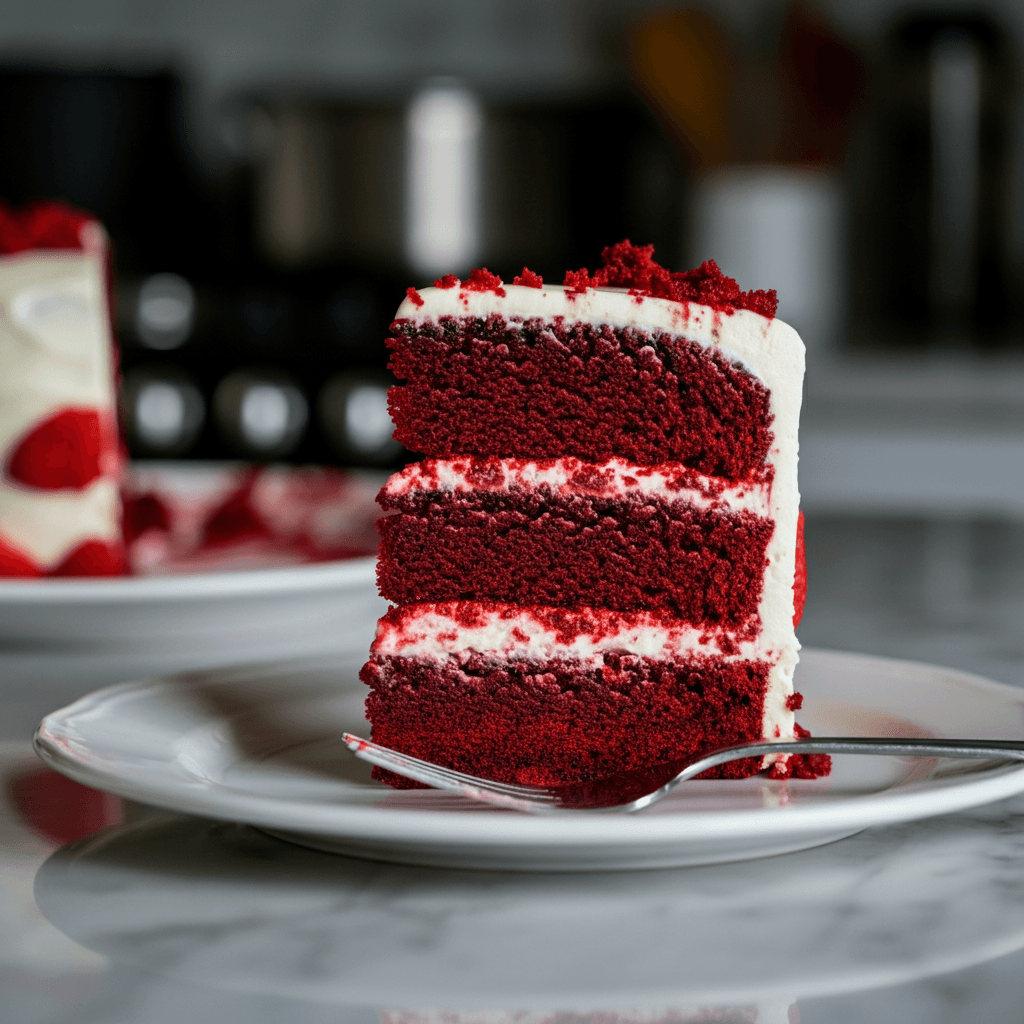
- Once the Red Velvet Cake layers are completely cool (this is CRITICAL, don’t rush it!), level them if needed. Spread a generous layer of frosting on the first cake layer, top with the second, and then frost the entire cake. I sometimes sprinkle a few cake crumbs on top for a rustic touch. Step back and admire your beautiful Red Velvet Cake!
One time, I was trying to bake this Red Velvet Cake for a friend’s birthday, and my dog decided it was a great time to “help” by knocking over the sugar bowl. There was granulated sugar everywhere! It was a sticky disaster, but we got through it, and the cake was still a hit. It just reminds me that kitchen chaos is part of the fun, and sometimes, the best recipes come with the messiest stories.
Red Velvet Cake Storage Tips
So, you’ve got leftover Red Velvet Cake? Lucky you! Honestly, this cake holds up really well. I usually store it covered tightly in the fridge for up to 3-4 days. The cream cheese frosting means it needs to stay cool. I once left a slice out overnight (oops!), and while it was still edible, the frosting got a bit too soft and separated. So, don’t do that, lol. For longer storage, you can wrap individual unfrosted layers in plastic wrap and foil, then freeze for up to a month. Just thaw them in the fridge before frosting or serving. It’s a great make-ahead option!
Red Velvet Cake Ingredient Substitutions
I’ve experimented a lot, to be real. For the buttermilk, if you don’t have it, you can totally make your own: just add a tablespoon of white vinegar or lemon juice to regular milk and let it sit for 5 minutes. It works, kinda, but store-bought buttermilk is best for that tangy flavor in your Red Velvet Cake. I’ve tried using applesauce instead of some oil for a slightly lighter cake, and it was okay, but the texture wasn’t quite as rich. For the frosting, if you’re not a cream cheese fan, a simple vanilla buttercream works too, but you lose that signature tang that makes this Red Velvet Cake so special. Experiment, but know what you might lose!
Serving Suggestions
This Red Velvet Cake is a showstopper all on its own, but honestly, a scoop of vanilla bean ice cream on the side? Heaven. Or maybe a simple cup of coffee or a glass of cold milk complements its richness so well. For a fancy touch, a few fresh raspberries scattered around the plate look beautiful and add a nice tart contrast. This cake and a good old-fashioned movie night? Yes please! It’s also fantastic for holiday gatherings or just when you need a little pick-me-up. It’s truly a cake for any mood.
Red Velvet Cake Cultural Backstory
The Red Velvet Cake has such a fascinating, almost mysterious history! There are stories about it originating in the South, others linking it to the Waldorf-Astoria Hotel. The red color was originally from non-Dutched cocoa powder reacting with acidic ingredients, but now we get that vibrant hue from food coloring. My Grandma Rose used to say it was a cake for special occasions, a sign of true hospitality, a dessert that just felt special. For me, it became a symbol of home, of family gatherings, and of that feeling of pure comfort. It’s a classic for a reason, and every bite of this Red Velvet Cake tells a story.
And there you have it, my friends, a truly special Red Velvet Cake. It might have caused a few flour avalanches in my kitchen, but every single time, it’s worth it. That rich, moist cake with the tangy, creamy frosting? Pure bliss. I really hope you give this recipe a whirl and make some sweet memories of your own. Don’t forget to tell me how it goes in your kitchen!
Frequently Asked Questions about Red Velvet Cake
- → Can I make this Red Velvet Cake ahead of time?
Absolutely! You can bake the cake layers a day in advance, wrap them tightly, and store at room temp. Make the frosting separately and chill. Assemble the Red Velvet Cake just before serving for freshest results, it saves so much time!
- → Why is my Red Velvet Cake not very red?
Oh, I’ve seen this! Honestly, it’s usually the food coloring. Make sure you’re using a good quality gel food coloring, liquid ones often don’t give that deep, vibrant hue. Also, ensure your cocoa powder isn’t Dutch-processed, as it can mute the red in your Red Velvet Cake.
- → My cream cheese frosting is too runny, what happened?
I’ve been there! This usually happens if your butter or cream cheese isn’t cold enough, or if you added too much liquid. Try chilling the frosting for 20-30 minutes, or add a bit more powdered sugar a tablespoon at a time until it firms up for your Red Velvet Cake.
- → How long does Red Velvet Cake last in the fridge?
With that luscious cream cheese frosting, your Red Velvet Cake is best stored in an airtight container in the fridge for up to 3-4 days. It stays wonderfully moist, honestly, sometimes even better the next day! Just make sure it’s covered well.
- → Can I make this a Red Velvet Cake Bundt cake?
You totally can! I’ve done it, and it works. Just grease and flour your Bundt pan really well, and increase the baking time to around 45-55 minutes. Keep an eye on it, as oven temps vary. It makes for a beautiful Red Velvet Cake presentation!

Classic Red Velvet Cake: A Rich, Creamy Treat
- Prep Time: 30 Minutes
- Cook Time: 30 Minutes
- Total Time: 1 Hour 30 Minutes
- Yield: 12 Servings 1x
- Category: Dessert
Description
Whip up a delightful Red Velvet Cake with tangy cream cheese frosting. This recipe shares my personal kitchen adventures for a truly special dessert.
Ingredients
- Cake Batter Essentials:
- 2 ½ cups (300g) all-purpose flour
- 1 ½ cups (300g) granulated sugar
- 1 tbsp unsweetened cocoa powder
- 1 tsp baking soda
- ½ tsp salt
- 2 large eggs, room temperature
- 1 cup (240ml) buttermilk, room temperature
- ½ cup (120ml) vegetable oil
- 1 tsp vanilla extract
- 2 tbsp red gel food coloring
- 1 tsp white vinegar
- For That Signature Frosting:
- 8 oz (226g) cream cheese, softened
- ½ cup (113g) unsalted butter, softened
- 4 cups (480g) powdered sugar, sifted
- 1 tsp vanilla extract
- Pinch of salt
- Finishing Touches:
- Cake crumbs (from leveling) for garnish, optional
Instructions
- Prep Your Pans & Oven:: First things first, get those cake pans ready. I usually grab two 9-inch round pans, grease ’em up good, and then dust ’em with a bit of flour. Honestly, I’ve skipped this step once or twice, and let me tell you, prying a cake out of a pan is not a fun kitchen workout. Preheat your oven to 350°F (175°C) too, don’t be like me and forget! This sets the stage for a beautiful Red Velvet Cake.
- Whisk the Dry Ingredients:: In a big bowl, whisk together your all-purpose flour, granulated sugar, unsweetened cocoa powder, baking soda, and a pinch of salt. This is where the magic starts to happen, getting all those dry bits evenly distributed. I always give it an extra whisk, because clumpy flour is just no fun and can mess with the texture of your Red Velvet Cake. We want smooth sailing!
- Mix the Wet Ingredients:: In another bowl, combine your room temperature eggs, buttermilk, vegetable oil, vanilla extract, and that vibrant red gel food coloring. This is where the Red Velvet Cake gets its signature hue! I’ve experimented with different red food colorings, and honestly, gel works best for that deep, rich color without making the batter too thin. Don’t be shy with the red – make it pop!
- Combine Gently:: Slowly add the wet ingredients to the dry ingredients, mixing on low speed until just combined. Don’t overmix, hon! Overmixing can lead to a tough cake, and we want a tender, fluffy Red Velvet Cake. I usually stop as soon as I see no more streaks of flour. You’ll see that gorgeous red color really start to shine through.
- Add the Vinegar Boost:: Now for the secret ingredient: white vinegar! Stir it in gently. This reacts with the baking soda to give the Red Velvet Cake its signature rise and a little tang. I always wonder how something so simple makes such a difference. Pour the batter evenly into your prepared pans. The batter will be a glorious, deep red, ready for baking!
- Bake to Perfection:: Pop those pans into the preheated oven and bake for about 25-30 minutes, or until a wooden skewer inserted into the center comes out clean. My kitchen smells absolutely divine at this stage – that sweet cocoa and vanilla aroma, oh my! Let them cool in the pans for about 10 minutes before transferring to a wire rack to cool completely. Patience is key for this Red Velvet Cake.
- Whip Up the Cream Cheese Frosting:: While the cakes cool, let’s make that dreamy cream cheese frosting. In a stand mixer, beat softened cream cheese and unsalted butter until light and fluffy. Gradually add powdered sugar, vanilla extract, and a pinch of salt. Beat until smooth and creamy. This is my favorite part, tasting little spoonfuls along the way, oops! This frosting is essential for a classic Red Velvet Cake.
- Assemble Your Masterpiece:: Once the Red Velvet Cake layers are completely cool (this is CRITICAL, don’t rush it!), level them if needed. Spread a generous layer of frosting on the first cake layer, top with the second, and then frost the entire cake. I sometimes sprinkle a few cake crumbs on top for a rustic touch. Step back and admire your beautiful Red Velvet Cake!


