
I remember the first time I really got chicken cutlets. It wasn’t some fancy recipe, honestly. It was a Tuesday, I was totally swamped, and my fridge looked like a sad, lonely place. I had some chicken breasts, a few eggs, and a box of panko staring back at me. My grandma always made them, but I’d always thought of them as a ‘special occasion’ thing. Turns out, they’re just… weeknight magic! The smell of those cutlets sizzling, that golden-brown crust forming it just transforms the whole kitchen. It felt like a small win, a comforting hug on a chaotic day, and I didn’t expect that from something so simple.
The first time I made these, I was so focused on getting the breading right that I completely forgot to season the chicken before dredging. Oops! The result was a little bland, bless its heart. But hey, that’s how we learn, right? Now, I always make sure to give those cutlets a good salt and pepper rub, maybe even a little garlic powder, before they even see the flour. It makes all the difference, trust me.

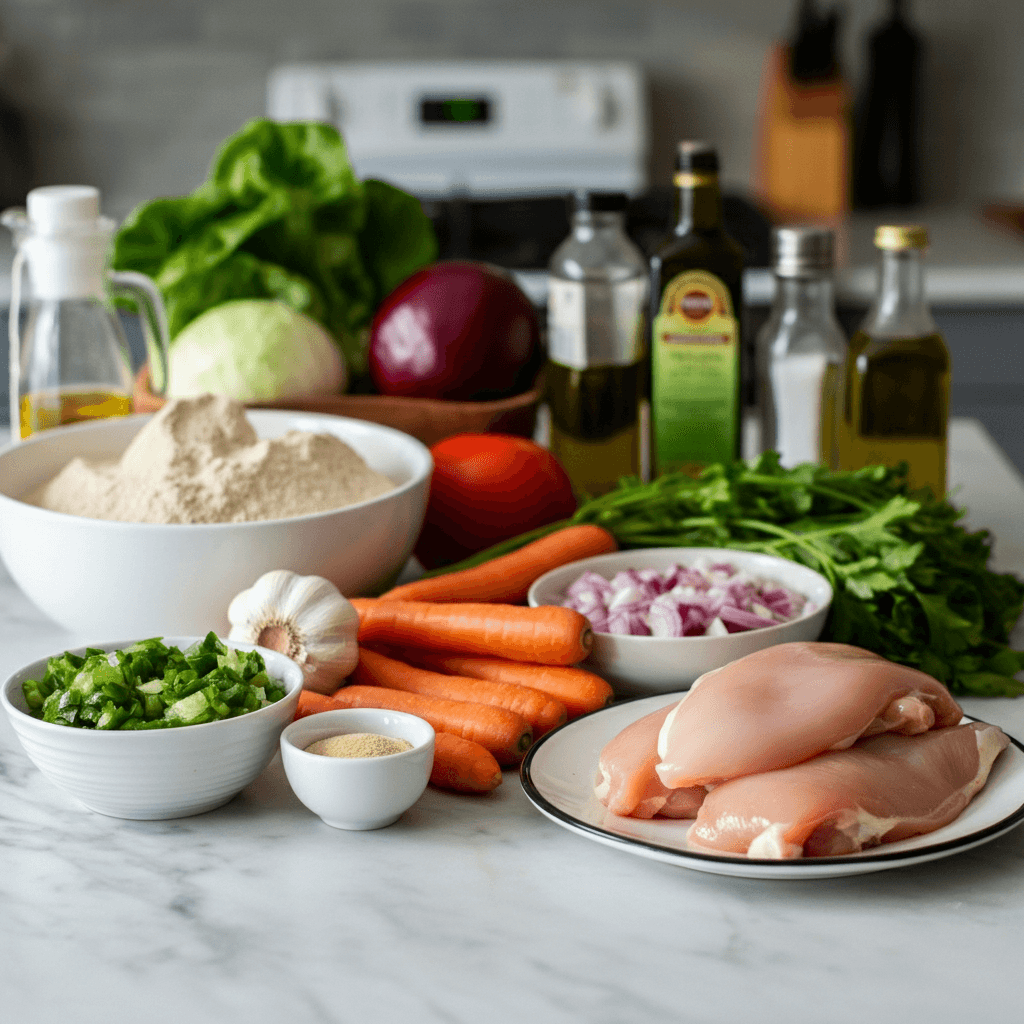
Ingredients for Your Chicken Cutlets Guide
- Boneless, Skinless Chicken Breasts (2 large): These are your canvas! I always slice them horizontally and then pound them thin, about 1/4-inch thick. It helps them cook evenly and quickly.
- All-Purpose Flour (1/2 cup): This is the first coat, the dry hug that preps the chicken for the egg wash. Don’t skip it, it’s crucial for that crispy crust!
- Large Eggs (2): The glue, the binder, the magic. I always whisk them with a splash of milk or water, just a tablespoon or two, to make them a little looser and easier to coat.
- Panko Breadcrumbs (1 cup): Ah, panko! This is where the real crunch comes from. Honestly, don’t use fine breadcrumbs if you can help it, panko gives that incredible, airy crispness.
- Kosher Salt & Freshly Ground Black Pepper (to taste): Seasoning is EVERYTHING. Season the chicken, season the flour, season the breadcrumbs. Layers of flavor, folks!
- Garlic Powder (1 tsp): My little secret weapon. It adds a subtle warmth and savory depth that just makes these cutlets sing. A bit more if you’re feeling adventurous!
- Smoked Paprika (1/2 tsp): For a lovely color and a hint of smoky sweetness. It’s not just for looks, it adds character.
- Olive Oil (1/4 cup) & Unsalted Butter (2 tbsp): The fat for frying. I love using a mix of both, the oil gives a high smoke point, and the butter adds incredible flavor and helps with browning.
- Fresh Lemon Wedges (for serving): A squeeze of fresh lemon at the end? Game changer. It brightens everything up and cuts through the richness.
- Fresh Parsley (2 tbsp, chopped, for garnish): For a pop of color and freshness. It makes the dish look fancy, even if it took you 20 minutes to make!
Making Quick Chicken Cutlets: Your Guide to Success
- Prep Your Chicken Cutlets Guide Base:
- First things first, let’s get those chicken breasts ready. Slice each breast horizontally to make two thinner pieces. Then, place them between two sheets of plastic wrap and pound them gently with a meat mallet or a heavy pan until they’re about 1/4-inch thick. This step is honestly key for even cooking and that signature cutlet texture. Once they’re thin, give them a good sprinkle of salt, black pepper, and half of your garlic powder and paprika. Don’t be shy with the seasoning!
- Set Up Your Dredging Station:
- This is where the organized chaos happens! You’ll need three shallow dishes. In the first, put your flour with the remaining garlic powder and paprika, and a pinch of salt and pepper. In the second, whisk your eggs with that splash of milk or water. In the third, pour your panko breadcrumbs. This assembly line is crucial for getting that perfect, even coating. I always set it up right next to the stove so it’s super efficient, no wasted steps!
- Coat Your Chicken Cutlets:
- Now for the fun part! Take one chicken cutlet and dredge it thoroughly in the seasoned flour, shaking off any excess. Next, dip it into the egg wash, making sure it’s completely coated, letting any extra drip off. Finally, press it firmly into the panko breadcrumbs, ensuring every inch is covered. This step is where I sometimes get a bit messy, but it’s worth it for that crust! Place the coated cutlets on a wire rack or a clean plate.
- Heat the Pan for Frying:
- Grab a large skillet, preferably cast iron or non-stick, and place it over medium-high heat. Add your olive oil and butter. Let the butter melt and sizzle a bit, you want it hot enough that a tiny pinch of panko sizzles immediately when dropped in. This hot fat is essential for achieving that gorgeous golden-brown crispness. Don’t rush this part, a properly heated pan prevents sticking and ensures even cooking.
- Fry Your Chicken Cutlets:
- Carefully place 2-3 coated chicken cutlets into the hot pan, making sure not to overcrowd it. Overcrowding drops the pan temperature and leads to soggy, not crispy, cutlets a mistake I’ve made too many times! Let them cook for about 3-4 minutes per side, until they’re beautifully golden brown and cooked through. You’ll see the edges turn opaque, and the crust will look incredibly inviting. The kitchen will start to smell amazing, honestly!
- Rest and Serve Your Chicken Cutlets:
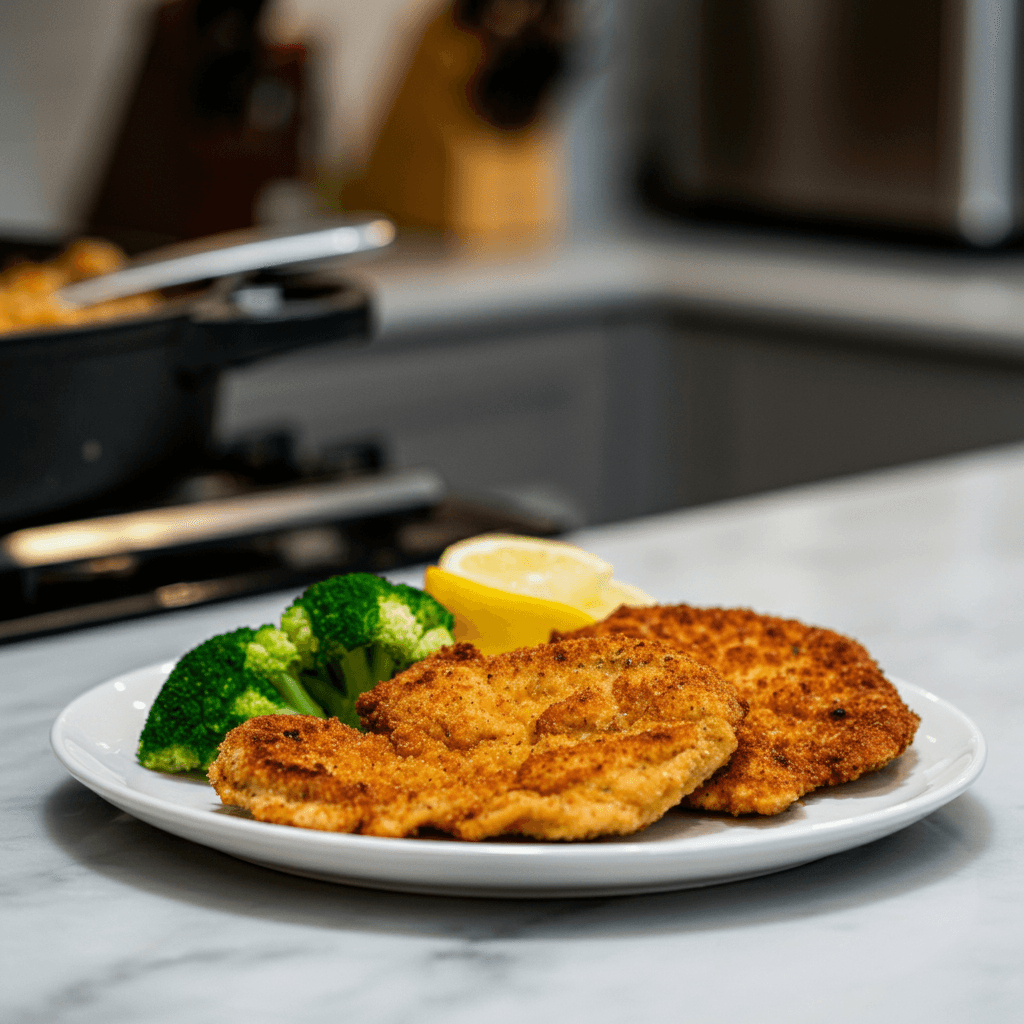
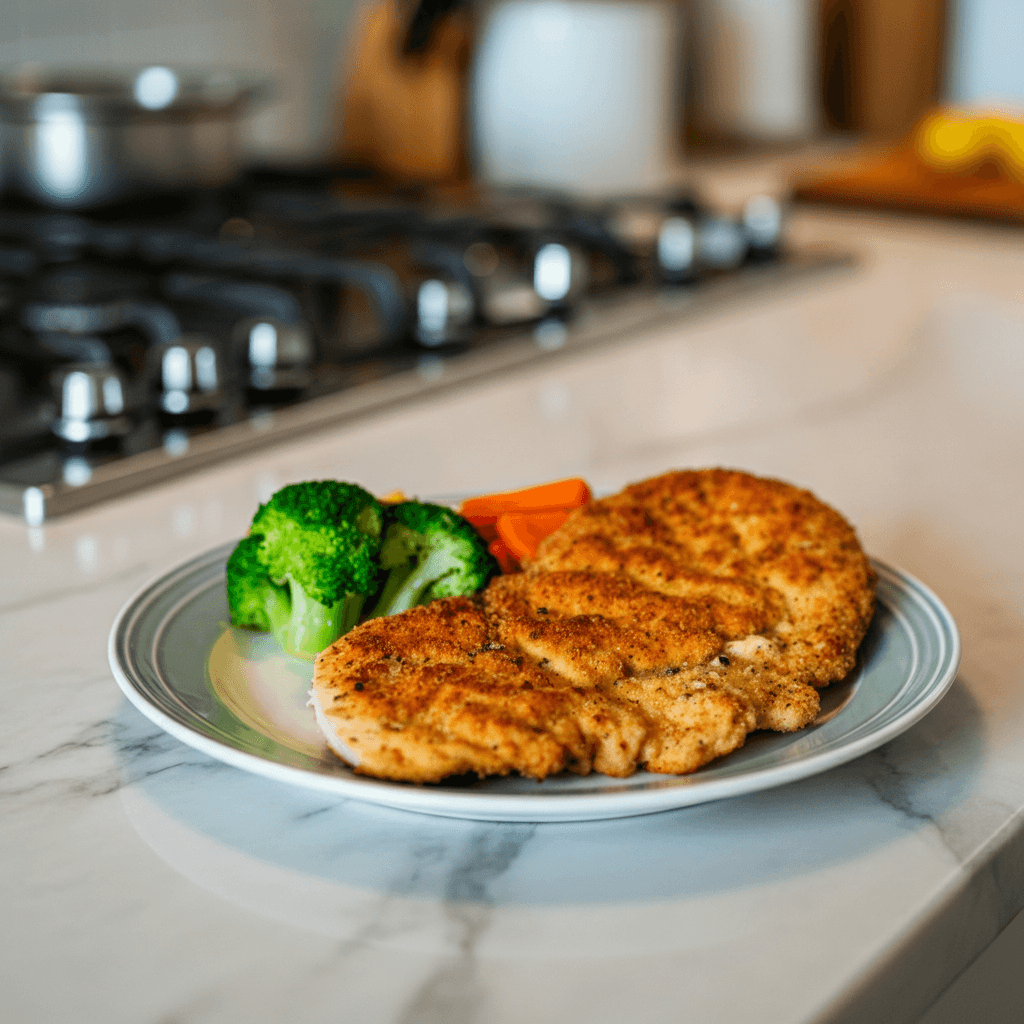
- Once cooked, transfer the golden-brown cutlets to a wire rack set over a baking sheet. This lets any excess oil drip off and keeps them wonderfully crispy. A little rest time, about 5 minutes, also helps the juices redistribute, ensuring tender chicken. Serve them immediately with a generous squeeze of fresh lemon and a sprinkle of chopped fresh parsley. They should be juicy on the inside, wonderfully crisp on the outside, and just begging to be eaten!
There’s something so satisfying about pulling a perfectly golden, crispy cutlet from the pan. Even if my kitchen counter is covered in flour and breadcrumbs, that moment makes it all worth it. It’s a little victory, a testament to simple ingredients coming together to create something truly delicious. And honestly, it feels like I’ve got my act together, even if just for a moment.
Chicken Cutlets Guide: Smart Storage Solutions
So, you’ve got leftover chicken cutlets? Lucky you! For best results, let them cool completely on a wire rack before storing. Pop them into an airtight container and they’ll happily live in the fridge for 3-4 days. I’ve found that reheating them in a toaster oven or a regular oven at 350°F (175°C) for about 10-15 minutes is the absolute best way to get some of that crispiness back. I microwaved them once, and the crust turned soggy and sad so don’t do that lol, it’s just not the same. If you want to freeze them, I recommend flash-freezing them individually on a baking sheet, then transferring them to a freezer-safe bag or container. They’ll keep for up to 2-3 months. Just thaw in the fridge overnight and reheat as usual!
Customizing Your Chicken Cutlets Guide
I love playing around with these cutlets! If you’re gluten-free, swap out the all-purpose flour for a gluten-free blend and use gluten-free panko, I tried it once, and it worked surprisingly well, though the texture was a tiny bit different. No chicken breasts? Boneless, skinless chicken thighs work too, just make sure to pound them evenly. For different flavors, you could mix Parmesan cheese into the panko for a cheesy crust, or add a pinch of cayenne pepper for a little kick. I’ve even experimented with dried herbs like oregano or thyme in the flour mix, and they add a lovely aromatic touch. Honestly, it’s hard to go wrong, just use what you have!
Serving Suggestions for Chicken Cutlets
These cutlets are so versatile, it’s almost criminal! For a quick weeknight, I love them alongside a simple green salad with a bright vinaigrette. They’re also fantastic piled on top of a bed of spaghetti with a quick marinara sauce a classic for a reason! Mashed potatoes and some steamed green beans make for a comforting, homey meal. For a bit of a twist, try them in a sandwich with some crunchy lettuce and a dollop of mayo. Honestly, these cutlets and a rom-com? Yes please. They also pair wonderfully with a light white wine or even just a crisp sparkling water with lemon. It’s all about what mood you’re in!
Cultural Backstory of the Chicken Cutlets Guide
While my version of chicken cutlets is firmly rooted in my own kitchen adventures, the concept of a breaded, pan-fried cutlet has a rich history across many cultures. Think Italian Cotoletta alla Milanese, Austrian Wiener Schnitzel, or even Japanese Tonkatsu. Each has its own nuances, but the core idea of tender meat encased in a crispy, flavorful crust is universal. For me, it was always a dish my grandma made, a simple yet satisfying meal that spoke of resourcefulness and love. It wasn’t fancy, but it was always good, a testament to how humble ingredients can create something truly special and comforting for the family table.
And there you have it! My take on these wonderfully simple, utterly delicious chicken cutlets. They’re more than just a meal, they’re a little piece of comfort, a canvas for creativity, and honestly, a lifesaver on those busy nights. I hope they bring as much joy to your kitchen as they do to mine. Don’t be shy about making them your own, and if you have any fun twists, please share them!
Chicken Cutlets Guide: Frequently Asked Questions
- → How do I get my chicken cutlets extra crispy?
Honestly, the secret is hot oil, panko breadcrumbs, and not overcrowding the pan! Also, a little rest on a wire rack after frying helps prevent sogginess. I learned that the hard way after my first few attempts!
- → Can I bake these chicken cutlets instead of frying?
You totally can! I’ve tried it. Spray them lightly with oil and bake at 400°F (200°C) for about 15-20 minutes, flipping halfway. They won’t be quite as crispy as fried, but still delicious and a great lighter option.
- → What if I don’t have a meat mallet to pound the chicken?
No mallet, no problem! I usually just use the bottom of a heavy skillet or a rolling pin. Just be gentle and work evenly. It gets the job done and you still get those perfectly thin cutlets.
- → How long can I keep raw, breaded chicken cutlets in the fridge?
I wouldn’t keep them for more than a day, maybe two at most. The breading can get a bit soggy. It’s best to bread them right before you plan to cook them for maximum crispness, from my experience.
- → Can I add different seasonings to the breading for these chicken cutlets?
Absolutely! That’s the fun part! I’ve tried Italian seasoning, a pinch of chili powder, or even some dried rosemary. Just sprinkle it into the flour or panko. Experiment and see what you love!

Quick Chicken Cutlets Guide: 5 Easy Meal Ideas
- Prep Time: 15 Minutes
- Cook Time: 10 Minutes
- Total Time: 25 Minutes
- Yield: 4 Servings
- Category: Dinner
Description
Chicken Cutlets Guide – Master quick chicken cutlets and whip up 5 amazing meal ideas. Simple, flavorful, and perfect for busy weeknights!
Ingredients
- Cutlet Base:
- Boneless, Skinless Chicken Breasts (2 large)
- All-Purpose Flour (1/2 cup)
- Large Eggs (2)
- Flavor Builders:
- Panko Breadcrumbs (1 cup)
- Kosher Salt & Freshly Ground Black Pepper (to taste)
- Garlic Powder (1 tsp)
- Smoked Paprika (1/2 tsp)
- Pantry Staples:
- Olive Oil (1/4 cup)
- Unsalted Butter (2 tbsp)
- Finishing Touches:
- Fresh Lemon Wedges (for serving)
- Fresh Parsley (2 tbsp, chopped, for garnish)
Instructions
- Prep Your Chicken Cutlets Guide Base:: First things first, let’s get those chicken breasts ready. Slice each breast horizontally to make two thinner pieces. Then, place them between two sheets of plastic wrap and pound them gently with a meat mallet or a heavy pan until they’re about 1/4-inch thick. This step is honestly key for even cooking and that signature cutlet texture. Once they’re thin, give them a good sprinkle of salt, black pepper, and half of your garlic powder and paprika. Don’t be shy with the seasoning!
- Set Up Your Dredging Station:: This is where the organized chaos happens! You’ll need three shallow dishes. In the first, put your flour with the remaining garlic powder and paprika, and a pinch of salt and pepper. In the second, whisk your eggs with that splash of milk or water. In the third, pour your panko breadcrumbs. This assembly line is crucial for getting that perfect, even coating. I always set it up right next to the stove so it’s super efficient, no wasted steps!
- Coat Your Chicken Cutlets:: Now for the fun part! Take one chicken cutlet and dredge it thoroughly in the seasoned flour, shaking off any excess. Next, dip it into the egg wash, making sure it’s completely coated, letting any extra drip off. Finally, press it firmly into the panko breadcrumbs, ensuring every inch is covered. This step is where I sometimes get a bit messy, but it’s worth it for that crust! Place the coated cutlets on a wire rack or a clean plate.
- Heat the Pan for Frying:: Grab a large skillet, preferably cast iron or non-stick, and place it over medium-high heat. Add your olive oil and butter. Let the butter melt and sizzle a bit; you want it hot enough that a tiny pinch of panko sizzles immediately when dropped in. This hot fat is essential for achieving that gorgeous golden-brown crispness. Don’t rush this part; a properly heated pan prevents sticking and ensures even cooking.
- Fry Your Chicken Cutlets:: Carefully place 2-3 coated chicken cutlets into the hot pan, making sure not to overcrowd it. Overcrowding drops the pan temperature and leads to soggy, not crispy, cutlets—a mistake I’ve made too many times! Let them cook for about 3-4 minutes per side, until they’re beautifully golden brown and cooked through. You’ll see the edges turn opaque, and the crust will look incredibly inviting. The kitchen will start to smell amazing, honestly!
- Rest and Serve Your Chicken Cutlets:: Once cooked, transfer the golden-brown cutlets to a wire rack set over a baking sheet. This lets any excess oil drip off and keeps them wonderfully crispy. A little rest time, about 5 minutes, also helps the juices redistribute, ensuring tender chicken. Serve them immediately with a generous squeeze of fresh lemon and a sprinkle of chopped fresh parsley. They should be juicy on the inside, wonderfully crisp on the outside, and just begging to be eaten!


