
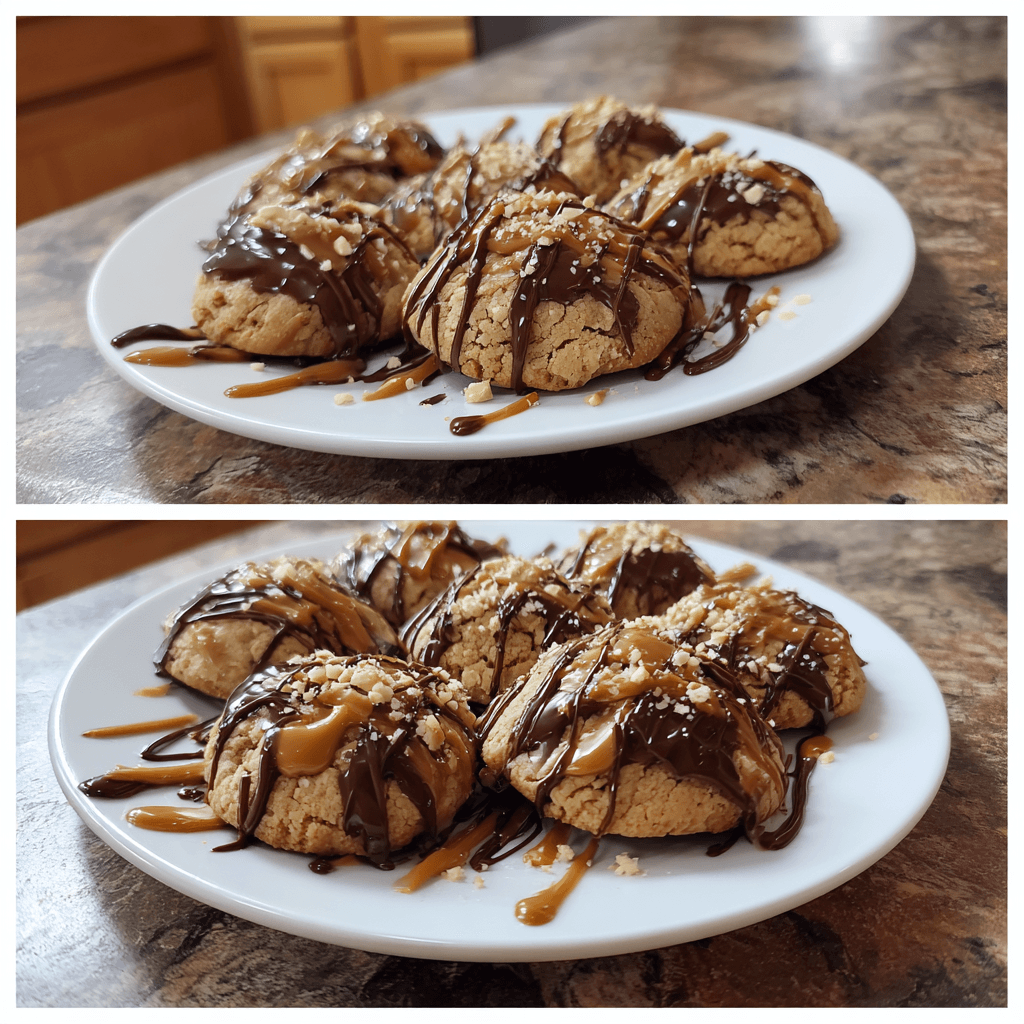
Honestly, this Peanut Butter Kiss Cookie Recipe isn’t just a recipe, it’s a hug in cookie form. I remember the first time I made them, I was maybe seven, standing on a wobbly kitchen stool next to my grandma. The smell of roasted peanuts and melting chocolate filled her tiny kitchen, and I swear that aroma still transports me back. We were supposed to gently press the kisses on top, but I, being a very enthusiastic child, ended up with chocolate smudges everywhere. Grandma just laughed, wiped my face with a floury hand, and said, “That’s how you know it’s made with love, honey.” This dish, with its crinkled edges and melty chocolate hat, is pure comfort to me.
One time, I tried to get fancy and used a tiny ice cream scoop for the dough, thinking it’d be perfectly uniform. Well, the scoops were too big, and the cookies spread like crazy, nearly merging into one giant peanut butter blob on the baking sheet! I panicked, honestly. My partner just walked in, saw the chaos, and said, “Looks like we’re having a cookie pizza!” We still ate them, slightly misshapen and utterly delicious. It taught me that sometimes, kitchen imperfections are just part of the charm, especially with a classic like this Peanut Butter Kiss Cookie Recipe.

Ingredients
- All-Purpose Flour: This is our sturdy foundation, the backbone of these chewy treats. Don’t go for cake flour here, we want that classic cookie texture. I once accidentally used self-rising, and let’s just say the cookies were… enthusiastic.
- Granulated Sugar & Brown Sugar: The granulated sugar gives that crisp edge, while brown sugar adds moisture and chewiness. Honestly, a mix is key. I tried all brown sugar once, and they were a bit too soft, almost falling apart.
- Creamy Peanut Butter: The star of the show! Use a good quality, creamy peanut butter. I’m talking Jif or Skippy, the kind that stirs up childhood memories. Natural, oily peanut butter tends to make the cookies spread more, so stick to the classic for this Peanut Butter Kiss Cookie Recipe.
- Unsalted Butter: Softened, please! This gives us that rich, tender crumb. I swear by unsalted so I can control the salt level myself. Once, I used cold butter in a hurry, and my dough was lumpy, it was a mess to mix.
- Large Egg: Our binder! It brings everything together and adds richness. I didn’t expect how much difference a room-temperature egg makes, it incorporates so much better into the creamed butter and sugar.
- Vanilla Extract: A splash of warmth and depth. Don’t skimp on the good stuff, it truly elevates the flavor. I once ran out and skipped it, and the cookies tasted… flatter, somehow, like they were missing a secret ingredient.
- Baking Soda: This is what gives our cookies a bit of lift and that signature crinkly texture. Without it, they’d be dense little pucks. I once grabbed baking powder by mistake, and they puffed up way too much!
- Salt: Essential for balancing the sweetness and enhancing the peanut butter flavor. Honestly, a little salt makes the whole cookie sing. I always add a tiny bit more than recommended because I love that sweet-salty combo.
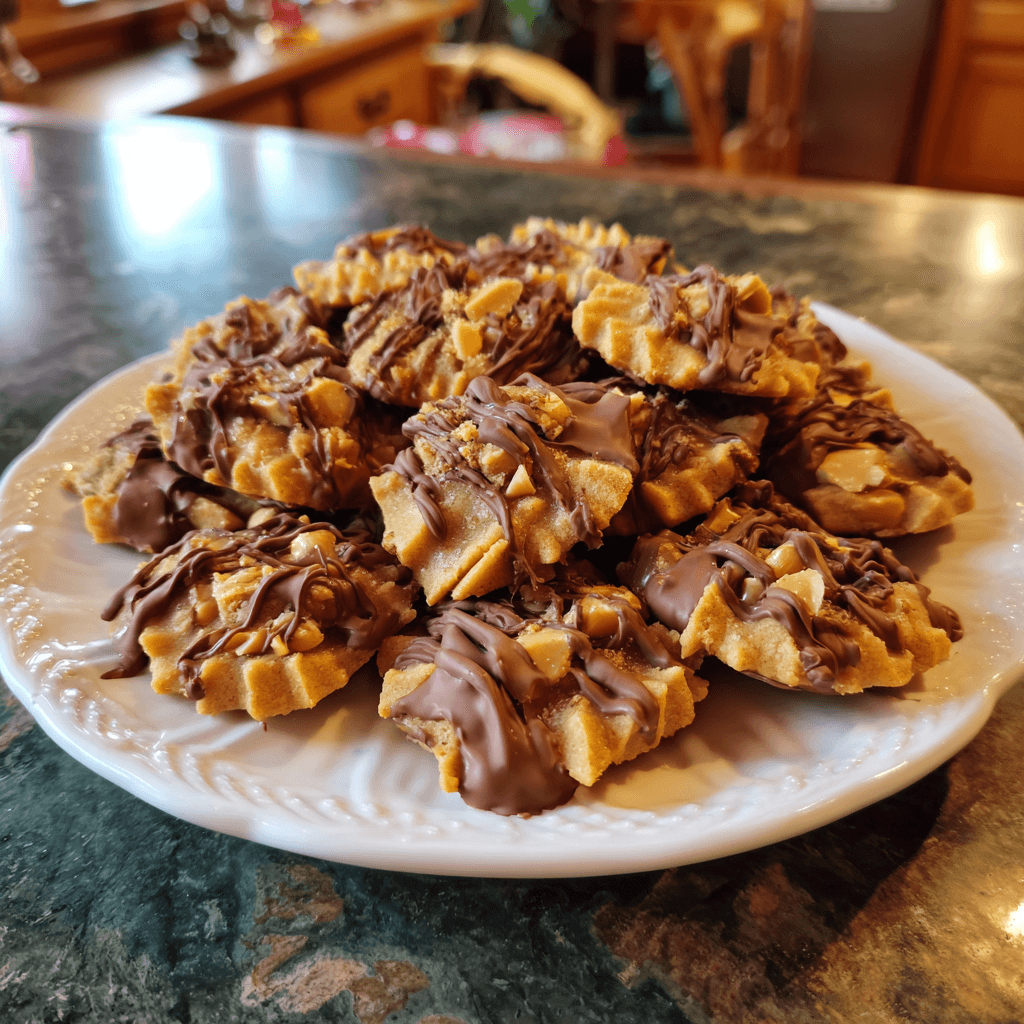
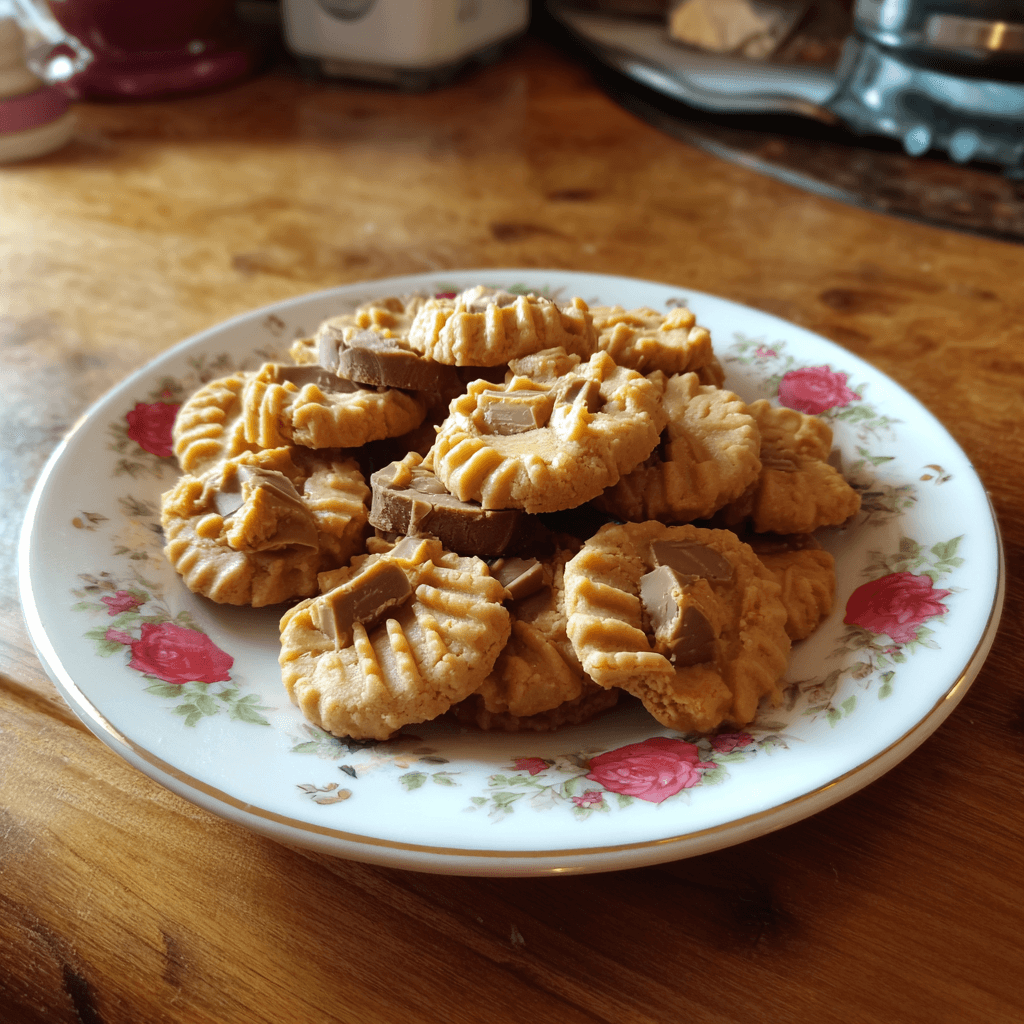
- Hershey’s Kisses: The iconic topping! Milk chocolate is traditional, but I’ve tried dark chocolate kisses, and they’re pretty good too if you like less sweetness. Just make sure they’re cold when you unwrap them, warm kisses are a sticky nightmare!
Crafting Your Peanut Butter Kiss Cookie Recipe
- Creaming the Goodness:
- First things first, get your butter and sugars together in a big bowl. I usually let my butter sit out for an hour or so, room temperature is key here, hon. Beat them with an electric mixer until they’re light and fluffy, like a cloud. This step, honestly, is where the magic starts for a tender cookie. I remember rushing this once, and the cookies were a bit dense, so don’t skip the fluffing!
- Adding the Peanut Butter & Egg:
- Next, scrape in that creamy peanut butter. Beat it until it’s fully combined and the mixture looks smooth and luscious. Then, crack in your egg and add the vanilla. Mix ’em until just combined. Overmixing after the egg goes in can make them tough, so stop when you don’t see any more streaks of yellow. I didn’t expect how much difference this makes, but trust me, it does.
- Mixing Dry into Wet:
- In a separate bowl, whisk together your flour, baking soda, and salt. Now, slowly add the dry ingredients to your wet mixture, a little at a time. Mix on low speed until just combined. Stop as soon as you don’t see any dry flour. This is where I always get a little flour dust on my counter, a sign of a kitchen in action! Don’t overmix, or you’ll get tough cookies, and nobody wants that.
- Rolling into Sweet Spheres:
- Now for the fun part! Grab a tablespoon of dough for each cookie and roll it into a neat little ball. Then, roll each ball in granulated sugar. This gives them that sparkly, slightly crisp exterior that’s just so pretty. I always make sure my hands are clean and slightly cool for this, otherwise, the dough gets super sticky. Lay them on a parchment-lined baking sheet, leaving a couple of inches between each one.
- Baking ‘Em Up:
- Pop those beauties into a preheated oven at 375°F (190°C) for about 8-10 minutes. Keep an eye on them! You want the edges to be lightly golden, but the centers should still look soft and slightly underbaked. They’ll firm up as they cool, promise. I sometimes pull them out at 8 minutes because I like them extra chewy, it’s all about what you like, honestly!
- The Kiss of Chocolate:
- As soon as you pull the cookies from the oven, immediately press a Hershey’s Kiss into the center of each warm cookie. The warmth of the cookie will slightly melt the chocolate, creating that iconic, gooey top. Let them cool on the baking sheet for a few minutes before transferring them to a wire rack to cool completely. This is where the kitchen smells absolutely heavenly, with that mix of peanut butter and chocolate, yum!
Honestly, sometimes my kitchen looks like a flour bomb went off after making these. There’s usually a stray chocolate smudge on my cheek, and the dog is suspiciously eyeing any dropped crumbs. But when that first batch comes out of the oven, and the whole house smells like pure joy, it’s all worth it. These Peanut Butter Kiss Cookie Recipe treats are just so comforting, like a warm blanket on a chilly evening, and a reminder of those sweet moments with Grandma.
Storing Your Peanut Butter Kiss Cookie Recipe Treats
Okay, so these Peanut Butter Kiss Cookie Recipe goodies actually store really well, which is a total win for meal prep or just having treats on hand. Once they’re completely cooled (and I mean completely, or you’ll get condensation), pop them into an airtight container. I usually layer them with a piece of parchment paper between layers to prevent the chocolate kisses from sticking to each other, because honestly, that’s a mess I’ve dealt with before. They’ll stay fresh and chewy at room temperature for about 3-5 days. If you want to keep them longer, you can freeze them for up to 3 months. Just make sure they’re in a freezer-safe bag or container. Thaw them at room temperature, and they’ll be almost as good as fresh. I microwaved one once for a few seconds, and the chocolate got a bit too melty and messy, so I prefer just letting them come to room temp naturally.
Ingredient Substitutions
I’m all for playing around in the kitchen, and this Peanut Butter Kiss Cookie Recipe is pretty forgiving! If you’re out of creamy peanut butter, crunchy will work in a pinch, but the texture will be a bit different, more rustic, you know? I tried it once, and while tasty, it wasn’t the classic smooth chew. For the Kisses, feel free to swap them out! Mini Reese’s Peanut Butter Cups work wonderfully, or even small squares of your favorite chocolate bar. I’ve even seen people use caramel-filled chocolates, which sounds like a fun twist. If you don’t have brown sugar, you can use all granulated, but add a tablespoon of molasses to get some of that moisture back. It worked surprisingly well for me when I was in a bind, though the flavor was a tad different.
Serving Suggestions
Honestly, these cookies are perfect on their own, straight from the cooling rack, still a bit warm with that melty chocolate. But if you want to get fancy, or just make it an extra special moment, try pairing them with a tall glass of cold milk it’s a classic for a reason! For a grown-up treat, I love them with a robust cup of coffee or a strong, dark tea. They’re also fantastic alongside a scoop of vanilla bean ice cream, the warm cookie and cold ice cream combo is just chef’s kiss. Sometimes, on a rainy afternoon, I’ll even crumble one over a bowl of plain yogurt for a little sweet crunch. They’re the ultimate cozy night in treat with a good book or your favorite rom-com.
Cultural Backstory
The Peanut Butter Kiss Cookie Recipe, often called a Peanut Butter Blossom, holds a special place in American baking history, especially around the holidays. It actually originated in 1957 when Freda Smith, from Ohio, submitted the recipe to the Pillsbury Bake-Off contest. She didn’t win the grand prize, but her unique idea of topping a peanut butter cookie with a chocolate kiss captured hearts (and taste buds!) nationwide. It quickly became a beloved classic, passed down through generations. For me, it connects to that timeless American tradition of home baking, of simple ingredients coming together to create something truly comforting and memorable. It reminds me of cookie exchanges and potlucks, and how food brings people together, just like it brought me and my grandma together in her kitchen.
So there you have it, my take on a truly classic treat. This Peanut Butter Kiss Cookie Recipe isn’t just about flour and sugar, it’s about warmth, memory, and a little bit of kitchen chaos. Every time I bake these, I can almost hear Grandma’s chuckle in the background. I hope they bring as much joy and sweet memories to your home as they do to mine. Honestly, I’d love to hear if you try them, and what kind of sweet memories they stir up for you!
Peanut Butter Kiss Cookie Recipe FAQs
- → Can I use natural peanut butter for this Peanut Butter Kiss Cookie Recipe?
Honestly, I’d advise against it for this specific recipe. Natural peanut butter tends to be oilier and can make the cookies spread too much and be crumbly. I tried it once, and they didn’t hold their shape as well. Stick to the classic creamy, hydrogenated stuff for the best results, trust me!
- → What if I don’t have Hershey’s Kisses?
No Kisses? No problem! I’ve experimented with mini peanut butter cups, chocolate chunks, or even just pressing a square of your favorite chocolate bar on top. They’ll still be delicious, just with a slightly different look. Get creative with your Peanut Butter Kiss Cookie Recipe!
- → Why did my Peanut Butter Kiss Cookie Recipe turn out hard?
Ah, a common kitchen oops! Usually, hard cookies mean they were overbaked. Remember, pull them from the oven when the edges are just golden and the centers still look a little soft. They’ll continue to cook slightly on the hot baking sheet. Also, overmixing the dough can lead to tough cookies.
- → How long do these Peanut Butter Kiss Cookie Recipe treats last?
Stored in an airtight container at room temperature, these delightful cookies usually stay fresh and soft for about 3 to 5 days. I’ve found they’re best within the first two days, but honestly, they rarely last that long in my house!
- → Can I add other flavors to this Peanut Butter Kiss Cookie Recipe?
Absolutely, get playful! I’ve seen people add a pinch of cinnamon or even a tiny bit of cayenne for a subtle kick. You could also try different flavored Kisses, like mint or caramel. Just don’t go too wild, the classic flavor combo is pretty special on its own!

Classic Peanut Butter Kiss Cookie Recipe for Sweet Memories
- Prep Time: 15 Minutes
- Cook Time: 10 Minutes
- Total Time: 25 Minutes
- Yield: 36 Servings 1x
- Category: Mediterranean Diet Recipes
Description
This Peanut Butter Kiss Cookie Recipe brings back childhood joy. Soft, chewy peanut butter cookies topped with a chocolate kiss. Simple baking, big flavor.
Ingredients
- Cookie Base Essentials:
- 1 ½ cups all-purpose flour
- 1 teaspoon baking soda
- ½ teaspoon salt
- ½ cup (1 stick) unsalted butter, softened
- ½ cup granulated sugar
- ½ cup packed light brown sugar
- ½ cup creamy peanut butter (like Jif or Skippy)
- 1 large egg, room temperature
- 1 teaspoon vanilla extract
- The Chocolatey Crown:
- 36 Hershey’s Kisses, unwrapped and chilled
- Finishing Touch:
- ¼ cup granulated sugar (for rolling)
Instructions
- Creaming the Goodness:: First things first, get your butter and sugars together in a big bowl. I usually let my butter sit out for an hour or so; room temperature is key here, hon. Beat them with an electric mixer until they’re light and fluffy, like a cloud. This step, honestly, is where the magic starts for a tender cookie. I remember rushing this once, and the cookies were a bit dense, so don’t skip the fluffing!
- Adding the Peanut Butter & Egg:: Next, scrape in that creamy peanut butter. Beat it until it’s fully combined and the mixture looks smooth and luscious. Then, crack in your egg and add the vanilla. Mix ’em until just combined. Overmixing after the egg goes in can make them tough, so stop when you don’t see any more streaks of yellow. I didn’t expect how much difference this makes, but trust me, it does.
- Mixing Dry into Wet:: In a separate bowl, whisk together your flour, baking soda, and salt. Now, slowly add the dry ingredients to your wet mixture, a little at a time. Mix on low speed until just combined. Stop as soon as you don’t see any dry flour. This is where I always get a little flour dust on my counter, a sign of a kitchen in action! Don’t overmix, or you’ll get tough cookies, and nobody wants that.
- Rolling into Sweet Spheres:: Now for the fun part! Grab a tablespoon of dough for each cookie and roll it into a neat little ball. Then, roll each ball in granulated sugar. This gives them that sparkly, slightly crisp exterior that’s just so pretty. I always make sure my hands are clean and slightly cool for this, otherwise, the dough gets super sticky. Lay them on a parchment-lined baking sheet, leaving a couple of inches between each one.
- Baking ‘Em Up:: Pop those beauties into a preheated oven at 375°F (190°C) for about 8-10 minutes. Keep an eye on them! You want the edges to be lightly golden, but the centers should still look soft and slightly underbaked. They’ll firm up as they cool, promise. I sometimes pull them out at 8 minutes because I like them extra chewy; it’s all about what you like, honestly!
- The Kiss of Chocolate:: As soon as you pull the cookies from the oven, immediately press a Hershey’s Kiss into the center of each warm cookie. The warmth of the cookie will slightly melt the chocolate, creating that iconic, gooey top. Let them cool on the baking sheet for a few minutes before transferring them to a wire rack to cool completely. This is where the kitchen smells absolutely heavenly, with that mix of peanut butter and chocolate, yum!


