
Introduction
As a child, the sweet aroma of peanut butter wafting through my kitchen always signaled a moment of pure joy. Whether it was a snowy afternoon or a sunny weekend, those familiar scents would draw my family together, igniting laughter and satisfaction. Now, as a busy adult, I find myself yearning for those nostalgic flavors, and that’s where my Peanut Butter Dream Bars come into play. This recipe is your new best friend, whether you’re juggling work calls or soccer practice.
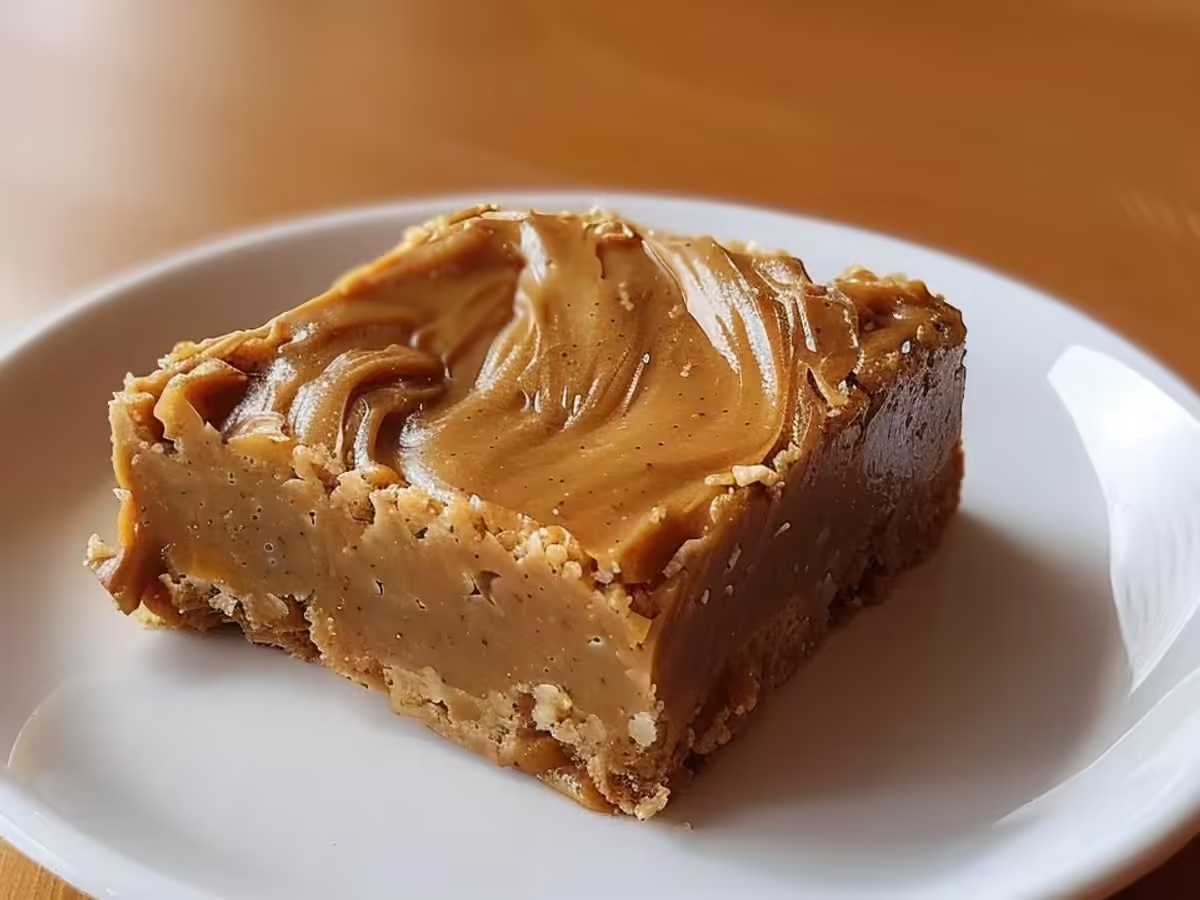
These bars are not just a treat; they encapsulate the essence of comfort food. Imagine a rich, creamy peanut butter layer atop a crumbly, buttery base, creating a heavenly confection that’s both indulgent and satisfying. With their easy preparation and nice taste, Peanut Butter Dream Bars promise to become a staple in your dessert repertoire. They are perfect for sharing at gatherings or enjoying as a sweet pick-me-up after a long day. Get ready to dive into a world of flavor and nostalgia—your taste buds are in for a treat!

Why You’ll Love Peanut Butter Dream Bars
Imagine coming home after a long day, craving something sweet yet comforting. That’s where Peanut Butter Dream Bars come in—like a warm hug for your taste buds. Whether you’re juggling work calls or soccer practice, this recipe is your new best friend. They are quick to prepare, meaning no more 6 PM panic—dinner’s ready faster than a microwave meal.
But it’s not just about speed; these bars are a delicious blend of creamy peanut butter, rich chocolate, and a crumbly crust that melts in your mouth. Not only does it save time, but it also satisfies your sweet tooth in the most nice way. Each bite is a perfect well-balanced of flavors, reminiscent of your childhood favorite treats, yet elevated for today’s palate.
With Peanut Butter Dream Bars, you can also cater to various dietary preferences. Create a gluten-free option or swap in vegan ingredients without losing that dreamy taste. Plus, they are perfect for sharing at gatherings or enjoying solo with a cup of coffee. Trust me, once you taste these bars, you’ll be hooked—and your family will be requesting them on repeat!
Ingredients For Peanut Butter Dream Bars
When I first set out to create these Peanut Butter Dream Bars, I wanted a recipe that was not only delicious but also simple enough for a busy weeknight. Whether you’re juggling work calls or soccer practice, this recipe is your new best friend. With a handful of straightforward ingredients, you can whip up a dessert that feels indulgent without the fuss.
To make the Peanut Butter Dream Bars, you’ll need a few key ingredients that come together in perfect well-balanced:
- 1 cup creamy peanut butter – Smooth and rich, this is the star of the show!
- ½ cup unsalted butter – Adds a luscious texture that melts in your mouth.
- 1 cup granulated sugar – Sweetness that balances the nutty flavor perfectly.
- 1 cup brown sugar – For a hint of caramel depth that elevates every bite.
- 2 large eggs – These bind everything together and create that dreamy consistency.
- 1 teaspoon vanilla extract – A splash of warmth that rounds out the flavors.
- 1 cup all-purpose flour – The backbone of your bars, giving them structure.
- 1 teaspoon baking powder – Helps them rise to the occasion.
- ½ teaspoon salt – Just enough to enhance all those nice flavors.
If you’re feeling adventurous, consider some fun swaps to customize your Peanut Butter Dream Bars:
- Chocolate chips – Who can resist a little chocolate? Toss in a cup for extra decadence!
- Chopped nuts – Add a bit of crunch with some walnuts or peanuts, if you like a bit of texture.
- Nut butter alternatives – Not a peanut fan? Almond or cashew butter works just as well—your secret’s safe with me!
With these ingredients on hand, you’re well on your way to enjoying a batch of Peanut Butter Dream Bars that will have everyone asking for seconds. So gather your supplies, and let’s dive into the next steps of making this sweet treat!
How To Make Peanut Butter Dream Bars
Making Peanut Butter Dream Bars is a nice journey that combines the creamy, nutty goodness of peanut butter with a buttery, crumbly base. Whether you’re juggling work calls or soccer practice, this recipe is your new best friend. It’s simple yet indulgent, perfect for satisfying your sweet tooth after a long day.
Gather Your Ingredients
Before diving into the heart of the recipe, gather all your ingredients. You’ll need peanut butter, sweetened condensed milk, graham cracker crumbs, and a few other staples. This step ensures a smooth cooking process—no scrambling mid-recipe!
Measuring Ingredients
Measure out your ingredients carefully. I like to keep my peanut butter at room temperature for easy scooping. This little tip can save you from wrestling with a cold jar. Trust me, it makes all the difference!
Mixing the Crust
In a large mixing bowl, combine the graham cracker crumbs with melted butter and a bit of sugar. Stir until you achieve a sandy texture that clumps together when pressed. This crust is the foundation of your Peanut Butter Dream Bars, adding that nice crunch that contrasts beautifully with the creamy filling.
Pressing the Base
Once mixed, press the crumb mixture evenly into the bottom of a greased baking pan. Use your hands or the bottom of a measuring cup to create an even layer. It’s essential to pack it tightly—this will ensure your bars hold their shape once baked.
Combining Peanut Butter and Sweetened Condensed Milk
In a separate bowl, blend the creamy peanut butter with sweetened condensed milk until smooth. The texture should be velvety, almost like a dreamy peanut butter frosting. This mixture is what truly makes the Peanut Butter Dream Bars irresistibly rich.
Baking to Perfection
Pour the peanut butter mixture over the crust in the baking pan and smooth it out. Now, bake in a preheated oven at 350°F (175°C) for about 20 minutes. As it bakes, your kitchen will fill with an irresistible aroma that will have everyone asking, “What’s cooking?”
Letting It Set
Once baked, remove the pan and allow it to cool completely. This step is crucial; patience pays off! Once cooled, you can cut the bars into squares and drizzle with melted chocolate if desired—because, why not?
Enjoying Your Creation
Serve your Peanut Butter Dream Bars at room temperature, or chill them in the fridge for a refreshing treat. These bars are perfect for sharing, but they’re also a nice indulgence for those quiet nights at home.
Expert Tips and Tricks
Creating the perfect Peanut Butter Dream Bars can be a nice adventure. To ensure your treats turn out as heavenly as they sound, keep these expert tips in mind. Whether you’re a seasoned baker or a novice in the kitchen, these tricks will help you achieve that dreamy texture and rich flavor that defines these bars.
- Choose Quality Peanut Butter: Use natural peanut butter without added sugars or oils for the best flavor. The creaminess will shine through, making your bars irresistibly smooth.
- Don’t Skip the Chilling: After baking, allow your bars to cool completely in the fridge. This step helps them firm up, making cutting easier and giving you those perfect, clean edges.
- Experiment with Toppings: Top your bars with melted chocolate, crushed nuts, or a sprinkle of sea salt. Each addition brings a nice contrast to the creamy peanut butter base.
- Use Parchment Paper: Line your baking pan with parchment paper, leaving some overhang. This makes for effortless removal and clean-up, allowing you to enjoy your Peanut Butter Dream Bars without any hassle.
- Adjust Sweetness: Taste the mixture before baking and adjust the sweetness to your liking. A touch more honey or maple syrup can improve the flavor, especially if you’re a sweet tooth.
- Try Different Nut Butters: If you’re feeling adventurous, swap peanut butter for almond or cashew butter. This can add a unique twist to your Peanut Butter Dream Bars, keeping things interesting.
- Don’t Overmix: When combining your ingredients, mix just until incorporated. Overmixing can lead to dense bars instead of the light, dreamy texture you’re aiming for.
- Store Properly: Keep your bars in an airtight container in the fridge. They’ll stay fresh for up to a week, ensuring you have a delicious snack ready whenever the craving hits.
With these tips in your back pocket, your Peanut Butter Dream Bars will be sure to impress friends and family alike. Happy baking!
Equipment Needed
When it comes to creating your indulgent Peanut Butter Dream Bars, having the right equipment can make all the difference. Whether you’re juggling work calls or soccer practice, this recipe is your new best friend, and with these essential tools, you’ll be ready to whip up these bars in no time!
- Mixing Bowls: A set of sturdy mixing bowls is crucial for combining your ingredients smoothly. Opt for a large bowl to accommodate the peanut butter and sweeteners.
- Measuring Cups and Spoons: Precision is key! Having a reliable set of measuring cups and spoons ensures you get the good balance of flavors in your Peanut Butter Dream Bars.
- Spatula: A silicone spatula is perfect for scraping down the sides of your mixing bowl, ensuring no peanut butter goodness goes to waste.
- 9×9-inch Baking Pan: This size is ideal for creating the perfect thickness in your bars. Line it with parchment paper for easy removal and clean-up.
- Whisk: A whisk is great for mixing dry ingredients or creating a smooth batter. You’ll want to make sure everything is well combined!
- Microwave-Safe Bowl: If you’re melting chocolate or peanut butter, a microwave-safe bowl will save you time and effort. Just be careful not to overheat!
- Cooling Rack: Once baked, let your Peanut Butter Dream Bars cool on a rack. This helps them set perfectly, ensuring that nice texture.
Having these items at your fingertips means you can dive straight into making your Peanut Butter Dream Bars without any hiccups. So gather your gear, and let’s get ready for a delicious adventure in the kitchen!
Variations and Substitutions
When it comes to Peanut Butter Dream Bars, the possibilities are as endless as your imagination! Whether you’re looking to cater to dietary restrictions or simply want to mix things up, there are several delicious variations and substitutions you can try. Here are some ideas to inspire your next batch:
- Dairy-Free Delight: To make these bars dairy-free, replace the butter with coconut oil. This swap adds a lovely hint of tropical flavor while keeping the texture rich and satisfying.
- Nut-Free Option: If you’re avoiding nuts, consider using sunbutter or soy nut butter instead of peanut butter. These alternatives maintain that creamy goodness while being safe for schools or parties.
- Sweetener Swaps: Prefer less sugar? Try using maple syrup or agave nectar in place of granulated sugar. These natural sweeteners offer a unique taste that pairs beautifully with peanut butter.
- Texture Twists: For added crunch, fold in some toasted oats or crushed pretzels into the peanut butter mixture. This adds an exciting texture that complements the creamy filling.
- Flavor Infusions: Want to spice things up? Add a teaspoon of cinnamon or a splash of vanilla extract to the peanut butter mixture for a warm, aromatic twist that elevates your Peanut Butter Dream Bars.
- Chocolate Lovers: Drizzle melted chocolate over the top or mix in chocolate chips. This indulgent addition turns your bars into a rich treat that chocolate enthusiasts won’t be able to resist.
- Fruit Additions: Add dried fruits like cranberries or chopped dates for a sweet touch that also adds fiber. Fresh banana slices on top can also enhance the flavor and make the bars even more nice.
With these variations and substitutions, your Peanut Butter Dream Bars will always be a crowd-pleaser, tailored to fit any occasion or preference! So go ahead, get creative and make this recipe truly your own!
Serving and Storage Suggestions
When it comes to enjoying your Peanut Butter Dream Bars, the possibilities are endless! These delicious treats can be served in various ways to make them even more nice. Whether you’re entertaining guests or enjoying a quiet night in, here are some serving suggestions:
- Chill for Extra Refreshment: For a cool twist, store your Peanut Butter Dream Bars in the refrigerator. The chilled texture enhances the creamy peanut butter flavor, making each bite a refreshing treat.
- Top with Whipped Cream: improve your bars by adding a dollop of whipped cream or a drizzle of chocolate sauce. This brings a touch of elegance and adds layers of flavor to each serving.
- Pair with Fresh Fruit: Serve your bars alongside slices of banana or strawberries. The natural sweetness of the fruit complements the rich peanut butter, creating a well-rounded dessert experience.
- Perfect for Lunch Boxes: These bars are not just for dessert! Slice them into smaller squares for a nutritious snack that’s perfect for school lunches or afternoon pick-me-ups.
- Storage for Freshness: To keep your Peanut Butter Dream Bars fresh, store them in an airtight container. They can last up to a week at room temperature or up to two weeks if refrigerated.
- Can You Freeze Them? Yes! If you want to save some for later, wrap individual bars in plastic wrap and place them in a freezer-safe bag. They’ll remain delicious for up to three months, ready to be enjoyed at a moment’s notice.
With these serving and storage suggestions, your Peanut Butter Dream Bars will always be a hit, whether freshly made or saved for later. Enjoy every bite, knowing you have the perfect plan for serving and storing this nice treat!
Conclusion
As you savor the last bite of your Peanut Butter Dream Bars, you’ll realize this treat is more than just a dessert; it’s a nice escape from the everyday hustle. Whether you’re sharing them with friends at a gathering or indulging in a quiet moment with a book, these bars always bring a touch of joy. The creamy peanut butter paired with a crunchy layer is truly a match made in heaven, making each bite a blissful experience that dances on your palate.
Moreover, the versatility of Peanut Butter Dream Bars makes them a fantastic choice for various occasions. You can serve them at parties, pack them in lunchboxes, or enjoy them as an afternoon pick-me-up. The best part? They’re incredibly simple to make, saving you precious time without compromising flavor. Ditch the store-bought snacks and embrace the homemade goodness that will leave everyone asking for seconds.
In conclusion, these Peanut Butter Dream Bars are an invitation to enjoy in comfort and happiness. They’re not just a treat; they’re a celebration of flavors that brings people together. So, go ahead and whip up a batch, and let the nice aroma fill your kitchen. You’ve earned it!
Print
Peanut Butter Dream Bars That Will Delight Your Taste Buds
Description
Delicious and creamy peanut butter bars with a crunchy layer, perfect for a sweet treat.
Ingredients
- 1 cup peanut butter
- 1/2 cup unsweetened applesauce
- 1/4 cup honey or maple syrup
- 1/4 cup brown sugar
- 1 cup rolled oats
- 1/2 cup chocolate chips
- 1/2 teaspoon vanilla extract
- 1/4 teaspoon salt
Instructions
- Preheat the oven to 350°F (175°C) and line an 8×8 inch baking pan with parchment paper.
- In a large bowl, mix together peanut butter, applesauce, honey, and brown sugar until smooth.
- Add the rolled oats, chocolate chips, vanilla extract, and salt, stirring until well combined.
- Spread the mixture evenly into the prepared baking pan.
- Bake for 20-25 minutes until golden brown.
- Let cool completely before cutting into bars.
Notes
- For a vegan option, use maple syrup instead of honey.
- Store in an airtight container for up to a week.
- Add nuts or dried fruits for extra texture and flavor.
Nutrition
- Serving Size: 1 bar
- Calories: 150
- Sugar: 8g
- Sodium: 50mg
- Fat: 7g
- Saturated Fat: 1.5g
- Unsaturated Fat: 4.5g
- Trans Fat: 0g
- Carbohydrates: 19g
- Fiber: 2g
- Protein: 4g
- Cholesterol: 0mg


