
Honestly, some recipes just feel like home, right? For me, the Peanut Butter Blossoms Recipe is exactly that. I remember being a little sprout, probably covered head-to-toe in flour, watching my grandma meticulously roll these little peanut butter spheres in sugar. The smell of warm peanut butter and melting chocolate would fill her kitchen, a scent that still instantly transports me back to those Christmases. It wasn’t just a cookie, it was a ritual, a symbol of warmth and family. This cookie, with its signature chocolate kiss nestled in the center, holds so many sweet memories for me, even the time I accidentally used salt instead of sugar for the roll oops! But hey, that’s how we learn, right?
I once tried to get fancy and use natural peanut butter for my Peanut Butter Blossoms Recipe. Big mistake, hon! The cookies spread out flat as pancakes, and the texture was all wrong. My kids still tease me about the ‘peanut butter wafers’ of Christmas past. Lesson learned: stick to the creamy, processed stuff for these particular beauties. Sometimes, tradition knows best, even when your inner chef wants to experiment!

Ingredients for This Peanut Butter Blossoms Recipe
- All-purpose flour: This is the backbone of our cookies, giving them structure. Honestly, don’t skimp on sifting if your flour tends to clump, it makes a difference in the final texture.
- Baking soda: Our little lift agent! It helps these Peanut Butter Blossoms get that signature soft, slightly chewy texture.
- Salt: Essential for balancing the sweetness and enhancing that rich peanut butter flavor. I always add a tiny bit more than recipes call for because I love that sweet and salty punch.
- Unsalted butter: Room temperature is key here, friends! If it’s too cold, your dough will be lumpy, too warm, and it’ll be greasy. I’ve had both disasters, trust me.
- Granulated sugar: For sweetness in the dough and that lovely sugary coating.
- Packed light brown sugar: Adds moisture and a deeper, caramel-like flavor that plays so well with the peanut butter.
- Creamy peanut butter: The star of the show! Use a processed creamy peanut butter (like Jif or Skippy) for the best texture and flavor. I tried natural once, and it was a spread-out mess.
- Large egg: Our binder! Helps hold everything together. Make sure it’s at room temperature too, it incorporates better into the butter mixture.
- Vanilla extract: A splash of warmth and depth. Use the good stuff if you have it, you can really smell the difference!
- Granulated sugar (for rolling): For that first sparkly coat.
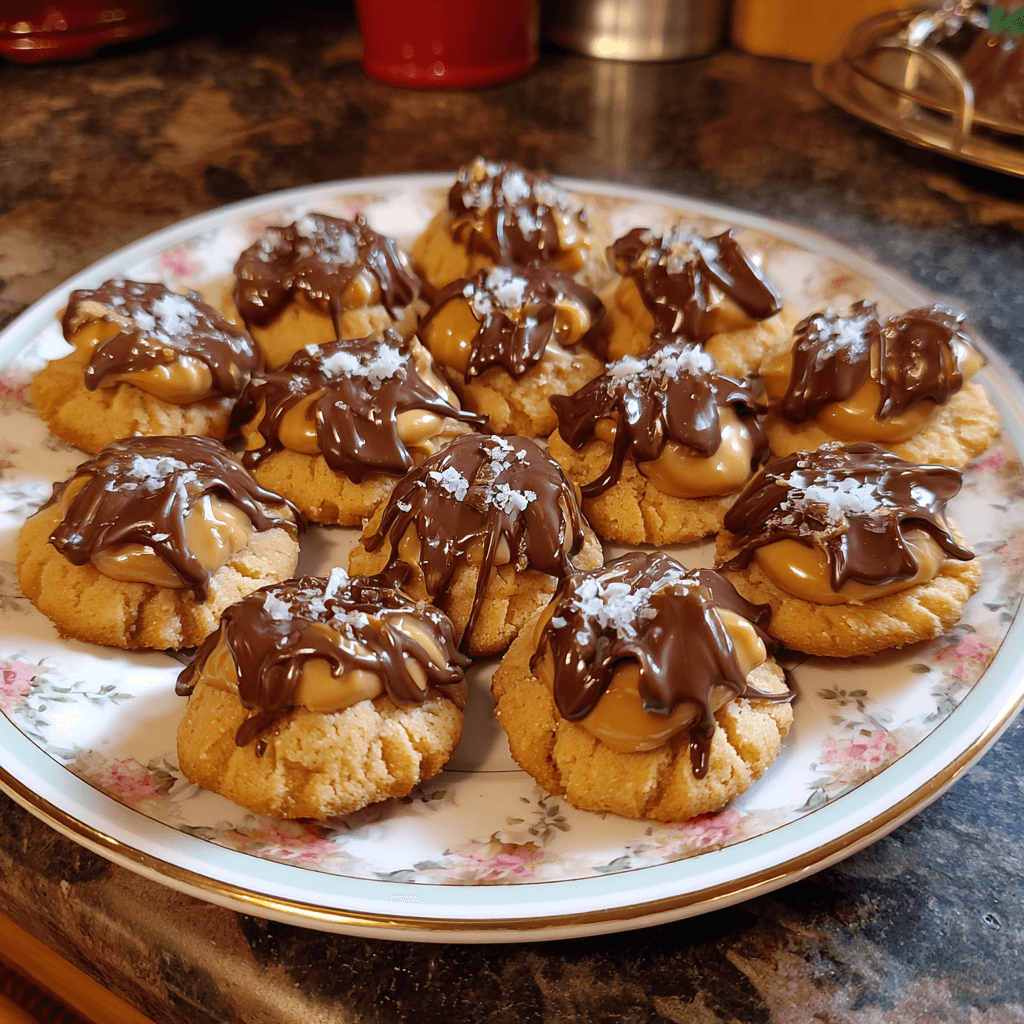
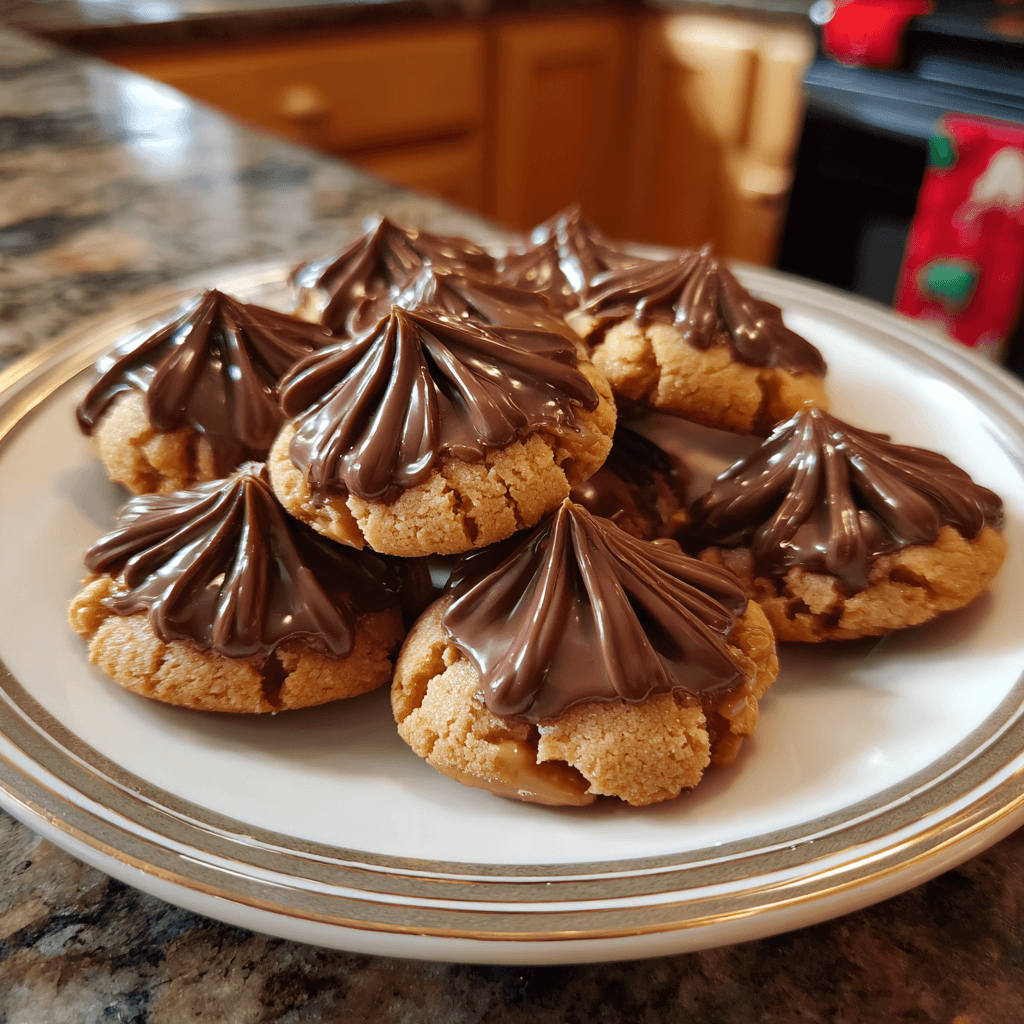
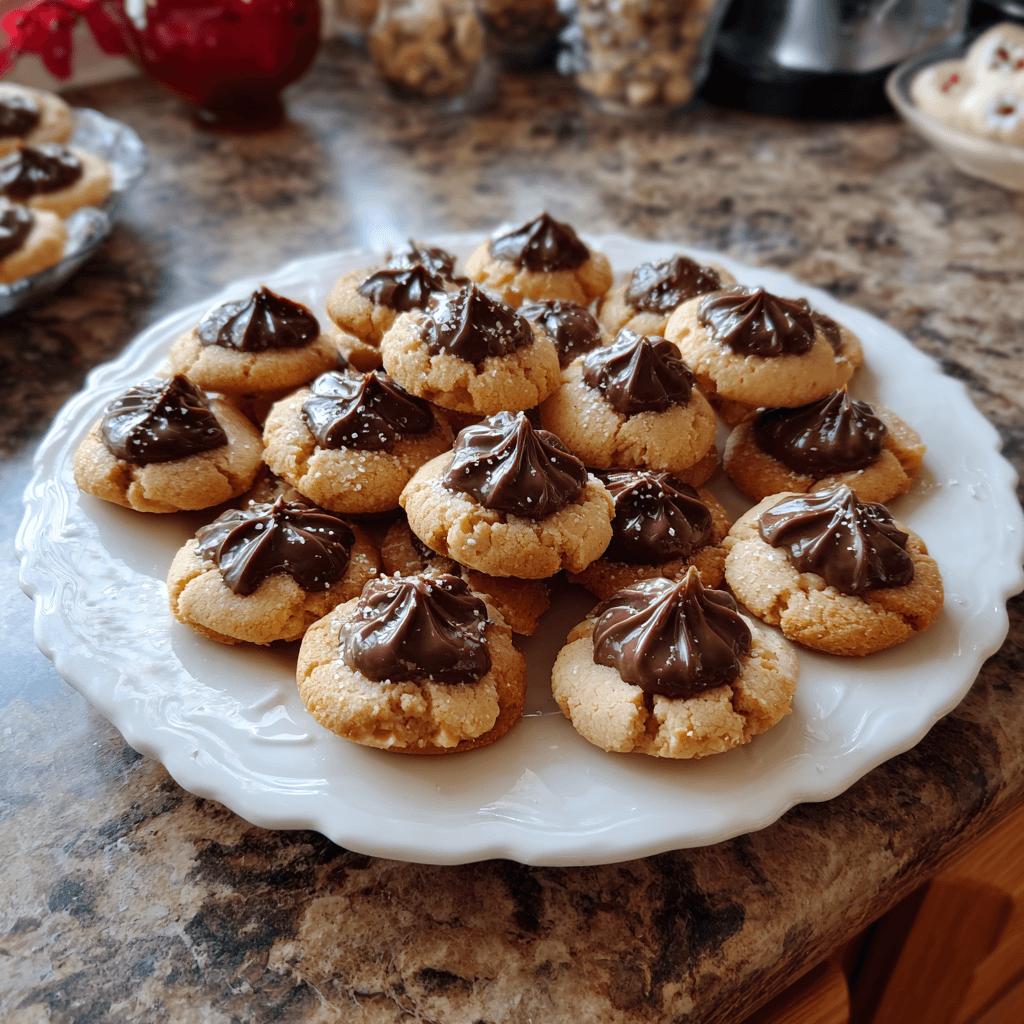
- Hershey’s Kisses: The iconic topping! Unwrap them before you start baking, or you’ll be scrambling with hot cookies, and that’s just kitchen chaos waiting to happen.
Making Your Peanut Butter Blossoms Recipe: Instructions
- Prep Your Kitchen & Dry Mix:
- First things first, let’s get organized! Preheat your oven to 375°F (190°C). Line a couple of baking sheets with parchment paper, this makes cleanup a breeze and prevents sticking, which is a lifesaver. In a medium bowl, whisk together your flour, baking soda, and salt. I always give it a good whisk for about 30 seconds to make sure everything’s evenly distributed, otherwise, you might get a surprise salty bite, and nobody wants that!
- Cream the Wet Ingredients:
- In a large bowl, or your stand mixer if you’re lucky enough to have one, cream together the softened butter, granulated sugar, and brown sugar until it’s light and fluffy. This usually takes me about 2-3 minutes. Then, beat in the creamy peanut butter until it’s well combined and looks wonderfully smooth. I’m telling you, the smell alone at this stage is enough to make your mouth water!
- Add Egg & Vanilla:
- Next, crack in that large egg and add the vanilla extract. Beat them into the mixture until just combined. Don’t go overboard here, overmixing can make your cookies tough, and we’re aiming for that tender, melt-in-your-mouth texture for these Peanut Butter Blossoms. Scrape down the sides of the bowl to make sure everything gets incorporated evenly.
- Combine Wet and Dry:
- Gradually add your dry flour mixture to the wet ingredients, mixing on low speed until just combined. Stop as soon as you don’t see any streaks of flour. Honestly, this is where I usually get flour all over the counter, but it’s part of the fun, right? The dough should be soft and pliable, not too sticky. If it feels a bit dry, don’t panic, it’ll come together.
- Roll ‘Em Up:
- Pour some granulated sugar into a small bowl. Scoop out tablespoon-sized portions of the cookie dough and roll them into neat little balls. Then, roll each ball in the granulated sugar until it’s fully coated. I find a cookie scoop makes this part so much easier and keeps them uniform, which is great for even baking.
- Bake & Kiss:
- Place the sugared dough balls about 2 inches apart on your prepared baking sheets. Bake for 8-10 minutes, or until the edges are lightly golden and the centers are still soft. As soon as you pull them from the oven, immediately press a Hershey’s Kiss into the center of each warm cookie. They’ll crackle a bit, which is totally normal and charming! Let them cool on the baking sheet for a few minutes before transferring to a wire rack to cool completely. That first bite, when the chocolate is still a little melty? Pure bliss.
There’s something so therapeutic about rolling these little dough balls, isn’t there? One time, my youngest decided to ‘help’ by coating them in glitter instead of sugar. I mean, it was a festive disaster, but we still laugh about the sparkly cookies that year. This Peanut Butter Blossoms Recipe is forgiving, though, and even with a few mishaps, they always turn out tasting like pure holiday magic.
Storage Tips for Peanut Butter Blossoms Recipe
Okay, so you’ve made a glorious batch of Peanut Butter Blossoms, and now you’re wondering how to keep them fresh (if they even last that long in your house, haha!). Store these beauties in an airtight container at room temperature for up to a week. I usually layer them with parchment paper to prevent the Kisses from sticking to each other learned that after a sad, stuck-together cookie incident. They actually get a little softer and chewier over time, which I personally love. If you want to keep them longer, they freeze really well! Just place them in a single layer on a baking sheet to flash freeze for about an hour until solid, then transfer them to a freezer-safe bag or container for up to 2-3 months. Thaw them at room temperature, and they’ll taste almost as fresh as the day you baked them. I’ve even popped a frozen one in the microwave for a few seconds for a warm, gooey treat totally recommend!
Peanut Butter Blossoms Recipe Ingredient Substitutions
I’m all for experimenting, even if it sometimes leads to ‘interesting’ results! For this Peanut Butter Blossoms Recipe, there are a few swaps you can try. If you’re out of light brown sugar, you can use all granulated sugar, but just know your cookies might be a tad less chewy and have a slightly different depth of flavor. I tried it once, and they were still good, just not quite the same. For the Hershey’s Kisses, you can absolutely use mini Reese’s peanut butter cups for an extra peanut-y punch that’s a personal favorite variation of mine! Or, if you prefer, any small chocolate candy like M&M’s will work, though they won’t melt into that iconic blossom shape. If you’re feeling adventurous, you could even try white chocolate kisses, but I haven’t personally ventured there yet!
Serving Your Peanut Butter Blossoms Recipe
These Peanut Butter Blossoms are honestly perfect on their own, fresh from the oven with that warm, gooey chocolate. But if you want to elevate the experience, I’ve got ideas! They’re absolutely divine with a tall glass of cold milk a classic combo that just can’t be beat. For an adult treat, I love them with a warm mug of spiced chai tea or a simple black coffee. During the holidays, I always arrange them on a festive platter with other cookies like snickerdoodles and gingerbread for a colorful spread. They also make a lovely homemade gift, wrapped up in a pretty tin. Honestly, a plate of these, a good book, and a cozy blanket? That’s my ideal evening right there. They just bring a smile to your face, no matter the occasion.
Cultural Backstory of Peanut Butter Blossoms
The Peanut Butter Blossoms Recipe has a really sweet history that ties into American home baking traditions. It’s believed to have originated in the 1950s, a time when home baking was booming and new, convenient ingredients were becoming popular. The recipe itself was famously submitted by Freda Smith to a Pillsbury Bake-Off contest in 1957, where it gained national recognition. The ingenious addition of pressing a chocolate kiss into the warm cookie after baking was a stroke of genius, creating that iconic ‘blossom’ look. For me, these cookies represent that era of wholesome, comforting, and slightly nostalgic baking. They remind me of my grandma’s kitchen, where every cookie had a story and every holiday felt a little more magical because of traditions like these. It’s a testament to simple ingredients coming together to create something truly beloved and enduring.
And there you have it, friends! My absolute favorite Peanut Butter Blossoms Recipe. It’s more than just butter, sugar, and peanut butter, it’s a little bite of childhood, a sprinkle of holiday cheer, and a whole lot of love. I hope these cookies bring as much joy to your kitchen as they do to mine, even if you have a glitter mishap or two along the way. Happy baking, and don’t forget to share your own cookie chaos stories with me!
Frequently Asked Questions About This Peanut Butter Blossoms Recipe
- → Can I use crunchy peanut butter for this Peanut Butter Blossoms Recipe?
Honestly, I’d stick to creamy for the best texture in these Peanut Butter Blossoms. I once tried crunchy, and while tasty, the cookie itself didn’t have that classic smooth, tender crumb I love. It felt a bit off balance, to be real.
- → What if my Hershey’s Kisses don’t melt nicely into the cookies?
This usually happens if your cookies have cooled too much before you press the Kisses in. I’ve been there! The trick is to do it immediately after they come out of the oven, while they’re super hot and soft. If they’ve hardened, you can gently warm the cookies in the oven for a minute or two.
- → My Peanut Butter Blossoms spread too much, what went wrong?
Oh, I’ve had this happen! It could be a few things: your butter might have been too soft, your oven temperature might be off, or you might have used natural peanut butter (which I learned the hard way spreads like crazy!). Chilling the dough for 30 minutes can often help, too.
- → How long do these Peanut Butter Blossoms last, and can I make them ahead?
They last about a week in an airtight container at room temperature. You can definitely make the dough ahead and chill it for up to 3 days, or even freeze the dough balls for future baking! Just thaw slightly before rolling and baking.
- → Can I use other chocolate candies instead of Hershey’s Kisses for my Peanut Butter Blossoms Recipe?
Absolutely! I’ve used mini Reese’s peanut butter cups for an extra peanut-y treat, and sometimes I’ll even use mini chocolate eggs around Easter. Any small chocolate candy will work, but the classic Kiss just has that special charm.

Classic Peanut Butter Blossoms Recipe: Sweet & Salty Twist
- Prep Time: 20 Minutes
- Cook Time: 10 Minutes
- Total Time: 45 Minutes
- Yield: 36 Servings 1x
- Category: Dessert
Description
This Peanut Butter Blossoms Recipe brings back holiday joy. Soft, chewy cookies with a chocolate kiss, a truly classic sweet & salty treat.
Ingredients
- Cookie Base Essentials:
- 1 ½ cups all-purpose flour
- 1 teaspoon baking soda
- ½ teaspoon salt
- ½ cup (1 stick) unsalted butter, softened
- ½ cup granulated sugar (for dough)
- ½ cup packed light brown sugar
- ½ cup creamy peanut butter
- Flavor & Texture Boosters:
- 1 large egg, room temperature
- 1 teaspoon vanilla extract
- The Iconic Topping:
- ½ cup granulated sugar (for rolling)
- 36 Hershey’s Kisses, unwrapped
- Kitchen Cabinet Staples:
- Parchment paper
Instructions
- Prep Your Kitchen & Dry Mix:: First things first, let’s get organized! Preheat your oven to 375°F (190°C). Line a couple of baking sheets with parchment paper; this makes cleanup a breeze and prevents sticking, which is a lifesaver. In a medium bowl, whisk together your flour, baking soda, and salt. I always give it a good whisk for about 30 seconds to make sure everything’s evenly distributed, otherwise, you might get a surprise salty bite, and nobody wants that!
- Cream the Wet Ingredients:: In a large bowl, or your stand mixer if you’re lucky enough to have one, cream together the softened butter, granulated sugar, and brown sugar until it’s light and fluffy. This usually takes me about 2-3 minutes. Then, beat in the creamy peanut butter until it’s well combined and looks wonderfully smooth. I’m telling you, the smell alone at this stage is enough to make your mouth water!
- Add Egg & Vanilla:: Next, crack in that large egg and add the vanilla extract. Beat them into the mixture until just combined. Don’t go overboard here; overmixing can make your cookies tough, and we’re aiming for that tender, melt-in-your-mouth texture for these Peanut Butter Blossoms. Scrape down the sides of the bowl to make sure everything gets incorporated evenly.
- Combine Wet and Dry:: Gradually add your dry flour mixture to the wet ingredients, mixing on low speed until just combined. Stop as soon as you don’t see any streaks of flour. Honestly, this is where I usually get flour all over the counter, but it’s part of the fun, right? The dough should be soft and pliable, not too sticky. If it feels a bit dry, don’t panic, it’ll come together.
- Roll ‘Em Up:: Pour some granulated sugar into a small bowl. Scoop out tablespoon-sized portions of the cookie dough and roll them into neat little balls. Then, roll each ball in the granulated sugar until it’s fully coated. I find a cookie scoop makes this part so much easier and keeps them uniform, which is great for even baking.
- Bake & Kiss:: Place the sugared dough balls about 2 inches apart on your prepared baking sheets. Bake for 8-10 minutes, or until the edges are lightly golden and the centers are still soft. As soon as you pull them from the oven, immediately press a Hershey’s Kiss into the center of each warm cookie. They’ll crackle a bit, which is totally normal and charming! Let them cool on the baking sheet for a few minutes before transferring to a wire rack to cool completely. That first bite, when the chocolate is still a little melty? Pure bliss.


