
I remember the first time I tried to make an Oreo Drip Cake. It was for my niece’s birthday, and honestly, I was a nervous wreck! The kitchen was a battlefield, flour everywhere, and I swear, I almost gave up when the ganache decided to seize. But then, that first bite of rich chocolate cake, creamy frosting, and crunchy Oreo bits? Pure magic. This Oreo Drip Cake isn’t just a dessert, it’s a hug in cake form, a celebration of all things delicious and a reminder that even kitchen chaos can lead to something truly special.
Once, I was so excited about getting the perfect drip that I completely forgot to chill my ganache. It just ran right off the sides, pooling at the bottom like a chocolate puddle! My husband, bless his heart, said it looked “rustic.” I just laughed, scraped it up, and started over. That’s the beauty of baking, though, right? Sometimes you mess up, and that’s okay, because the next time, you get that glorious, perfectly imperfect Oreo Drip Cake.

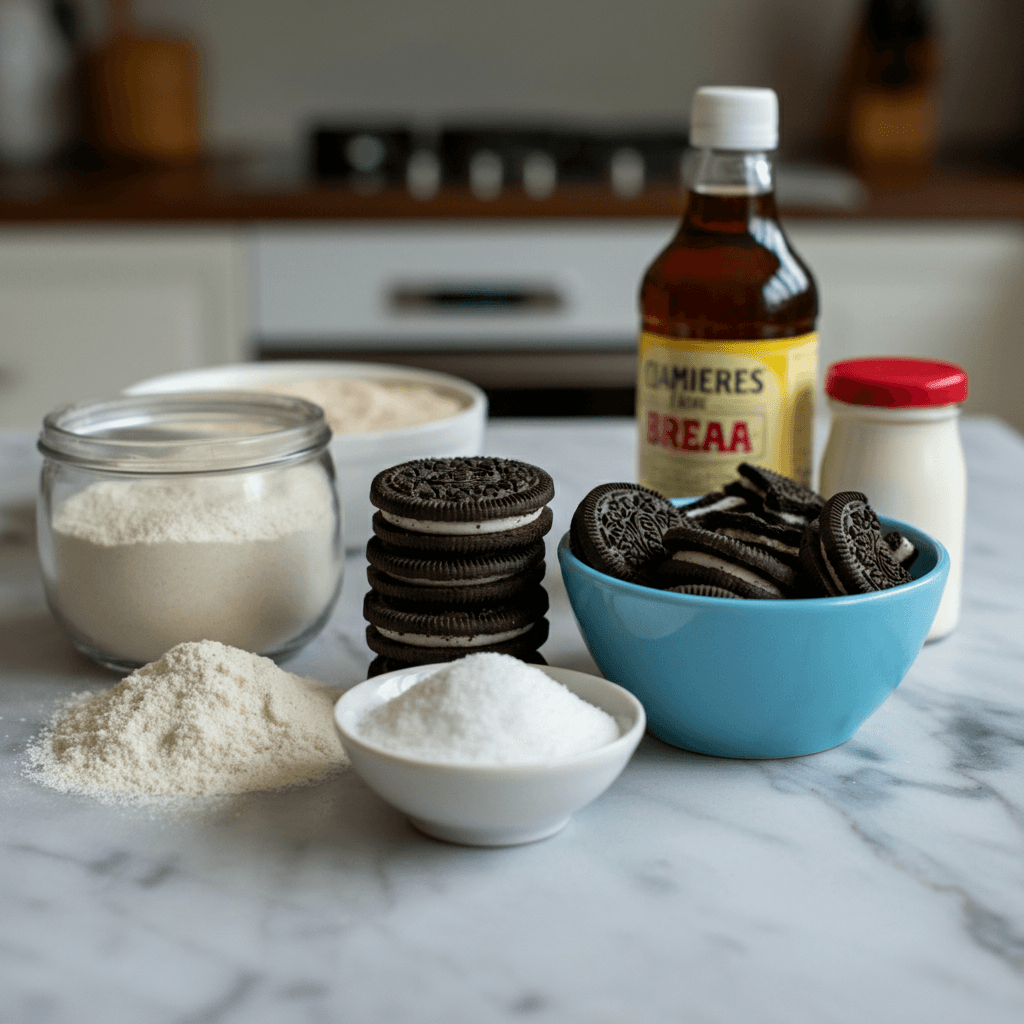
Ingredients for Your Oreo Drip Cake
Cake Base Essentials
- All-purpose flour: Honestly, the backbone of any good cake. I’ve tried gluten-free once, and it worked… kinda, but for that classic crumb, stick with the regular stuff.
- Granulated sugar: This is where the sweetness comes from, obviously! Don’t skimp, unless you like your cake tasting like unsweetened cocoa, which, no thanks.
Unsweetened cocoa powder: Use a good quality one, like Dutch-processed. It makes a world of difference in the depth of chocolate flavor. I once used a cheap one, and the cake just tasted… flat. Never again!
Baking soda & baking powder: The dynamic duo for lift! Make sure they’re fresh, an old box means a flat cake, and who wants that? I didn’t expect that much of a difference, but it’s real.
Wet Wonders & Flavor Boosters
- Large eggs: Room temperature, please! It helps them emulsify better with the other wet ingredients. I always forget to take them out ahead of time, oops!
- Buttermilk: This is key for a tender, moist crumb. Don’t have it? Mix milk with a tablespoon of white vinegar or lemon juice and let it sit for 5 minutes. Works like a charm when you’re in a pinch.
Vegetable oil: Adds moisture without making the cake dense. I’ve used melted butter, but oil really keeps it light and fluffy.
Vanilla extract: A good quality pure vanilla extract really elevates the chocolate. It’s like a secret handshake for flavors.
Hot water or coffee: This is my favorite trick! Hot liquid “blooms” the cocoa powder, intensifying the chocolate flavor. Coffee, even better, it doesn’t make it taste like coffee, just more chocolatey!
Frosting & Oreo Fun
- Unsalted butter: Again, room temperature is crucial for a smooth, lump-free buttercream. I once tried to rush it with cold butter, and my frosting looked like cottage cheese. Learn from my mistakes!
- Powdered sugar: Sift it! Seriously, sift it. No one wants lumpy frosting. I know it’s an extra step, but trust me, it’s worth it for that silky smooth finish.
Heavy cream: For that glorious, rich buttercream and the perfect drip ganache. Don’t use anything less, hon.
Oreo cookies: The star of our Oreo Drip Cake! You’ll need some crushed for the cake and frosting, and whole for decoration. I always buy an extra pack because, well, snacking during baking is a must.
Semi-sweet chocolate chips: For the drip! A good quality chocolate melts smoother and tastes better. I’ve used milk chocolate, but it can be a bit too sweet for me.
Baking Your Dreamy Oreo Drip Cake
- Mix the Dry Ingredients:
- First things first, get your oven preheating to 350°F (175°C) and grease and flour two 8-inch round cake pans. In a big mixing bowl, whisk together your flour, sugar, cocoa powder, baking soda, baking powder, and salt. I always give it a good, enthusiastic whisk, like I’m trying to beat the Monday blues. Make sure there are no lumps, because nobody wants a surprise flour pocket in their cake, right?
- Combine Wet Ingredients:
- In a separate, medium-sized bowl, whisk your eggs, buttermilk, vegetable oil, and vanilla extract. This is where the magic starts to happen! The buttermilk and oil are working together to promise a super moist cake. I always take a moment to smell that lovely vanilla, it just makes the kitchen feel so inviting. Make sure everything is well combined before moving on, a little extra whisking here saves a lot of trouble later.
- Bring It All Together:
- Now, pour the wet ingredients into the dry ingredients. Mix on low speed with an electric mixer, or by hand if you’re feeling strong, just until barely combined. Don’t overmix! That’s a common mistake I made early on, and it makes for a tough cake. Then, slowly pour in your hot water or coffee. The batter will be thin, and that’s okay! It smells so rich at this point, you’ll want to just dive in.
- Bake the Cake Layers:
- Divide the batter evenly between your two prepared cake pans. Pop them into the preheated oven and bake for 30-35 minutes, or until a wooden skewer inserted into the center comes out clean. My kitchen always smells incredible when these are baking, it’s pure bliss! Let them cool in the pans for about 10-15 minutes before inverting them onto a wire rack to cool completely. Patience is a virtue here, don’t rush it!
- Whip Up the Oreo Buttercream:
- While the cakes cool, let’s make that dreamy Oreo Drip Cake frosting! In a large bowl, beat the softened butter until creamy. Gradually add the sifted powdered sugar, alternating with splashes of heavy cream, until it’s light and fluffy. Stir in your crushed Oreo cookies. This is where the real fun begins, seeing those cookie bits disappear into the creamy goodness. I always taste-test a spoonful… or two. It’s important for quality control, you know?
- Assemble and Drip Your Oreo Drip Cake:
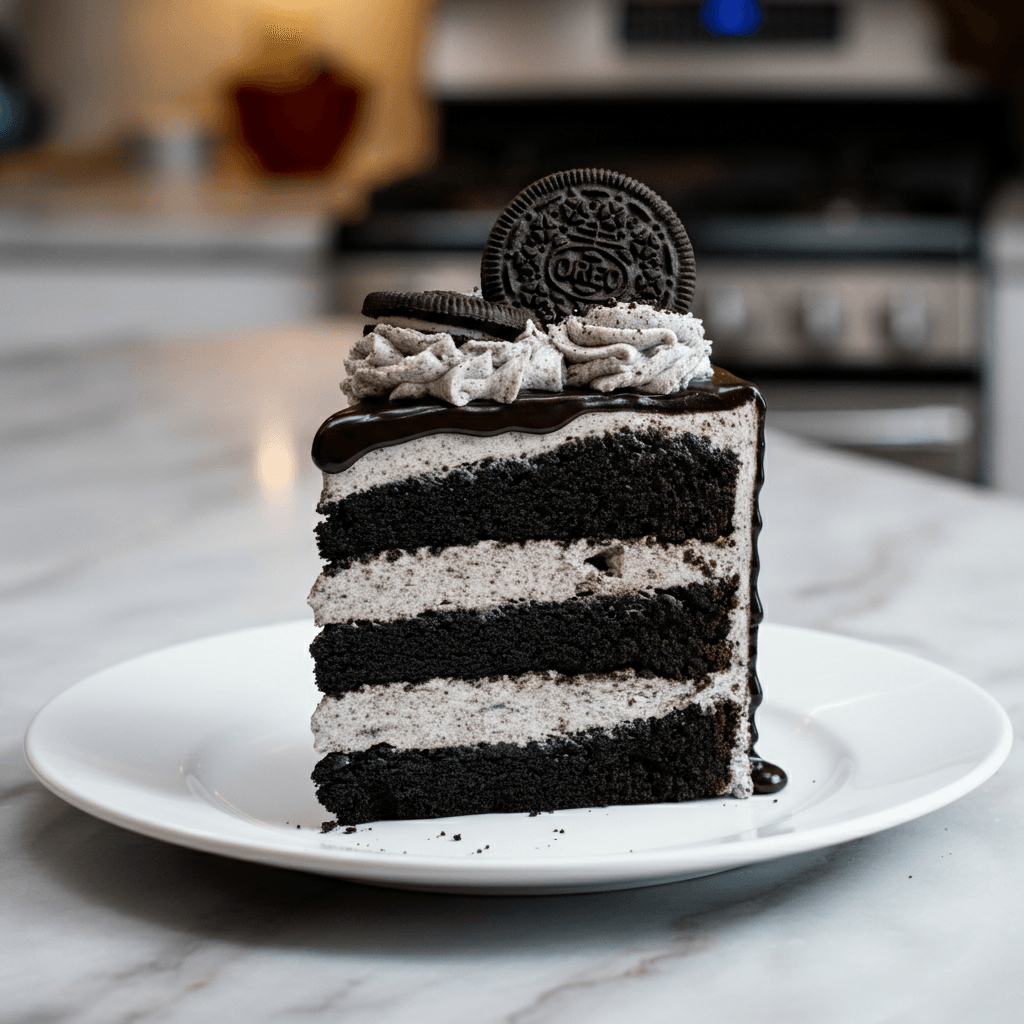
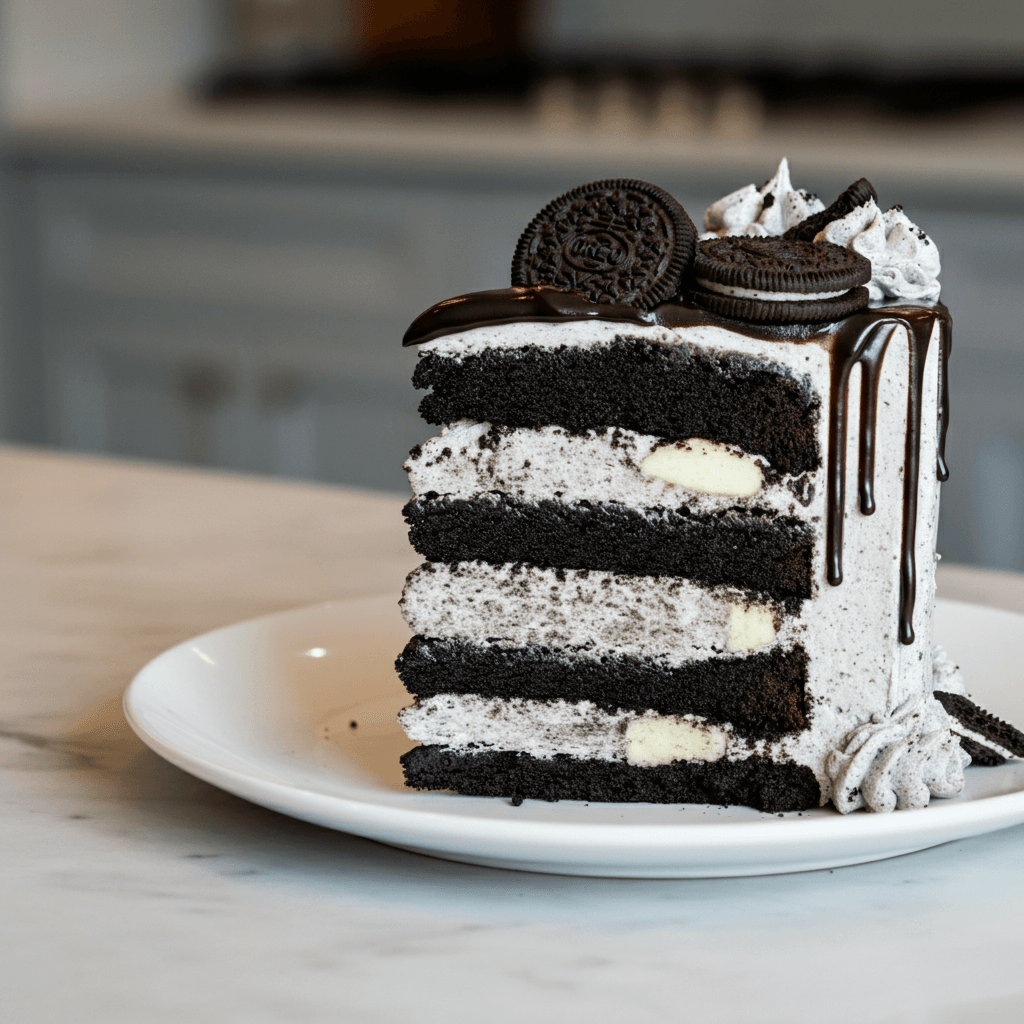
- Once your cake layers are completely cool (this is critical, warm cakes will melt your frosting!), level them if needed. Place one layer on your serving plate, spread with a generous amount of Oreo buttercream, then top with the second layer. Frost the entire cake smoothly. Now for the drip! Melt your chocolate chips with a bit more heavy cream, let it cool slightly, then carefully spoon it around the edges, letting it drip down. Finish by decorating with whole Oreos. The finished Oreo Drip Cake looks so impressive, you’ll be so proud!
I remember one time, the kids were “helping” me crush the Oreos for this Oreo Drip Cake, and bits ended up all over the kitchen, even on the ceiling fan! It was total chaos, but also so much fun. Baking this cake always brings a smile to my face, not just because of the delicious outcome, but for all the sweet, messy memories it creates in my kitchen.
Oreo Drip Cake Storage Tips
So, you’ve got leftover Oreo Drip Cake? Lucky you! Honestly, this cake holds up surprisingly well. I usually cover it loosely with plastic wrap or pop it into an airtight cake carrier. Stored at room temperature, it’s usually good for about 2-3 days. If you want it to last longer, or if your kitchen runs warm, the fridge is your friend it’ll keep for up to 5 days there. Just remember to let it come to room temperature for about 30 minutes before serving, as the frosting can get a bit firm when cold. I microwaved a slice once to warm it up quickly, and the buttercream got a little… runny. So, don’t do that lol. Patience is key for enjoying that perfect texture.
Oreo Drip Cake Ingredient Substitutions
I’ve played around with this Oreo Drip Cake recipe quite a bit, so I’ve got some ideas for you! If you don’t have buttermilk, you can totally make your own: just put 1 tablespoon of white vinegar or lemon juice in a measuring cup, then fill to the 1-cup mark with regular milk (any kind works, but whole milk is best here). Let it sit for 5 minutes, and boom, homemade buttermilk! For the chocolate chips in the drip, I’ve tried dark chocolate, and it gives a more intense, less sweet contrast, which is nice if you’re into that. I even swapped out some of the all-purpose flour for cake flour once for an even more tender crumb, and it worked beautifully. Just keep the total weight of flour the same. Experimenting is part of the fun, after all!
Serving Your Delicious Oreo Drip Cake
This Oreo Drip Cake is pretty much a showstopper on its own, but a few little touches can make it even more special. I love serving a slice with a big scoop of vanilla bean ice cream, the cold, creamy ice cream against the rich cake is just heavenly. A fresh cup of coffee or a tall glass of cold milk makes a wonderful pairing, too. Honestly, this cake and a good rom-com on a Friday night? Yes please! It’s also fantastic with a sprinkle of extra crushed Oreos right before serving, or even a few fresh raspberries for a pop of color and tartness. It’s perfect for any mood, from a quiet treat to a big celebration.
The Sweet Backstory of My Oreo Drip Cake
The concept of a “drip cake” is relatively new, really taking off with the rise of social media food trends. But the idea of a chocolate cake loaded with cookies? That’s just timeless comfort. My personal connection to this Oreo Drip Cake started with those childhood memories of dunking Oreos in milk, a simple joy. When I first saw a drip cake, I thought, “How can I combine that elegance with the nostalgic comfort of Oreos?” And so, this recipe was born out of a desire to blend something visually stunning with a flavor that brings you right back to happy, simpler times. It became my go-to for family birthdays, a sweet tradition everyone looks forward to.
Honestly, every time I bake this Oreo Drip Cake, it feels like a little victory. From the moment the kitchen fills with that rich chocolate smell to seeing everyone’s faces light up with that first bite, it’s just pure joy. It might not always be perfect, my kitchen might get a little messy, but the love that goes into it, and the smiles it creates, are what truly matter. I hope you make it your own and share your delightful versions with me!
Frequently Asked Questions
- → Can I make the Oreo Drip Cake layers ahead of time?
Oh, absolutely! I often bake the cake layers a day or two in advance. Once they’re completely cool, wrap them tightly in plastic wrap and store them at room temperature. It actually helps make them easier to handle when you’re ready to frost your Oreo Drip Cake!
- → What if I don’t have buttermilk for my Oreo Drip Cake?
No worries at all! I’ve been there. Just make a quick substitute: add a tablespoon of white vinegar or lemon juice to a measuring cup, then fill with regular milk until it reaches 1 cup. Let it sit for about 5 minutes until it curdles a bit. Works like a charm for your Oreo Drip Cake!
- → My chocolate drip isn’t working for my Oreo Drip Cake, what am I doing wrong?
Ah, the drip! It’s a common tricky spot. The ganache might be too hot or too cold. If it’s too hot, it’ll just run off, too cold, and it won’t drip at all. Let it cool for about 10-15 minutes after melting until it’s thick but still pourable. I’ve had many a runny drip, so don’t fret!
- → How long does this Oreo Drip Cake last?
If stored properly, covered and at room temperature, your Oreo Drip Cake should be good for 2-3 days. In the fridge, it can last up to 5 days. Just make sure to bring it to room temperature before serving for the best texture. I once forgot it out for a week… oops, don’t do that!
- → Can I add other mix-ins to the Oreo Drip Cake batter or frosting?
Definitely! Get creative! I’ve sometimes added chocolate chips to the cake batter for extra chocolatey goodness. For the frosting, a swirl of peanut butter or a dash of mint extract could be fun, too. I even tried some chopped white chocolate once, and it was surprisingly good!
Oreo Drip Cake: Easy Chocolate Cookie Dream
- Prep Time: 45 Minutes
- Cook Time: 35 Minutes
- Total Time: 2 Hours 20 Minutes
- Yield: 12 Servings 1x
- Category: Dinner
Description
Oreo Drip Cake: Make your own stunning chocolate masterpiece! Rich chocolate cake, creamy frosting, and crunchy Oreo pieces. Perfect for any celebration.
Ingredients
- Cake Base Essentials:
- 2 cups (240g) all-purpose flour
- 2 cups (400g) granulated sugar
- ¾ cup (65g) unsweetened cocoa powder (Dutch-processed recommended)
- 2 teaspoons baking soda
- 1 teaspoon baking powder
- 1 teaspoon salt
- Wet Wonders & Flavor Boosters:
- 2 large eggs, room temperature
- 1 cup (240ml) buttermilk, room temperature
- ½ cup (120ml) vegetable oil
- 2 teaspoons vanilla extract
- 1 cup (240ml) hot water or hot coffee
- Frosting & Oreo Fun:
- 1 cup (226g) unsalted butter, softened
- 4 cups (480g) powdered sugar, sifted
- ¼ cup (60ml) heavy cream (plus more if needed)
- 1 teaspoon vanilla extract
- 15–20 Oreo cookies, crushed (for frosting & cake)
- 10–12 Oreo cookies, whole (for decoration)
- ½ cup (90g) semi-sweet chocolate chips (for drip)
- 2 tablespoons heavy cream (for drip)
Instructions
- Mix the Dry Ingredients:: First things first, get your oven preheating to 350°F (175°C) and grease and flour two 8-inch round cake pans. In a big mixing bowl, whisk together your flour, sugar, cocoa powder, baking soda, baking powder, and salt. I always give it a good, enthusiastic whisk, like I’m trying to beat the Monday blues. Make sure there are no lumps, because nobody wants a surprise flour pocket in their cake, right?
- Combine Wet Ingredients:: In a separate, medium-sized bowl, whisk your eggs, buttermilk, vegetable oil, and vanilla extract. This is where the magic starts to happen! The buttermilk and oil are working together to promise a super moist cake. I always take a moment to smell that lovely vanilla; it just makes the kitchen feel so inviting. Make sure everything is well combined before moving on, a little extra whisking here saves a lot of trouble later.
- Bring It All Together:: Now, pour the wet ingredients into the dry ingredients. Mix on low speed with an electric mixer, or by hand if you’re feeling strong, just until barely combined. Don’t overmix! That’s a common mistake I made early on, and it makes for a tough cake. Then, slowly pour in your hot water or coffee. The batter will be thin, and that’s okay! It smells so rich at this point, you’ll want to just dive in.
- Bake the Cake Layers:: Divide the batter evenly between your two prepared cake pans. Pop them into the preheated oven and bake for 30-35 minutes, or until a wooden skewer inserted into the center comes out clean. My kitchen always smells incredible when these are baking, it’s pure bliss! Let them cool in the pans for about 10-15 minutes before inverting them onto a wire rack to cool completely. Patience is a virtue here, don’t rush it!
- Whip Up the Oreo Buttercream:: While the cakes cool, let’s make that dreamy Oreo Drip Cake frosting! In a large bowl, beat the softened butter until creamy. Gradually add the sifted powdered sugar, alternating with splashes of heavy cream, until it’s light and fluffy. Stir in your crushed Oreo cookies. This is where the real fun begins, seeing those cookie bits disappear into the creamy goodness. I always taste-test a spoonful… or two. It’s important for quality control, you know?
- Assemble and Drip Your Oreo Drip Cake:: Once your cake layers are completely cool (this is critical, warm cakes will melt your frosting!), level them if needed. Place one layer on your serving plate, spread with a generous amount of Oreo buttercream, then top with the second layer. Frost the entire cake smoothly. Now for the drip! Melt your chocolate chips with a bit more heavy cream, let it cool slightly, then carefully spoon it around the edges, letting it drip down. Finish by decorating with whole Oreos. The finished Oreo Drip Cake looks so impressive, you’ll be so proud!


