Description
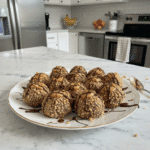
Quick, creamy No-Bake Peanut Butter Cheesecake Bites are a dreamy, easy dessert for peanut butter lovers. No oven needed, pure bliss!
Ingredients
Scale
- Crust Essentials:
- 1 ½ cups graham cracker crumbs
- ½ cup unsalted butter, melted
- Creamy Filling Stars:
- 16 oz (2 blocks) full-fat cream cheese, softened
- 1 cup creamy peanut butter (natural, stir-type preferred)
- 1 ½ cups powdered sugar
- 1 tsp vanilla extract
- 1 cup heavy cream, cold
- Finishing Touches:
- Optional: melted chocolate for drizzling
- Optional: chopped roasted peanuts for garnish
Instructions
- Prepare the Crust for No-Bake Peanut Butter Cheesecake Bites:: First things first, let’s get that crust ready! In a medium bowl, combine your graham cracker crumbs and melted butter. Stir them together until everything looks evenly moistened, like wet sand. Now, line a mini muffin tin with paper liners—this is crucial for easy removal, trust me. Spoon about a tablespoon of the crumb mixture into each liner and press it down firmly with the back of a spoon or a small glass. I always make sure it’s packed tight, but not *too* tight, remembering my chisel incident! Pop this into the fridge while we make the filling.
- Whip the Cream Cheese Mixture:: Next up, grab a large mixing bowl and your softened cream cheese. Beat it with an electric mixer on medium speed until it’s super smooth and creamy, no lumps allowed! This is where you really want to make sure your cream cheese is at room temperature, otherwise, you’ll be fighting lumps forever. I once tried to rush this step with cold cream cheese and ended up with a lumpy mess that took forever to smooth out. Add in the peanut butter, powdered sugar, and vanilla extract, then beat until everything is wonderfully combined and looks light and fluffy, smelling absolutely divine.
- Whip the Heavy Cream:: In a separate, clean bowl, pour in your cold heavy cream. Using your electric mixer (cleaned beaters, please!), whip the cream on high speed until it forms stiff peaks. You want it to hold its shape when you lift the beaters. This step is honestly my favorite because you see the cream transform into this beautiful, airy cloud. Just be careful not to over-whip it, or you’ll end up with a grainy texture—I’ve done it, and it’s a bummer, so keep an eye on it!
- Combine the Filling for No-Bake Peanut Butter Cheesecake Bites:: Now for the magic! Gently fold the whipped cream into your peanut butter cream cheese mixture. Use a spatula and a light hand, trying not to deflate all that lovely air you just whipped in. You want it to be light, airy, and uniformly combined, with no streaks of plain cream cheese or whipped cream. This is where the filling starts to look like actual cheesecake, so creamy and inviting! I love seeing the two distinct textures come together into one delicious cloud.
- Assemble Your No-Bake Peanut Butter Cheesecake Bites:: Once your filling is perfectly combined, spoon or pipe it over your chilled graham cracker crusts in the mini muffin tin. I usually use a small cookie scoop for this; it makes things so much neater and ensures even portions. Fill each liner almost to the top. This is where I sometimes get a little messy, a blob here, a dollop there, but it’s all part of the homemade charm, right? Don’t stress about being absolutely perfect, just get that yummy filling in there.
- Chill and Serve Your No-Bake Peanut Butter Cheesecake Bites:: This is the hardest part: waiting! Place the muffin tin back into the fridge and let your No-Bake Peanut Butter Cheesecake Bites chill for at least 4 hours, or even better, overnight. They need this time to firm up properly, otherwise, they’ll be too soft. Once they’re perfectly firm, you can remove them from the muffin tin by gently lifting the paper liners. I often pop one straight into my mouth right after pulling them out—they’re just too tempting!
