
Oh, Halloween! I remember the year my little niece, bless her heart, decided she ONLY wanted to eat “spooky food.” I mean, who knew a five-year-old could be such a food critic? That’s when I stumbled upon the idea of Mummy Mini Pizzas. Honestly, it was a desperate attempt to get her to eat something other than candy corn. The kitchen was a glorious mess of flour and sauce, and the smell of baking dough and melting cheese just filled the air. These aren’t just any mini pizzas, they’re a little piece of my heart, a symbol of those chaotic, joyful moments that make life so sweet. And they’re super comforting, even when they look a bit… undead.
I swear, the first time I made these Mummy Mini Pizzas, I got a little too enthusiastic with the cheese strips. They looked less like mummies and more like abstract art, all tangled and lopsided. My husband, bless his heart, said they looked like they’d had a rough night out. We still laugh about it! But hey, that’s real cooking, right? It doesn’t always have to be picture-perfect to be absolutely delicious and fun.

Ingredients for Spooky Mummy Mini Pizzas
Base Ingredients
- English Muffins or Mini Pizza Bases: These are your canvases for the Mummy Mini Pizzas! I swear by English muffins for that perfect crispy-chewy texture, but mini naan or pre-made pizza bases work too. Just don’t use those super thin cracker-like ones unless you like a very crunchy mummy.
- Pizza Sauce: Use your favorite jarred sauce, hon. No shame in a good quality store-bought one. I usually reach for a classic marinara, but a spicier arrabiata could be fun for the grown-up mummies. Just make sure it’s not too watery, or your mummy will be soggy!
Flavor Boosters
- Mozzarella Cheese: This is the magic for your mummy bandages! I prefer a block of low-moisture mozzarella that I shred myself, then cut into strips. Pre-shredded works, but sometimes it doesn’t melt quite as beautifully. Less is more here, you want strips, not a blanket!
Black Olives: These are essential for the mummy’s eyes! Pitted black olives, sliced in half, give that perfect spooky gaze. I once tried green olives, and let me tell you, it was a mistake they just didn’t have the same eerie effect.
Optional Extras
- Pepperoni or Sliced Sausage: If you want your mummy to have a little something extra underneath those bandages, a few mini pepperonis or crumbled cooked sausage work great. Just don’t overload it, or the bandages won’t stick.
Dried Oregano: A tiny sprinkle over the sauce before the cheese adds that classic pizza parlor aroma. It just smells like home, you know?
Crafting Your Mummy Mini Pizzas: Step-by-Step
- Prep Your Bases:
- First things first, get those English muffins or mini pizza bases ready. If you’re using muffins, gently split them in half with a fork that creates all those nooks and crannies for the sauce to nestle into. I usually toast them lightly first in the toaster or a dry pan, it helps prevent them from getting soggy later. Honestly, this is a step I often skip when I’m in a rush, and I always regret it a little bit when the crust isn’t quite as crisp as I like. Don’t be like me, take the extra minute!
- Sauce It Up:
- Now for the sauce! Spoon a generous tablespoon or two of pizza sauce onto each muffin half or mini base. Spread it out evenly, almost to the edges, but leave a tiny border. I sometimes get a bit heavy-handed with the sauce, and then it bubbles over in the oven, making a sticky mess on the baking sheet. Learn from my oops moment: a little less sauce means a happier, cleaner baking experience. You want a good base, not a swimming pool for your mummy.
- The Mummy’s Inner Layer (Optional):
- If you’re adding any pepperoni or sausage, now’s the time! Lay a few mini pepperonis or sprinkle some cooked sausage crumbles over the sauce. Don’t go wild here, remember, the cheese strips need space to shine as the mummy’s bandages. I once loaded these up with too much stuff, and the cheese just slid right off, ruining the mummy effect. Keep it sparse, but impactful!
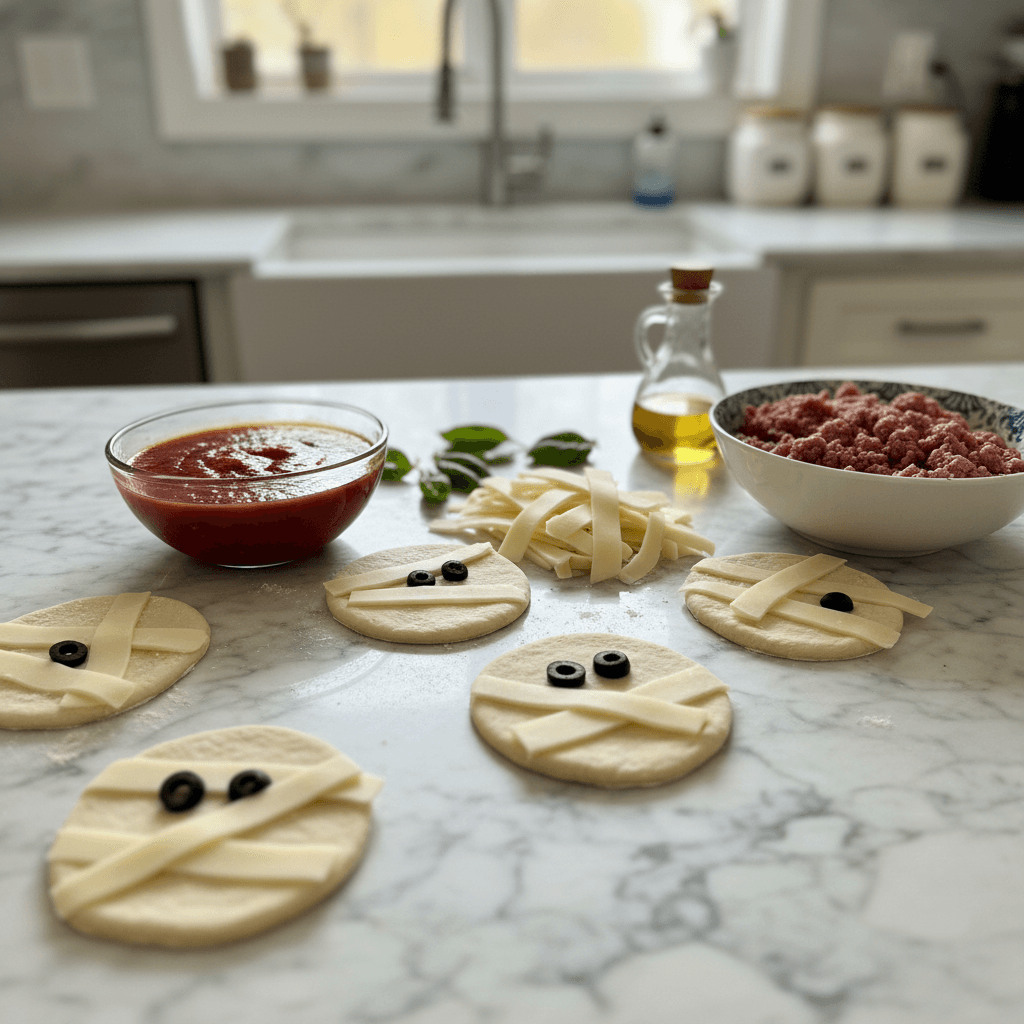
- Bandage Time for Mummy Mini Pizzas:
- This is the fun part! Take your mozzarella strips and lay them across the sauce, crisscrossing them like mummy bandages. Leave a small gap near the top for the eyes. Don’t worry about them being perfectly straight, a little wonkiness just adds to the spooky charm, honestly. I usually do about 3-4 strips per mini pizza, varying the angles. It smells like pure potential right now, a promise of cheesy goodness!
- Eyes On The Prize:
- Place two black olive halves in the gap you left near the top, creating the mummy’s eyes. This is where your Mummy Mini Pizzas truly come to life! Sometimes, the olives roll off before baking, so just gently press them into the cheese a little. I once tried using thinly sliced green peppers for eyes, and while they tasted fine, they just didn’t give that distinct, slightly creepy mummy vibe. Stick to the olives, trust me.
- Bake and Serve Your Mummy Mini Pizzas:
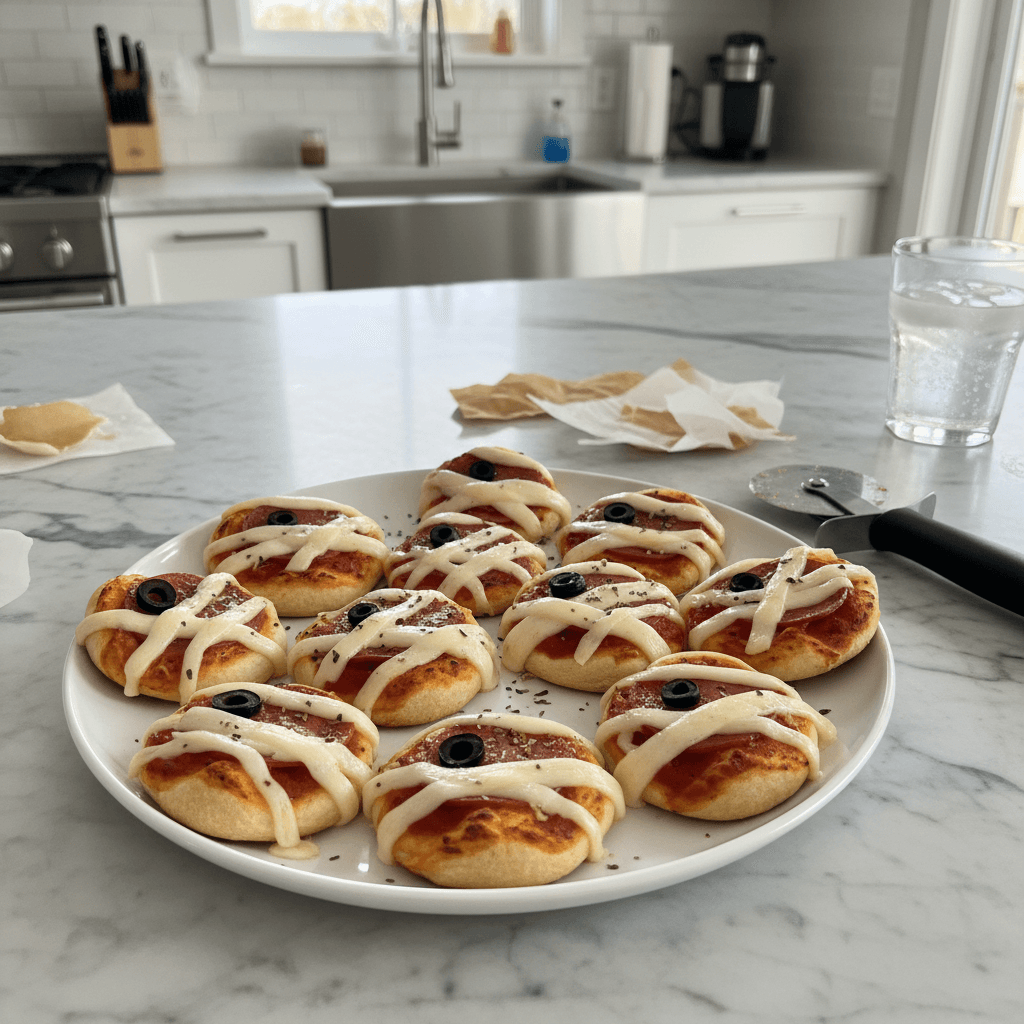
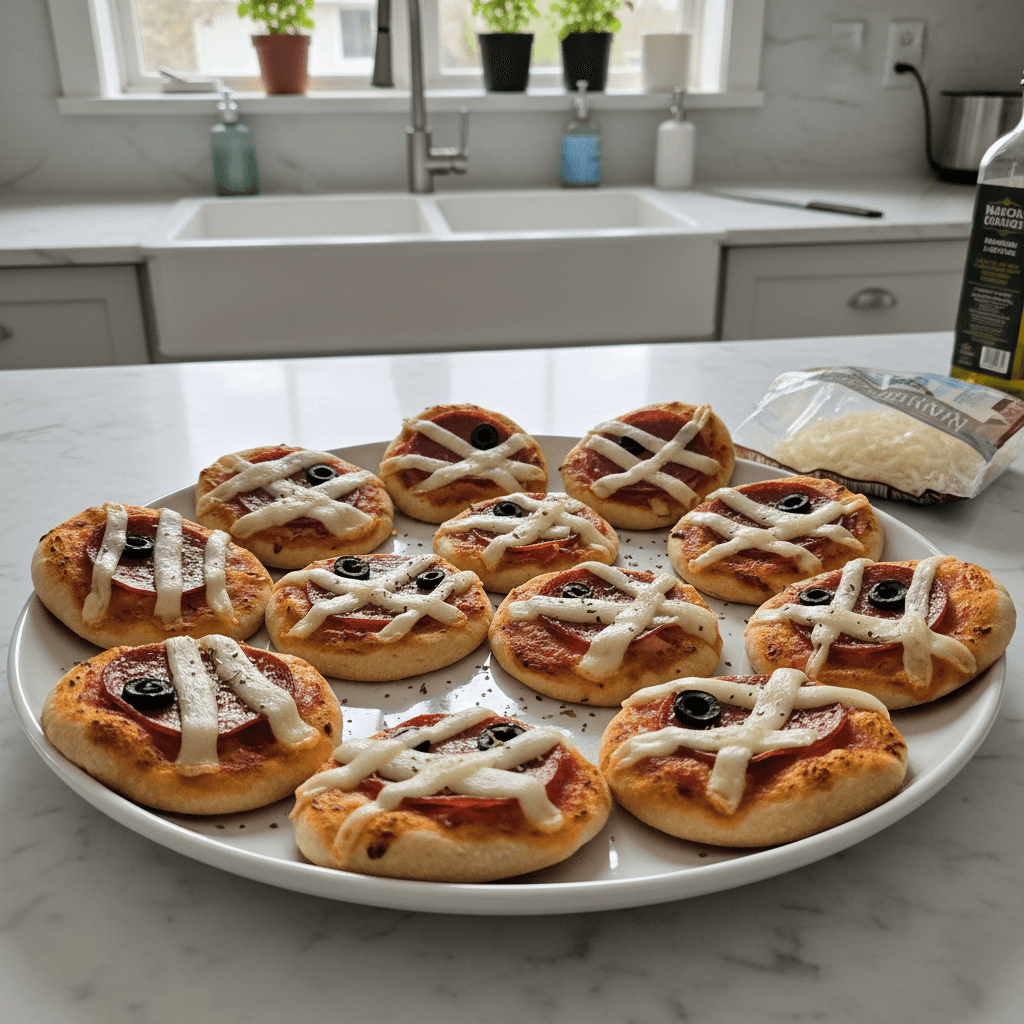
- Pop your baking sheets into the preheated oven and bake for about 8-10 minutes, or until the cheese is melted, bubbly, and slightly golden at the edges. Keep an eye on them, because ovens vary! The smell of baking cheese and warm bread is just heavenly. Once they’re out, let them cool for a minute or two before serving. They’ll be hot, but oh-so-worth-it. The final result should be a perfectly spooky, cheesy bite, ready for your Halloween bash!
Making these Mummy Mini Pizzas always brings back such sweet, slightly chaotic memories of Halloween prep with the family. There’s usually flour on the counter, sauce on my apron, and laughter echoing through the kitchen. It’s never a perfectly clean process, but that’s the beauty of it, right? The joy is in the making, and the eating!
Storage Tips for Leftover Mummy Mini Pizzas
So, you’ve got some leftover Mummy Mini Pizzas? Lucky you! Once they’ve cooled completely, stack them with parchment paper in between (this prevents sticking, a little trick I picked up after a few sticky disasters) and place them in an airtight container. They’ll keep in the fridge for up to 3 days. Reheating is best in a toaster oven or a regular oven at 350°F (175°C) for about 5-7 minutes, until the cheese is bubbly again and the crust is crisp. I microwaved them once, and the crust turned rubbery and the sauce separated so don’t do that lol. They also freeze pretty well! Just wrap them individually in plastic wrap, then pop them in a freezer-safe bag for up to a month. Thaw in the fridge overnight before reheating.
Ingredient Substitutions for Mummy Mini Pizzas
Life happens, and sometimes you don’t have exactly what the recipe calls for, right? For the bases, if English muffins aren’t around, try mini bagels, pita bread, or even sliced baguette pieces for a different texture. I once used leftover focaccia, and it worked, kinda it was a bit thick, but still tasty! If mozzarella strips are too fiddly, you can shred the cheese and then just place small clumps, leaving gaps for the eyes. It won’t be quite as bandage-like, but it’ll still be a cheesy mummy. No black olives? Green olives work in a pinch, but as I mentioned, they give a slightly different vibe. You could even use tiny pieces of bell pepper for colorful, albeit less spooky, eyes for your Mummy Mini Pizzas.
Serving Suggestions for Your Mummy Mini Pizzas
These Mummy Mini Pizzas are basically a party in themselves! Serve them on a big platter for a Halloween gathering, maybe with some spooky-themed dips like a green guacamole “swamp dip” or a blood-red marinara for extra dipping fun. They’re fantastic alongside a simple green salad (to balance out all that cheesy goodness, you know?). For drinks, a sparkling cider or a homemade “witch’s brew” punch would be perfect. And for dessert? Maybe some ghost-shaped cookies or apple slices with peanut butter and mini chocolate chips for “spider webs.” These mini pizzas and a classic Halloween movie marathon? Yes please, that’s my ideal October evening, honestly.
The Spooky History of Mummy Mini Pizzas
While the exact origin of Mummy Mini Pizzas is a bit of a mystery, like any good spooky tale, their popularity definitely surged with the rise of easy, kid-friendly Halloween party food. They’re a playful take on classic pizza, combining the universally loved comfort food with the fun, dress-up spirit of Halloween. For me, they connect back to those cherished family traditions of making holiday treats together, where the process is just as important as the outcome. It’s about creating memories, sharing laughter, and sometimes, making a glorious mess in the kitchen. They’ve become a staple in our household, a signal that spooky season has officially arrived!
There you have it, friends! My take on the utterly charming, slightly chaotic, and always delicious Mummy Mini Pizzas. They always turn out just right, even with a few crooked cheese strips. I hope these bring as much joy and spooky fun to your kitchen as they do to mine. Don’t forget to share your own mummy creations with me I love seeing your kitchen adventures!
Frequently Asked Questions About Mummy Mini Pizzas
- → Can I make these Mummy Mini Pizzas ahead of time?
You can definitely prep the bases with sauce and toppings (minus the cheese strips and olives) a few hours ahead and keep them in the fridge. Add the cheese and olives right before baking for the freshest results! I tried making them completely ahead once, and the cheese got a bit stiff.
- → What if I don’t have English muffins for Mummy Mini Pizzas?
No worries! Mini bagels, pita bread, or even sliced French bread work wonderfully. I’ve even used large crackers in a pinch, but they get super crispy. Just pick a sturdy base that can hold up to the sauce and cheese, honestly!
- → How do I get the cheese strips just right for the Mummy Mini Pizzas?
I find using a block of low-moisture mozzarella and a sharp knife or pizza cutter works best. Cut slices about 1/4 to 1/2 inch wide, then lay them crisscross. Don’t stress about perfection, a slightly messy mummy is a charming mummy, trust me!
- → Can these Mummy Mini Pizzas be frozen for later?
Absolutely! Assemble them, but don’t bake. Freeze them on a baking sheet until solid, then transfer to a freezer-safe bag. Bake from frozen at 375°F (190°C) for about 15-20 minutes, adding a few extra minutes until bubbly. Super convenient for unexpected cravings!
- → Can I add other toppings to my Mummy Mini Pizzas?
Totally! Just remember to keep it light so the mummy bandages show. Cooked crumbled sausage, tiny bits of bell pepper, or even finely chopped mushrooms could work. Just ensure they’re small enough not to overwhelm the mummy design. Experiment and have fun!

Spooky Mummy Mini Pizzas: Easy Halloween Party Bites
- Prep Time: 20 Minutes
- Cook Time: 10 Minutes
- Total Time: 30 Minutes
- Yield: 12-16 Mini Pizzas 1x
- Category: Dessert
Description
Whip up fun Mummy Mini Pizzas for Halloween! These easy, spooky party bites are perfect for kids and adults, with a quick prep and cheesy goodness.
Ingredients
- Base Ingredients:
- 6–8 English Muffins or Mini Pizza Bases (split)
- 1/2 cup Pizza Sauce
- Flavor Boosters:
- 8 oz Mozzarella Cheese (low-moisture, block, cut into strips)
- 1/4 cup Black Olives (pitted, sliced in half)
- Optional Extras:
- 1/4 cup Mini Pepperoni or cooked crumbled sausage
- 1/2 tsp Dried Oregano
Instructions
- Prep Your Bases:: First things first, get those English muffins or mini pizza bases ready. If you’re using muffins, gently split them in half with a fork – that creates all those nooks and crannies for the sauce to nestle into. I usually toast them lightly first in the toaster or a dry pan; it helps prevent them from getting soggy later. Honestly, this is a step I often skip when I’m in a rush, and I always regret it a little bit when the crust isn’t quite as crisp as I like. Don’t be like me, take the extra minute!
- Sauce It Up:: Now for the sauce! Spoon a generous tablespoon or two of pizza sauce onto each muffin half or mini base. Spread it out evenly, almost to the edges, but leave a tiny border. I sometimes get a bit heavy-handed with the sauce, and then it bubbles over in the oven, making a sticky mess on the baking sheet. Learn from my oops moment: a little less sauce means a happier, cleaner baking experience. You want a good base, not a swimming pool for your mummy.
- The Mummy’s Inner Layer (Optional):: If you’re adding any pepperoni or sausage, now’s the time! Lay a few mini pepperonis or sprinkle some cooked sausage crumbles over the sauce. Don’t go wild here; remember, the cheese strips need space to shine as the mummy’s bandages. I once loaded these up with too much stuff, and the cheese just slid right off, ruining the mummy effect. Keep it sparse, but impactful!
- Bandage Time for Mummy Mini Pizzas:: This is the fun part! Take your mozzarella strips and lay them across the sauce, crisscrossing them like mummy bandages. Leave a small gap near the top for the eyes. Don’t worry about them being perfectly straight; a little wonkiness just adds to the spooky charm, honestly. I usually do about 3-4 strips per mini pizza, varying the angles. It smells like pure potential right now, a promise of cheesy goodness!
- Eyes On The Prize:: Place two black olive halves in the gap you left near the top, creating the mummy’s eyes. This is where your Mummy Mini Pizzas truly come to life! Sometimes, the olives roll off before baking, so just gently press them into the cheese a little. I once tried using thinly sliced green peppers for eyes, and while they tasted fine, they just didn’t give that distinct, slightly creepy mummy vibe. Stick to the olives, trust me.
- Bake and Serve Your Mummy Mini Pizzas:: Pop your baking sheets into the preheated oven and bake for about 8-10 minutes, or until the cheese is melted, bubbly, and slightly golden at the edges. Keep an eye on them, because ovens vary! The smell of baking cheese and warm bread is just heavenly. Once they’re out, let them cool for a minute or two before serving. They’ll be hot, but oh-so-worth-it. The final result should be a perfectly spooky, cheesy bite, ready for your Halloween bash!


