
Introduction to Mini Loaf Pan Desserts
There’s something magical about the aroma of freshly baked treats wafting through the kitchen. I recall the first time I discovered my love for baking mini loaf pan desserts; it was a chilly afternoon, and I was juggling work calls and my kids’ soccer practice. With a mini loaf pan in hand, I whipped up a batch of sweet banana bread that filled the house with warmth and comfort. Whether you’re looking for a quick snack or a delightful dessert to share, mini loaf pan desserts are your new best friend. These charming little loaves pack big flavor in a compact form, making them excellent for any occasion.
What I adore about mini loaf pan desserts is their versatility. From classic chocolate chip to seasonal pumpkin spice, these treats can cater to every palate. Perfectly portioned, they’re great for sharing or enjoying solo. Plus, they bake faster than traditional loaves, saving you precious time. So, roll up your sleeves and get ready to enjoy in the world of mini loaf pan desserts-where every bite is a little moment of joy!

Why You’ll Love This Mini Loaf Pan Desserts
Imagine walking into your kitchen after a long day, the aroma of freshly baked Mini Loaf Pan Desserts wrapping around you like a warm hug. Whether you’re juggling work calls or soccer practice, this recipe is your new best friend. These delightful mini treats are not just quick to make; they’re a celebration of flavor and nostalgia in a convenient size. No more 6 PM panic-dinner’s ready faster than a microwave meal, and the best part? They fit perfectly in lunchboxes or as an after-school snack.
This dish is like a cozy blanket for your taste buds. Each slice offers a moist, tender crumb that’s bursting with flavor, making it an instant hit with family and friends. Not only does it save time, but it also allows for endless creativity-think about all the flavor combinations you can whip up! From rich chocolate to zesty lemon, the possibilities are as varied as your cravings. Plus, mini loaf pans are ideal for portion control, allowing you to enjoy without going overboard. Treat yourself to a little slice of happiness today with these Mini Loaf Pan Desserts!
Ingredients for Mini Loaf Pan Desserts
Print
Mini Loaf Pan Desserts That Will Delight Your Taste Buds!
- Prep Time: 15 minutes
- Cook Time: 25 minutes
- Total Time: 40 minutes
- Yield: 4 mini loaves 1x
- Category: Dessert
- Cuisine: American
Description
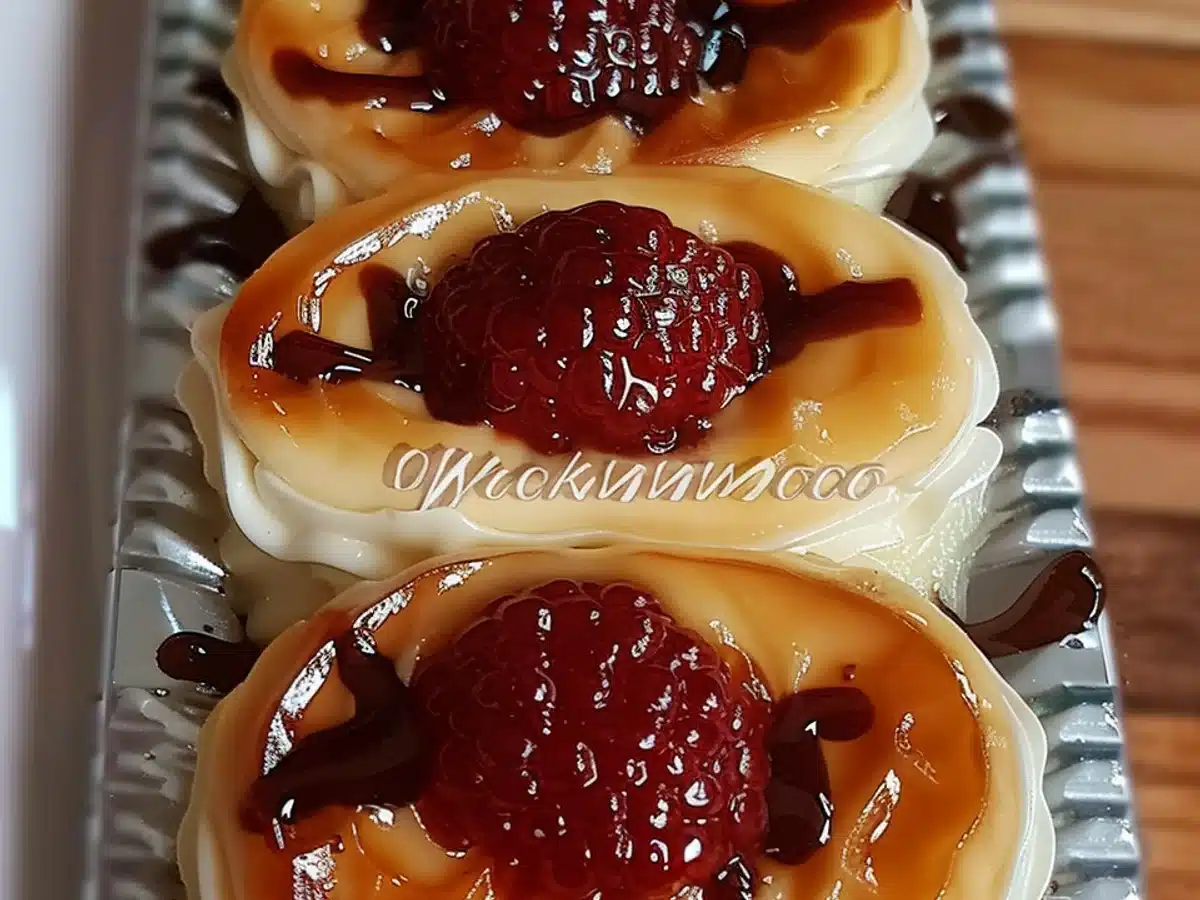
Delightful mini loaf pan desserts that are perfect for any occasion and sure to please any sweet tooth.
Ingredients
- 1 cup all-purpose flour
- 1/2 cup sugar
- 1/4 cup unsalted butter, softened
- 2 large eggs
- 1/2 cup milk
- 1 tsp vanilla extract
- 1/2 tsp baking powder
- 1/4 tsp salt
- 1/2 cup chocolate chips (optional)
Instructions
- Preheat your oven to 350°F (175°C).
- In a mixing bowl, cream together the butter and sugar until light and fluffy.
- Add the eggs one at a time, mixing well after each addition.
- Stir in the milk and vanilla extract.
- In another bowl, whisk together the flour, baking powder, and salt.
- Gradually add the dry ingredients to the wet mixture, stirring until just combined.
- If desired, fold in the chocolate chips.
- Pour the batter into greased mini loaf pans, filling each about 2/3 full.
- Bake for 20-25 minutes, or until a toothpick inserted into the center comes out clean.
- Allow to cool in the pans for 10 minutes before transferring to a wire rack to cool completely.
Notes
- These mini loaves can be frozen for up to 3 months.
- Feel free to add nuts or dried fruits for variation.
- For a healthier option, substitute half of the all-purpose flour with whole wheat flour.
Nutrition
- Serving Size: 1 mini loaf
- Calories: 180
- Sugar: 10g
- Sodium: 150mg
- Fat: 7g
- Saturated Fat: 4g
- Carbohydrates: 25g
- Fiber: 1g
- Protein: 3g
- Cholesterol: 50mg
When it comes to crafting tasty Mini Loaf Pan Desserts, the right ingredients are your secret weapons. Picture this: a warm, fragrant loaf fresh out of the oven, filling your kitchen with irresistible aromas. Whether you’re juggling work calls or soccer practice, having these ingredients on hand makes whipping up these delightful treats a breeze.
Start with the basics. You’ll need all-purpose flour, which gives your mini loaves that excellent structure and texture. As for sugar, it sweetens the deal, creating a lovely balance in flavor. Don’t forget eggs, a crucial binding agent that helps everything stick together nicely. Next, grab your favorite butter-it brings a rich, creamy taste that elevates your dessert to the next level. Finally, a splash of vanilla extract adds warmth and depth, turning simple batter into something magical.
Want to get creative? Consider adding chocolate chips or nuts for a delightful crunch. If you’re feeling adventurous, swap in coconut flakes for a tropical twist. Not a fan of dairy? Applesauce can replace butter for a lighter version-your secret’s safe with me! Additionally, fresh fruits like blueberries or bananas can bring a burst of flavor and moisture to your mini loaf pan desserts.
Keep in mind that having a variety of ingredients allows you to tailor your mini loaves to fit any occasion or craving. With this selection, your kitchen will be a playground for tasty possibilities!
How to Make Mini Loaf Pan Desserts
Creating delightful Mini Loaf Pan Desserts is a breeze, even for those who feel they lack baking skills. Let’s dive into the steps that will transform simple ingredients into adorable, tasty treats. Whether you’re juggling work calls or soccer practice, this recipe is your new best friend. Plus, the charming presentation of these mini loaves makes them excellent for sharing-or keeping all to yourself!
- Preheat Your Oven
Start by preheating your oven to 350°F (175°C). This step is crucial because it ensures your Mini Loaf Pan Desserts bake evenly. While waiting, you can prepare your ingredients and get everything organized. - Prepare the Mini Loaf Pans
Grease your mini loaf pans with a little butter or non-stick spray. This will prevent your desserts from sticking and make cleanup a breeze. If you prefer to use parchment paper, cut it to fit each pan for extra protection. - Mix the Batter
In a large mixing bowl, combine your dry ingredients first-like flour, sugar, and baking powder. Then, in another bowl, whisk together the wet ingredients, such as eggs, milk, and melted butter. Slowly fold the wet mixture into the dry ingredients until combined. Remember, a few lumps are okay-overmixing can lead to dense loaves! - Add Flavor
This is where you can get creative! Consider folding in chocolate chips, nuts, or dried fruit for added texture and flavor. If you’re feeling adventurous, a splash of vanilla extract or a sprinkle of cinnamon can elevate your Mini Loaf Pan Desserts to a whole new level. - Fill the Pans
Evenly distribute the batter among the greased mini loaf pans, filling each about two-thirds full. This allows room for the batter to rise without overflowing. Use a spatula to smooth the tops for an even bake. - Bake
Place the filled pans in your preheated oven and bake for about 25-30 minutes. The exact time may vary, so keep an eye on them! You’ll know they’re done when a toothpick inserted in the center comes out clean. The aroma wafting through your kitchen will be hard to resist! - Cool and Serve
Once baked, remove the pans from the oven and let them cool for about 10 minutes. Then, carefully transfer the mini loaves to a wire rack to cool completely. This step is important to ensure the texture is just right. Enjoy your Mini Loaf Pan Desserts warm or at room temperature!
With these simple steps, you’ll have a batch of tasty Mini Loaf Pan Desserts ready to impress family and friends. Get ready for compliments, because these treats are as delightful to taste as they are to see!
Tips for Success
Achieving the ideal Mini Loaf Pan Desserts is all about the little details. Whether you’re a seasoned baker or just starting out, these tips will help you elevate your creations. Remember, the journey to dessert perfection is just as sweet as the end result!
- Use a good quality non-stick spray or line your pans with parchment paper. This ensures your mini loaves slide out easily.
- Don’t overfill the pans. Leave about a half-inch of space at the top for the batter to rise without overflowing.
- Rotate the pans halfway through baking. This promotes even cooking and helps avoid any hot spots in your oven.
- Check for doneness by inserting a toothpick in the center. It should come out clean, signaling your Mini Loaf Pan Desserts are ready.
- Let them cool in the pan for a few minutes, then transfer to a wire rack. Cooling too quickly can lead to sogginess.
- Experiment with flavors. Add nuts, chocolate chips, or dried fruits to make your Mini Loaf Pan Desserts uniquely yours!
With these tips in hand, you’ll be well on your way to creating delectable Mini Loaf Pan Desserts that impress family and friends alike. Happy baking!
Equipment Needed
When diving into the delightful world of Mini Loaf Pan Desserts, having the right equipment can make your baking experience smooth and enjoyable. Whether you’re a seasoned baker or just starting out, these essential tools will guide you through the process.
- Mini loaf pans: A must-have for this recipe. If you don’t have them, a standard muffin tin works too-just adjust the baking time!
- Mixing bowls: Use a variety of sizes for mixing your batter. A large bowl is excellent for combining dry ingredients, while a medium one is great for wet ones.
- Measuring cups and spoons: Accurate measurements ensure your Mini Loaf Pan Desserts turn out just right. No need for fancy gadgets-standard sets will do!
- Rubber spatula: This tool is essential for scraping down the sides of your bowl and mixing ingredients thoroughly. A spoon will work in a pinch, but a spatula is a game changer!
- Whisk: A handy tool for blending your wet ingredients. If you’re in a hurry, a fork can get the job done as well!
With these tools on hand, you’re ready to whip up some tasty Mini Loaf Pan Desserts that will impress everyone!
Variations
When it comes to Mini Loaf Pan Desserts, the possibilities are practically endless! Whether you’re looking to accommodate dietary needs or just want to switch things up, these variations will inspire your creativity in the kitchen. Let’s dive into some tasty adaptations!
- Dietary-Friendly Tweaks: Swap traditional ingredients for alternatives that cater to different diets. For instance, use almond flour instead of all-purpose flour for a gluten-free option. Your gluten-sensitive friends will be thanking you!
- For the Dairy-Free Crowd: Replace regular milk with coconut milk. This simple change adds a rich, creamy flavor that everyone will love, especially those avoiding dairy.
- Seasonal Twists: Embrace seasonal ingredients! In the fall, add roasted pumpkin or butternut squash to your batter. It infuses the dessert with warmth and nostalgia, making it like Thanksgiving in a loaf.
- Fruit-Filled Delights: Incorporate fresh or dried fruits. Blueberries and apples add moisture and natural sweetness, while nuts like walnuts or pecans give a satisfying crunch.
- Indulgent Add-ins: If you’re looking for something a bit more decadent, consider adding chocolate chips or swirls of caramel. These treats will transform your Mini Loaf Pan Desserts into something truly irresistible.
- Spice it Up: Experiment with spices! A dash of cinnamon or nutmeg can elevate the flavor profile, making your dessert feel warm and inviting.
- Mini Loaf Pan Desserts for Special Occasions: Consider making themed versions for holidays. Peppermint extract for Christmas or lemon zest for summer gatherings can add a festive touch that delights your guests.
With these variations, your Mini Loaf Pan Desserts can be tailored to fit any occasion or dietary preference. So, grab your mini loaf pan and start experimenting!


