
Honestly, I remember the first time I made Malibu Chicken. It was one of those weeknights, chaos reigning, kids doing homework at the kitchen counter, and I just wanted something comforting, something that felt a little special without being a huge fuss. I’d seen the recipe floating around, and I thought, “Why not?” The smells that filled my kitchen as that chicken sizzled? Pure magic. It brought back memories of those old-school diner meals, but way better, because it was my kitchen, my mess, and my happy family waiting. This dish, with its crispy coating and gooey, cheesy center, just makes everyone happy.
The first time I tried to bread the chicken, I swear, flour ended up on the ceiling. No joke. I was juggling the chicken cutlets, trying to keep one hand dry, one hand wet, and somehow managed to flick flour straight up! My husband just laughed, bless his heart. But you know what? Even with the slight kitchen disaster, that Malibu Chicken still came out golden and delicious. It was a messy triumph, and it’s been a family favorite ever since.

Ingredients
Main Ingredients
- Boneless, Skinless Chicken Breasts: We’re going for about 1.5 lbs, sliced thin or pounded. I find four pieces usually works. Don’t skip the pounding part, it helps them cook evenly and get super tender.
- Thin-Sliced Ham: About 4-6 slices, depending on how big your chicken pieces are. I like a good quality deli ham, not too salty. It adds that perfect savory layer.
- Swiss Cheese: 4-6 slices. This is crucial for that gooey, melty center. Don’t use anything pre-shredded here, it just doesn’t melt the same, trust me.
Coating & Frying
- All-Purpose Flour: About half a cup. This is your first layer for that beautiful crisp. I always keep a big bag in my pantry, it’s a kitchen staple!
- Large Eggs: Two, whisked well. This is the glue! I didn’t expect how much difference fresh eggs make, but they do.
- Panko Breadcrumbs: One cup. Panko gives you that extra crunch we’re chasing. Regular breadcrumbs work, but panko is my secret weapon for serious crispiness.
- Vegetable Oil: Enough for shallow frying, maybe 1/2 to 3/4 cup. You want enough to come up about halfway on the chicken.
Flavor Boosters
- Garlic Powder: A teaspoon. Everything’s better with garlic, right? It just adds that little something extra to the breading.
- Onion Powder: Half a teaspoon. Complements the garlic, brings a deeper savory note.
- Salt & Black Pepper: To taste, for seasoning the chicken and the breading. Don’t be shy, but don’t overdo it!
Instructions
- Prep the Chicken:
- First things first, let’s get those chicken breasts ready! I like to slice each breast in half horizontally to make thinner cutlets, then place them between two sheets of plastic wrap. Grab your meat mallet or a heavy pan if you’re like me and can never find the mallet and pound them to about 1/4 to 1/2 inch thick. This step is key for even cooking and tender chicken, honestly. Season both sides with a good sprinkle of salt and pepper. I always forget to salt them properly at this stage, so don’t be like me!
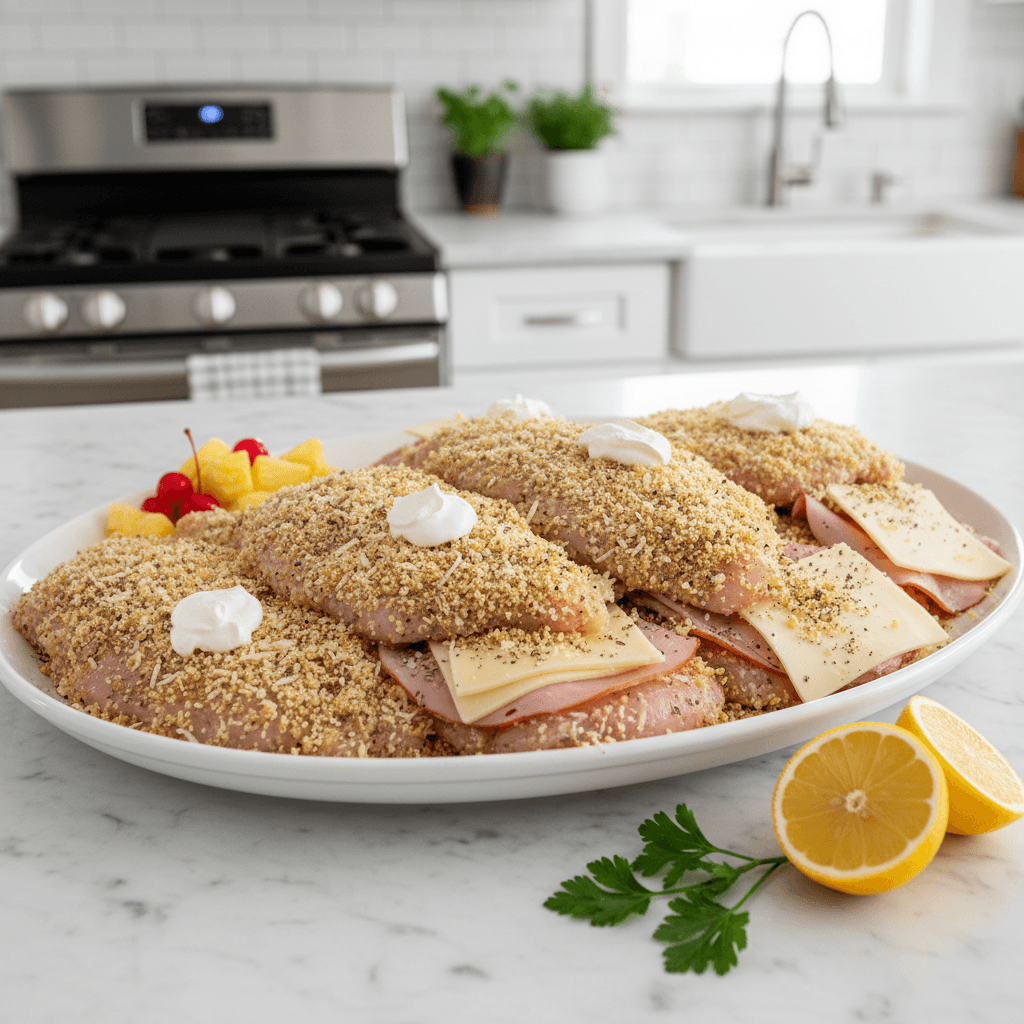
- Assemble the Malibu Chicken:
- Now for the fun part! Lay out your pounded chicken cutlets. On one half of each piece, layer a slice of ham, then a slice of Swiss cheese. Fold the other half of the chicken over, like a little edible parcel, and gently press the edges to seal. You want these little pockets of cheesy goodness to stay tucked in. I once tried to overstuff them, and the cheese just oozed out everywhere during frying a delicious mess, but not what we’re aiming for here!
- Set Up Breading Stations:
- Time to get messy! Grab three shallow dishes. In the first, put your all-purpose flour. In the second, whisk those two large eggs until they’re nice and uniform. In the third, combine the Panko breadcrumbs with the garlic powder, onion powder, a pinch of salt, and some fresh black pepper. Mix it all up. This is where the magic happens for that crispy coating. I always tell myself I’ll keep one hand dry, one hand wet, but by the end, both are usually covered, haha!
- Bread the Chicken:
- Take each chicken parcel and dredge it first in the flour, making sure it’s fully coated. Shake off any excess. Next, dip it into the egg wash, letting any extra drip off. Finally, press it firmly into the Panko mixture, ensuring every inch is covered. This is where you really build that crispy exterior. I usually do this in batches, setting the breaded chicken on a clean plate while I heat the oil. It smells so good even before it hits the pan!
- Fry the Malibu Chicken:
- Heat your vegetable oil in a large skillet over medium-high heat. You want it shimmering, around 350°F (175°C). Carefully place the breaded chicken into the hot oil, making sure not to overcrowd the pan. Cook for about 4-6 minutes on each side, until the chicken is golden brown and cooked through, and the cheese is beautifully melted inside. The kitchen gets so fragrant at this point, honestly, it’s hard to wait!
- Finish and Serve:
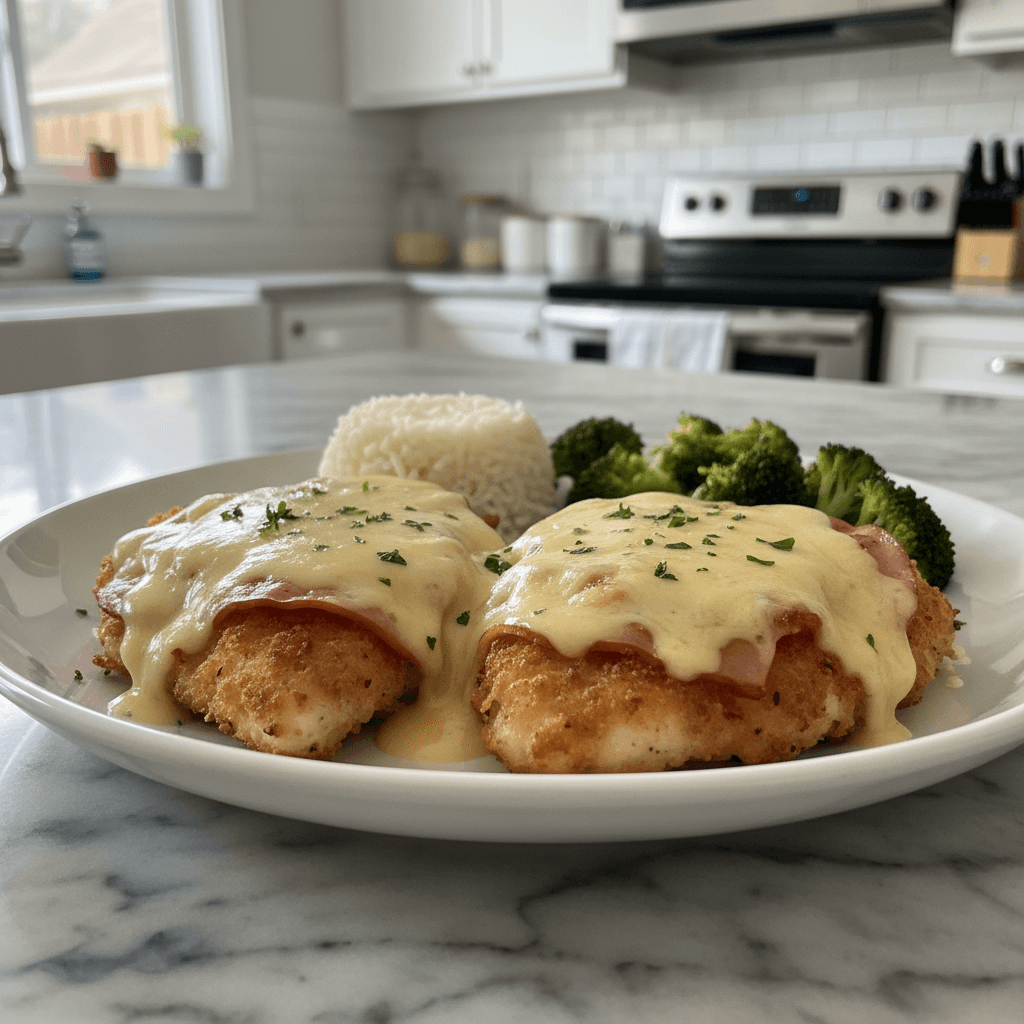
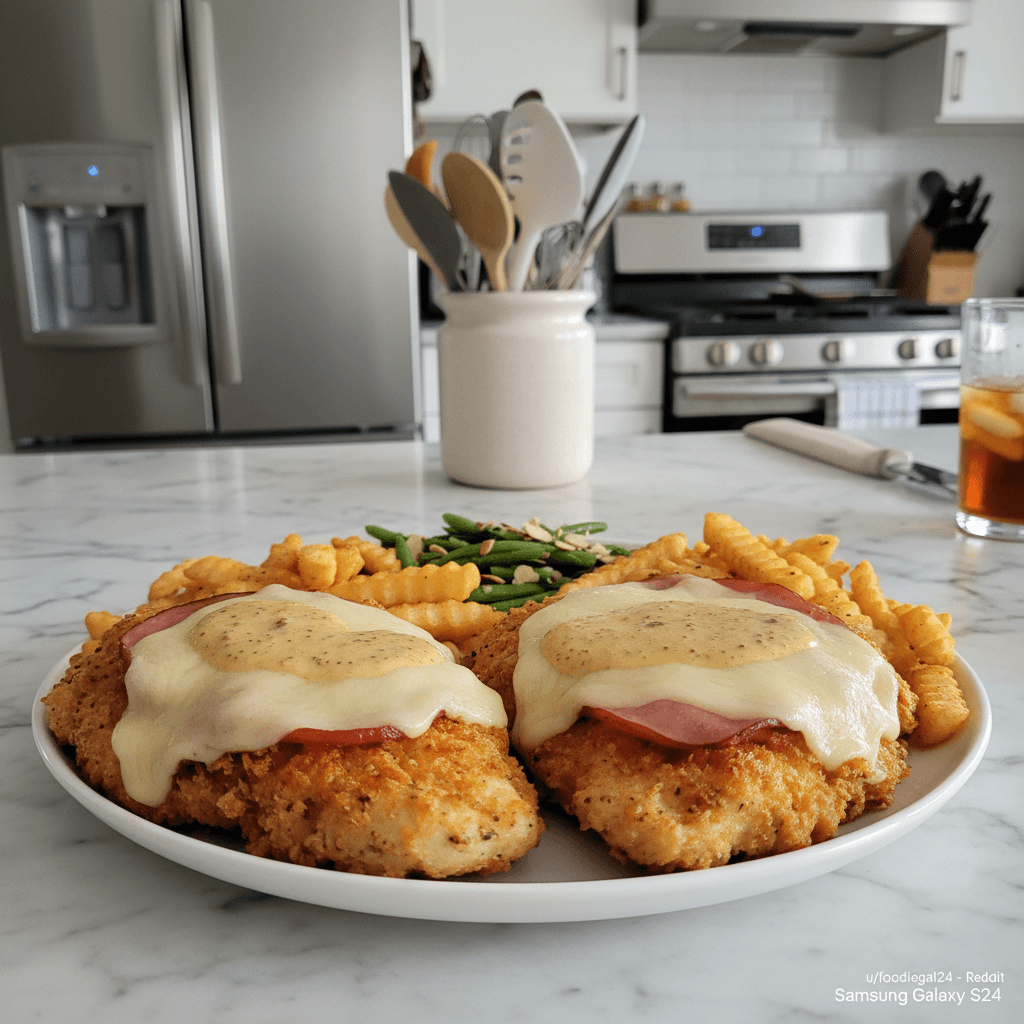
- Once your Malibu Chicken is golden and crispy, carefully remove it from the skillet and place it on a wire rack set over a baking sheet to drain any excess oil. This helps keep it from getting soggy. Let it rest for a few minutes that’s the hardest part, I know! before serving. The chicken should be perfectly cooked, the ham warm, and the Swiss cheese gloriously gooey. It’s a sight to behold, and the first bite? Pure comfort.
I remember one time I got a little too ambitious and tried to fry all the chicken at once. The oil cooled down, and the chicken ended up a bit soggy, not the crispy dream I was going for. Oops! From then on, I always fry in batches. It might take a minute longer, but the payoff of that perfect crunch is so worth it. This Malibu Chicken just brings a smile to my face every single time.
Storage Tips for Malibu Chicken
Okay, so if you happen to have any leftover Malibu Chicken which, let’s be real, is a rare occurrence in my house! you can store it in an airtight container in the fridge for up to 3 days. Reheating is where it gets tricky. I microwaved it once, and the sauce separated a little, and the breading lost its crisp, so don’t do that lol. My favorite way to reheat is in the oven or air fryer. Pop it back into a preheated oven at 350°F (175°C) for about 10-15 minutes, or until warmed through and crispy again. The air fryer works even better, about 5-7 minutes at 375°F (190°C). It truly helps bring back that lovely crunch.
Malibu Chicken Ingredient Substitutions
Life happens, right? Sometimes you don’t have exactly what the recipe calls for. I’ve tried a few swaps with this Malibu Chicken, and here’s what worked (and kinda worked). If you’re out of Swiss cheese, provolone or even a mild white cheddar can step in, though the flavor profile will shift a bit. I tried mozzarella once, and it was good, but not quite the same classic taste. For the ham, sliced turkey or even prosciutto could work for a different twist. I haven’t tried bacon, but that could be interesting! As for the breading, if you don’t have Panko, regular breadcrumbs are fine, but you’ll lose a little of that superior crunch. Gluten-free breadcrumbs are also a good option if you need them, I’ve used them for friends and they turned out great.
Serving Suggestions for Malibu Chicken
This Malibu Chicken is so satisfying on its own, but a good side can elevate it, honestly. For a complete meal, I love serving it with a simple side of steamed green beans or asparagus, maybe a light lemon vinaigrette. Or, if I’m feeling extra, some creamy mashed potatoes or a wild rice pilaf. For drinks, a crisp white wine like a Sauvignon Blanc or even just a tall glass of iced tea would be perfect. And for a cozy night in? This dish and a rom-com? Yes please. It’s that kind of comforting meal that just makes you want to snuggle up.
Cultural Backstory
While the exact origins of Malibu Chicken are a little fuzzy, it seems to have emerged from that wonderful era of American comfort food, often seen on diner menus or as a specialty dish in casual restaurants. It’s a playful take on classic chicken cordon bleu, simplifying it a bit and giving it that laid-back, almost Californian vibe, hence the “Malibu” name. For me, it became special because it was one of those recipes that felt achievable and exciting when I was first starting to really cook for my family. It felt like a little piece of culinary adventure right in my own kitchen, without having to be a fancy chef. It’s a testament to how simple ingredients can create something truly memorable and comforting.
Honestly, getting the oil temperature just right is a game-changer for crispy Malibu Chicken, too low, and it’s greasy, too high, and it burns. Trust your instincts on that! And for a little mood-based tweak, sometimes I’ll sprinkle a tiny bit of smoked paprika into the breadcrumbs for an extra layer of flavor. It just adds a little warmth. This Malibu Chicken turned out so perfectly this time, golden and juicy. I really hope you try it and make your own kitchen memories!
Frequently Asked Questions
- → Can I bake this Malibu Chicken instead of frying?
You can! I’ve done it when I’m trying to avoid the mess of frying. Bake at 375°F (190°C) for 20-25 minutes, or until cooked through. It won’t be quite as crispy, but still delicious, honestly!
- → What kind of ham works best for Malibu Chicken?
I recommend a good quality, thin-sliced deli ham, like Black Forest or honey ham. Avoid super thick slices, they can make the chicken harder to fold. I tried a really salty ham once, and it overpowered the dish, oops!
- → How do I prevent the cheese from oozing out?
The trick is not to overstuff the chicken and to press the edges firmly to seal. Also, make sure your oil is hot enough for frying, this helps create a quick crust that locks everything in. I’ve had many cheesy escapes, believe me!
- → Can I prep Malibu Chicken ahead of time?
You can definitely bread the chicken ahead! I usually bread it and then place it on a plate, covered, in the fridge for a few hours. It helps the breading adhere better. Just don’t let it sit too long, or it might get soggy.
- → What else can I stuff inside this Malibu Chicken?
Oh, the possibilities! Sometimes I add a thin slice of roasted red pepper or a few spinach leaves with the ham and cheese. I even tried a little mustard spread once for a tangy kick, and it was a pleasant surprise. Experiment away!

Crispy Malibu Chicken: Cheesy Dinner Idea
- Prep Time: 20 Minutes
- Cook Time: 25 Minutes
- Total Time: 45 Minutes
- Yield: 4 Servings 1x
- Category: AllRecipes
Description
Try my crispy Malibu Chicken recipe! Golden fried chicken, ham, and Swiss cheese for a comforting, easy dinner.
Ingredients
- Main Ingredients:
- 1.5 lbs boneless, skinless chicken breasts (4 pieces, pounded thin)
- 4–6 slices thin-sliced ham
- 4–6 slices Swiss cheese
- Coating & Frying:
- 1/2 cup all-purpose flour
- 2 large eggs, whisked
- 1 cup Panko breadcrumbs
- 1/2 – 3/4 cup vegetable oil (for shallow frying)
- Flavor Boosters:
- 1 teaspoon garlic powder
- 1/2 teaspoon onion powder
- Salt, to taste
- Black pepper, to taste
Instructions
- Prep the Chicken:: First things first, let’s get those chicken breasts ready! I like to slice each breast in half horizontally to make thinner cutlets, then place them between two sheets of plastic wrap. Grab your meat mallet – or a heavy pan if you’re like me and can never find the mallet – and pound them to about 1/4 to 1/2 inch thick. This step is key for even cooking and tender chicken, honestly. Season both sides with a good sprinkle of salt and pepper. I always forget to salt them properly at this stage, so don’t be like me!
- Assemble the Malibu Chicken:: Now for the fun part! Lay out your pounded chicken cutlets. On one half of each piece, layer a slice of ham, then a slice of Swiss cheese. Fold the other half of the chicken over, like a little edible parcel, and gently press the edges to seal. You want these little pockets of cheesy goodness to stay tucked in. I once tried to overstuff them, and the cheese just oozed out everywhere during frying – a delicious mess, but not what we’re aiming for here!
- Set Up Breading Stations:: Time to get messy! Grab three shallow dishes. In the first, put your all-purpose flour. In the second, whisk those two large eggs until they’re nice and uniform. In the third, combine the Panko breadcrumbs with the garlic powder, onion powder, a pinch of salt, and some fresh black pepper. Mix it all up. This is where the magic happens for that crispy coating. I always tell myself I’ll keep one hand dry, one hand wet, but by the end, both are usually covered, haha!
- Bread the Chicken:: Take each chicken parcel and dredge it first in the flour, making sure it’s fully coated. Shake off any excess. Next, dip it into the egg wash, letting any extra drip off. Finally, press it firmly into the Panko mixture, ensuring every inch is covered. This is where you really build that crispy exterior. I usually do this in batches, setting the breaded chicken on a clean plate while I heat the oil. It smells so good even before it hits the pan!
- Fry the Malibu Chicken:: Heat your vegetable oil in a large skillet over medium-high heat. You want it shimmering, around 350°F (175°C). Carefully place the breaded chicken into the hot oil, making sure not to overcrowd the pan. Cook for about 4-6 minutes on each side, until the chicken is golden brown and cooked through, and the cheese is beautifully melted inside. The kitchen gets so fragrant at this point, honestly, it’s hard to wait!
- Finish and Serve:: Once your Malibu Chicken is golden and crispy, carefully remove it from the skillet and place it on a wire rack set over a baking sheet to drain any excess oil. This helps keep it from getting soggy. Let it rest for a few minutes – that’s the hardest part, I know! – before serving. The chicken should be perfectly cooked, the ham warm, and the Swiss cheese gloriously gooey. It’s a sight to behold, and the first bite? Pure comfort.


