
Introduction
Growing up in a coastal town, key lime pie was more than just dessert; it was a vibrant part of life. The tangy sweetness of the key limes, perfectly balanced with a creamy filling, always brought smiles to our family gatherings. Whether you’re juggling work calls or soccer practice, this recipe for Key Lime Pie Bars is your new best friend. With just a handful of ingredients and minimal prep time, you can whip up a batch that captures the essence of summer in every bite.
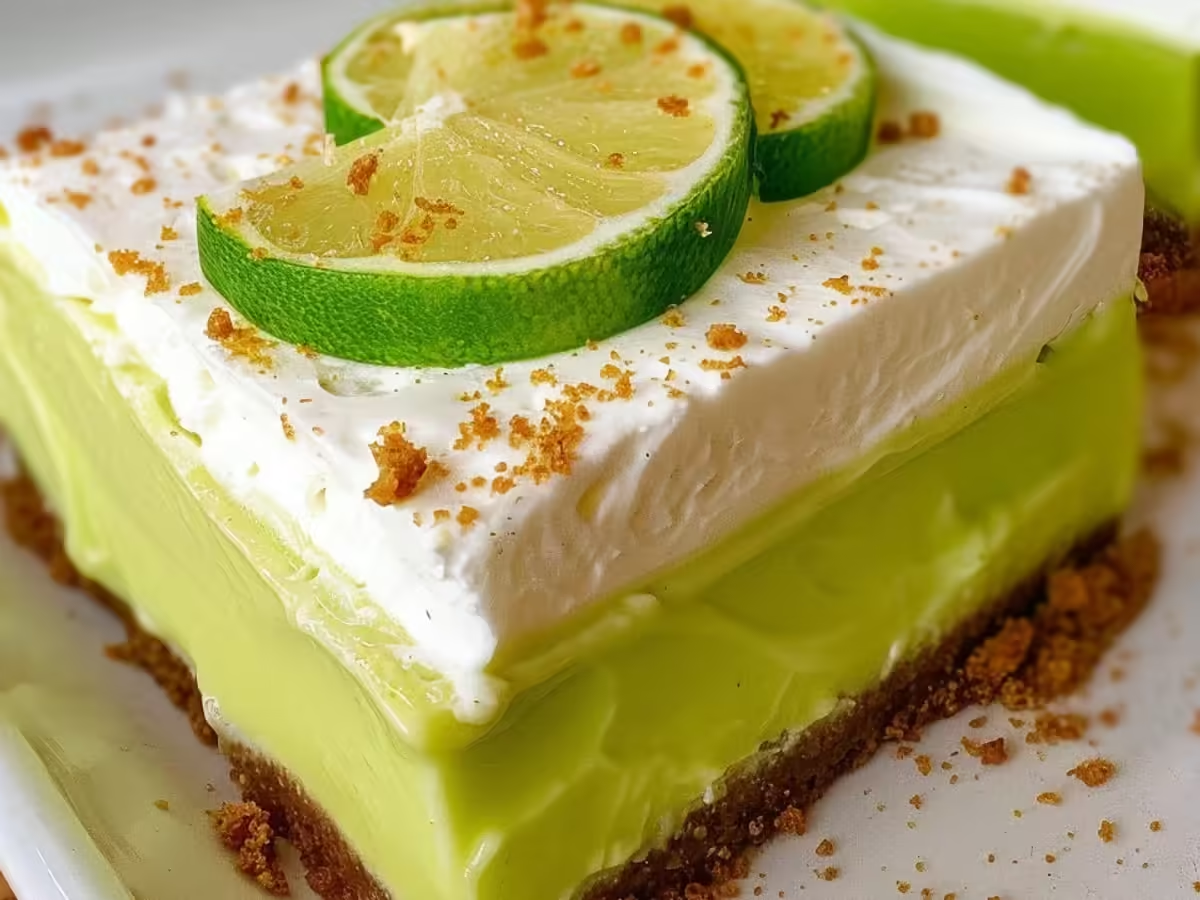
These bars combine the zesty flavor of key limes with a buttery graham cracker crust, creating a nice treat that’s both refreshing and indulgent. Picture yourself biting into a slice, the creamy filling melting in your mouth, while the crust adds a satisfying crunch. Perfect for parties, picnics, or simply treating yourself after a long day, Key Lime Pie Bars are a versatile dessert that can brighten any occasion. So, get ready to bring a taste of the tropics to your kitchen and impress your friends and family with this easy and delicious recipe!

Why You’ll Love treat yourself to in flavorful Key Lime Pie Bars for a Sweet Treat!
Imagine sinking your teeth into a luscious slice of Key Lime Pie Bars, where the tartness of fresh lime dances with the sweetness of a graham cracker crust. This dessert is like a summer vacation on a plate, capturing the essence of sun-kissed afternoons and ocean breezes. Whether you’re juggling work calls or soccer practice, this recipe is your new best friend, delivering a nice treat that can be whipped up in no time.
Not only does it save time, but it also satisfies that sweet tooth craving without the fuss of traditional pie-making. Gone are the days of wrestling with pie crusts and intricate baking techniques. These Key Lime Pie Bars are as straightforward as they are scrumptious, making them perfect for both novice bakers and seasoned pros. With each bite, you’ll experience creamy goodness and a burst of zesty flavor that elevates your dessert game.
Say goodbye to complicated recipes that leave you frazzled. These bars are your go-to solution for potlucks, family gatherings, or even a quiet night in. Treat yourself to this flavorful dessert that feels indulgent yet is surprisingly easy to make. Once you try them, you’ll wonder how you ever lived without this refreshing treat! Trust me—these Key Lime Pie Bars will become your new favorite dessert staple.
Ingredients For treat yourself to in flavorful Key Lime Pie Bars for a Sweet Treat!
When I first tasted Key Lime Pie bars at a friend’s summer barbecue, it was like sunshine on my palate. Those bright, tangy flavors instantly transported me to a tropical paradise. Now, I whip them up at home whenever I want to treat myself to something special. Whether you’re juggling work calls or soccer practice, this recipe for Key Lime Pie Bars is your new best friend. The ingredient list is as simple as it is nice, ensuring you can enjoy in this sweet treat without a fuss.
To create your own batch of Key Lime Pie Bars, gather these must-have ingredients:
- Graham cracker crumbs – They form the perfect crunchy base that cradles the creamy filling.
- Unsalted butter – This adds richness and helps bind the crust together beautifully.
- Sweetened condensed milk – A key player in creating that luscious, creamy texture.
- Key lime juice – Freshly squeezed, if possible, for that vibrant, zesty flavor.
- Eggs – They help set the filling for those perfectly chewy bars.
- Zest of key limes – This elevates the flavor and adds a pop of color.
- Granulated sugar – Just the right amount to balance the tartness of the lime.
If you’re feeling adventurous, consider these fun swaps and additions to make your Key Lime Pie Bars uniquely yours:
- Honey or maple syrup – Replace sugar for a more natural sweetness.
- Almond flour – Use it instead of graham cracker crumbs for a gluten-free crust.
- Whipped cream – Top your bars for an indulgent finish—because who doesn’t love a little extra creaminess?
These ingredients come together to create a dessert that is as refreshing as it is satisfying. The combination of creamy, tart filling resting on a crunchy, buttery crust makes these Key Lime Pie Bars a sweet treat you won’t forget! With just a few simple ingredients, you’ll be on your way to enjoying a slice of paradise right in your kitchen.
How To Make treat yourself to in flavorful Key Lime Pie Bars for a Sweet Treat!
There’s something magical about the zing of fresh lime juice that instantly transports me to sunny beaches, even during a dreary day. Making Key Lime Pie Bars is my go-to remedy for a sweet escape, and trust me, they’re worth every squeeze of that citrus goodness! Whether you’re juggling work calls or soccer practice, this recipe is your new best friend. The creamy filling and buttery crust create a nice contrast that will have your taste buds dancing with joy.
Let’s dive into the process of creating these zesty delights! First, you’ll want to gather your ingredients and get your workspace ready. The beauty of Key Lime Pie Bars lies in their simplicity. You can whip them up in no time, making them perfect for a last-minute dessert or a planned gathering. Get ready to impress your friends and family with this treat!
- Gather Your Ingredients: Start by collecting everything you need—from the zesty limes to the buttery graham cracker crumbs. Having everything in one spot will streamline your process and save you from any unexpected last-minute runs to the store.
- Preheat Your Oven: Set your oven to 350°F (175°C). This preheating step ensures your crust bakes evenly and becomes perfectly golden.
- Prepare Your Baking Dish: Grease a square baking dish with butter or line it with parchment paper for easy removal. This little trick will make serving your Key Lime Pie Bars a breeze!
- Crush the Graham Crackers: Place your graham crackers in a zip-top bag and crush them with a rolling pin until they resemble fine crumbs. It’s a great way to relieve stress while preparing for your baking adventure!
- Mix Ingredients: In a bowl, combine the graham cracker crumbs, melted butter, and a bit of sugar. Stir until everything is well blended—think of it as creating a sandy beach for your creamy filling to rest on.
- Press Into the Dish: Firmly press the mixture into the bottom of your prepared baking dish. Make sure it’s even, as a solid crust will hold those delicious fillings perfectly.
- Whisk the Ingredients: In a separate bowl, whisk together the sweetened condensed milk, lime juice, and egg yolks until smooth. As you mix, imagine the tropical flavors melding into a creamy dream.
- Pour Over the Crust: Gently pour the lime mixture over the crust, spreading it evenly. It’s like a sunny layer of happiness ready to bake!
- Bake to Perfection: Place your dish in the oven and bake for about 20 minutes, or until the filling is set. As it bakes, the sweet aroma of lime will fill your kitchen, beckoning everyone to gather around.
Once baked, allow the Key Lime Pie Bars to cool before chilling them in the refrigerator. This will enhance the flavors and give you that refreshing zing in every bite. Trust me, you’ll want to take your time with these bars, as the wait will only heighten the anticipation for that first slice of citrus enjoyment!
Expert Tips and Tricks
- Choose Fresh Ingredients: The quality of your ingredients can make or break your Key Lime Pie Bars. Opt for fresh key limes if possible; their zesty brightness transforms this dessert into something extraordinary.
- Get the Right Texture: For a creamier filling, ensure your cream cheese is at room temperature before mixing. This helps achieve that velvety smoothness that melts in your mouth.
- Chill for Best Results: After baking, let your Key Lime Pie Bars cool completely before chilling in the fridge. The longer they chill, the more the flavors mix together, making each bite a refreshing delight.
- Adjust Sweetness: Depending on your preference, feel free to tweak the sugar amount. A little less sugar can enhance the tanginess of the limes, making for a perfectly balanced treat.
- Garnish Like a Pro: A dollop of whipped cream and a sprinkle of lime zest can improve the presentation of your Key Lime Pie Bars. Not only does it look appealing, but it also adds a nice contrast in flavor.
- Use a Glass Baking Dish: For even baking, a glass dish is your best friend. It allows you to keep an eye on the browning process, ensuring your crust is perfectly golden.
- Make Ahead: These bars are perfect for prepping in advance. Make them a day ahead of your event; they’ll taste even better after resting overnight!
- Experiment with Crusts: While a traditional graham cracker crust is classic, try using crushed cookies like Oreos or gingersnaps for a unique twist on your Key Lime Pie Bars.
- Consider an Extra Zing: A splash of coconut cream can add a tropical flair to your bars, making them even more irresistible.
Equipment Needed
When it comes to whipping up a batch of nice Key Lime Pie Bars, having the right equipment can make all the difference. Whether you’re juggling work calls or soccer practice, this recipe is your new best friend, and being prepared is essential. The right tools will not only streamline the process but also ensure that your bars turn out perfectly every time. So, let’s gather what you need!
- 9×9-inch Baking Pan: A square pan is perfect for achieving those neat, sliceable bars. Look for one with straight edges to help create those clean lines.
- Parchment Paper: Lining your pan with parchment paper makes for easy removal and cleanup. Plus, it helps prevent sticking, ensuring your bars come out flawlessly.
- Mixing Bowls: You’ll need a couple of mixing bowls—one for the crust and another for the filling. Glass or stainless steel works best for easy mixing.
- Whisk: A sturdy whisk is essential for combining your filling ingredients until smooth. It’s like a magic wand for getting rid of lumps!
- Measuring Cups and Spoons: Precision is key in baking, so grab your measuring cups and spoons. They’ll help you nail the perfect ratios of ingredients.
- Microplane Zester: This handy tool helps you extract fresh lime zest, adding that zesty punch to your bars. Fresh zest can improve the taste immensely.
- Juicer: A simple hand juicer or citrus squeezer will allow you to get every last drop of juice from those limes. Trust me, fresh lime juice is a game changer!
- Cooling Rack: Once your bars are baked, a cooling rack will help them set perfectly, preventing sogginess from trapped steam.
Having these essential tools ready will set you up for success as you create your flavorful Key Lime Pie Bars. With the right equipment in hand, you can focus on the fun part—baking and enjoying this sweet treat!
Variations and Substitutions
When it comes to enhancing your treat yourself to in flavorful Key Lime Pie Bars for a Sweet Treat!, the possibilities are as diverse as your palate. Whether you’re looking to cater to dietary needs or simply want to mix things up, here are some fantastic variations and substitutions to consider:
- Dietary-Friendly Tweaks: If you’re cooking for a dairy-free crowd, swap out cream for coconut milk. This change not only keeps the dish creamy but also adds a hint of tropical goodness that will have everyone cheering!
- Gluten-Free Options: For a gluten-free version of treat yourself to in flavorful Key Lime Pie Bars for a Sweet Treat!, opt for gluten-free pasta or grains. Quinoa or rice can be nice substitutes that maintain the dish’s integrity while accommodating dietary restrictions.
- Protein Swaps: Not a tofu fan? Chicken or shrimp works too—your secret’s safe with me! This option provides a different taste while keeping the dish hearty and satisfying.
- Seasonal Twists: Embrace the seasons by adding roasted squash in fall. This addition brings a sweet, nutty flavor that’s like Thanksgiving in a bowl, making treat yourself to in flavorful Key Lime Pie Bars for a Sweet Treat! a comforting delight year-round.
- Herb Variations: Fresh basil adds a burst of summer, but feel free to experiment with herbs like thyme or parsley. Each herb brings its own unique flair to treat yourself to in flavorful Key Lime Pie Bars for a Sweet Treat!, letting you customize it to your taste.
- Vegetable Additions: Want to sneak in more veggies? Toss in some spinach or kale. These greens will not only enhance the dish’s nutrition but also add a splash of color that’s visually appealing.
- Nutty Flavor Boost: Add a handful of toasted nuts or seeds for a satisfying crunch. Almonds or sunflower seeds can improve the texture of treat yourself to in flavorful Key Lime Pie Bars for a Sweet Treat! while delivering healthy fats.
With these variations and substitutions, you can tailor treat yourself to in flavorful Key Lime Pie Bars for a Sweet Treat! to suit any occasion or dietary preference, ensuring it remains a favorite in your household!
Serving and Storage Suggestions
Once you’ve made this nice treat yourself to in flavorful Key Lime Pie Bars for a Sweet Treat!, you’ll want to savor every bite and share it with loved ones. Whether it’s a cozy weeknight dinner or a weekend gathering, the way you serve and store this dish can improve the experience. Here are some tips to ensure you enjoy your treat yourself to in flavorful Key Lime Pie Bars for a Sweet Treat! to its fullest potential.
- Serving Style: Present your treat yourself to in flavorful Key Lime Pie Bars for a Sweet Treat! in a beautiful serving dish, garnished with fresh herbs or a sprinkle of cheese. This simple touch transforms your meal from ordinary to extraordinary.
- Pairing Suggestions: Complement your dish with a side of garlic bread or a crisp salad. Think of these sides as the perfect accompaniments, enhancing every mouthful of your treat yourself to in flavorful Key Lime Pie Bars for a Sweet Treat!.
- Storage Tips: If you have leftovers, store them in an airtight container in the fridge. This keeps your treat yourself to in flavorful Key Lime Pie Bars for a Sweet Treat! fresh for up to three days, perfect for quick lunches or dinners.
- Freezing Options: For longer storage, freeze portions in resealable bags. Lay them flat in the freezer to save space. You’ll thank yourself later when a busy night calls for a quick meal—just reheat and enjoy!
- Reheating Advice: When it’s time to enjoy your leftovers, reheat gently on the stove or in the microwave. Stir occasionally to maintain the dish’s texture and keep it moist.
By following these serving and storage suggestions, you can maximize your enjoyment of the treat yourself to in flavorful Key Lime Pie Bars for a Sweet Treat! while minimizing food waste. Planning ahead means more delicious meals and less stress, allowing you to focus on what really matters—great food and great company!
Conclusion
At the end of the day, this recipe isn’t just dinner—it’s sanity saved. Whether you’re juggling work calls or soccer practice, treat yourself to in flavorful Key Lime Pie Bars for a Sweet Treat! is your new best friend, ready to bring comfort and deliciousness to your table. Imagine diving into a bowl of this dish, where each bite is a reminder of home-cooked warmth and love. You’ll find that it not only satisfies hunger but also nourishes the soul.
As you explore the world of treat yourself to in flavorful Key Lime Pie Bars for a Sweet Treat!, don’t hesitate to make it your own. Experiment with seasonal ingredients or tweak the flavors to match your family’s preferences. This dish is like a canvas; your creativity can turn it into a masterpiece that resonates with your taste buds. Plus, the joy of sharing a meal with loved ones makes it even more special.
So, gather your ingredients, put on some music, and let the aroma of treat yourself to in flavorful Key Lime Pie Bars for a Sweet Treat! fill your kitchen. You’ll soon realize that this simple recipe is a gateway to cherished memories and nice moments. Here’s to many delicious dinners ahead!
Print
treat yourself to in flavorful Key Lime Pie Bars for a Sweet Treat!
Description
Delight in these tangy and sweet Key Lime Pie Bars that offer a perfect balance of flavors with a buttery crust and creamy lime filling.
Ingredients
- 1 ½ cups graham cracker crumbs
- ½ cup unsalted butter, melted
- ⅓ cup granulated sugar
- 2 large eggs
- 1 can (14 ounces) sweetened condensed milk
- ½ cup fresh lime juice
- 1 tablespoon lime zest
- Pinch of salt
Instructions
- Preheat the oven to 350°F (175°C).
- In a bowl, combine graham cracker crumbs, melted butter, and sugar. Press the mixture into the bottom of a greased baking dish.
- Bake the crust for 10 minutes, then remove from the oven and let cool.
- In another bowl, whisk together the eggs, sweetened condensed milk, lime juice, lime zest, and salt until smooth.
- Pour the lime filling over the cooled crust and spread evenly.
- Bake for an additional 15-20 minutes until set.
- Let the bars cool to room temperature, then refrigerate for at least 2 hours before cutting into squares.
- Serve chilled and enjoy!
Notes
- For extra flavor, add more lime zest to the filling.
- These bars can be stored in the refrigerator for up to a week.
- Garnish with whipped cream or lime slices for a decorative touch.
Nutrition
- Serving Size: 1 bar
- Calories: 180
- Sugar: 15g
- Sodium: 90mg
- Fat: 8g
- Saturated Fat: 5g
- Unsaturated Fat: 2g
- Trans Fat: 0g
- Carbohydrates: 24g
- Fiber: 1g
- Protein: 2g
- Cholesterol: 30mg


