
There’s this crispness in the air, you know? The kind that makes you want to pull out your favorite worn-out sweater and maybe, just maybe, light a candle that smells like cinnamon and apples. For me, that feeling always brings me back to autumn afternoons at the local orchard, sipping on warm, spiced apple cider. Honestly, one year I had this wild idea: what if I could capture that exact cozy, tangy, sweet feeling in something cold and creamy? That’s how my journey to this Homemade Apple Cider Ice Cream Recipe began. My first attempt was… well, let’s just say it was more like a frozen apple slushie than ice cream. But after a few kitchen adventures (and a fair bit of cider-induced sugar rush), I finally landed on this recipe, and it’s pure magic. It’s got that nostalgic warmth but with a delightful chill, making it special and comforting.
I remember one time, trying to reduce the cider, I got distracted by a squirrel outside my window (don’t ask). The cider ended up a tad too thick, almost like apple syrup, and when I folded it into the base, it created these little chewy, intense apple pockets. It wasn’t what I planned, but honestly, it was a happy accident! My husband still asks for “the squirrel batch.” So, sometimes, a little kitchen chaos leads to something pretty special.

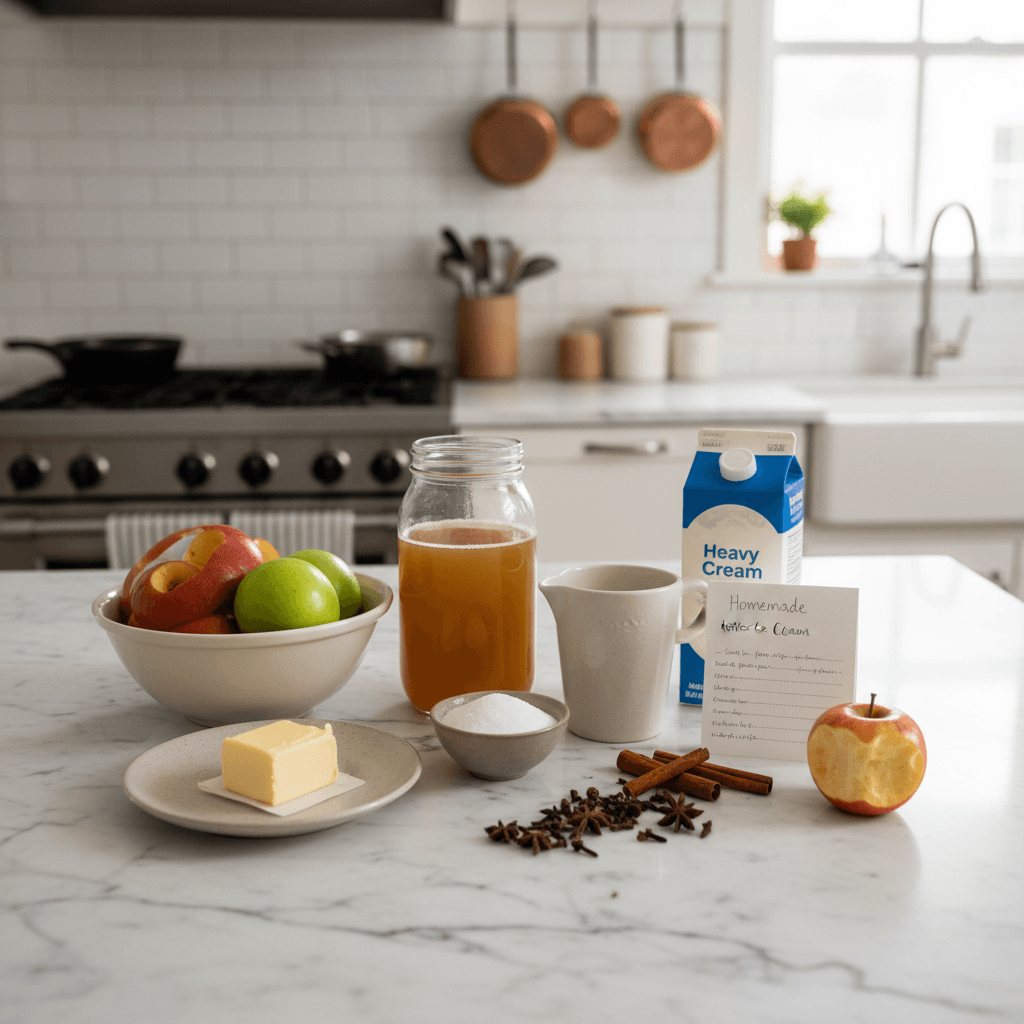
Ingredients for Homemade Apple Cider Ice Cream
- Heavy Cream: This is your base, your creamy dream. Don’t skimp here, hon. I tried once with a lighter cream, and it just didn’t have that luscious mouthfeel. You want that rich, velvety texture, trust me.
- Whole Milk: Balances the richness of the cream. Again, whole milk is key, anything less and your ice cream might get a bit icy, and nobody wants that.
Apple Cider (reduced): The star of the show! Reducing it concentrates that amazing apple flavor. I always look for a good quality, unfiltered cider it makes a huge difference. Don’t use apple juice, it’s just not the same depth of flavor.
Granulated Sugar: Sweetens and helps with the texture. I usually adjust this a bit depending on how sweet my cider is. A little less if the cider is super sweet, a little more if it’s tart.
Egg Yolks: These create a custard base, making the ice cream incredibly smooth and preventing it from becoming too icy. Yes, separating yolks can be messy, but it’s worth it. I once got a bit of white in there, and the custard was fine, so don’t fret too much!
- Cinnamon & Nutmeg: These spices give it that classic autumn warmth. Freshly grated nutmeg is a game-changer, honestly, the pre-ground stuff just can’t compete. I usually go a little heavier on the cinnamon because I just love it.
- Vanilla Extract: Just a touch rounds out all those lovely flavors. Use a good quality vanilla, it really shines through.
- A Pinch of Salt: Sounds weird for ice cream, right? But it actually enhances all the other flavors. Don’t skip it!
Crafting Your Homemade Apple Cider Ice Cream
- Reduce the Cider:
- First things first, grab your apple cider and pour it into a saucepan. You want to bring this to a simmer over medium heat and let it bubble away gently until it’s reduced by about half, maybe even two-thirds. This step, honestly, is where all that intense apple flavor comes from. It’ll take a good 20-30 minutes, and your kitchen will start smelling absolutely divine, like a fall festival in a pot. Keep an eye on it, stir it occasionally so it doesn’t scorch, and definitely don’t walk away like I did that one time with the squirrel it gets sticky fast!
- Make the Custard Base:
- While your cider is reducing, get another saucepan and whisk together the heavy cream, whole milk, about half of your sugar, cinnamon, nutmeg, and that little pinch of salt. Bring it to a gentle simmer over medium heat, just until you see tiny bubbles around the edges. Meanwhile, in a separate bowl, whisk your egg yolks with the remaining sugar until they’re pale and creamy. Now for the crucial part: temper those yolks! Slowly, and I mean slowly, drizzle about a cup of the hot cream mixture into the egg yolks, whisking constantly. This warms the yolks without scrambling them. I used to rush this, and oops, scrambled eggs for dessert! Don’t do that.
- Combine and Thicken:
- Once tempered, pour the egg yolk mixture back into the saucepan with the rest of the cream. Stir constantly over medium-low heat, using a wooden spoon or a heat-proof spatula, until the mixture thickens enough to coat the back of the spoon. This usually takes about 5-8 minutes. You’re looking for a custard consistency, not a pudding. The smell, oh, it’s just so rich and sweet! Don’t let it boil, or your custard might curdle. If you see it getting too hot, pull it off the heat for a moment. This is where patience pays off!
- Chill Out:
- Remove the custard from the heat and stir in your vanilla extract and the now-reduced apple cider. Give it a good whisk to combine everything beautifully. Now, this is important: you need to chill this mixture thoroughly. Pour it into a clean bowl, cover it with plastic wrap directly on the surface (this prevents a skin from forming), and pop it in the fridge for at least 4 hours, or even better, overnight. I’ve tried to rush this step, thinking “it’s cold enough,” and it just doesn’t churn as well. Seriously, don’t rush the chill, it makes all the difference for a smooth apple cider ice cream.
- Churn, Baby, Churn:
- Once your base is completely chilled, it’s time for the fun part! Get your ice cream maker ready according to its manufacturer’s instructions. Pour the cold ice cream base into the frozen bowl of your machine and churn it for about 20-25 minutes, or until it reaches the consistency of soft-serve ice cream. It’s so exciting to watch it transform! My machine sometimes makes a funny noise if the base isn’t cold enough, so I always double-check. Don’t be afraid to experiment with churning times, some machines are faster than others.
- Firm Up and Enjoy:
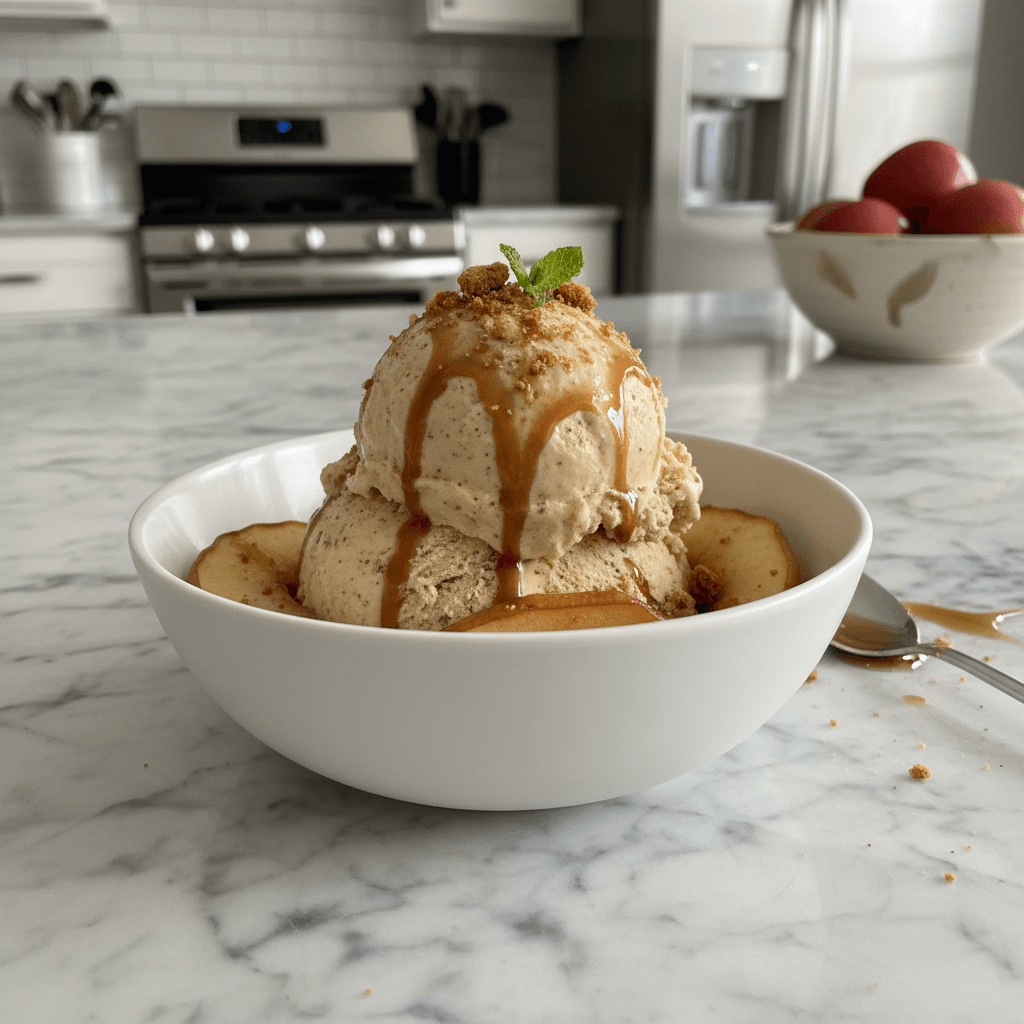
- Transfer your freshly churned apple cider ice cream into an airtight container. If you like it soft, you can eat it right away. But for a firmer, scoopable consistency, cover it and freeze it for another 2-4 hours. This waiting period is the hardest part, honestly! When it’s ready, it should look wonderfully creamy, smell like a dream, and taste like pure autumn happiness in a spoon. A little sprinkle of extra cinnamon or a drizzle of caramel makes it even better!
Making this recipe always brings a little bit of joyous chaos to my kitchen. There’s usually a splash of cider on the counter, a stray eggshell, and the delightful aroma of cinnamon hanging in the air. It’s not about being perfect, it’s about the process and the delicious reward at the end. Every scoop feels like a little hug, a taste of autumn, and a reminder of those sweet orchard memories.
Storage Tips for Homemade Apple Cider Ice Cream
Okay, so you’ve made this glorious Homemade Apple Cider Ice Cream Recipe, and now you want to save some (if there’s any left, that is!). The best way I’ve found to store it is in a shallow, airtight container. I usually press a piece of parchment paper or plastic wrap directly onto the surface of the ice cream before putting the lid on. This helps prevent those annoying ice crystals from forming and keeps it tasting fresh. I once just slapped a lid on it, and after a few days, it had this weird icy crust so don’t do that, lol. It’ll keep well in the freezer for about 2-3 weeks. Beyond that, the texture might start to degrade a bit, losing some of its creaminess. If it gets too hard, just let it sit on the counter for 5-10 minutes before scooping. It softens beautifully and tastes just as good as day one!
Ingredient Substitutions for Homemade Apple Cider Ice Cream
I’ve experimented a bit with this Homemade Apple Cider Ice Cream Recipe, and here’s what I’ve found. If you don’t have heavy cream, a combination of half-and-half and a little extra butter might work in a pinch, but honestly, the texture won’t be quite as rich. I tried it once, and it was… thinner, let’s say. For the spices, if you’re not a fan of nutmeg, you could totally swap it for a tiny pinch of ground ginger or even a touch of allspice for a different kind of warmth. I’ve also made a version with a splash of bourbon added to the cooled custard base before chilling oh my goodness, it adds such a lovely depth! Just a tablespoon or two, otherwise, it can get a bit boozy. You can also play with the sugar levels, if your cider is super sweet, feel free to reduce the granulated sugar by a tablespoon or two. It’s all about what tastes good to you!
Homemade Apple Cider Ice Cream Serving Ideas
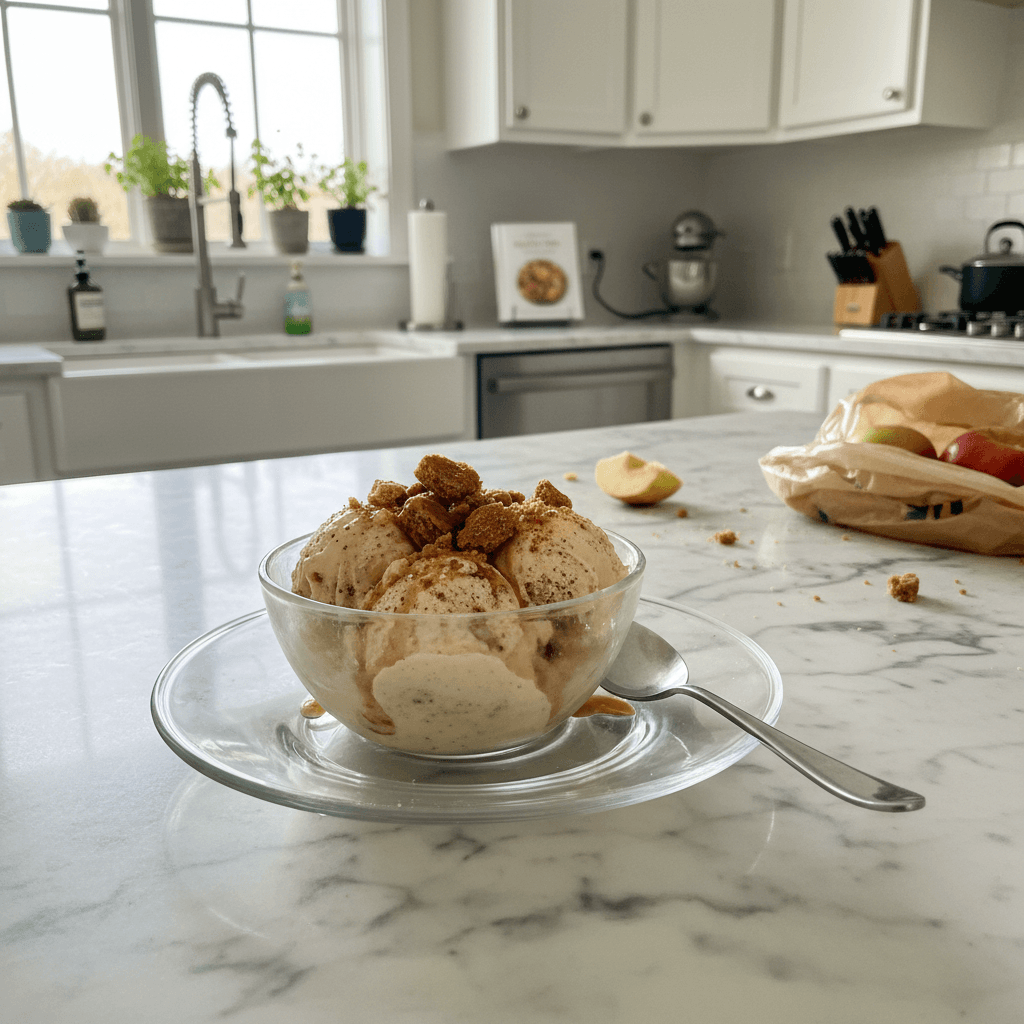
This Homemade Apple Cider Ice Cream Recipe is absolutely divine on its own, but oh, the possibilities! I love serving it with a warm slice of apple pie or even a simple apple crisp the hot and cold contrast is just chef’s kiss. A drizzle of homemade caramel sauce (or store-bought, no judgment here!) and a sprinkle of candied pecans takes it over the top. Honestly, it’s also amazing alongside some ginger snaps or shortbread cookies. For a truly indulgent experience, I’ve served it with a shot of espresso poured over it, making an impromptu affogato. And if you’re feeling extra, a tiny dollop of whipped cream and a cinnamon stick for garnish makes it feel super fancy. It’s perfect after a hearty fall dinner, or just as a pick-me-up on a lazy Sunday afternoon.
The Story Behind Homemade Apple Cider Ice Cream
Fall has always been my favorite season. The changing leaves, the cooler air, and especially, the annual trip to the apple orchard. My grandma used to make the most incredible spiced cider, simmering it all day, filling the house with this intoxicating aroma. This Homemade Apple Cider Ice Cream Recipe is my way of bottling up those cherished memories. It’s not a traditional ice cream flavor you find everywhere, which is part of its charm. It’s inspired by those simple, beautiful moments of autumn the joy of biting into a crisp apple, the warmth of a spiced drink, and the comfort of family gatherings. For me, it connects me back to my roots, to those early days of understanding how food can evoke such strong feelings and memories. It’s a taste of home, a taste of fall, and a taste of all the good things.
So there you have it, my Homemade Apple Cider Ice Cream Recipe. It’s a little bit of autumn sunshine, a little bit of spice, and a whole lot of creamy deliciousness. I honestly didn’t expect to love it as much as I do, but it’s become a staple in my fall kitchen. I hope you give it a try and maybe even make a few happy kitchen messes of your own. Don’t forget to tell me how your batch turns out!
Frequently Asked Questions About Homemade Apple Cider Ice Cream
- → Can I make this recipe without an ice cream maker?
You can! It’s a bit more work, but doable. Freeze the chilled base in a shallow pan, then every 30-45 minutes, whisk it vigorously to break up ice crystals, repeating for 3-4 hours. It won’t be quite as smooth, but still delicious, honestly.
- → What kind of apple cider should I use for this apple cider ice cream recipe?
I always go for an unfiltered, good quality apple cider. The cloudier, the better, in my opinion! Avoid anything labeled “apple juice” as it lacks the depth of flavor needed for this recipe. I once used a clear juice, and it was just… bland.
- → Why do I need to temper the egg yolks?
Tempering slowly raises the temperature of the egg yolks, preventing them from scrambling when added to the hot cream. It creates a smooth, stable custard. I learned this the hard way with a lumpy batch once, oops!
- → How long does this recipe last in the freezer?
Stored properly in an airtight container with plastic wrap pressed directly on the surface, this recipe will stay fresh and creamy for about 2-3 weeks. Beyond that, it might start to lose some texture, but it’s usually gone before then in my house!
- → Can I add other spices to this apple cider ice cream?
Absolutely! I’ve played around with a tiny bit of ground ginger or even a pinch of cardamom. You could also try a dash of allspice. Just start with a small amount and taste as you go, you can always add more, but you can’t take it away!

Homemade Apple Cider Ice Cream Recipe: Creamy Autumn Treat
- Prep Time: 30 Minutes
- Cook Time: 15 Minutes
- Total Time: 6 Hours 30 Minutes
- Yield: 6 Servings 1x
- Category: AllRecipes
Description
Homemade Apple Cider Ice Cream: Craft your own creamy, tangy fall treat! This easy recipe brings the crisp taste of autumn to every scoop.
Ingredients
- Base Ingredients:
- 2 cups heavy cream
- 1 cup whole milk
- 2 cups apple cider (reduced to 1 cup)
- 3/4 cup granulated sugar (divided)
- 4 large egg yolks
- Flavor Boosters:
- 1 teaspoon ground cinnamon
- 1/4 teaspoon ground nutmeg (freshly grated if possible)
- 1 teaspoon vanilla extract
- Pinch of salt
- Optional Extras:
- 1–2 tablespoons bourbon or apple brandy (added to cooled custard)
- 1/4 cup finely diced caramelized apples (swirled in during churning)
- Garnish & Toppings:
- Caramel drizzle
- Candied pecans
- Whipped cream
- Cinnamon sticks
Instructions
- Reduce the Cider:: First things first, grab your apple cider and pour it into a saucepan. You want to bring this to a simmer over medium heat and let it bubble away gently until it’s reduced by about half, maybe even two-thirds. This step, honestly, is where all that intense apple flavor comes from. It’ll take a good 20-30 minutes, and your kitchen will start smelling absolutely divine, like a fall festival in a pot. Keep an eye on it, stir it occasionally so it doesn’t scorch, and definitely don’t walk away like I did that one time with the squirrel—it gets sticky fast!
- Make the Custard Base:: While your cider is reducing, get another saucepan and whisk together the heavy cream, whole milk, about half of your sugar, cinnamon, nutmeg, and that little pinch of salt. Bring it to a gentle simmer over medium heat, just until you see tiny bubbles around the edges. Meanwhile, in a separate bowl, whisk your egg yolks with the remaining sugar until they’re pale and creamy. Now for the crucial part: temper those yolks! Slowly, and I mean slowly, drizzle about a cup of the hot cream mixture into the egg yolks, whisking constantly. This warms the yolks without scrambling them. I used to rush this, and oops, scrambled eggs for dessert! Don’t do that.
- Combine and Thicken:: Once tempered, pour the egg yolk mixture back into the saucepan with the rest of the cream. Stir constantly over medium-low heat, using a wooden spoon or a heat-proof spatula, until the mixture thickens enough to coat the back of the spoon. This usually takes about 5-8 minutes. You’re looking for a custard consistency, not a pudding. The smell, oh, it’s just so rich and sweet! Don’t let it boil, or your custard might curdle. If you see it getting too hot, pull it off the heat for a moment. This is where patience pays off!
- Chill Out:: Remove the custard from the heat and stir in your vanilla extract and the now-reduced apple cider. Give it a good whisk to combine everything beautifully. Now, this is important: you need to chill this mixture thoroughly. Pour it into a clean bowl, cover it with plastic wrap directly on the surface (this prevents a skin from forming), and pop it in the fridge for at least 4 hours, or even better, overnight. I’ve tried to rush this step, thinking “it’s cold enough,” and it just doesn’t churn as well. Seriously, don’t rush the chill, it makes all the difference for a smooth apple cider ice cream.
- Churn, Baby, Churn:: Once your base is completely chilled, it’s time for the fun part! Get your ice cream maker ready according to its manufacturer’s instructions. Pour the cold ice cream base into the frozen bowl of your machine and churn it for about 20-25 minutes, or until it reaches the consistency of soft-serve ice cream. It’s so exciting to watch it transform! My machine sometimes makes a funny noise if the base isn’t cold enough, so I always double-check. Don’t be afraid to experiment with churning times; some machines are faster than others.
- Firm Up and Enjoy:: Transfer your freshly churned apple cider ice cream into an airtight container. If you like it soft, you can eat it right away. But for a firmer, scoopable consistency, cover it and freeze it for another 2-4 hours. This waiting period is the hardest part, honestly! When it’s ready, it should look wonderfully creamy, smell like a dream, and taste like pure autumn happiness in a spoon. A little sprinkle of extra cinnamon or a drizzle of caramel makes it even better!


