

You know, fall just hits different. The air gets crisp, the leaves turn, and suddenly I’m dreaming of cozy nights and gatherings with friends. I remember one year, trying to be that host for a Halloween get-together, I wanted something fun but also, honestly, not covered in candy corn. That’s when the idea for a Harvest Hummus Board really clicked. I didn’t expect it to be such a hit, but everyone loved picking at the colorful veggies and dipping into the creamy hummus. It’s got that comforting vibe, but it’s still fresh and vibrant, a real crowd-pleaser that just feels right for the season.
I still laugh thinking about the first time I tried to make a really fancy Harvest Hummus Board. I got so carried away with arranging the veggies, I almost forgot to actually make the hummus! Ended up scrambling, blending chickpeas practically seconds before guests arrived, with a little tahini smudge on my cheek. Oops! But you know what? Everyone still raved about it. It just goes to show, sometimes the little imperfections make things more memorable.

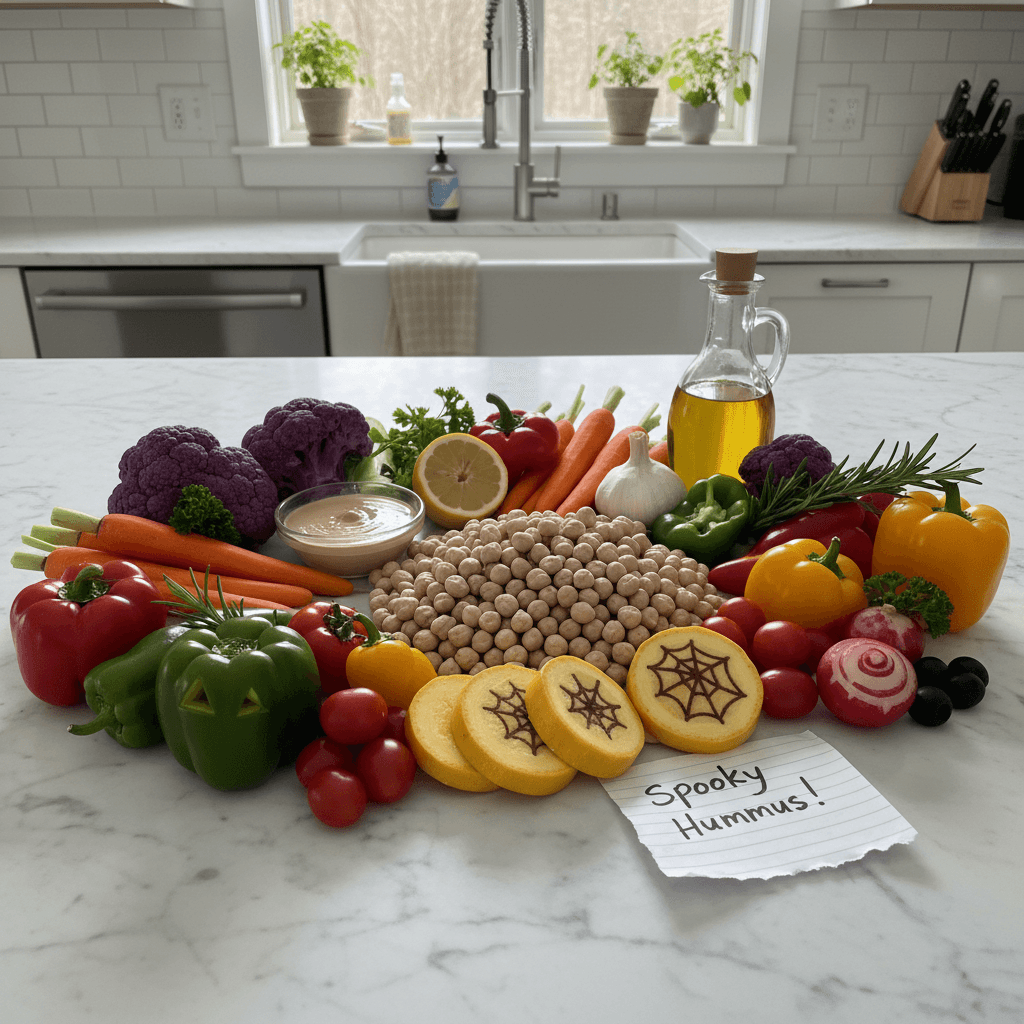
Ingredients for Your Harvest Hummus Board
- Canned Chickpeas: These are the backbone of our Harvest Hummus Board, hon. Make sure to drain and rinse them really well, that starchy liquid can make your hummus taste a bit…off.
- Tahini: Don’t skimp on good tahini! It gives hummus that essential earthy, nutty depth. I tried making it once without and it worked… kinda, but it wasn’t the same. Cashew butter is an okay swap if you’re in a pinch, but tahini is king.
Lemon Juice: Fresh is always, always best. Bottled lemon juice just doesn’t have that bright, zesty punch. I always keep a bag of lemons on hand, because honestly, everything tastes better with fresh lemon.
Garlic: I’m a garlic girl, so I usually add a bit more than most recipes call for. Two cloves are good, but three or even four? Chef’s kiss! Just remember, too much raw garlic can be a bit harsh.
Olive Oil: A good quality extra virgin olive oil makes all the difference, both in the hummus and drizzled on top. It adds a lovely richness and that signature Mediterranean flavor. I always feel a little fancy pouring it.
- Ice Water: This is my secret weapon for super creamy hummus. Don’t underestimate it! It helps lighten the texture without making it watery. It’s a little trick I picked up years ago, and it works wonders.
Smoked Paprika & Cumin: These spices bring warmth and a subtle smokiness that just sings with the chickpeas. I love how the paprika smells when you open the jar, so earthy and inviting.
Assorted Veggies: Carrots, cucumber, bell peppers (think orange, yellow, maybe even purple!), radishes, broccoli florets, snap peas the more colorful, the better for your Harvest Hummus Board!
Pita Bread & Crackers: Essential dippers! I usually grab a mix of soft pita and some sturdy crackers for different textures. Sometimes I’ll toast the pita lightly, it’s just so good.
Fresh Parsley & Pomegranate Arils: For garnish! They add a pop of color and freshness. The pomegranate arils are especially festive for a fall Harvest Hummus Board.
Instructions to Assemble Your Harvest Hummus Board
- Prep the Chickpeas:
- Okay, first things first, drain and rinse those canned chickpeas really well. I usually put them in a colander and give them a good rinse under cold water until no more foam appears. Some folks even peel the skins for super smooth hummus, but honestly, I rarely bother unless I’m feeling extra ambitious. Just make sure they’re nice and clean before they go into the food processor.
- Blend the Hummus Base:
- Into your food processor, toss the rinsed chickpeas, tahini, fresh lemon juice, and garlic cloves. Give it a good whir for about a minute. It’ll look a bit thick and pasty at first, and you might think, “Mama Tessa, what have I done?” Don’t worry, this is normal! Keep scraping down the sides of the bowl to make sure everything gets nicely incorporated. This is where the magic starts to happen.
- Adjust Consistency with Ice Water:
- Now for the creamy goodness! With the food processor running, slowly drizzle in the ice water, a tablespoon at a time. You’ll see the hummus start to transform, becoming much lighter and silkier. I usually add about 2-4 tablespoons, but you might need a little more or less depending on your chickpeas. Keep blending until it’s super smooth and luscious, it should smell absolutely divine by now!
- Season and Taste:
- Time to make it sing! Add your olive oil, smoked paprika, cumin, and a good pinch of salt. Blend again to mix everything in. Then, for the most important part: taste it! Does it need more lemon? More salt? Another tiny pinch of paprika? This is your Harvest Hummus Board, so make it perfect for you. I always adjust a little here, a little there, until it’s just right.
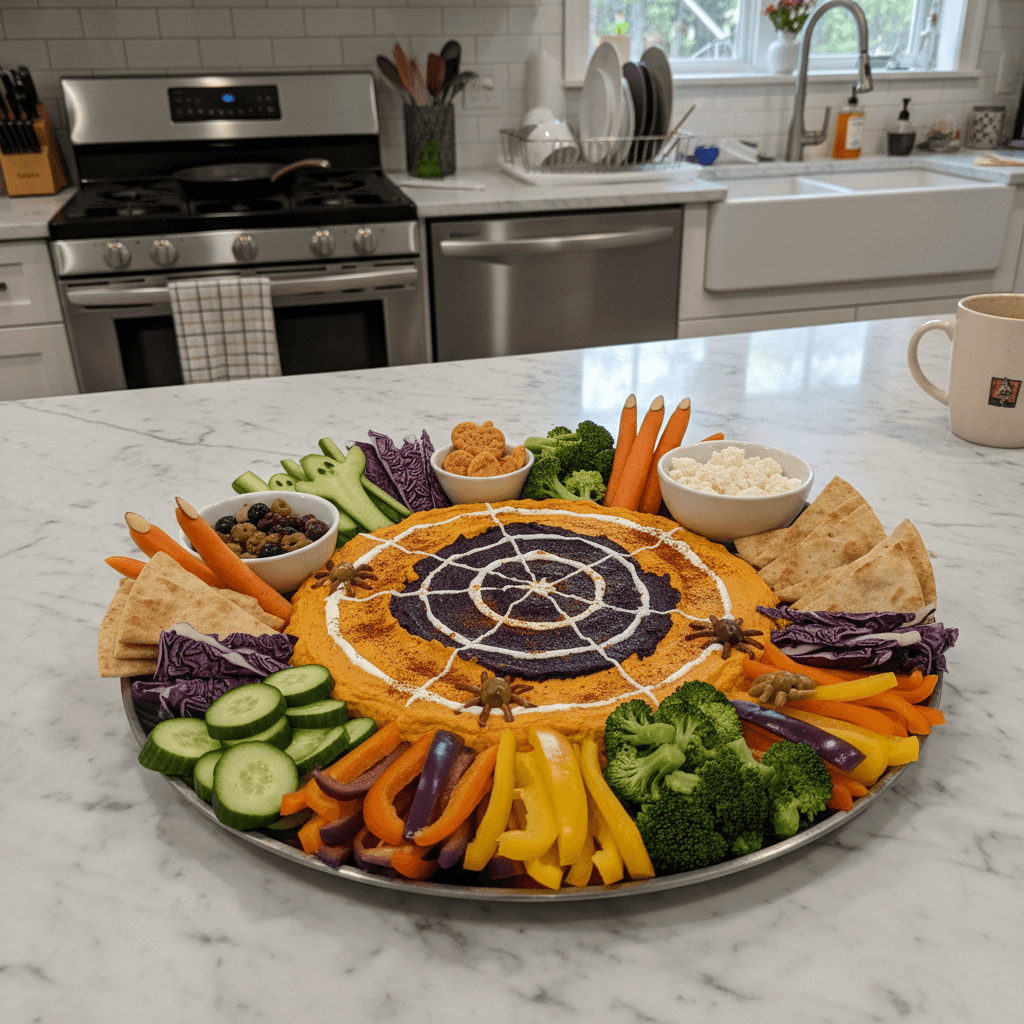
- Assemble Your Harvest Hummus Board:
- Once your hummus is tasting fantastic, spread it onto a large platter or board, creating a nice, swirly base. Now for the fun part: arranging all those colorful veggies and dippers around it. I like to group similar colors together or create little pathways of veggies. Don’t be afraid to get creative, it’s supposed to be a feast for the eyes as much as the tummy! I always make sure there’s a good mix of crunchy and soft dippers.
- Garnish and Serve:
- Almost done! Drizzle a little more olive oil over the hummus, then sprinkle with fresh parsley and those jewel-like pomegranate arils. These finishing touches really make your Harvest Hummus Board pop! Serve it up right away and watch everyone gather ’round. Honestly, there’s nothing quite like seeing happy faces digging into something you made with love.
Making this Harvest Hummus Board always reminds me of my grandmother, who could whip up the most incredible spreads with seemingly simple ingredients. There’s something so comforting about taking fresh, vibrant produce and transforming it into something beautiful and delicious. Even if my kitchen gets a little messy in the process, the joy of sharing it with loved ones makes it all worthwhile, every single time.
Harvest Hummus Board Ingredient Substitutions
Life happens, right? Sometimes you don’t have exactly what the recipe calls for, and that’s okay! For the hummus base, if you’re out of tahini, a little bit of smooth cashew butter or even almond butter can work, but it will change the flavor profile quite a bit I tried it once and it worked… kinda, but it was definitely a different vibe. No fresh lemons? Bottled juice is a last resort, but seriously, try to find fresh. As for the veggies on your Harvest Hummus Board, get creative! Cherry tomatoes, sliced bell peppers of any color, celery sticks, snap peas, even blanched green beans work. For dippers, rice crackers or gluten-free pita can make this a gluten-friendly Harvest Hummus Board. Don’t be afraid to experiment with what you have!
Serving Your Harvest Hummus Board
This Harvest Hummus Board is truly versatile! It’s fantastic as an appetizer for any gathering, especially during the fall season. I love serving it alongside a big bowl of lentil soup for a light but satisfying lunch, or as part of a larger Mediterranean-inspired spread with some grilled halloumi and olives. For drinks, a crisp white wine or even just some sparkling water with lemon would be lovely. And honestly, this dish and a rom-com? Yes please. It’s also perfect for a casual weeknight dinner when you just want something fresh and easy. Sometimes, I’ll even add some marinated artichoke hearts or feta cheese for an extra pop of flavor and texture to my Harvest Hummus Board.
Cultural Backstory of Hummus
Hummus, the star of our Harvest Hummus Board, has such a rich history! It’s a staple in Middle Eastern and Mediterranean cuisines, with roots stretching back centuries. While its exact origin is debated, it’s believed to have originated in ancient Egypt or the Levant region. The word “hummus” itself means “chickpeas” in Arabic. For me, discovering hummus was like finding a new culinary friend. It’s so simple, yet so incredibly satisfying and versatile. It reminds me of the warmth and hospitality of those cultures, where food is always at the heart of connection and community. Sharing a Harvest Hummus Board feels like carrying on that beautiful tradition, bringing people together over good food.
So there you have it, my friends! The Harvest Hummus Board, a little piece of fall joy from my kitchen to yours. It’s more than just a recipe, it’s about gathering, sharing, and making those everyday moments a little more special. I hope you give it a try and make it your own. And please, tell me all about your kitchen adventures and how your Harvest Hummus Board turned out I love hearing from you!
Frequently Asked Questions
- → Can I make the hummus ahead for my Harvest Hummus Board?
Absolutely! You can make the hummus up to 3-4 days in advance. Just store it in an airtight container in the fridge. Give it a good stir before serving, and maybe a fresh drizzle of olive oil to bring it back to life!
- → What if I don’t have tahini for this Harvest Hummus Board?
While tahini gives hummus its signature flavor, you could try a small amount of cashew butter or almond butter. It won’t taste exactly the same, but it’ll still be creamy and delicious! I’ve tried it, and it works if you’re in a pinch.
- → How do I get super smooth hummus for my Harvest Hummus Board?
The trick is patience with your food processor! Blend for a good few minutes, scraping down the sides. Slowly adding ice water helps immensely. Some folks even peel the chickpeas, but I usually skip that step and still get great results!
- → How long does a Harvest Hummus Board last once assembled?
Honestly, once assembled, it’s best enjoyed within 1-2 hours. The veggies can start to dry out or get soggy if left too long. I always try to assemble it right before guests arrive for maximum freshness and visual appeal.
- → Can I add other flavors to my Harvest Hummus Board?
Oh, definitely! Get creative! Roasted red peppers, sun-dried tomatoes, or even a swirl of pesto can be blended into the hummus for different flavors. I’ve tried a roasted carrot hummus, and it was surprisingly good!
Harvest Hummus Board: Festive Fall Veggie Platter
- Prep Time: 20 Minutes
- Cook Time: 0 Minutes
- Total Time: 20 Minutes
- Yield: 8-10 Servings 1x
- Category: Dessert
Description
Create a vibrant Harvest Hummus Board with colorful Halloween veggies. This easy, festive veggie tray is perfect for any fall gathering!
Ingredients
- Base Hummus Ingredients:
- 1 (15-ounce) can chickpeas, drained and rinsed
- 1/4 cup tahini
- 1/4 cup fresh lemon juice
- 2–3 cloves garlic, minced
- 2 tablespoons extra virgin olive oil
- 2–4 tablespoons ice water
- 1/2 teaspoon salt, or to taste
- Flavor Boosters:
- 1/2 teaspoon smoked paprika
- 1/4 teaspoon ground cumin
- Pinch of cayenne pepper (optional)
- Vibrant Veggies & Dippers:
- 2 carrots, peeled and sliced into sticks
- 1 cucumber, sliced
- 1 orange bell pepper, sliced
- 1 yellow bell pepper, sliced
- 1/2 cup radishes, thinly sliced
- 1 cup broccoli florets
- 1 cup snap peas
- Pita bread, cut into wedges
- Assorted crackers
- Finishing Touches:
- Fresh parsley, chopped, for garnish
- 1/4 cup pomegranate arils, for garnish
- Extra drizzle of olive oil
Instructions
- Prep the Chickpeas:: Okay, first things first, drain and rinse those canned chickpeas really well. I usually put them in a colander and give them a good rinse under cold water until no more foam appears. Some folks even peel the skins for super smooth hummus, but honestly, I rarely bother unless I’m feeling extra ambitious. Just make sure they’re nice and clean before they go into the food processor.
- Blend the Hummus Base:: Into your food processor, toss the rinsed chickpeas, tahini, fresh lemon juice, and garlic cloves. Give it a good whir for about a minute. It’ll look a bit thick and pasty at first, and you might think, “Mama Tessa, what have I done?” Don’t worry, this is normal! Keep scraping down the sides of the bowl to make sure everything gets nicely incorporated. This is where the magic starts to happen.
- Adjust Consistency with Ice Water:: Now for the creamy goodness! With the food processor running, slowly drizzle in the ice water, a tablespoon at a time. You’ll see the hummus start to transform, becoming much lighter and silkier. I usually add about 2-4 tablespoons, but you might need a little more or less depending on your chickpeas. Keep blending until it’s super smooth and luscious; it should smell absolutely divine by now!
- Season and Taste:: Time to make it sing! Add your olive oil, smoked paprika, cumin, and a good pinch of salt. Blend again to mix everything in. Then, for the most important part: taste it! Does it need more lemon? More salt? Another tiny pinch of paprika? This is your Harvest Hummus Board, so make it perfect for *you*. I always adjust a little here, a little there, until it’s just right.
- Assemble Your Harvest Hummus Board:: Once your hummus is tasting fantastic, spread it onto a large platter or board, creating a nice, swirly base. Now for the fun part: arranging all those colorful veggies and dippers around it. I like to group similar colors together or create little pathways of veggies. Don’t be afraid to get creative; it’s supposed to be a feast for the eyes as much as the tummy! I always make sure there’s a good mix of crunchy and soft dippers.
- Garnish and Serve:: Almost done! Drizzle a little more olive oil over the hummus, then sprinkle with fresh parsley and those jewel-like pomegranate arils. These finishing touches really make your Harvest Hummus Board pop! Serve it up right away and watch everyone gather ’round. Honestly, there’s nothing quite like seeing happy faces digging into something you made with love.


