
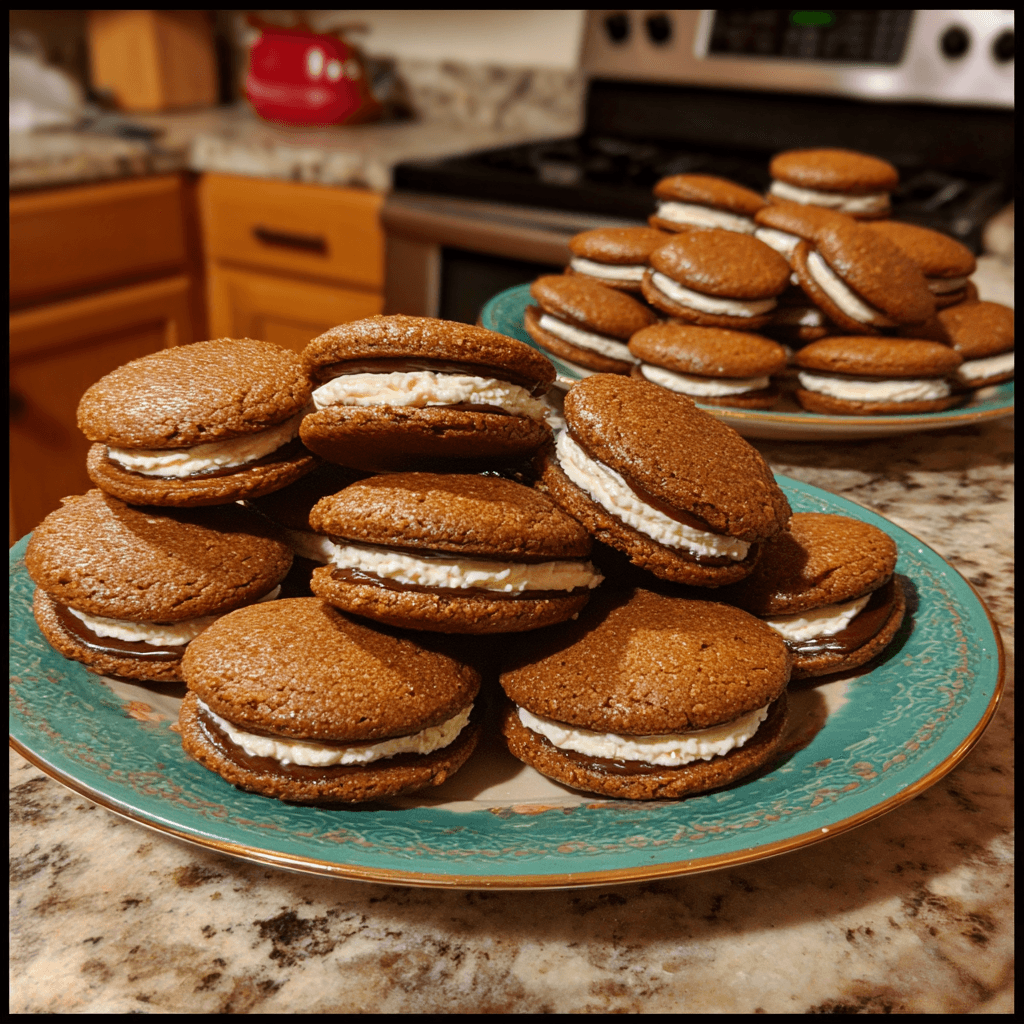
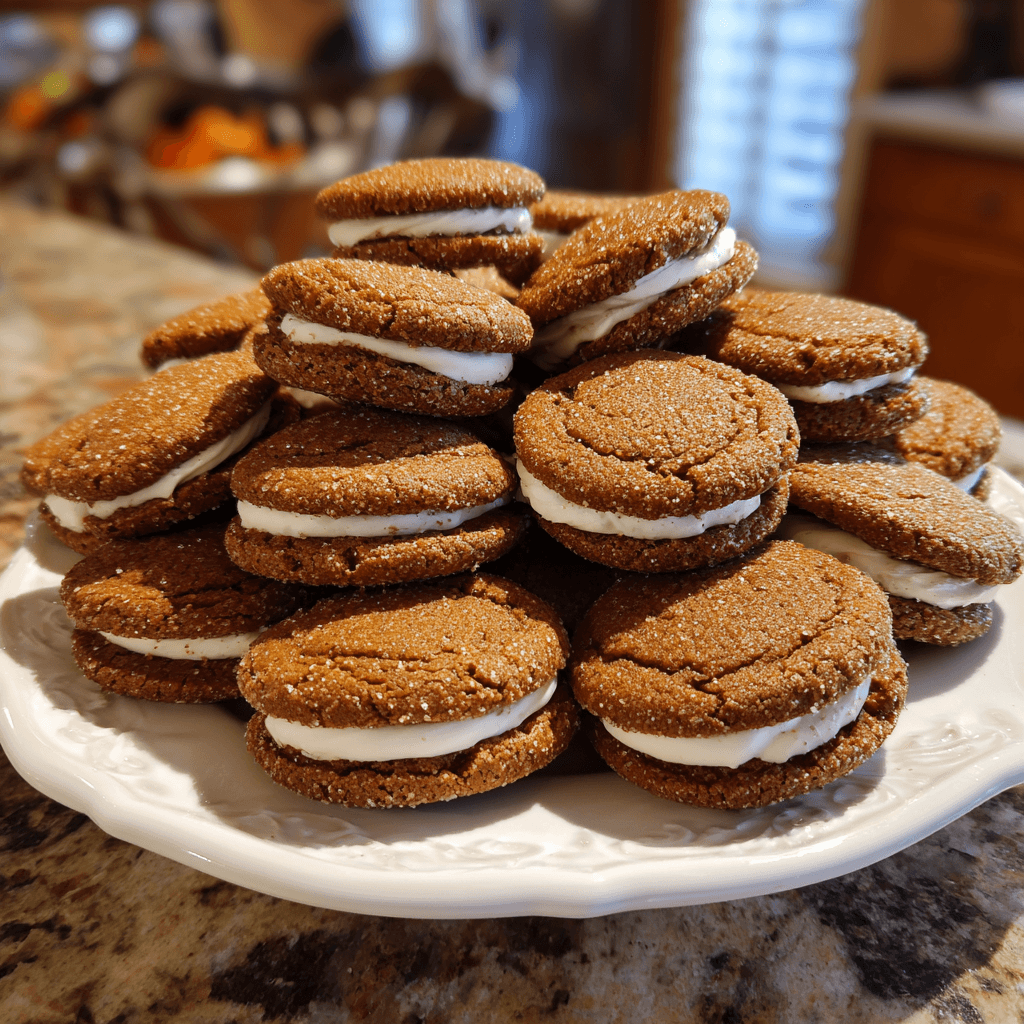
Honestly, when I was a kid, gingerbread cookies were a bit of a mystery. They always smelled so incredible, but sometimes they just felt… a little plain? Then one holiday season, I saw a picture of two gingerbread cookies hugging a creamy filling, and my whole world shifted. It was a revelation! I just knew I had to try making these Gingerbread Cookie Sandwiches. My first attempt? Total chaos. Flour everywhere, frosting oozing out, but the smell? Oh, it was pure magic. It’s the kind of scent that instantly makes your kitchen feel like a warm hug, even if your counter looks like a gingerbread explosion. These aren’t just cookies, they’re a memory in the making, and they just hit different.
I remember one time, I was so excited to get these Gingerbread Cookie Sandwiches done that I pulled the cookies out of the oven a little too early. They looked fine, but as they cooled, they went all soft and floppy not ideal for sandwiching! I had to bake another batch, which was a pain, but honestly, it taught me patience. Now, I always wait for those crisp edges, knowing they’ll soften just enough once they’re filled. Live and learn, right? My kitchen has seen its share of baking blunders, but these cookies are always worth the effort.

Ingredients for Gingerbread Cookie Sandwiches
For the Chewy Gingerbread Cookies:
- All-Purpose Flour: This is your base, hon. Don’t go using cake flour, we need that sturdy structure for holding the filling. I once tried a gluten-free blend, and while it worked, the texture was definitely different a bit more crumbly, not quite the chew I love.
- Unsalted Butter: The fat that makes everything tender and delicious. Make sure it’s softened, but not melted! I’ve definitely tried to rush it in the microwave and ended up with a greasy mess. Oops.
- Dark Brown Sugar: This is key for that deep, molasses-y flavor and chewiness. Don’t swap for white sugar unless you want a totally different cookie, it just won’t be the same.
- Molasses: The star of the show for gingerbread! Use unsulphured, good quality molasses. That blackstrap stuff? Too intense for these, trust me, I’ve been there. It brings that signature sticky-sweetness and dark color.
- Egg Yolk: Just the yolk, okay? This adds richness and helps bind the dough without making the cookies too stiff. I always separate my eggs by hand, I’ve dropped a shell bit in too many times with those fancy gadgets.
Flavor Boosters (Spices):
- Ground Ginger: We’re making Gingerbread Cookie Sandwiches, so obviously, we need ginger! I like a generous amount for that warm, spicy kick. Freshly ground makes a difference, but good quality pre-ground works too.
- Ground Cinnamon: This spice just rounds out the ginger so beautifully. It adds warmth without being too overpowering. I tend to add a little extra, I just love the smell when it hits the warm butter.
- Ground Cloves & Nutmeg: These two bring that classic, cozy holiday aroma. A little goes a long way, too much and it can be bitter. Don’t skip them though, they are essential for that signature gingerbread flavor.
For the Tangy Cream Cheese Frosting:
- Cream Cheese: Full-fat, brick-style cream cheese, chilled. Seriously, don’t use the spreadable kind in a tub, it’s too soft and your frosting will be a sad, runny mess. I made that mistake once, and the frosting just melted off the cookies.
- Powdered Sugar: For sweetness and structure. Sift it! I know, it’s an extra step, but it prevents lumps and gives you that silky-smooth frosting texture. No one wants lumpy frosting, right?
- Unsalted Butter (softened): Again, softened, not melted. It helps create that creamy, spreadable texture for your filling.
- Vanilla Extract: A good quality vanilla just elevates the whole frosting. It adds a lovely aromatic sweetness that pairs perfectly with the spiced cookies.
Crafting Gingerbread Cookie Sandwiches: Instructions
- Mix Up the Cookie Dough:
- First things first, grab your stand mixer or a big bowl and some elbow grease, honestly. Cream together that softened butter and dark brown sugar until it’s light and fluffy. This is where you’re incorporating air, making for a tender cookie. Then, beat in the molasses and that single egg yolk. It’ll look a bit weird and separated at first, but keep going, it’ll come together. The smell starts to get really promising here, that deep, sweet molasses aroma. Don’t worry if it looks a little messy, mine always does!
- Add the Dry Ingredients and Spices:
- In a separate bowl, whisk together your flour, ginger, cinnamon, cloves, nutmeg, baking soda, and a pinch of salt. This ensures all those lovely spices are evenly distributed. Gradually add this dry mixture to your wet ingredients, mixing on low speed until just combined. Seriously, stop as soon as it comes together. Overmixing is my nemesis, it develops the gluten too much, and you’ll end up with tough cookies. You want a soft, slightly sticky dough. I’ve definitely mixed too long and cursed my tough cookies before.
- Chill That Dough:
- Now, divide your dough in half, flatten each into a disc, wrap them in plastic wrap, and pop them in the fridge for at least 30 minutes, or up to an hour. This chilling step is crucial, friends! It helps firm up the dough, making it much easier to roll out, and prevents your cookies from spreading too much in the oven. I always try to skip this step when I’m in a hurry, and it never works out well. Patience is a virtue here, I promise!
- Roll and Cut Your Cookies:
- Preheat your oven to 350°F (175°C) and line baking sheets with parchment paper. On a lightly floured surface, roll out one disc of chilled dough to about 1/4-inch thickness. Use your favorite cookie cutters I like simple rounds or squares for Gingerbread Cookie Sandwiches. Carefully transfer them to your prepared baking sheets, leaving a little space between each. This step sometimes gets a bit chaotic for me, with flour dusting everything, but it’s part of the fun!
- Bake ‘Em Up:
- Bake for 8-10 minutes, or until the edges are set and just barely golden. The centers might still look a little soft, but they’ll firm up as they cool. Don’t overbake! That’s how you get dry, crumbly cookies instead of chewy ones. I always set a timer for 8 minutes and then check them obsessively. Let them cool on the baking sheet for a few minutes before transferring them to a wire rack to cool completely. This helps them firm up without breaking.
- Whip Up the Frosting and Assemble:
- While the cookies cool, make your cream cheese frosting. Beat the softened butter and chilled cream cheese together until smooth. Gradually add the powdered sugar, a little at a time, until it’s light and fluffy, then beat in the vanilla. Once your cookies are completely cool (seriously, completely!), spread a generous dollop of frosting on the flat side of one cookie, then gently top with another. Repeat until all your Gingerbread Cookie Sandwiches are ready. This is where it gets messy and fun!
Making these Gingerbread Cookie Sandwiches always brings a little joyful chaos to my kitchen. There’s usually a dusting of flour on my nose, a smear of frosting on my cheek, and the sweet, spicy scent filling every corner of the house. I remember one time, my little niece came over and insisted on helping. She ended up decorating herself with more frosting than the cookies, but her giggles were the best ingredient. It’s those moments, the imperfect, messy ones, that make baking so special for me.
Storing Your Gingerbread Cookie Sandwiches
Okay, so once you’ve made these beauties, you’ll want to store them properly to keep them fresh and delicious. I usually pop them into an airtight container and keep them in the fridge. The cream cheese frosting needs that chill to stay firm and prevent it from getting all funky. I once left a batch out overnight, thinking it would be fine, and let’s just say the frosting got a little too soft and… not great. So, fridge is your friend here! They’ll stay good for about 3-4 days this way. If you want to prep ahead, you can bake the cookies and freeze them unfrosted for up to a month. Just thaw them completely before you whip up the frosting and assemble. Honestly, they taste even better the next day once the flavors have had a chance to meld together.
Gingerbread Cookie Sandwiches: Ingredient Substitutions
I get it, sometimes you’re missing an ingredient or just want to shake things up! For the molasses, if you’re out of dark, you can use light molasses, but the flavor will be a bit milder and the color lighter. I tried using golden syrup once, and it gave a lovely caramel note, but it wasn’t quite the classic gingerbread. For the spices, feel free to adjust to your taste, if you’re not a huge fan of cloves, reduce it! You could even add a pinch of cardamom for a different twist, I’ve done that, and it was surprisingly good. For the frosting, if you don’t have cream cheese, a buttercream made with just butter, powdered sugar, and vanilla works too, but you’ll lose that tangy counterpoint that makes these Gingerbread Cookie Sandwiches so special. I’ve also swapped some of the powdered sugar in the frosting for brown sugar, and it added a nice, deeper flavor, almost like caramel. It worked, kinda, but made the frosting a bit denser.
Serving Gingerbread Cookie Sandwiches
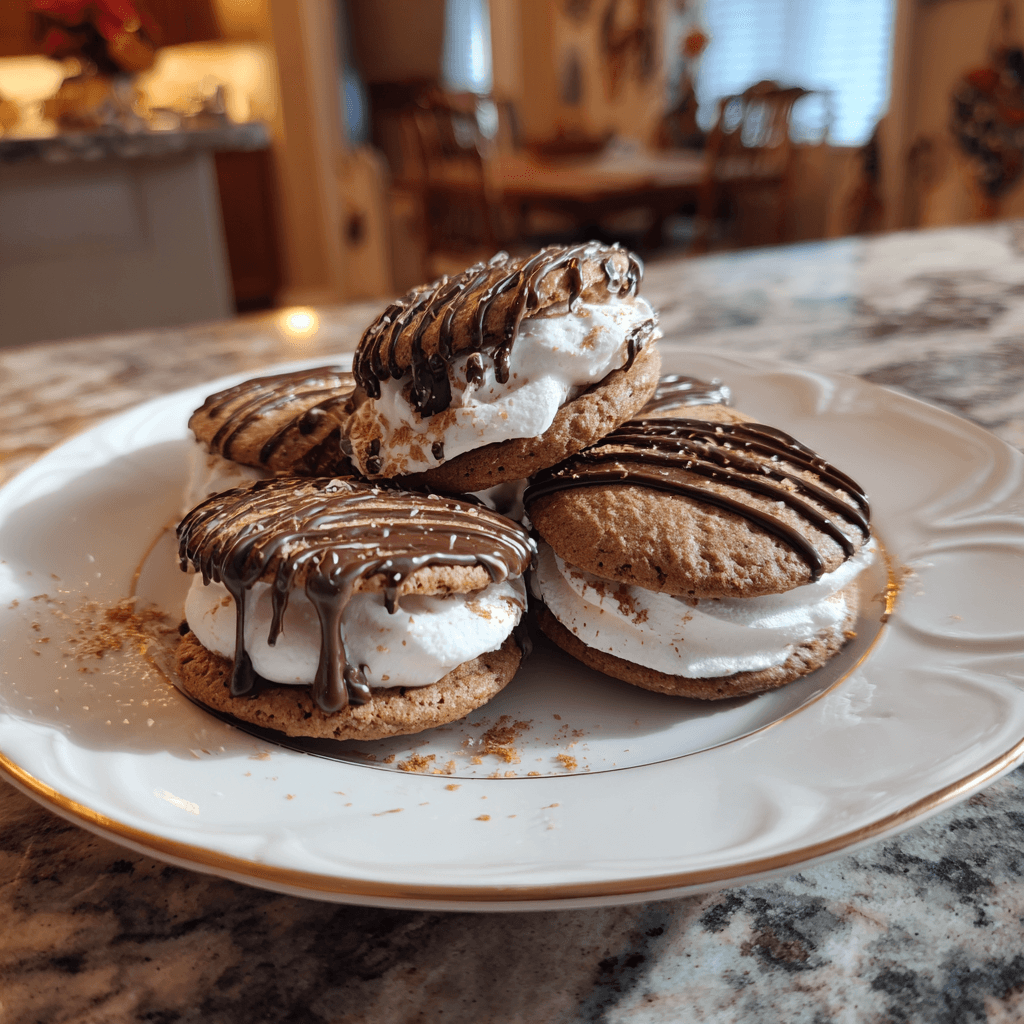
These Gingerbread Cookie Sandwiches are just begging to be shared! I love serving them with a hot mug of spiced apple cider or a creamy vanilla latte the warm drinks really complement the cool, tangy filling and spicy cookies. They’re also fantastic as part of a holiday dessert platter, especially alongside some shortbread or a simple fruit tart for contrast. For a fun presentation, I sometimes sprinkle a tiny bit of ground cinnamon or even some edible glitter on top of the frosting before serving. My kids love that! They’re perfect for a quiet evening at home with a good book, or for bringing to a potluck. Honestly, they just make any moment feel a little more festive and special. They pair so well with a cozy night in, maybe a holiday movie playing in the background.
Cultural Backstory of Gingerbread Cookie Sandwiches
Gingerbread has such a rich history, going all the way back to ancient times, but it really took off in Europe during the Middle Ages. Monasteries were often the first to bake it, using spices brought back from the Crusades. Over centuries, gingerbread evolved, from spiced bread to the crisp cookies we know today, especially popular around holidays. The idea of a cookie sandwich, though, that feels a bit more modern, a delightful evolution of the classic. For me, gingerbread always brings back memories of my grandmother’s kitchen around Christmastime. She’d bake dozens of gingerbread men, and the whole house would smell incredible. While she never made them into sandwiches, I think she’d approve of this twist. It’s about taking those cherished flavors and making them new, keeping the tradition alive but adding your own little touch. These Gingerbread Cookie Sandwiches feel like a nod to that history, with a playful, modern hug in the middle.
Honestly, these Gingerbread Cookie Sandwiches have become a staple in my holiday baking, and I hope they will in yours too. There’s just something so deeply satisfying about biting into that soft, spiced cookie with the cool, tangy cream cheese filling. It’s a little bit of magic, a little bit of comfort, and a whole lot of deliciousness. They might not always come out perfectly symmetrical in my kitchen, but that’s part of their charm, right? I’d love to hear how your own gingerbread adventures turn out!
Frequently Asked Questions
- → Can I make the gingerbread cookie dough ahead of time?
Absolutely! I often make the dough a day or two in advance. Just wrap it tightly in plastic wrap and keep it in the fridge. It actually deepens the flavors, which I love. Just let it sit out for about 15-20 minutes before you try to roll it out, or it’ll be too hard.
- → What if I don’t have molasses for the gingerbread cookie sandwiches?
While molasses is key for that classic gingerbread flavor, if you’re in a pinch, you could try dark corn syrup or golden syrup. The flavor won’t be as deep, and they might be a little sweeter, but it’ll work. I tried it once, and they were still tasty, just different.
- → My cream cheese frosting for the gingerbread cookie sandwiches is too runny, what happened?
Oh, I’ve been there! Usually, it means your cream cheese or butter wasn’t cold enough, or you used spreadable cream cheese. Make sure both are chilled and use full-fat brick cream cheese. You can try adding a bit more powdered sugar, a tablespoon at a time, to thicken it up, and then pop it back in the fridge for 15 minutes.
- → How long do gingerbread cookie sandwiches last?
Stored in an airtight container in the fridge, these Gingerbread Cookie Sandwiches are best enjoyed within 3-4 days. The cookies will soften slightly as they sit, which I actually prefer! I once kept them a bit longer, and the cookies got a little too soft, so stick to the recommended time.
- → Can I use different cookie cutters for these gingerbread cookie sandwiches?
For sure! I often use simple round cutters, but holiday shapes like stars or little houses would be adorable. Just make sure they’re roughly the same size so they sandwich together nicely. I’ve used mismatched ones before, and it made for some very quirky, lopsided sandwiches, but still delicious!

Spiced Gingerbread Cookie Sandwiches: Creamy Filling
- Prep Time: 30 Minutes
- Cook Time: 10 Minutes
- Total Time: 40 Minutes
- Yield: 12 Servings 1x
- Category: Mediterranean Diet Recipes
Description
Craft spiced gingerbread cookie sandwiches with creamy filling. Chewy spiced cookies hug a tangy cream cheese filling, perfect for festive moments and sharing.
Ingredients
- For the Chewy Gingerbread Cookies:
- 2 ½ cups (300g) all-purpose flour
- ½ teaspoon baking soda
- ½ teaspoon salt
- 1 tablespoon ground ginger
- 1 ½ teaspoons ground cinnamon
- ½ teaspoon ground cloves
- ¼ teaspoon ground nutmeg
- ¾ cup (170g) unsalted butter, softened
- ¾ cup (150g) dark brown sugar, packed
- ½ cup (120ml) molasses (unsulphured)
- 1 large egg yolk
- For the Tangy Cream Cheese Frosting:
- 8 ounces (226g) full-fat cream cheese, chilled
- ½ cup (113g) unsalted butter, softened
- 3–4 cups (360-480g) powdered sugar, sifted (adjust to taste)
- 1 teaspoon vanilla extract
- Optional Garnish:
- A sprinkle of ground cinnamon
- Edible glitter for a festive touch
- Make It Special:
- Orange zest (a pinch in the cookie dough)
- A tiny bit of cardamom (in the spice mix)
Instructions
- Mix Up the Cookie Dough:: First things first, grab your stand mixer—or a big bowl and some elbow grease, honestly. Cream together that softened butter and dark brown sugar until it’s light and fluffy. This is where you’re incorporating air, making for a tender cookie. Then, beat in the molasses and that single egg yolk. It’ll look a bit weird and separated at first, but keep going; it’ll come together. The smell starts to get really promising here, that deep, sweet molasses aroma. Don’t worry if it looks a little messy, mine always does!
- Add the Dry Ingredients and Spices:: In a separate bowl, whisk together your flour, ginger, cinnamon, cloves, nutmeg, baking soda, and a pinch of salt. This ensures all those lovely spices are evenly distributed. Gradually add this dry mixture to your wet ingredients, mixing on low speed until *just* combined. Seriously, stop as soon as it comes together. Overmixing is my nemesis; it develops the gluten too much, and you’ll end up with tough cookies. You want a soft, slightly sticky dough. I’ve definitely mixed too long and cursed my tough cookies before.
- Chill That Dough:: Now, divide your dough in half, flatten each into a disc, wrap them in plastic wrap, and pop them in the fridge for at least 30 minutes, or up to an hour. This chilling step is crucial, friends! It helps firm up the dough, making it much easier to roll out, and prevents your cookies from spreading too much in the oven. I always try to skip this step when I’m in a hurry, and it never works out well. Patience is a virtue here, I promise!
- Roll and Cut Your Cookies:: Preheat your oven to 350°F (175°C) and line baking sheets with parchment paper. On a lightly floured surface, roll out one disc of chilled dough to about 1/4-inch thickness. Use your favorite cookie cutters—I like simple rounds or squares for Gingerbread Cookie Sandwiches. Carefully transfer them to your prepared baking sheets, leaving a little space between each. This step sometimes gets a bit chaotic for me, with flour dusting everything, but it’s part of the fun!
- Bake ‘Em Up:: Bake for 8-10 minutes, or until the edges are set and just barely golden. The centers might still look a little soft, but they’ll firm up as they cool. Don’t overbake! That’s how you get dry, crumbly cookies instead of chewy ones. I always set a timer for 8 minutes and then check them obsessively. Let them cool on the baking sheet for a few minutes before transferring them to a wire rack to cool completely. This helps them firm up without breaking.
- Whip Up the Frosting and Assemble:: While the cookies cool, make your cream cheese frosting. Beat the softened butter and chilled cream cheese together until smooth. Gradually add the powdered sugar, a little at a time, until it’s light and fluffy, then beat in the vanilla. Once your cookies are completely cool (seriously, completely!), spread a generous dollop of frosting on the flat side of one cookie, then gently top with another. Repeat until all your Gingerbread Cookie Sandwiches are ready. This is where it gets messy and fun!


