

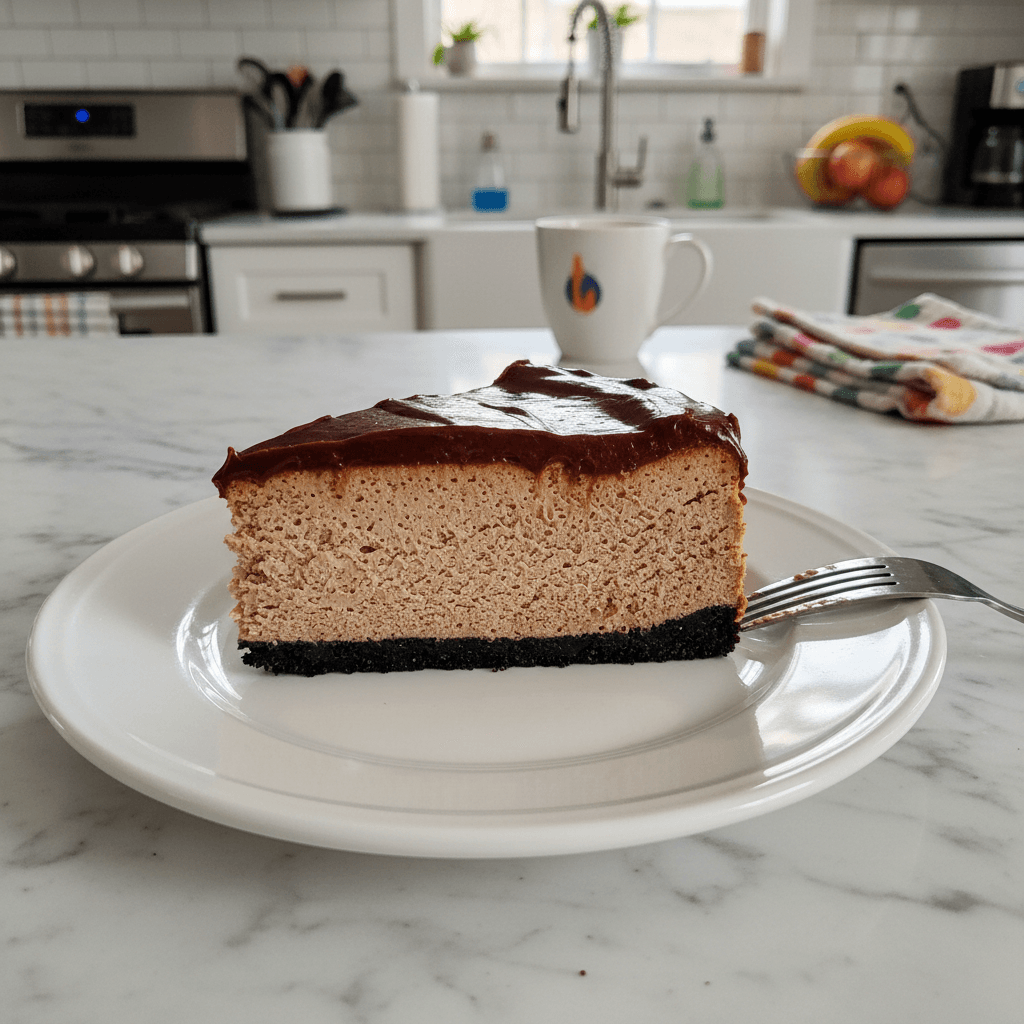
Honestly, this creamy no-bake chocolate cheesecake slice came into my life during a baking crisis you know the kind, where the oven decides to take an unplanned vacation. I was hosting a small get-together, and I just needed something, anything, sweet and chocolatey. I stumbled upon a basic no-bake idea, and after a few tweaks (and one very messy kitchen, oops!), this delicious slice was born. It’s comforting, reminds me of lazy Sunday afternoons, and honestly, the sheer joy of not turning on the oven on a hot day? Priceless. This recipe just feels like a little hug, and it’s become a total staple.
I still remember the first time I made this creamy no-bake chocolate cheesecake slice. I was so convinced I’d mess up the crust I always over-butter things. But this time, it just worked! The only real oops was trying to rush the chill time, which resulted in a slightly slumpy slice. Lesson learned: patience, my friends, is key for a truly successful creamy no-bake chocolate cheesecake slice. Don’t be like me and try to cut corners with the fridge!

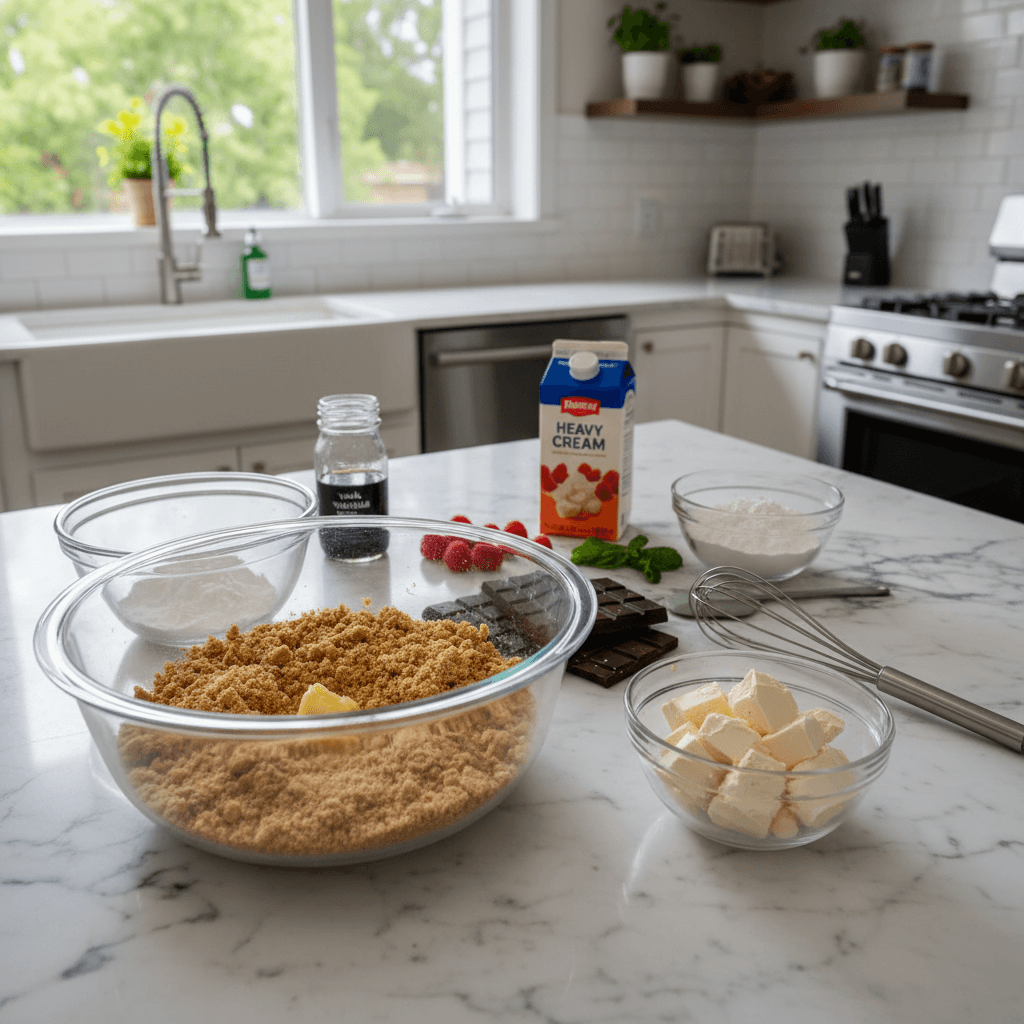
Creamy No-Bake Chocolate Cheesecake Slice Ingredients
- Chocolate Wafer Cookies: These are the base, the foundation of our creamy no-bake chocolate cheesecake slice! I swear by the dark chocolate ones, not the milk chocolate, for that deep flavor. Don’t skimp here, it makes all the difference.
- Unsalted Butter: Melted, of course. This binds the crust together. Use good quality butter, you really can taste it. And honestly, I once used salted butter by mistake it wasn’t awful, but it definitely had a tang.
- Cream Cheese: Full-fat, softened! Please, for the love of all things creamy, do not use low-fat or whipped cream cheese. It just won’t set up the same, and your creamy no-bake chocolate cheesecake slice will be sad. I’ve tried, trust me.
- Granulated Sugar: Just enough to sweeten things up without being cloying. I sometimes add a tiny bit more if my day has been particularly rough, haha!
- Unsweetened Cocoa Powder: This is where the rich chocolate magic happens. Dutch-processed is my go-to for that deep, dark color and intense flavor. Don’t use hot cocoa mix that’s a different beast entirely.
- Heavy Cream: Whipped until stiff peaks form. This is what gives our creamy no-bake chocolate cheesecake slice that dreamy, airy texture. I always eyeball it, but usually, a cup and a half does the trick.
- Vanilla Extract: A splash of good quality vanilla just rounds out all the chocolate flavors. I’ve been known to add a little extra, because why not?
- Chocolate Chips (optional): For garnish or to mix into the filling for extra chocolatey goodness. Dark chocolate chips are my preference, but semi-sweet works beautifully too. I once sprinkled white chocolate chips on top, and it looked so pretty!
Crafting Your Own Creamy No-Bake Chocolate Cheesecake Slice Instructions
- Prep the Pan & Crust:
- First things first, grab an 8×8 or 9×9 inch square pan. Line it with parchment paper, leaving an overhang on two sides this is your little lifesaver for lifting the creamy no-bake chocolate cheesecake slice out later, trust me! Now, crush those chocolate wafer cookies. I usually throw them in a food processor, but a Ziploc bag and a rolling pin work just as well, albeit with a bit more arm muscle. Melt your butter, then mix it into the cookie crumbs until it all looks like wet sand. Press this mixture firmly into the bottom of your prepared pan. Really press it down, like you’re saying, “You are staying put!”
- Whip the Cream Cheese Mixture:
- In a large bowl, beat the softened full-fat cream cheese with the granulated sugar until it’s super smooth and fluffy. You want no lumps here, hon. I usually scrape down the sides of the bowl a few times to make sure everything is incorporated. Then, whisk in the unsweetened cocoa powder and vanilla extract. It’ll look a bit stiff at first, but keep going until it’s a luscious, uniform chocolate color. This is where the magic starts to smell really good, honestly!
- Whip the Heavy Cream:
- In a separate, chilled bowl (I pop mine in the freezer for 10 minutes beforehand game changer!), whip the heavy cream until stiff peaks form. This means when you lift the whisk, the cream holds its shape. Don’t over-whip it, or you’ll end up with butter, and while delicious, that’s not what we’re going for in our creamy no-bake chocolate cheesecake slice!
- Combine for Creamy Filling:
- Gently fold about a third of the whipped cream into the chocolate cream cheese mixture to lighten it up. Then, add the remaining whipped cream and fold until just combined. You want to be gentle here to keep all that beautiful air in the mixture. Overmixing will deflate it, and we want this creamy no-bake chocolate cheesecake slice to be light and airy, not dense!
- Assemble the Slice:
- Spoon the creamy chocolate filling over your prepared cookie crust. Use an offset spatula or the back of a spoon to spread it out evenly, making sure it reaches all the corners. Give the pan a gentle tap on the counter a few times to release any air bubbles and help settle the mixture. This step always makes me feel like a fancy pastry chef, even if my kitchen is a total mess!
- Chill and Garnish:
- Now for the hardest part: chilling! Cover the pan loosely with plastic wrap and refrigerate for at least 4 hours, or even better, overnight. I know, I know, it’s tough to wait. But trust me, it needs this time to firm up properly. Once chilled, lift the creamy no-bake chocolate cheesecake slice out of the pan using the parchment paper overhang. Slice it into squares, and if you’re feeling extra, sprinkle with some chocolate shavings or a dusting of cocoa powder. Enjoy your glorious creation!
Honestly, this creamy no-bake chocolate cheesecake slice has saved me from so many dessert dilemmas. I once made it for a potluck, completely forgot my spatula, and had to slice it with a plastic knife. It wasn’t pretty, but everyone still raved about the taste. That’s when you know a recipe is a winner it can survive my kitchen chaos and still shine!
Storing Your Creamy No-Bake Chocolate Cheesecake Slice
Okay, so you’ve made this incredible creamy no-bake chocolate cheesecake slice and, by some miracle, there are leftovers. Or maybe you’re smart and made it ahead! To store, cover the pan or individual slices tightly with plastic wrap. It’ll keep beautifully in the refrigerator for up to 3-4 days. I wouldn’t push it much past that, as the crust can start to get a bit soft, and the cream cheese filling might lose some of its fresh texture. I once tried freezing a whole slice, thinking it would be a brilliant idea. It was… okay. The texture changed a bit, becoming a bit icier, but still edible if you’re desperate for a chocolate fix! Just make sure to thaw it in the fridge for a few hours before serving.
Ingredient Substitutions for Creamy No-Bake Chocolate Cheesecake Slice
Life happens, and sometimes you don’t have exactly what the recipe calls for, right? For the chocolate wafer cookies, I’ve swapped them for Oreo cookies (crushed, with the cream filling removed) or even graham crackers. The flavor profile changes, of course, but it still makes a solid crust. I tried using digestive biscuits once, and it worked, kinda it was a bit less chocolatey, but still good. If you’re out of unsweetened cocoa powder, you could try melting some good quality dark chocolate and folding that in, but you might need to adjust the sugar slightly. Honestly, I haven’t messed with the cream cheese or heavy cream too much because they’re essential for that creamy no-bake chocolate cheesecake slice texture, but for vanilla extract, any good quality extract will do!
Serving Suggestions for Your Creamy No-Bake Chocolate Cheesecake Slice
This creamy no-bake chocolate cheesecake slice is pretty fantastic all on its own, but sometimes a little something extra just elevates it, you know? A dollop of freshly whipped cream is always a classic, or a sprinkle of cocoa powder or chocolate shavings makes it feel super fancy. I sometimes drizzle a little raspberry sauce over it for a nice tart contrast chocolate and raspberry are just meant to be! A warm cup of coffee or a cold glass of milk pairs perfectly. For a cozy night in, I love having a slice with a big mug of herbal tea and a good book. It’s comforting, satisfying, and just makes any evening feel a little more special.
Cultural Backstory of the No-Bake Chocolate Cheesecake Slice
Cheesecake itself has a long, storied history, dating back to ancient Greece! But this specific creamy no-bake chocolate cheesecake slice feels very much like a modern American invention, born out of a desire for quick, delicious desserts without the fuss of an oven. It’s the kind of recipe that probably got passed around at potlucks and family gatherings, evolving over time. For me, it reminds me of my grandmother, who always had a knack for whipping up something sweet even when it seemed like she had nothing in the pantry. This no-bake version just feels like a nod to that clever, resourceful spirit making something wonderfully indulgent with minimal effort. It’s a testament to simple ingredients creating something truly delightful.
Honestly, this creamy no-bake chocolate cheesecake slice has brought so much joy to my kitchen, even through the occasional blunder. It’s proof that dessert doesn’t have to be complicated to be absolutely delicious and comforting. I really hope you give it a try and maybe even make some of your own memories with it. Let me know how your slices turn out!
Frequently Asked Questions About Creamy No-Bake Chocolate Cheesecake Slice
- → Can I make this creamy no-bake chocolate cheesecake slice ahead of time?
Absolutely! This creamy no-bake chocolate cheesecake slice is a fantastic make-ahead dessert. You can prepare it a day in advance, which actually gives it more time to set up perfectly in the fridge. I often make it the night before a party, it’s one less thing to worry about on the day!
- → What if I don’t have chocolate wafer cookies for the crust?
No worries! As I mentioned, you can totally use crushed Oreo cookies (just remove the cream filling first) or even graham cracker crumbs. The flavor will be a little different, but still delicious. I’ve even used shortbread cookies in a pinch, and it was pretty good!
- → My creamy no-bake chocolate cheesecake slice filling isn’t setting up. What went wrong?
Oh, I’ve been there! Usually, it means the cream cheese wasn’t full-fat, or the heavy cream wasn’t whipped to stiff peaks. Also, not chilling it long enough is a common culprit. Give it more time in the fridge, honestly, it usually firms up eventually!
- → How long does this creamy no-bake chocolate cheesecake slice last in the fridge?
If stored properly, tightly covered, your creamy no-bake chocolate cheesecake slice will last for about 3-4 days in the refrigerator. After that, the crust can start to get a bit soggy, and the filling might lose its optimal texture. It never lasts that long in my house, though!
- → Can I add other flavors to the creamy no-bake chocolate cheesecake slice?
Totally! I’ve experimented with a tiny bit of peppermint extract for a mint chocolate version, or a swirl of caramel. You could also add orange zest for a chocolate-orange vibe. Just be careful not to add too much liquid, or it might affect the setting. Have fun with it!
Creamy No-Bake Chocolate Cheesecake Slice: Easy Dessert
- Prep Time: 25 Minutes
- Cook Time: 0 Minutes
- Total Time: 4 Hours 25 Minutes
- Yield: 10 Servings 1x
- Category: Lunch
Description
Whip up a dreamy, creamy no-bake chocolate cheesecake slice with this easy recipe. My go-to for a quick dessert, no oven needed!
Ingredients
- Crust Essentials:
- 2 cups (about 24) chocolate wafer cookies, finely crushed
- 1/2 cup (1 stick) unsalted butter, melted
- Creamy Filling Stars:
- 2 (8-ounce) packages full-fat cream cheese, softened
- 1 cup granulated sugar
- 1/2 cup unsweetened cocoa powder (Dutch-processed preferred)
- 1 1/2 cups heavy cream, chilled
- 1 teaspoon vanilla extract
- Optional Decadence & Garnish:
- 1/4 cup chocolate chips, for mixing or garnish
- Chocolate shavings or extra cocoa powder, for dusting
Instructions
- Prep the Pan & Crust:: First things first, grab an 8×8 or 9×9 inch square pan. Line it with parchment paper, leaving an overhang on two sides – this is your little lifesaver for lifting the creamy no-bake chocolate cheesecake slice out later, trust me! Now, crush those chocolate wafer cookies. I usually throw them in a food processor, but a Ziploc bag and a rolling pin work just as well, albeit with a bit more arm muscle. Melt your butter, then mix it into the cookie crumbs until it all looks like wet sand. Press this mixture firmly into the bottom of your prepared pan. Really press it down, like you’re saying, “You are staying put!”
- Whip the Cream Cheese Mixture:: In a large bowl, beat the softened full-fat cream cheese with the granulated sugar until it’s super smooth and fluffy. You want no lumps here, hon. I usually scrape down the sides of the bowl a few times to make sure everything is incorporated. Then, whisk in the unsweetened cocoa powder and vanilla extract. It’ll look a bit stiff at first, but keep going until it’s a luscious, uniform chocolate color. This is where the magic starts to smell really good, honestly!
- Whip the Heavy Cream:: In a separate, chilled bowl (I pop mine in the freezer for 10 minutes beforehand – game changer!), whip the heavy cream until stiff peaks form. This means when you lift the whisk, the cream holds its shape. Don’t over-whip it, or you’ll end up with butter, and while delicious, that’s not what we’re going for in our creamy no-bake chocolate cheesecake slice!
- Combine for Creamy Filling:: Gently fold about a third of the whipped cream into the chocolate cream cheese mixture to lighten it up. Then, add the remaining whipped cream and fold until just combined. You want to be gentle here to keep all that beautiful air in the mixture. Overmixing will deflate it, and we want this creamy no-bake chocolate cheesecake slice to be light and airy, not dense!
- Assemble the Slice:: Spoon the creamy chocolate filling over your prepared cookie crust. Use an offset spatula or the back of a spoon to spread it out evenly, making sure it reaches all the corners. Give the pan a gentle tap on the counter a few times to release any air bubbles and help settle the mixture. This step always makes me feel like a fancy pastry chef, even if my kitchen is a total mess!
- Chill and Garnish:: Now for the hardest part: chilling! Cover the pan loosely with plastic wrap and refrigerate for at least 4 hours, or even better, overnight. I know, I know, it’s tough to wait. But trust me, it needs this time to firm up properly. Once chilled, lift the creamy no-bake chocolate cheesecake slice out of the pan using the parchment paper overhang. Slice it into squares, and if you’re feeling extra, sprinkle with some chocolate shavings or a dusting of cocoa powder. Enjoy your glorious creation!


