
I remember one blustery autumn afternoon, the kind where the wind just howls outside, and you crave something warm and grounding. My pantry was looking a bit sparse, but a forgotten bag of cornmeal whispered promises. That day, I pulled out my grandmother’s tattered recipe box and found her simple cornbread muffins recipe, handwritten on a faded index card. Honestly, I didn’t expect much, just a quick bite, but the smell that filled my tiny kitchen? Pure comfort. It was a little messy, flour on the counter, a bit of milk splattered, but the result was a revelation. These aren’t just muffins, they’re a hug in a paper liner, a reminder of simpler times.
Oh, the times I’ve made these! Once, I was so distracted by a podcast, I almost grabbed the baking powder instead of baking soda. Oops! My partner, bless his heart, pointed it out just as my hand hovered over the wrong can. Can you imagine flat muffins? A tragedy! It just goes to show, even simple recipes need a little attention, though I’m still convinced half the fun is the near-disasters.

Cornbread Muffins Recipe Ingredients
Dry Essentials
- Yellow Cornmeal: This is the heart of our cornbread muffins recipe, hon. Don’t go for the super fine stuff, a medium grind gives you that rustic texture I love. It’s what gives them that wholesome, earthy flavor.
- All-Purpose Flour: Just enough to keep our muffins light and tender, not too dense. I once tried using whole wheat flour, and while it worked, the texture was a bit… chewy for my preference.
- Granulated Sugar: A touch of sweetness really balances the cornmeal. You can adjust this, I sometimes add a little extra if I’m feeling fancy, but don’t overdo it unless you want cake!
- Baking Powder & Baking Soda: Our lift-off crew! These guys work together to create that lovely fluffy texture. Make sure they’re fresh, old leavening agents mean flat, sad muffins, and nobody wants that.
- Salt: Just a pinch, but it makes all the difference, honest. It brightens all the other flavors. I always forget to add it sometimes, and then wonder why something feels missing.
Wet Wonders
- Buttermilk: Oh, buttermilk! It reacts with the baking soda to give a tender crumb and a slight tang. Don’t use skim milk, just don’t. If you don’t have buttermilk, you can make your own with milk and a splash of lemon juice or vinegar, but the real deal is better.
- Large Egg: Binds everything together, gives structure. I try to use farm-fresh eggs if I can get my hands on them, the yolks are so vibrant.
- Unsalted Butter, melted: Butter is flavor, pure and simple. Make sure it’s melted but not scorching hot, or it might cook your egg. I once added it too hot and ended up with scrambled bits in my batter, oops!
Making Golden Cornbread Muffins Recipe
- Prep Your Oven & Pan:
- First things first, let’s get that oven preheated to 400°F (200°C). While it’s warming up, line a 12-cup muffin tin with paper liners or give it a good spray with non-stick cooking spray. I always forget this step and then scramble when the batter’s ready, so learn from my chaos! A well-prepped pan means no stuck muffins, and that’s a win in my book.
- Whisk the Dry Ingredients:
- In a large mixing bowl, combine your cornmeal, flour, sugar, baking powder, baking soda, and salt. Give them a really good whisk until everything is evenly distributed. This is where you want to make sure there are no sneaky lumps hiding. I usually grab my biggest whisk and just go for it, a little arm workout never hurt anyone, right?
- Combine the Wet Ingredients:
- In a separate, medium-sized bowl, whisk together the buttermilk, egg, and melted butter. Make sure the butter isn’t too hot, or you’ll end up with scrambled egg bits, which, trust me, I’ve done before! You want it all nicely combined and smooth. This step always smells so inviting, honestly, even before it hits the dry stuff.
- Mix Wet into Dry (Gently!):
- Pour the wet ingredients into the dry ingredients. Now, this is CRITICAL: mix just until combined. Seriously, overmixing is the enemy of tender muffins. A few lumps are totally fine! I learned this the hard way with dense, chewy muffins. Just a few gentle stirs, you got this!
- Fill Those Muffin Cups:
- Spoon the batter evenly into your prepared muffin cups, filling each one about two-thirds full. I usually use an ice cream scoop for this, it makes things so much tidier and ensures even muffins. Don’t stress if it’s not absolutely perfect, a little rustic charm is part of the home-baked appeal, right?
- Bake to Golden Perfection:
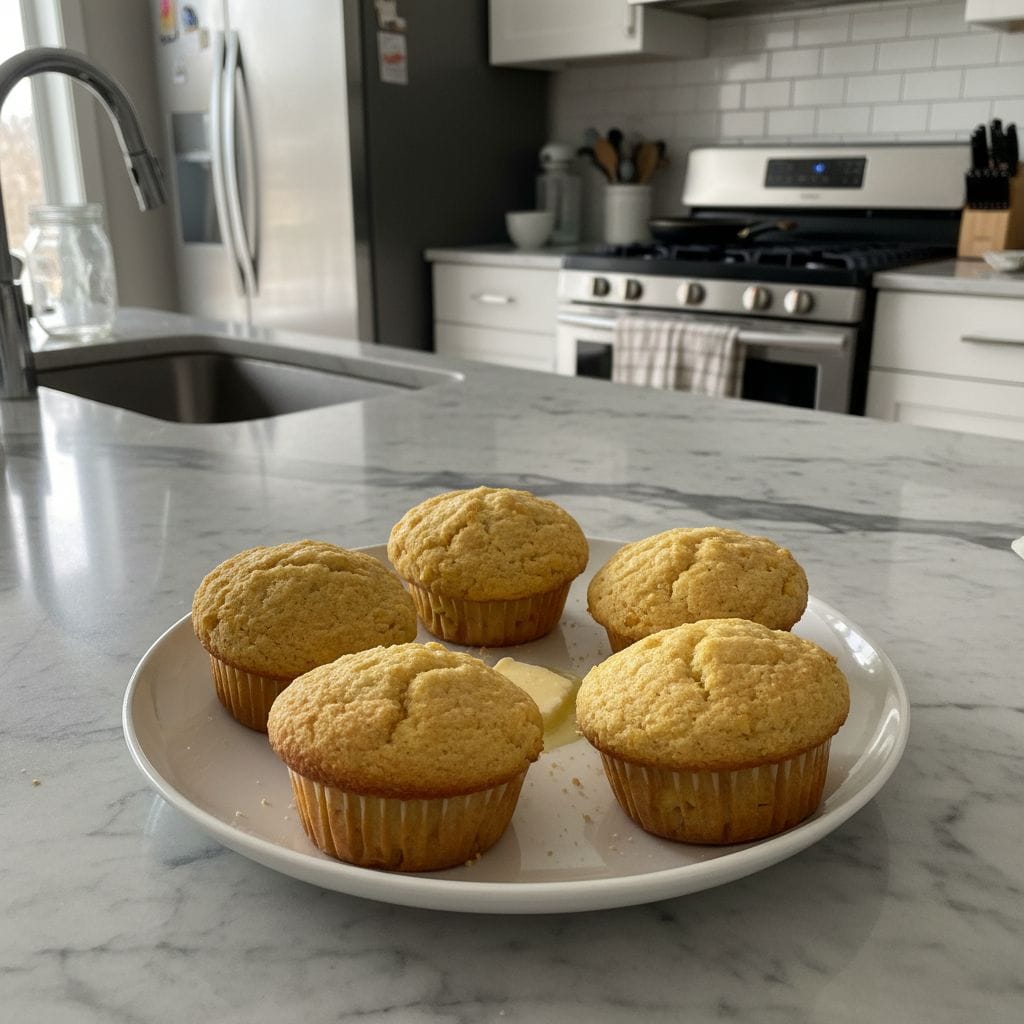
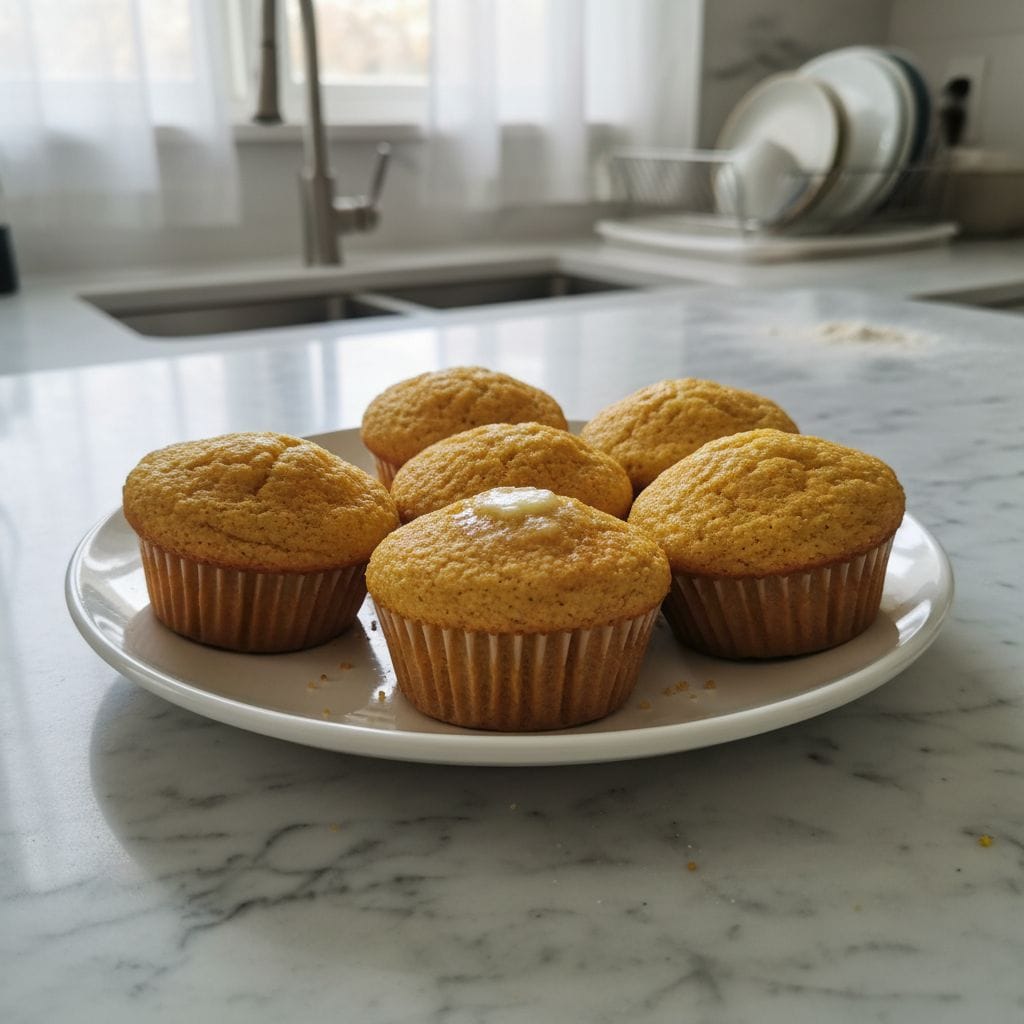
- Pop your muffin tin into the preheated oven and bake for 15-18 minutes, or until the tops are golden brown and a wooden skewer inserted into the center of a muffin comes out clean. The smell as they bake is just divine that warm, sweet corn aroma fills the whole kitchen. Let them cool in the pan for a few minutes before transferring to a wire rack. They’ll be warm, fluffy, and ready for butter!
Making these muffins always brings me back to that initial cozy feeling. Sometimes, my kitchen ends up looking like a flour explosion, but seeing those golden tops emerge from the oven? Worth every bit of mess. They’re just so simple, yet so satisfying. A little bit of everyday magic, honestly.
Cornbread Muffins Recipe Storage Tips
So, you’ve got leftover cornbread muffins? Lucky you! I’ve tried a few ways to store these, and here’s what works. Once they’re completely cool, pop them into an airtight container. They’ll stay fresh and tender at room temperature for about 2-3 days. I microwaved one once that was a day old, and it got a little chewy, so don’t do that lol. For longer storage, you can freeze them! Just wrap each muffin individually in plastic wrap, then place them in a freezer-safe bag. They’ll keep for up to 3 months. To reheat, just thaw at room temp or give them a quick zap in the microwave, but not too long, or they’ll dry out. Trust me, I’ve had my share of sad, dry muffins.
Ingredient Substitutions for Your Cornbread Muffins
Life happens, and sometimes you just don’t have exactly what the recipe calls for. I’ve experimented a bit! For buttermilk, if you’re out, just add a tablespoon of white vinegar or lemon juice to regular milk (dairy or non-dairy works!) and let it sit for 5 minutes. It works… kinda. The texture is a little different, but it’ll do in a pinch. If you want a sweeter muffin, you can swap half the sugar for brown sugar for a richer, more molasses-like flavor, I tried that once, and it gave them a lovely depth. You can also add a handful of shredded cheddar cheese or a few chopped jalapeños for a savory kick a total game changer if you ask me!
Serving Your Cornbread Muffins Recipe
These golden muffins are incredibly versatile. My favorite way to enjoy them? Warm, with a generous slather of butter and a drizzle of honey. Honestly, it’s pure heaven. They’re an absolute essential alongside a hearty bowl of chili or a comforting stew, soaking up all those delicious juices. For breakfast, they’re fantastic with scrambled eggs and a side of bacon. And for a truly Southern touch, try them with some collard greens. This recipe and a quiet evening with a good book? Yes please. They even make a surprisingly good base for a quick savory sandwich if you split them open!
Cultural Backstory of Cornbread Muffins
Cornbread, in its many forms, has such a rich history, especially in the American South. It’s a staple, a symbol of home cooking and resourcefulness. This cornbread muffins recipe, for me, connects to those traditions. My grandma used to tell stories of her own grandmother making cornbread from scratch, using cornmeal ground at the local mill. It wasn’t just food, it was sustenance, a way to bring family together. While my version is a bit modernized into convenient muffins, the spirit of that humble, nourishing dish is still there, a taste of history in every bite.
So there you have it, my take on a classic. These golden muffins always make my kitchen feel a little more like home, a little more lived-in, and a lot more loved. I hope they bring you the same kind of simple joy and comfort. Honestly, they’re just wonderful. Now go on, bake a batch and tell me how your cornbread muffins turned out!

Frequently Asked Questions about Cornbread Muffins Recipe
- → Can I make this recipe ahead of time?
Absolutely! I often bake a batch on Sunday and enjoy them through the week. They store really well, just make sure they’re completely cool before sealing them up. A quick reheat makes them taste fresh again!
- → What if I don’t have buttermilk for my muffins?
No buttermilk? No problem! I’ve used regular milk with a splash of vinegar or lemon juice. It works pretty well, though the tang is a little less pronounced. Don’t let it stop you from making these!
- → Why did my muffins come out tough?
Ah, that’s usually a sign of overmixing! I’ve been there. You only want to mix the wet and dry ingredients until just combined. A few lumps are totally okay and actually preferred for a tender crumb in this recipe.
- → How long do these muffins last?
At room temperature in an airtight container, they’re good for about 2-3 days. In the freezer, they’ll last for up to 3 months. I always have a stash for those sudden chili cravings!
- → Can I add other ingredients to this recipe?
Oh, for sure! I love adding shredded cheddar or chopped jalapeños for a savory kick. Sometimes, I even throw in some corn kernels. Experiment and make them your own, that’s the fun part!
Golden Cornbread Muffins Recipe: Simple & Hearty
- Prep Time: 10 Minutes
- Cook Time: 18 Minutes
- Total Time: 28 Minutes
- Yield: 12 Servings 1x
- Category: Dinner
Description
Golden cornbread muffins recipe from my kitchen to yours. Enjoy simple, hearty, slightly sweet muffins perfect for any meal. Quick to mix, easy to bake!
Ingredients
- Dry Essentials:
- 1 ½ cups (195g) yellow cornmeal
- 1 cup (125g) all-purpose flour
- ⅓ cup (65g) granulated sugar
- 1 tbsp baking powder
- ½ tsp baking soda
- ½ tsp salt
- Wet Wonders:
- 1 cup (240ml) buttermilk
- 1 large egg
- ½ cup (113g) unsalted butter, melted
- Optional Mix-Ins:
- ½ cup shredded cheddar cheese
- ¼ cup chopped jalapeños
- ½ cup fresh or frozen corn kernels
Instructions
- Prep Your Oven & Pan:: First things first, let’s get that oven preheated to 400°F (200°C). While it’s warming up, line a 12-cup muffin tin with paper liners or give it a good spray with non-stick cooking spray. I always forget this step and then scramble when the batter’s ready, so learn from my chaos! A well-prepped pan means no stuck muffins, and that’s a win in my book.
- Whisk the Dry Ingredients:: In a large mixing bowl, combine your cornmeal, flour, sugar, baking powder, baking soda, and salt. Give them a really good whisk until everything is evenly distributed. This is where you want to make sure there are no sneaky lumps hiding. I usually grab my biggest whisk and just go for it; a little arm workout never hurt anyone, right?
- Combine the Wet Ingredients:: In a separate, medium-sized bowl, whisk together the buttermilk, egg, and melted butter. Make sure the butter isn’t too hot, or you’ll end up with scrambled egg bits, which, trust me, I’ve done before! You want it all nicely combined and smooth. This step always smells so inviting, honestly, even before it hits the dry stuff.
- Mix Wet into Dry (Gently!):: Pour the wet ingredients into the dry ingredients. Now, this is CRITICAL: mix just until combined. Seriously, overmixing is the enemy of tender muffins. A few lumps are totally fine! I learned this the hard way with dense, chewy muffins. Just a few gentle stirs, you got this!
- Fill Those Muffin Cups:: Spoon the batter evenly into your prepared muffin cups, filling each one about two-thirds full. I usually use an ice cream scoop for this; it makes things so much tidier and ensures even muffins. Don’t stress if it’s not absolutely perfect; a little rustic charm is part of the home-baked appeal, right?
- Bake to Golden Perfection:: Pop your muffin tin into the preheated oven and bake for 15-18 minutes, or until the tops are golden brown and a wooden skewer inserted into the center of a muffin comes out clean. The smell as they bake is just divine – that warm, sweet corn aroma fills the whole kitchen. Let them cool in the pan for a few minutes before transferring to a wire rack. They’ll be warm, fluffy, and ready for butter!


