

Honestly, Thanksgiving at my house doesn’t officially start until the smell of sausage, onions, and sage hits the air. This isn’t just any stuffing recipe; this is THE stuffing. It’s the one my Aunt Carol used to make, the one that caused a legitimate family feud the one year my cousin tried to bring a cornbread version. We don’t talk about that year. I remember being a kid, perched on a stool, my only job to tear up stale bread into bite-sized pieces. It felt like the most important task in the world. The first time I made it on my own, I was so nervous. I called her three times just to confirm how much butter was an ‘obscene amount of butter’ (her words, not mine). I, of course, used the wrong kind of bread—some soft, fluffy sandwich loaf—and ended up with a pan of savory, sausage-flavored mush. Oops. It was still delicious, don’t get me wrong, but it wasn’t *right*. This recipe is the result of years of perfecting, of learning that stale, sturdy bread is your best friend, and that there’s no such thing as too much sage. It’s comfort in a casserole dish, a hug from the inside out, and the one thing that truly makes it feel like the holidays.
The funniest moment had to be the year my dog, Buster, somehow managed to snag a whole cooked sausage off the counter while my back was turned. I spent a solid ten minutes searching for it, convinced I was losing my mind and had miscounted. I only figured it out when I saw him looking suspiciously happy in the corner. We were one sausage short that year, but it was worth it for the story.


Ingredients
- Sturdy White Bread: You need bread that can stand up to the broth. I mean it. Get a good, crusty loaf and let it sit out for a day or two. If you use soft sandwich bread, you’re heading for mush-ville. I learned that the hard way.
- Pork Sausage: I swear by a simple, savory pork sausage, like Jimmy Dean’s regular roll. The flavor is classic. One year I tried a spicy Italian version and, while good, it just wasn’t the same Thanksgiving taste.
- Yellow Onion & Celery: The classic duo. Don’t skimp here. This is the foundation of your flavor, and the smell of them sautéing in butter is basically the official start of the holiday for me.
- Unsalted Butter: A whole stick. Yes. A whole one. Don’t question it. This is not the time for health food. Full-fat butter provides richness that you just can’t replicate.
- Chicken Broth: Use a low-sodium one so you can control the salt level. The amount can vary depending on how stale your bread is, so have a little extra on hand just in case.
- Fresh Sage & Thyme: Please, please use fresh if you can. It makes such a difference. The smell alone is worth it. Dried works in a pinch, but you’ll need to use less.
Instructions
- Step 1: Prep Your Bread
- First things first, let’s talk bread. If you were smart and planned ahead, your bread is already stale. If you’re like me and forgot, just cube it up and toast it in the oven at 300°F for about 15-20 minutes until it’s dried out. You want it to be like a crouton, ready to soak up all that goodness without falling apart. This is probably the most important step, so don’t skip it! Once it’s ready, just dump it all into the biggest bowl you own. Seriously, you’ll need the space.
- Step 2: Cook the Sausage
- Get a large skillet—I use my trusty cast iron—and crumble the sausage into it over medium heat. Break it up with a spoon as it cooks. You’re looking for it to be nicely browned and cooked through. No pink bits! This is where the flavor magic begins. The whole kitchen will start to smell amazing. Once it’s done, use a slotted spoon to transfer the sausage to the bowl with the bread, leaving the rendered fat in the skillet. Don’t you dare throw that liquid gold away!
- Step 3: Sauté the Veggies
- Melt that glorious stick of butter right into the sausage drippings in the skillet. Is it healthy? No. Is it necessary? Absolutely. Toss in your chopped onion and celery and cook them until they’re soft and translucent, which usually takes about 8-10 minutes. This is not the time to rush. You want them to release all their sweet, savory flavors. Scrape up any browned bits from the bottom of the pan—that’s pure flavor right there. I always sneak a bite at this stage. You know, for quality control.
- Step 4: Combine Everything
- Time to bring it all together. Scrape the buttery onion and celery mixture into the giant bowl with the bread and sausage. Add your fresh, chopped sage and thyme, the salt, and a generous amount of black pepper. Give it all a gentle toss. It’s going to look like a mountain of beige, but trust the process. Try to distribute everything evenly without completely crushing the bread cubes. It’s a delicate dance, but you can do it.
- Step 5: Add the Broth
- Now for the moisture. Slowly pour in about two cups of the chicken broth, tossing gently as you go. You want the bread to be moist, but not swimming. The amount you need really depends on how dry your bread was. I add a little at a time until it feels right—not too soggy, not too dry. This is where you have to trust your gut. Let it sit for a few minutes to really absorb. Then, stir in the whisked egg. It acts as a binder and gives the stuffing a lovely texture.
- Step 6: Bake to Perfection
- Transfer the whole glorious mess into a greased 9×13 inch baking dish. You can bake it right away, or this is the point where you can cover and refrigerate it overnight. When you’re ready, bake it covered with foil at 375°F for 30 minutes. Then, remove the foil and bake for another 15-20 minutes, or until the top is beautifully golden brown and crispy. Those crispy top bits are what my family fights over every single year. Let it rest for a few minutes before serving. Enjoy the cheers!
This stuffing is more than just food; it’s a tradition. Every time I make it, I feel like I’m channeling my Aunt Carol, standing in her sunny yellow kitchen. It connects me to the holidays of my childhood, and now that I’m the one making it, I get to see that same joy on the faces of my own family. It’s a whole lot of love baked into a 9×13 pan.
Storage Tips
Okay, let’s be real about leftovers. They’re the best part of Thanksgiving! Let the stuffing cool completely, then store it in an airtight container in the fridge for up to 4 days. To reheat, I highly recommend the oven or a toaster oven. Pop it in at 350°F until it’s warmed through—this helps re-crisp the top. I microwaved it once in a hurry and it got kind of steamy and soft, which was a bit sad. So don’t do that if you can avoid it, lol. If it seems a little dry, you can sprinkle a tablespoon or two of chicken broth over it before reheating. It works like a charm.
Ingredient Substitutions
I’m a traditionalist with this recipe, but I have experimented! If you don’t eat pork, a good quality turkey or chicken sausage works well. The flavor will be a bit milder, so you might want to amp up the herbs. For a vegetarian version, I once tried using a plant-based sausage and vegetable broth. To be honest, it was pretty good! You just need to add a bit more butter or olive oil to make up for the lack of fat. You can also swap the bread. I’ve used sourdough for a tangy twist and challah for a richer, slightly sweeter stuffing. Just make sure whatever you use is sturdy and stale!
Serving Suggestions
Obviously, this stuffing belongs next to a giant roasted turkey and a puddle of gravy. It’s its natural habitat. But don’t stop there! I love it with a dollop of cranberry sauce on top for that perfect sweet-and-savory bite. For a full-on comfort meal, a scoop of this next to some creamy mashed potatoes is basically a hug on a plate. Drink-wise, a nice Pinot Noir or a festive sparkling cider pairs beautifully. And for the ultimate day-after meal? A Thanksgiving leftover sandwich with turkey, stuffing, and cranberry sauce. You just can’t beat it.
Cultural Backstory
Stuffing, or ‘dressing’ as it’s called in many parts of the U.S., is a cornerstone of the American Thanksgiving meal. Its roots go way back, with recipes for stuffing birds appearing in Roman cookbooks! But this specific style—the humble bread, sausage, and sage combination—feels deeply rooted in classic American home cooking. For my family, it’s a recipe that’s been passed down through at least three generations. It’s less about a formal culinary history and more about our own personal history. It’s the taste of November, of family gathering in a warm kitchen, of the happy, chaotic energy that defines the holiday for us. It’s our tradition, and it’s perfect.
So there it is. Our family’s little piece of holiday magic. It might seem like just a side dish, but it’s always the star of my plate. I hope you make it, mess it up a little, make it your own, and love it as much as we do. Let me know how it turns out! I’d love to hear your stuffing stories.
Frequently Asked Questions
- → Can I prepare this stuffing ahead of time?
Oh, absolutely! And you should, to save your sanity on Thanksgiving Day. You can assemble the entire thing (right up to the baking step), cover it tightly, and keep it in the fridge for up to 24 hours. Then just pop it in the oven when you’re ready.
- → My stuffing came out dry. What did I do wrong?
It probably just needed a bit more broth! The exact amount can vary depending on how stale your bread is. Next time, add a little more liquid until it feels nicely saturated but not watery. You can always salvage a dry stuffing by drizzling more warm broth over it before serving.
- → Can I bake this inside the turkey?
My Aunt Carol always said not to, and I stick with that! It’s a food safety thing—it’s hard to get the stuffing to a safe temperature without overcooking the turkey. Baking it separately also guarantees you get that amazing crispy top, which is, in my opinion, non-negotiable.
- → How do I know when the stuffing is done?
The most important thing is that the center is hot and cooked through, especially since there’s a raw egg in there. The top should be a beautiful golden brown and crispy. If you have an instant-read thermometer, the center should register at least 165°F.
- → Can I add other ingredients like mushrooms or apples?
Go for it! This recipe is a great base for experimenting. I’ve added sautéed mushrooms before and it was delicious. A chopped apple would add a lovely sweetness. Just cook them along with the onions and celery. Make it your own—that’s what home cooking is all about!
My Family’s Classic Thanksgiving Sausage Stuffing Recipe
- Prep Time: 20 Minutes
- Cook Time: 50 Minutes
- Total Time: 70 Minutes
- Yield: 10-12 Servings 1x
- Category: Home
Description
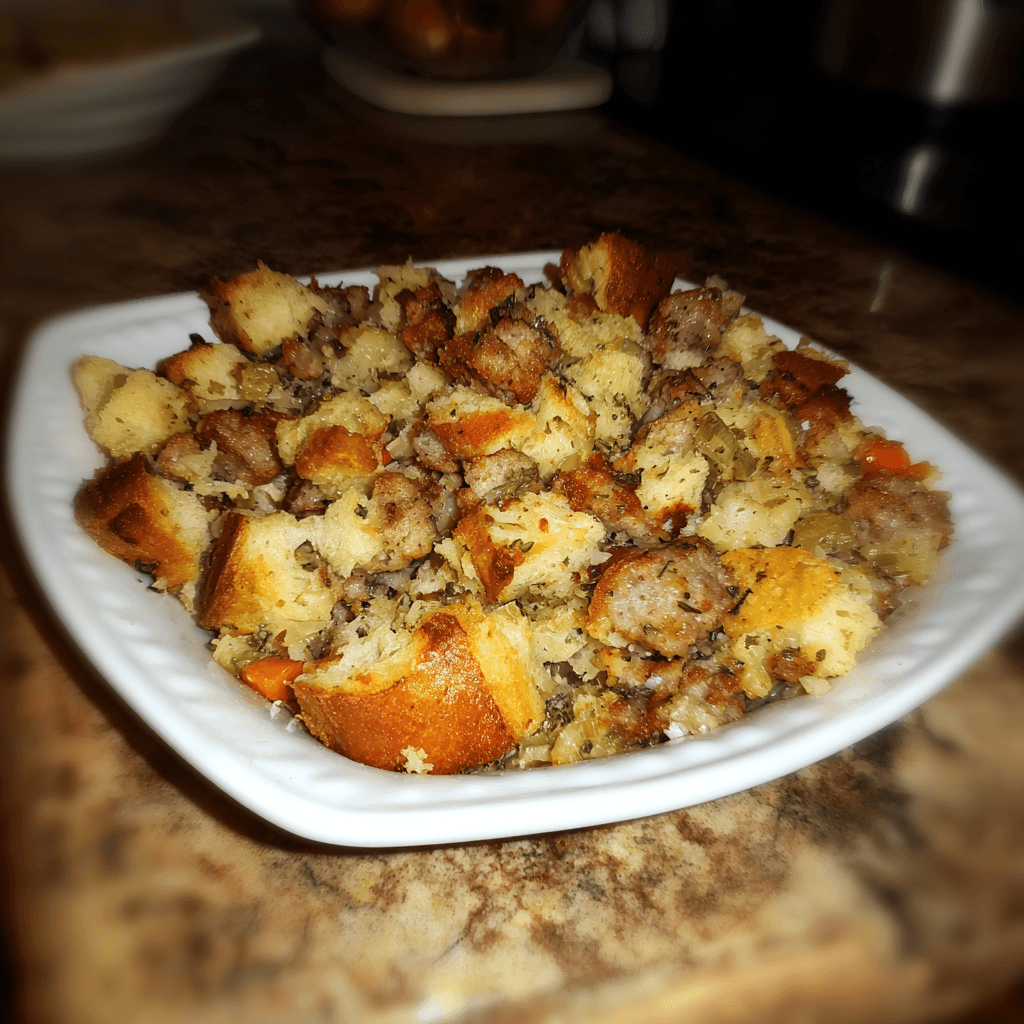
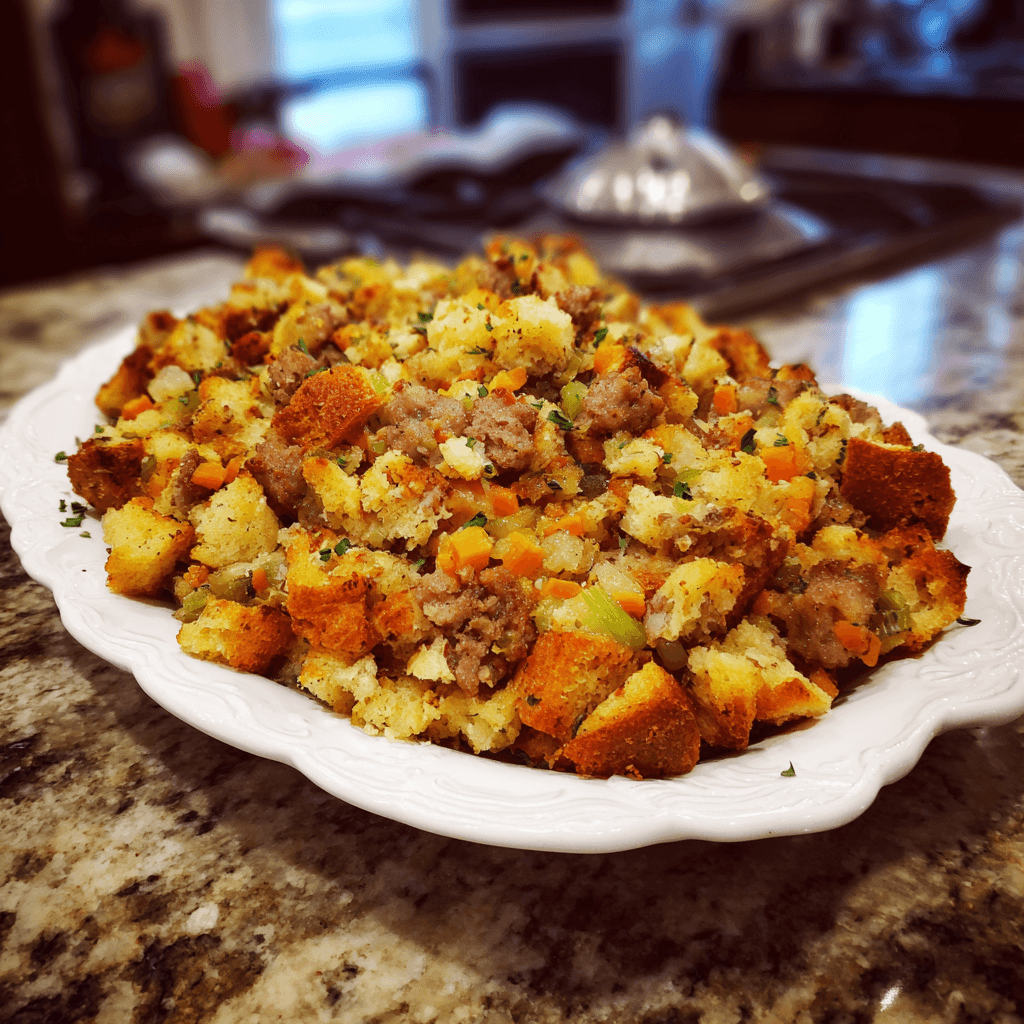
This is the real deal—my family’s classic sausage stuffing. It’s savory, moist, perfectly seasoned, and the absolute star of our Thanksgiving table.
Ingredients
- The Stuffing Base:
- 1 loaf (about 1 lb) sturdy white bread, cut into 1-inch cubes and left out to dry overnight
- 1 lb savory pork sausage
- 1 stick (1/2 cup) unsalted butter
- Flavor Builders:
- 2 medium yellow onions, chopped
- 4 celery stalks, chopped
- 2–3 tablespoons fresh sage, finely chopped
- 1 tablespoon fresh thyme leaves
- 1 teaspoon salt
- 1/2 teaspoon black pepper
- The Binders:
- 3–4 cups low-sodium chicken broth
- 2 large eggs, lightly whisked
Instructions
- Prep Your Bread: First things first, let’s talk bread. If you were smart and planned ahead, your bread is already stale. If you’re like me and forgot, just cube it up and toast it in the oven at 300°F for about 15-20 minutes until it’s dried out. You want it to be like a crouton, ready to soak up all that goodness without falling apart. This is probably the most important step, so don’t skip it! Once it’s ready, just dump it all into the biggest bowl you own. Seriously, you’ll need the space.
- Cook the Sausage: Get a large skillet—I use my trusty cast iron—and crumble the sausage into it over medium heat. Break it up with a spoon as it cooks. You’re looking for it to be nicely browned and cooked through. No pink bits! This is where the flavor magic begins. The whole kitchen will start to smell amazing. Once it’s done, use a slotted spoon to transfer the sausage to the bowl with the bread, leaving the rendered fat in the skillet. Don’t you dare throw that liquid gold away!
- Sauté the Veggies: Melt that glorious stick of butter right into the sausage drippings in the skillet. Is it healthy? No. Is it necessary? Absolutely. Toss in your chopped onion and celery and cook them until they’re soft and translucent, which usually takes about 8-10 minutes. This is not the time to rush. You want them to release all their sweet, savory flavors. Scrape up any browned bits from the bottom of the pan—that’s pure flavor right there. I always sneak a bite at this stage. You know, for quality control.
- Combine Everything: Time to bring it all together. Scrape the buttery onion and celery mixture into the giant bowl with the bread and sausage. Add your fresh, chopped sage and thyme, the salt, and a generous amount of black pepper. Give it all a gentle toss. It’s going to look like a mountain of beige, but trust the process. Try to distribute everything evenly without completely crushing the bread cubes. It’s a delicate dance, but you can do it.
- Add the Broth: Now for the moisture. Slowly pour in about three cups of the chicken broth, tossing gently as you go. You want the bread to be moist, but not swimming. The amount you need really depends on how dry your bread was. I add a little at a time until it feels right—not too soggy, not too dry. Let it sit for a few minutes to really absorb. Then, stir in the whisked eggs. They act as a binder and give the stuffing a lovely texture.
- Bake to Perfection: Transfer the whole glorious mess into a greased 9×13 inch baking dish. You can bake it right away, or this is the point where you can cover and refrigerate it overnight. When you’re ready, bake it covered with foil at 375°F for 30 minutes. Then, remove the foil and bake for another 15-20 minutes, or until the top is beautifully golden brown and crispy. Those crispy top bits are what my family fights over every single year. Let it rest for a few minutes before serving.


