
Introduction to Cherry Crumb Bars
There’s something magical about the smell of sweet cherries wafting through the kitchen, isn’t there? I still remember the first time I baked Cherry Crumb Bars with my grandmother. We would spend the afternoon pitting cherries, laughing as we created a tasty mess. Whether you’re juggling work calls or soccer practice, this recipe for Cherry Crumb Bars is your new best friend. These delightful bars combine a buttery crumb crust with a luscious cherry filling, making them the ultimate treat for any occasion. They’re excellent for weekend gatherings or as an after-school snack, bringing a taste of nostalgia to your table.
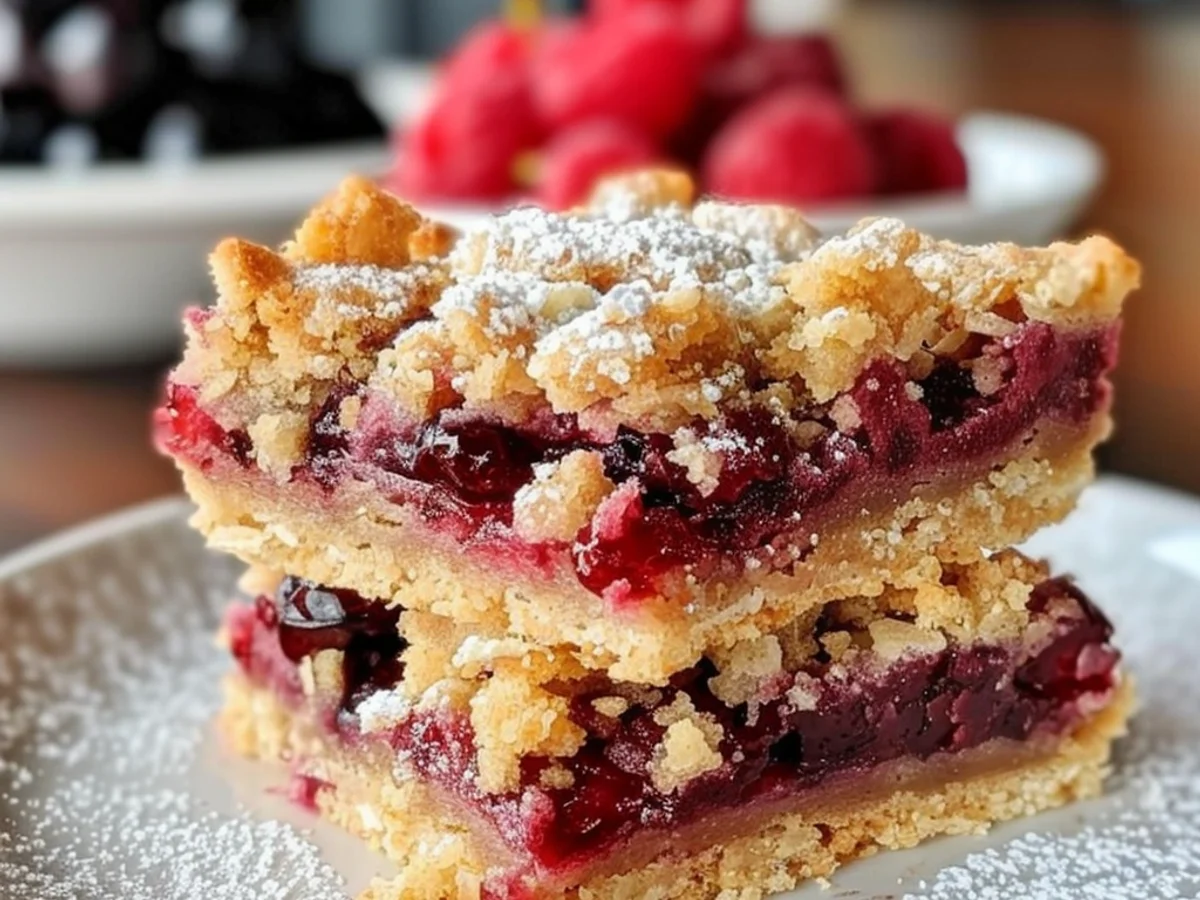
Cherry Crumb Bars are not just a dessert; they’re a slice of happiness that can brighten even the busiest of days. Imagine slicing into a warm, tender bar, the tartness of cherries mingling with the sweetness of sugar and the crunch of a crumbly topping. It’s a comforting embrace for your taste buds, promising satisfaction in every bite. With just a handful of ingredients and minimal prep time, you’ll want to make these Cherry Crumb Bars a staple in your baking repertoire!

Why You’ll Love This Cherry Crumb Bars
Picture this: it’s a busy afternoon, and you’re trying to juggle work calls, soccer practice, and dinner prep all at once. Enter these Cherry Crumb Bars, your new best friend in the kitchen. This delightful treat is like a cozy blanket for your taste buds, wrapping you in sweet cherry goodness and buttery, crumbly perfection. Not only does it save time, but it also offers a satisfying dessert that you can whip up in no time.
These Cherry Crumb Bars are a excellent solution for those hectic days. No more 6 PM panic-dinner’s ready faster than a microwave meal! With just a handful of ingredients and minimal effort, you can create a dessert that feels indulgent yet is incredibly easy to prepare. Plus, the vibrant color and juicy cherry filling will make your family swoon. So, whether you’re serving them as a snack or a dessert, you’ll find that these bars are a nice addition to any meal or gathering.
In just a few simple steps, you can enjoy the sweet and tangy flavors of fresh cherries combined with a crumbly topping that’s just irresistible. Trust me, once you make these Cherry Crumb Bars, they will become a staple in your kitchen!
Ingredients for Cherry Crumb Bars
When it comes to making Cherry Crumb Bars, having the right ingredients on hand is crucial for creating a tasty treat that hits all the right notes. Picture yourself in your kitchen, surrounded by the vibrant colors of fresh cherries and the comforting aroma of buttery crust-this recipe is sure to elevate your baking game. Whether you’re juggling work calls or soccer practice, this recipe is your new best friend.
Let’s dive into what you’ll need to whip up these delightful Cherry Crumb Bars. First, grab some plump, juicy cherries; they’re the star of the show! Their sweet-tart flavor adds a refreshing burst to each bite. Next, you’ll need all-purpose flour, which forms the base of your crumbly crust and topping.
Don’t forget the granulated sugar to sweeten the cherries and the crust-it’s the magic ingredient that brings everything together. You’ll also want some unsalted butter, as it lends richness and creates that melt-in-your-mouth texture. A pinch of salt is essential, balancing the sweetness and enhancing all the flavors.
Feeling adventurous? Consider adding a dash of almond extract to elevate the flavor profile of your Cherry Crumb Bars. It complements the cherries beautifully! If you don’t have cherries on hand, fear not-frozen cherries work just as well, just ensure they’re thawed before using. Not a fan of cherries? Swap them for blueberries or raspberries; your secret’s safe with me!
Lastly, if you want a nutty crunch, sprinkle in some chopped walnuts or almonds for an added layer of texture. With these ingredients, your cherry crumb bars will be a crowd-pleaser, excellent for any occasion!
How to Make Cherry Crumb Bars
Making Cherry Crumb Bars is a delightful journey that starts with a few simple ingredients and ends with a tasty treat that your family will adore. Whether you’re juggling work calls or soccer practice, this recipe is your new best friend. The sweet and tart cherries nestled in a buttery crumb crust create a dessert that feels like a warm hug on a chilly day. Let’s dive into the steps to create these scrumptious bars!
- Step 1: Prepare the Cherry Filling
- Step 2: Make the Crust and Crumble Topping
- Step 3: Assemble the Bars
- Step 4: Bake to Perfection
- Step 5: Cool and Serve
Start by preheating your oven to 375°F (190°C). This will ensure it’s nice and hot when you’re ready to bake. In a mixing bowl, combine 2 cups of pitted and halved cherries with ½ cup of granulated sugar and 2 tablespoons of cornstarch. Stir gently until the cherries are coated and set aside. This mixture will create a juicy filling that adds vibrant flavor to your Cherry Crumb Bars.
In another bowl, combine 1 ½ cups of all-purpose flour, ½ cup of brown sugar, and ½ teaspoon of salt. Mix well, then cut in ½ cup of cold butter until the mixture resembles coarse crumbs. You can use a pastry cutter or your fingers for this step. Reserve about one cup of this mixture to use as the crumb topping. Add 1 teaspoon of vanilla extract to the remaining mixture and stir until combined.
Press the dough firmly into the bottom of a greased 9×9-inch baking dish to form the base. Pour the cherry filling over the crust, spreading it evenly. Then, sprinkle the reserved crumb topping over the cherries. This layer will bake to a golden perfection, creating a beautiful contrast with the vibrant filling.
Place the baking dish in the preheated oven and bake for 30-35 minutes, or until the top is golden brown and the cherry filling is bubbling. The aroma wafting from the oven will have everyone eagerly waiting for a taste of your Cherry Crumb Bars.
Once baked, remove the dish from the oven and allow it to cool completely on a wire rack. Patience is key here; letting the bars cool will help them set up nicely. Once cooled, cut into squares and serve. You can enjoy them as they are or with a scoop of vanilla ice cream for an indulgent treat!
With these straightforward steps, you’ll have tasty Cherry Crumb Bars ready in no time. Enjoy the delightful combination of flavors and textures that make this dessert a true crowd-pleaser!
Tips for Success
Creating the ultimate Cherry Crumb Bars is all about attention to detail and a few insider secrets. Whether you’re a seasoned baker or a first-timer, these tips will help ensure your bars turn out perfectly every time. Pro tip: Let the bars cool completely before cutting; patience pays off!
- Use fresh cherries: Fresh cherries make a world of difference. Their juicy sweetness complements the crumb topping beautifully.
- Don’t skip the chilling: Chilling the dough for the crumb topping creates a flaky texture that’s hard to resist.
- Layer wisely: Spread the cherry filling evenly to avoid sogginess. A consistent layer allows for even cooking.
- Adjust sweetness: Taste the cherry mixture before baking. If the cherries are tart, a bit more sugar can balance the flavors.
- excellent bake time: Keep an eye on the bars as they bake. A golden-brown top indicates they’re nearly done, but check for doneness with a toothpick.
- Store properly: Keep any leftovers in an airtight container at room temperature for up to three days. Enjoy them as a snack!
Equipment Needed
Making Cherry Crumb Bars is as much about having the right tools as it is about the ingredients. Whether you’re a seasoned baker or just starting out, these essentials will help you create the excellent dessert.
- Mixing Bowls: A set of various sizes makes combining ingredients a breeze. Glass or stainless steel bowls work wonders.
- Measuring Cups and Spoons: Precision is key in baking. Grab a set that you can rely on for both dry and liquid ingredients.
- 9×13-inch Baking Dish: This is the excellent size for your Cherry Crumb Bars. If you don’t have one, a similar-sized pan will do!
- Whisk: A trusty whisk will help you mix your dry ingredients thoroughly. A fork can work in a pinch, too!
- Spatula: A silicone spatula is fantastic for folding and spreading the crumb mixture evenly. A wooden spoon can also work.
With these tools at your fingertips, you’ll be well on your way to whipping up a batch of delightful Cherry Crumb Bars that everyone will love. Happy baking!
Variations
Cherry Crumb Bars are a delightful treat, but did you know that you can easily customize them to suit various tastes and dietary needs? Whether you’re aiming for a healthier twist or just want to experiment with flavors, these variations will keep your taste buds excited. Let’s dive into some creative options!
- Dietary-Friendly Tweaks:
- For a gluten-free version, swap all-purpose flour with almond or coconut flour. You’ll enjoy a nutty flavor that pairs beautifully with cherries.
- Vegans can replace the butter with coconut oil or a plant-based margarine. This keeps the crumbly texture while making it dairy-free.
- Try using maple syrup instead of granulated sugar for a natural sweetness that adds depth to the bars.
- Seasonal Twists:
- In the fall, mix in some chopped pecans or walnuts for a delightful crunch that complements the cherries.
- During summer, throw in some fresh blueberries along with the cherries for a vibrant burst of flavor that’s a feast for the eyes!
- For a holiday twist, add a hint of cinnamon or nutmeg to the crumb topping, evoking the cozy warmth of your favorite seasonal treats.
- Flavor Infusions:
- Experiment with a splash of almond extract in the filling for a lovely, nutty aroma that enhances the cherry flavor.
- Swap out cherries for other fruits like raspberries or strawberries to create your own fruity variation while keeping the same crumbly goodness.
- Add a layer of cream cheese between the cherry filling and crumb topping for a rich, creamy contrast that elevates the bars to a whole new level.
With these variations, your Cherry Crumb Bars can be as unique as your taste preferences. Whether you’re looking to accommodate dietary restrictions or just enjoy in new flavors, there’s a twist for everyone!
Serving Suggestions
Cherry Crumb Bars are not just a delightful treat on their own; they shine even brighter when paired with the right accompaniments. Whether you’re hosting a gathering or just indulging in a quiet evening, these suggestions will elevate your Cherry Crumb Bars experience.
- Serve with vanilla ice cream: The creamy texture of ice cream perfectly complements the tartness of the cherries, creating a blissful harmony of flavors.
- Accompany with a dollop of whipped cream: A light, fluffy topping adds a touch of elegance and sweetness, making each bite more indulgent.
- Pair with a hot cup of coffee or tea: The warmth of your favorite brew enhances the rich flavors of the Cherry Crumb Bars, making it a cozy afternoon treat.
- Garnish with fresh mint leaves: A sprinkle of fresh mint not only adds a pop of color but also a refreshing note that balances the sweetness.
- Serve on a rustic wooden board: Presentation matters! Placing your Cherry Crumb Bars on a charming board can transform your dessert into an eye-catching centerpiece.
With these serving suggestions, your Cherry Crumb Bars will be the highlight of any gathering, offering delightful contrasts and a memorable experience for you and your guests.
Print
Cherry Crumb Bars That Will Delight Your Taste Buds!
- Prep Time: 15 minutes
- Cook Time: 35 minutes
- Total Time: 50 minutes
- Yield: 16 bars 1x
- Category: Dessert
- Cuisine: American
Description
Delicious Cherry Crumb Bars with a buttery crust and sweet cherry filling, topped with a crumbly streusel.
Ingredients
- 1 1/2 cups all-purpose flour
- 1/2 cup granulated sugar
- 1/2 cup unsalted butter, softened
- 1/4 teaspoon salt
- 1/2 teaspoon baking powder
- 1 cup fresh or frozen cherries, pitted and halved
- 1 tablespoon lemon juice
- 1/4 cup brown sugar
- 1 teaspoon vanilla extract
Instructions
- Preheat the oven to 350°F (175°C).
- In a mixing bowl, combine flour, sugar, salt, and baking powder.
- Add the softened butter and mix until crumbly.
- Press half of the mixture into the bottom of a greased 8×8 inch baking dish.
- In another bowl, mix the cherries with lemon juice, brown sugar, and vanilla extract.
- Spread the cherry mixture over the crust in the baking dish.
- Sprinkle the remaining crumb mixture over the cherries.
- Bake for 30-35 minutes until golden brown.
- Allow to cool before cutting into bars.
Notes
- For a gluten-free version, substitute all-purpose flour with a gluten-free blend.
- Feel free to add nuts for extra crunch.
- These bars can be stored in an airtight container for up to 3 days.
Nutrition
- Serving Size: 1 bar
- Calories: 180
- Sugar: 10g
- Sodium: 50mg
- Fat: 8g
- Saturated Fat: 5g
- Carbohydrates: 25g
- Fiber: 1g
- Protein: 2g
- Cholesterol: 15mg


