

I remember the first time I attempted a Caramel Apple Pie. It was a crisp autumn evening, leaves crunching outside, and I had this grand vision of a picture-perfect dessert. Honestly, I thought it would be a breeze. I had apples, I had flour, what could go wrong? Well, let’s just say my first crust looked more like a topographical map of a very lumpy planet. But the smell, oh, the smell! Cinnamon, baked apples, and that sweet, buttery caramel simmering away. It filled my tiny kitchen with such warmth. Even with its rustic charm (read: wonky edges), that first slice of Caramel Apple Pie was a revelation. It tasted like home, like a hug, and it’s been a fall tradition ever since.
One time, I was so excited to get this pie in the oven, I completely forgot to add the cinnamon to the apple filling. I pulled it out, smelled it, and thought, ‘Something’s missing.’ My husband took a bite and said, ‘It’s good, but… plain?’ Oops! I just drizzled extra cinnamon caramel sauce on top, and we called it a ‘deconstructed’ Caramel Apple Pie. Hey, it still tasted pretty darn good, and we had a laugh about my forgetfulness. That’s the beauty of baking, sometimes the mistakes lead to new, delicious discoveries!

Ingredients
- All-Purpose Flour: For that flaky, tender crust. Honestly, don’t skimp on quality here, it makes a difference. I’ve tried whole wheat once, and while adventurous, it just didn’t give that classic feel.
- Granny Smith Apples: The star of this Caramel Apple Pie! Their tartness is essential to cut through the richness of the caramel. I tried using all Honeycrisp once, and it was just too sweet for me. You need that zing!
- Unsalted Butter: In both the crust and the caramel. Using unsalted means you control the salt content. I swear by a good quality European butter, it makes the crust extra tender.
- Brown Sugar: For the filling and the caramel. The molasses notes in brown sugar just sing with the apples. I’ve used white sugar in a pinch, but it lacks that deep, warm flavor.
- Heavy Cream: For the luscious caramel. This is where the magic happens, turning sugar into liquid gold. Don’t even think about light cream, just don’t. It won’t emulsify the same way.
- Ground Cinnamon & Nutmeg: These spices are the soul of any apple pie. I like to add a generous pinch, it just screams ‘fall.’ Freshly grated nutmeg? Oh, that’s a game-changer if you have it.
- Vanilla Extract: A touch of vanilla rounds out all the flavors, especially in the caramel. I always use real vanilla, not imitation. The difference is honestly noticeable.
- Lemon Juice: A little splash helps prevent the apples from browning and brightens the flavors. It’s a small detail, but it makes a big impact on the overall taste of your Caramel Apple Pie.
Instructions
- Crafting Your Flaky Crust:
- First, you gotta get that pie crust sorted. In a large bowl, whisk together your flour, sugar, and salt. Now, cut in that cold, unsalted butter. I like to use a pastry blender or even my fingertips, but quickly! You want little pea-sized pieces of butter throughout. This is what gives you those glorious, flaky layers. Slowly add ice water, a tablespoon at a time, mixing until just combined. Don’t overmix, or your crust will be tough. Gather it into two discs, wrap ’em up, and let them chill in the fridge for at least 30 minutes. Trust me, this rest is crucial.
- Preparing the Caramel Apple Filling:
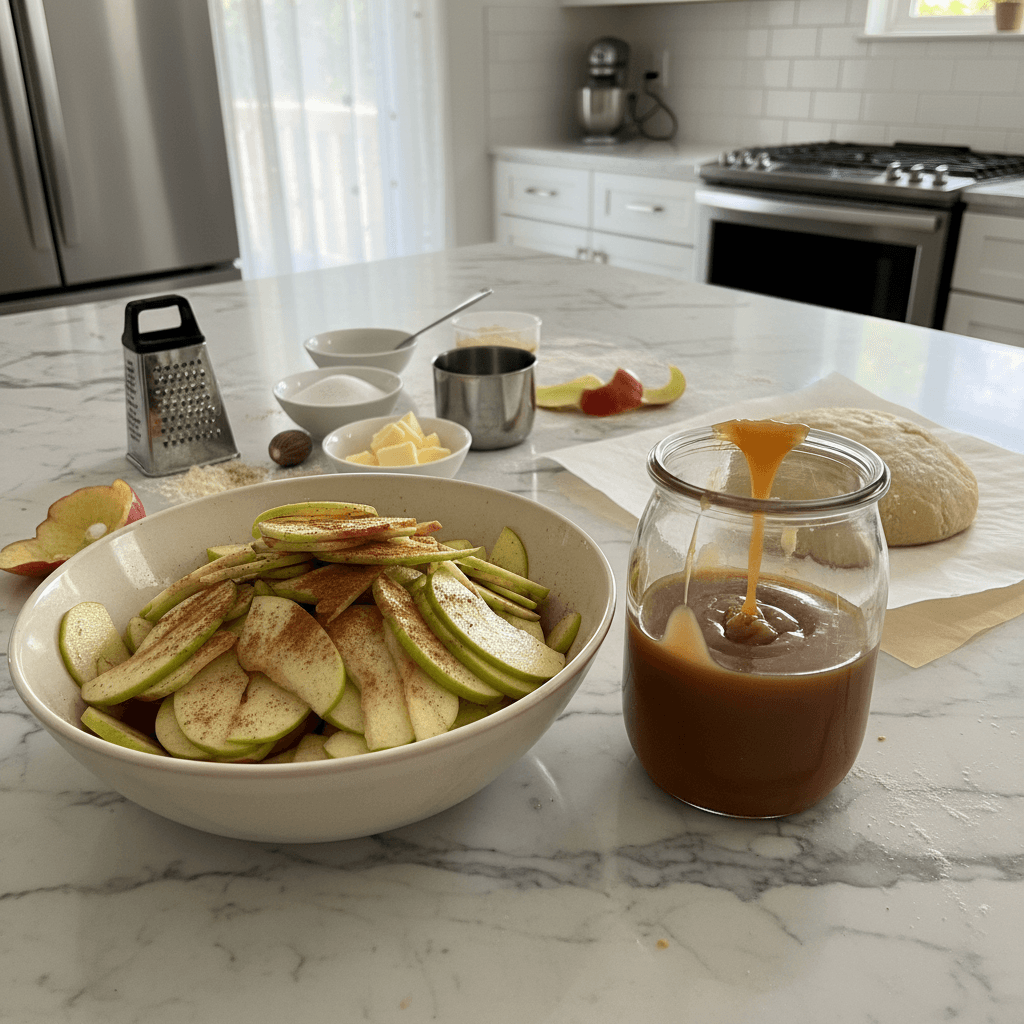
- While your dough is chilling, let’s tackle the apples for our Caramel Apple Pie. Peel, core, and slice those Granny Smiths. I usually go for about 1/4-inch thick slices, they cook down nicely without turning to mush. Toss them in a big bowl with the brown sugar, cinnamon, nutmeg, a pinch of salt, and that splash of lemon juice. Give it a good mix, making sure every apple slice is coated. This is where your kitchen starts to smell absolutely divine, hon. Set it aside to let the flavors meld a bit and for the apples to release some of their juices.
- Whipping Up the Homemade Caramel:
- Okay, time for the star: the caramel! In a heavy-bottomed saucepan, melt your butter over medium heat. Stir in the brown sugar and a pinch of salt. Cook, stirring constantly, until it’s bubbly and the sugar is dissolved, about 2-3 minutes. This is where I always get a bit nervous, watching it not burn! Slowly, very slowly, pour in the heavy cream, whisking constantly. It’ll bubble up like crazy, don’t panic! Reduce the heat to low and let it simmer for another 5-7 minutes, until it thickens slightly. Stir in the vanilla extract. Let it cool a bit, it’ll thicken more as it cools.
- Assembling Your Caramel Apple Pie:
- Preheat your oven to 400°F (200°C). Grab one of your chilled pie dough discs and roll it out on a lightly floured surface into a 12-inch circle. Carefully transfer it to a 9-inch pie plate. Trim the edges, leaving about a 1/2-inch overhang. Now, pour your apple filling into the crust. Drizzle about half of your cooled caramel sauce over the apples. Roll out your second dough disc. You can make a lattice top (a bit fiddly, but so pretty!) or just lay it over the top, cutting a few slits for steam. Crimp the edges to seal. I usually brush with a little egg wash and sprinkle with coarse sugar for sparkle.
- Baking to Golden Perfection:
- Place your assembled Caramel Apple Pie on a baking sheet (to catch any drips trust me, you’ll thank me later!). Bake for 15 minutes at 400°F (200°C). Then, reduce the oven temperature to 375°F (190°C) and continue baking for another 45-55 minutes, or until the crust is golden brown and the filling is bubbly. If the crust starts browning too quickly, loosely tent it with foil. I once forgot the baking sheet, and my oven had a caramel party. Messy, but smelled fantastic!
- Cooling and Serving Your Masterpiece:
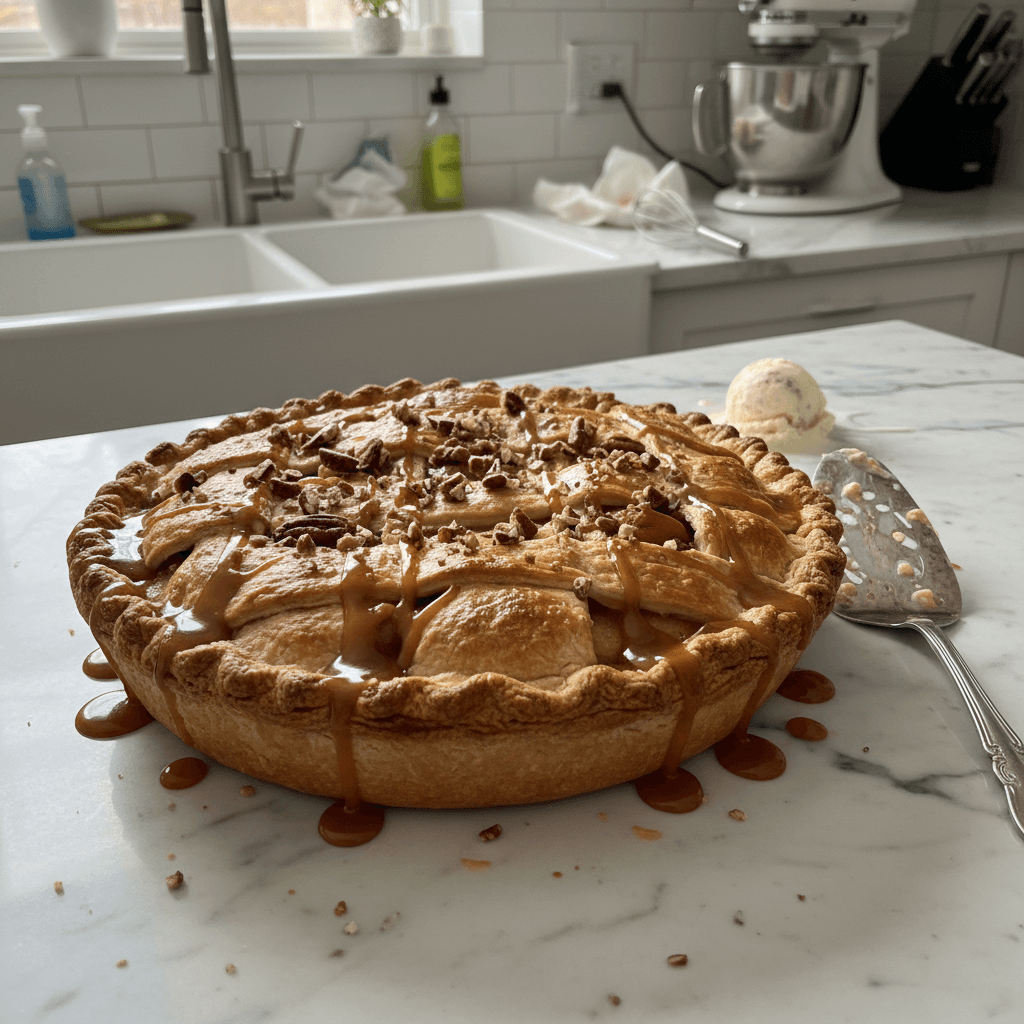
- This is the hardest part, honestly: letting it cool! Once your Caramel Apple Pie comes out of the oven, it needs to cool completely on a wire rack for at least 3-4 hours. This allows the filling to set properly, otherwise, it’ll be a runny mess when you slice it. I know, the wait is excruciating, especially with that incredible smell! Just before serving, gently warm the remaining caramel sauce and drizzle it generously over each slice. A scoop of vanilla bean ice cream is practically mandatory.
I remember one Thanksgiving, I was making two of these Caramel Apple Pies. My little niece, who was maybe five, ‘helped’ by trying to taste-test the raw apple filling. She had cinnamon and sugar all over her face, giggling. It was pure chaos, but also one of those sweet, messy kitchen moments you never forget. This pie isn’t just a dessert, it’s a memory-maker, a centerpiece for family and friends, and honestly, a testament to the joy of baking something from scratch.
Storing Your Homestyle Caramel Apple Pie
Storing this beautiful Caramel Apple Pie is pretty straightforward, but I’ve learned a few things the hard way. Once the pie is completely cooled (and I mean completely, otherwise you’ll get condensation and a soggy bottom yuck!), you can cover it loosely with plastic wrap or foil. It’ll keep at room temperature for about 2 days. If you want it to last longer, pop it in the fridge, it’s good for up to 4-5 days there. I microwaved a slice once, hoping for that warm, gooey goodness, but the crust got a bit soft and the caramel separated a tiny bit. So, for reheating, I prefer a gentle warm-up in the oven at 300°F (150°C) for about 15-20 minutes. It crisps up the crust beautifully and warms the filling without making it mushy.
Caramel Apple Pie Ingredient Swaps
I’ve tried my fair share of ingredient experiments with Caramel Apple Pie, sometimes out of necessity, sometimes just for fun. For the apples, if you can’t find Granny Smiths, a mix of Honeycrisp and Braeburn works really well, you still get that balance of sweet and tart. I once used all Golden Delicious, and it was a bit too soft and sweet for my liking, honestly. For the caramel, if you’re short on heavy cream, evaporated milk can work, but it won’t be quite as rich or thick. I tried regular milk once, and it just didn’t get to the right consistency a bit watery, if I’m being real. You can also play with the spices, a pinch of allspice or ginger can add a lovely warmth. Just don’t go too wild, or you might lose that classic apple pie flavor!
Serving Up Your Caramel Apple Pie
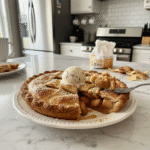
Oh, the joy of serving a slice of warm Caramel Apple Pie! It’s an experience, not just a dessert. My absolute favorite way to serve it is with a generous scoop of vanilla bean ice cream, the cold, creamy ice cream melting into the warm, gooey pie is just heavenly. A dollop of freshly whipped cream is also a fantastic choice, especially if you’re not an ice cream person. For a truly decadent experience, a tiny sprinkle of flaky sea salt on top of the caramel drizzle just before serving really enhances all those sweet and salty notes. This pie, a cozy blanket, and a good book? Yes please. Or maybe a fun board game with friends. It just fits any mood, honestly.
The Heart of Caramel Apple Pie
Caramel Apple Pie, while not having a single ancient cultural origin like some dishes, is a beautiful fusion of two beloved comfort foods: classic apple pie and rich caramel. Apple pie itself has roots tracing back to medieval Europe, a symbol of home and hearth, brought to America by early settlers. Caramel, on the other hand, comes from the French word ‘caramel’ (burnt sugar), with its history as a confectionery going back centuries. The combination feels so American, so autumnal, so perfectly comforting. For me, it evokes memories of my grandma’s kitchen in the fall, the air thick with the scent of baking apples and simmering sugar. It’s a recipe that feels like a warm hug, a reminder of simpler times and shared joy around the table.
This Caramel Apple Pie has seen me through countless fall seasons, holiday gatherings, and just plain old Tuesday nights when I needed a little extra comfort. Each time I make it, it brings a smile to my face, even if there’s a flour cloud or a caramel drip incident. It’s a labor of love, a delicious, sweet reward. I hope it brings as much warmth and joy to your kitchen as it does to mine. Don’t forget to tell me how your pie turns out, I love hearing about your kitchen adventures!
Frequently Asked Questions
- → Can I make the Caramel Apple Pie crust ahead of time?
Absolutely! I often make my pie dough a day or two in advance. Just wrap the discs tightly in plastic wrap and keep them in the fridge. It actually helps the gluten relax, which can lead to an even flakier crust. Super handy for busy baking days, honestly.
- → What if my caramel for the Caramel Apple Pie doesn’t thicken?
Oh, I’ve been there! Sometimes it just needs a little more time on the heat. Keep simmering it gently, stirring often, until it coats the back of a spoon. Make sure your heavy cream is room temp, too, cold cream can sometimes shock it. Don’t crank the heat, just be patient. It’ll get there, I promise.
- → My Caramel Apple Pie crust is browning too fast, what should I do?
This happens to me all the time! Just grab a piece of aluminum foil and loosely tent it over the pie. This will protect the crust from burning while the filling continues to cook. You can also buy a pie crust shield, but foil works just as well in a pinch. Don’t worry, your pie will be fine!
- → How do I store leftover slices of Caramel Apple Pie?
Once cooled, just cover any leftover slices with plastic wrap or foil. They’ll keep well at room temperature for a couple of days. For longer storage, pop them in an airtight container in the fridge for up to 4-5 days. I usually just grab a slice and warm it up slightly in the oven for a quick treat.
- → Can I add nuts to my Caramel Apple Pie for extra crunch?
You totally can! I’ve added chopped pecans or walnuts to the apple filling before, and it gives a lovely textural contrast. You could also sprinkle them on top of the pie before baking, or even toast them and add them with the caramel drizzle when serving. Experimentation is what makes baking fun!
Homestyle Caramel Apple Pie: A Sweet Fall Hug
- Prep Time: 45 Minutes
- Cook Time: 60 Minutes
- Total Time: 5 Hours (includes cooling)
- Yield: 8 Servings 1x
- Category: Dinner
Description
Rich Homestyle Caramel Apple Pie, bursting with tender apples and gooey caramel, is your perfect fall dessert. A truly comforting slice of homemade goodness.
Ingredients
- For the Flaky Crust:
- 2 ½ cups (300g) all-purpose flour
- 1 teaspoon salt
- 1 tablespoon granulated sugar
- 1 cup (226g) unsalted butter, very cold and cubed
- ½ cup (120ml) ice water, plus more if needed
- For the Caramel Apple Filling:
- 6–7 large Granny Smith apples (about 2 ½ lbs), peeled, cored, and sliced ¼-inch thick
- ½ cup (100g) packed light brown sugar
- 1 teaspoon ground cinnamon
- ¼ teaspoon ground nutmeg
- ¼ teaspoon salt
- 1 tablespoon fresh lemon juice
- For the Homemade Caramel:
- ½ cup (113g) unsalted butter
- ¾ cup (150g) packed light brown sugar
- ¼ teaspoon salt
- ½ cup (120ml) heavy cream, room temperature
- 1 teaspoon vanilla extract
- For the Finishing Touches:
- 1 large egg, whisked (for egg wash, optional)
- 1 tablespoon coarse sugar (for sprinkling, optional)
- Vanilla bean ice cream or whipped cream (for serving)
Instructions
- Crafting Your Flaky Crust:: First, you gotta get that pie crust sorted. In a large bowl, whisk together your flour, sugar, and salt. Now, cut in that cold, unsalted butter. I like to use a pastry blender or even my fingertips, but quickly! You want little pea-sized pieces of butter throughout. This is what gives you those glorious, flaky layers. Slowly add ice water, a tablespoon at a time, mixing until just combined. Don’t overmix, or your crust will be tough. Gather it into two discs, wrap ’em up, and let them chill in the fridge for at least 30 minutes. Trust me, this rest is crucial.
- Preparing the Caramel Apple Filling:: While your dough is chilling, let’s tackle the apples for our Caramel Apple Pie. Peel, core, and slice those Granny Smiths. I usually go for about 1/4-inch thick slices; they cook down nicely without turning to mush. Toss them in a big bowl with the brown sugar, cinnamon, nutmeg, a pinch of salt, and that splash of lemon juice. Give it a good mix, making sure every apple slice is coated. This is where your kitchen starts to smell absolutely divine, hon. Set it aside to let the flavors meld a bit and for the apples to release some of their juices.
- Whipping Up the Homemade Caramel:: Okay, time for the star: the caramel! In a heavy-bottomed saucepan, melt your butter over medium heat. Stir in the brown sugar and a pinch of salt. Cook, stirring constantly, until it’s bubbly and the sugar is dissolved, about 2-3 minutes. This is where I always get a bit nervous, watching it not burn! Slowly, *very slowly*, pour in the heavy cream, whisking constantly. It’ll bubble up like crazy, don’t panic! Reduce the heat to low and let it simmer for another 5-7 minutes, until it thickens slightly. Stir in the vanilla extract. Let it cool a bit; it’ll thicken more as it cools.
- Assembling Your Caramel Apple Pie:: Preheat your oven to 400°F (200°C). Grab one of your chilled pie dough discs and roll it out on a lightly floured surface into a 12-inch circle. Carefully transfer it to a 9-inch pie plate. Trim the edges, leaving about a 1/2-inch overhang. Now, pour your apple filling into the crust. Drizzle about half of your cooled caramel sauce over the apples. Roll out your second dough disc. You can make a lattice top (a bit fiddly, but so pretty!) or just lay it over the top, cutting a few slits for steam. Crimp the edges to seal. I usually brush with a little egg wash and sprinkle with coarse sugar for sparkle.
- Baking to Golden Perfection:: Place your assembled Caramel Apple Pie on a baking sheet (to catch any drips – trust me, you’ll thank me later!). Bake for 15 minutes at 400°F (200°C). Then, reduce the oven temperature to 375°F (190°C) and continue baking for another 45-55 minutes, or until the crust is golden brown and the filling is bubbly. If the crust starts browning too quickly, loosely tent it with foil. I once forgot the baking sheet, and my oven had a caramel party. Messy, but smelled fantastic!
- Cooling and Serving Your Masterpiece:: This is the hardest part, honestly: letting it cool! Once your Caramel Apple Pie comes out of the oven, it needs to cool completely on a wire rack for at least 3-4 hours. This allows the filling to set properly, otherwise, it’ll be a runny mess when you slice it. I know, the wait is excruciating, especially with that incredible smell! Just before serving, gently warm the remaining caramel sauce and drizzle it generously over each slice. A scoop of vanilla bean ice cream is practically mandatory.


