
Remember that one Halloween where I tried to carve a pumpkin and it ended up looking like a melted alien? Yeah, my kitchen endeavors sometimes start a bit… chaotic. But then, there are recipes like these Black Velvet Cupcakes that just click. I first stumbled upon a recipe for a ‘black cake’ years ago, probably while scrolling through Pinterest at 2 AM, and thought, “Halloween!” The idea of a cupcake so dark it almost shimmered, yet tasted so wonderfully chocolatey, totally captivated me. It felt like a little bit of spooky magic, all in one bite. This recipe has become my secret weapon for adding a touch of eerie elegance to any fall gathering.
My first time making these, I spilled half the black food coloring gel right onto my white countertop. It looked like a crime scene, honestly! I panicked, thinking the whole batch of Black Velvet Cupcakes was doomed, but after a frantic clean-up and a deep breath, I kept going. The batter was a gorgeous, inky black, and the smell of cocoa filled the kitchen. It was a messy start, but the end result was so worth it a true testament to pushing through kitchen chaos!

Black Velvet Cupcakes: Ingredients
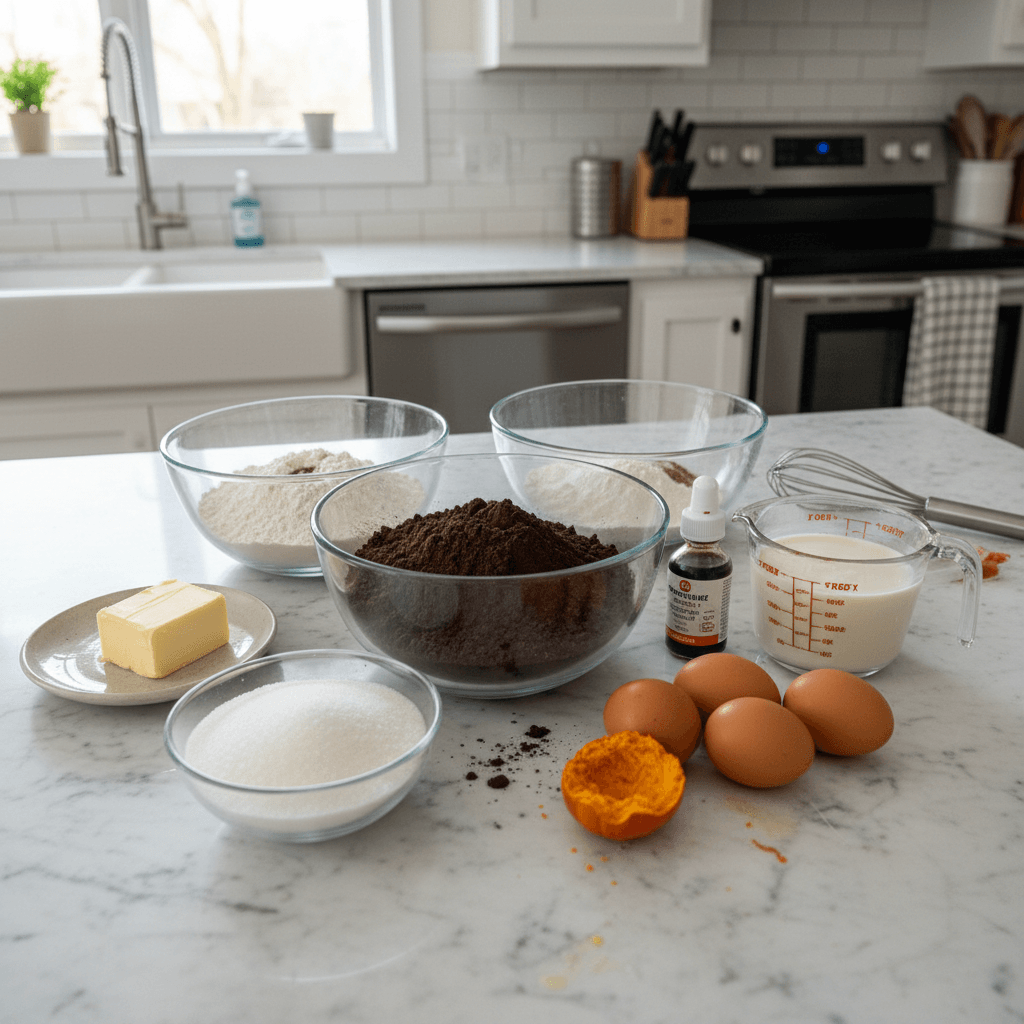
- All-Purpose Flour: This is your base, your foundation. Don’t go trying any fancy low-protein stuff unless you know what you’re doing, I tried once, and the cupcakes were… flat.
- Granulated Sugar: Sweetness, obviously! But it also helps with moisture. If you cut too much, your Black Velvet Cupcakes might turn out dry, and nobody wants that.
Unsweetened Cocoa Powder (Dutch-processed): This is crucial for that deep, dark color and rich chocolate flavor. Regular cocoa powder won’t give you the same intensity, trust me.
Baking Soda & Baking Powder: Our leavening duo! They work together to give these Black Velvet Cupcakes their lovely lift. Don’t mix them up, I made that mistake once and my cupcakes looked like sad little hockey pucks.
Salt: Just a pinch, but it really brings out all the chocolatey goodness. Don’t skip it, even if you think it’s tiny, it makes a huge difference.
- Buttermilk: This is the secret to tender, moist Black Velvet Cupcakes. The acidity reacts with the baking soda. If you don’t have it, a milk + lemon juice/vinegar hack works (1 cup milk + 1 tbsp acid, let sit 5 mins), but real buttermilk is always better.
- Vegetable Oil: Provides moisture without making the Black Velvet Cupcakes heavy. I’ve tried butter, but oil just gives a more consistent, tender crumb.
- Large Eggs: Binds everything together and adds richness. Make sure they’re at room temperature, it helps them emulsify better with the other ingredients.
- Black Food Coloring Gel: This is where the magic happens! Get a good quality gel, like AmeriColor Super Black. Liquid food coloring just won’t give you that intense, dramatic black color.
- Vanilla Extract: Enhances all the flavors. I always use pure vanilla, not imitation, the taste is just so much better.
- Cream Cheese (for frosting): Make sure it’s full-fat and softened. Don’t use the low-fat stuff, your frosting will be runny, and it’s just not the same.
- Unsalted Butter (for frosting): Softened, but not melted. It’s the base for that creamy, dreamy frosting.
- Powdered Sugar (for frosting): Sift it! Seriously, save yourself the lumpy frosting headache. I learned that the hard way.
- Heavy Cream (for frosting): Helps make the frosting light and fluffy. A little goes a long way.
Black Velvet Cupcakes: Instructions
- Prep Your Space:
- First things first, get your oven preheating to 350°F (175°C). Line a 12-cup muffin tin with paper liners. I always forget this step and then scramble when the batter’s ready, so learn from my mistakes! Make sure all your ingredients are at room temperature, it really does make a difference in the final texture of these Black Velvet Cupcakes. You’ll feel the butter yield under your finger, and the eggs won’t shock the other ingredients, leading to a smoother batter. It just sets everything up for success, honestly.
- Whisk the Dry Stuff:
- In a large bowl, whisk together the flour, sugar, cocoa powder, baking soda, baking powder, and salt. Give it a good, thorough mix until there are no lumps and everything looks uniform. This step is surprisingly important, you want all those leavening agents and flavors evenly distributed so every Black Velvet Cupcake rises beautifully. I once rushed this, and some cupcakes were denser than others oops! You’ll see the cocoa powder lightening the flour, creating a uniform, dusty brown mix.
- Combine Wet Ingredients:
- In a separate medium bowl, whisk together the buttermilk, vegetable oil, eggs, and vanilla extract until well combined. This is where the magic starts to happen! Add your black food coloring gel here. Start with a generous amount, maybe a tablespoon or two, and whisk until the mixture is an intense, inky black. Don’t be shy, you want that dramatic Black Velvet Cupcakes color! I always smell the vanilla here, a sweet promise of what’s to come, even through the oil and buttermilk.
- Mix It Up:
- Pour the wet ingredients into the dry ingredients. Using a whisk or spatula, mix until just combined. Be careful not to overmix! Overmixing develops the gluten too much, resulting in tough Black Velvet Cupcakes, and we want them tender and moist. A few small lumps are totally fine, it’s better to under-mix than over-mix, trust me on this one. The batter will be a glorious deep black, looking almost like liquid midnight.
- Bake Those Beauties:
- Divide the batter evenly among the prepared muffin cups, filling each about two-thirds full. Pop the tin into your preheated oven and bake for 18-22 minutes, or until a wooden skewer inserted into the center of a Black Velvet Cupcake comes out with only a few moist crumbs. My oven runs a little hot, so I usually check at 18 minutes. The kitchen will start to smell amazing, a rich, dark chocolate aroma that’s just heavenly.
- Cool and Frost:
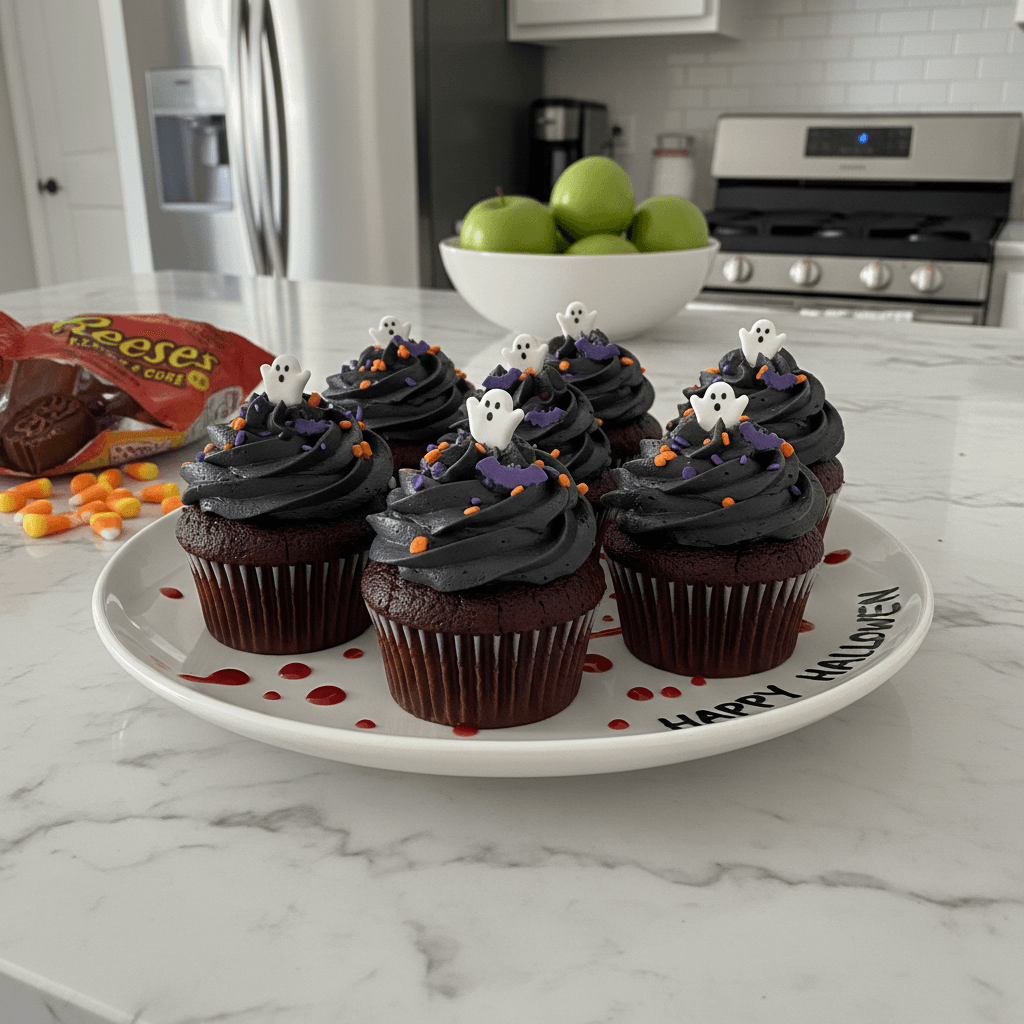
- Let the Black Velvet Cupcakes cool in the muffin tin for about 5 minutes before transferring them to a wire rack to cool completely. This is crucial before frosting! If you try to frost warm cupcakes, the frosting will melt and slide right off I’ve made that mistake too many times. While they cool, whip up your cream cheese frosting until it’s light and fluffy. Once the cupcakes are fully cool, pipe or spread the frosting on top. They’ll look so elegant and spooky, ready for their close-up!
There’s something incredibly satisfying about pulling a tray of these Black Velvet Cupcakes from the oven. Even with the smudged flour on my cheek and the stray drop of black dye on the counter, seeing those perfectly risen, dark beauties just makes my heart happy. It reminds me that even when things feel a bit messy, the end result can be absolutely delightful. These aren’t just cupcakes, they’re a little piece of edible art, born from a bit of kitchen chaos and a lot of love.
Storing Your Black Velvet Cupcakes
These Black Velvet Cupcakes are at their absolute best on the day they’re made, especially with that fresh cream cheese frosting. If you happen to have any leftovers (which, let’s be real, is rare around here!), you’ll want to store them properly to keep them tasting great. Because of the cream cheese frosting, they need to be refrigerated. Pop them into an airtight container, this keeps them from drying out and picking up any weird fridge smells. I’ve found they’ll keep well for up to 3-4 days in the fridge. Before serving, I always recommend letting them come to room temperature for about 15-20 minutes. It really brings out the full flavor and softness of both the cupcake and the frosting. I once left them out on the counter overnight by mistake, and let’s just say the frosting wasn’t too happy about that definitely don’t do that!
Black Velvet Cupcakes: Ingredient Swaps
Life happens, and sometimes you just don’t have everything on hand, right? For the buttermilk in these Black Velvet Cupcakes, if you’re in a pinch, you can totally make a quick substitute. Just add 1 tablespoon of white vinegar or lemon juice to a liquid measuring cup, then fill it up to 1 cup with regular milk (any kind, though whole milk works best). Let it sit for about 5 minutes until it curdles slightly. It works, kinda, but real buttermilk always gives a richer flavor. For the cocoa powder, while Dutch-processed is truly ideal for that deep color and flavor, if you only have natural unsweetened cocoa, you can still use it. Just know the Black Velvet Cupcakes might not be quite as dark, and the flavor profile will be slightly different, a bit more acidic. I tried it once, and they were still delicious, just not as dramatically black. You can also swap out the vegetable oil for another neutral oil like canola or grapeseed, no problem.
Serving Your Black Velvet Cupcakes
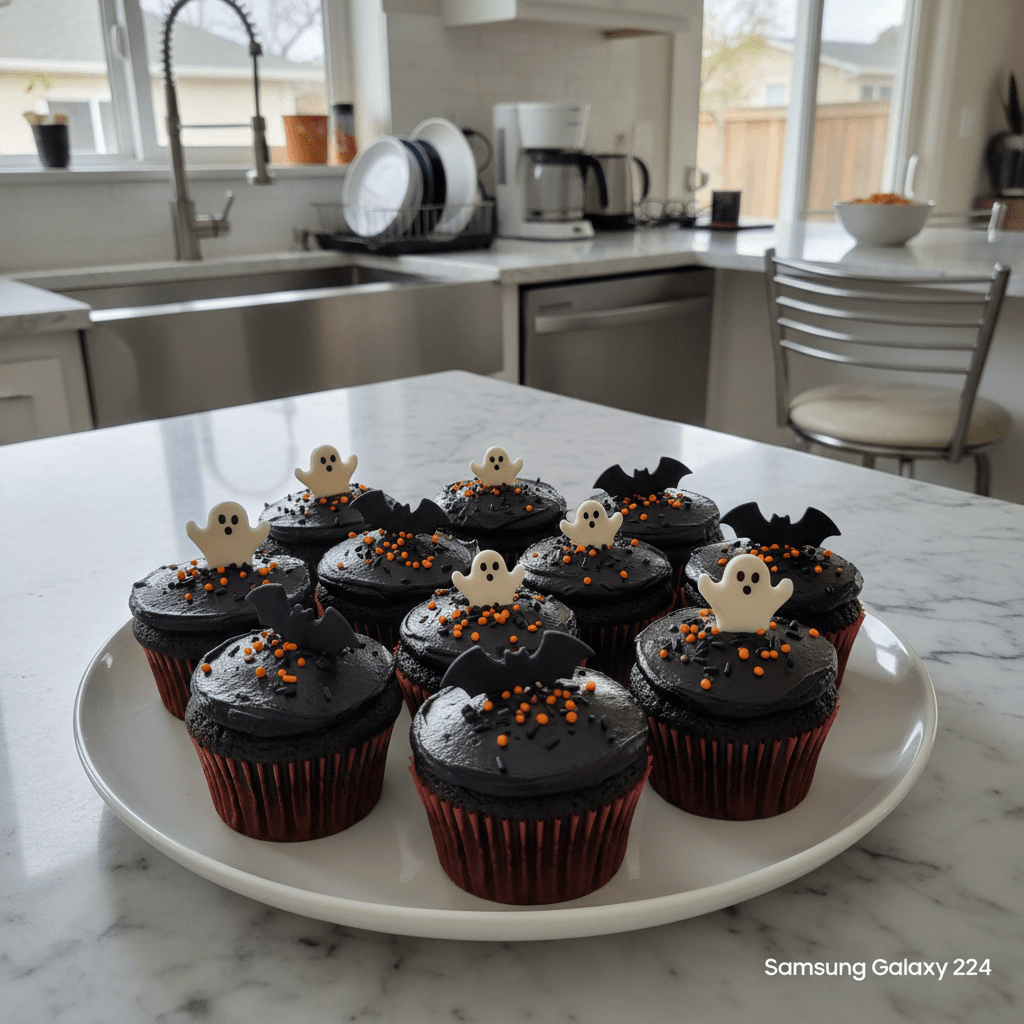
These Black Velvet Cupcakes are a showstopper all on their own, especially for Halloween! I love serving them on a dark platter for maximum dramatic effect. For a really spooky vibe, you could sprinkle a little edible glitter on top, or add some fun Halloween sprinkles before the frosting sets. A tiny plastic spider or a candy eyeball perched on top of each one? Adorable and perfectly creepy! For drinks, a rich, dark hot chocolate or even a dry red wine would pair beautifully, complementing the deep chocolate notes without being overly sweet. If you’re feeling extra, a scoop of vanilla bean ice cream on the side is never a bad idea. Honestly, these Black Velvet Cupcakes and a good horror movie marathon? That’s my ideal night in!
The Story Behind Black Velvet Cupcakes
You know, the concept of a ‘velvet’ cake itself has such a fun history, usually tied to Southern baking, where the texture is king soft, fine, and, well, velvety! Red velvet cakes are iconic, known for their vibrant color and mild chocolate flavor. But these Black Velvet Cupcakes? They feel like the mysterious, gothic cousin. While red velvet often gets its color from food dye and a reaction with cocoa, black velvet leans heavily into dark cocoa and black food coloring to achieve its dramatic hue. For me, discovering Black Velvet Cupcakes was like finding a new favorite character in a classic story. It takes a familiar comfort food and gives it a wonderfully unexpected, slightly spooky twist, making it absolutely perfect for Halloween. It’s a modern take on a classic, a little bit edgy, and totally delicious.
And there you have it, my friends! These Black Velvet Cupcakes are more than just a dessert, they’re a little bit of magic, a dash of drama, and a whole lot of deliciousness. Every time I make them, I’m reminded that sometimes the best things come from embracing a little chaos and a lot of creativity in the kitchen. I hope you give them a try for your next spooky celebration. Let me know how your own Black Velvet Cupcakes turn out I love hearing about your kitchen adventures!
Frequently Asked Questions
- → How do I get the blackest Black Velvet Cupcakes?
Honestly, it’s all about that black gel food coloring! Use a good quality brand like AmeriColor Super Black. Don’t skimp, and mix it into your wet ingredients until it’s really dark. Liquid food coloring just won’t give you the same intense shade, I learned that the hard way.
- → Can I use regular cocoa powder for Black Velvet Cupcakes?
You can, but your Black Velvet Cupcakes won’t be as dark, and the flavor will be a bit different. Dutch-processed cocoa is crucial for that deep color and less acidic flavor profile. I tried regular once, and they were more ‘dark brown’ than ‘black velvet’.
- → My Black Velvet Cupcakes came out dry, what happened?
Oh no! Usually, this means you either overmixed the batter or overbaked them. Remember, mix until just combined and keep a close eye on your oven. Every oven is different, so start checking a few minutes before the recipe suggests. Mine always bakes faster than I expect!
- → How should I store leftover Black Velvet Cupcakes?
Because of the cream cheese frosting, these Black Velvet Cupcakes need to be stored in an airtight container in the refrigerator. They’ll keep well for 3-4 days. Just let them come to room temperature for a bit before eating for the best texture and flavor.
- → Can I make these Black Velvet Cupcakes ahead of time?
Absolutely! You can bake the cupcakes a day in advance and store them unfrosted at room temperature in an airtight container. Make the frosting the day of, or a few hours before, and frost once the cupcakes are completely cool. It’s a total meal-prep win!
Black Velvet Cupcakes for a Spooky Halloween Treat
- Prep Time: 20 Minutes
- Cook Time: 20 Minutes
- Total Time: 40 Minutes
- Yield: 12 Servings 1x
- Category: AllRecipes
Description
Whip up rich Black Velvet Cupcakes, a spooky Halloween dessert treat with dark cocoa and creamy frosting. Perfect for your next ghoulish gathering!
Ingredients
- Cupcake Base:
- 1 ½ cups (190g) All-Purpose Flour
- 1 ½ cups (300g) Granulated Sugar
- ¾ cup (65g) Unsweetened Cocoa Powder (Dutch-processed is best)
- 1 ½ teaspoons Baking Soda
- ½ teaspoon Baking Powder
- ½ teaspoon Salt
- ¾ cup (180ml) Buttermilk
- ½ cup (120ml) Vegetable Oil
- 2 Large Eggs, room temperature
- 1–2 tablespoons Black Food Coloring Gel (adjust for desired darkness)
- 2 teaspoons Vanilla Extract
- Cream Cheese Frosting:
- 8 ounces (226g) Cream Cheese, full-fat, softened
- ½ cup (113g) Unsalted Butter, softened
- 3–4 cups (360-480g) Powdered Sugar, sifted
- 1–2 tablespoons Heavy Cream
- 1 teaspoon Vanilla Extract
- Optional Spooky Touches:
- Halloween sprinkles
- Edible glitter
- Candy eyeballs
- Small plastic spiders
Instructions
- Prep Your Space: First things first, get your oven preheating to 350°F (175°C). Line a 12-cup muffin tin with paper liners. I always forget this step and then scramble when the batter’s ready, so learn from my mistakes! Make sure all your ingredients are at room temperature; it really does make a difference in the final texture of these Black Velvet Cupcakes. You’ll feel the butter yield under your finger, and the eggs won’t shock the other ingredients, leading to a smoother batter. It just sets everything up for success, honestly.
- Whisk the Dry Stuff: In a large bowl, whisk together the flour, sugar, cocoa powder, baking soda, baking powder, and salt. Give it a good, thorough mix until there are no lumps and everything looks uniform. This step is surprisingly important; you want all those leavening agents and flavors evenly distributed so every Black Velvet Cupcake rises beautifully. I once rushed this, and some cupcakes were denser than others—oops! You’ll see the cocoa powder lightening the flour, creating a uniform, dusty brown mix.
- Combine Wet Ingredients: In a separate medium bowl, whisk together the buttermilk, vegetable oil, eggs, and vanilla extract until well combined. This is where the magic starts to happen! Add your black food coloring gel here. Start with a generous amount, maybe a tablespoon or two, and whisk until the mixture is an intense, inky black. Don’t be shy; you want that dramatic Black Velvet Cupcakes color! I always smell the vanilla here, a sweet promise of what’s to come, even through the oil and buttermilk.
- Mix It Up: Pour the wet ingredients into the dry ingredients. Using a whisk or spatula, mix until just combined. Be careful not to overmix! Overmixing develops the gluten too much, resulting in tough Black Velvet Cupcakes, and we want them tender and moist. A few small lumps are totally fine; it’s better to under-mix than over-mix, trust me on this one. The batter will be a glorious deep black, looking almost like liquid midnight.
- Bake Those Beauties: Divide the batter evenly among the prepared muffin cups, filling each about two-thirds full. Pop the tin into your preheated oven and bake for 18-22 minutes, or until a wooden skewer inserted into the center of a Black Velvet Cupcake comes out with only a few moist crumbs. My oven runs a little hot, so I usually check at 18 minutes. The kitchen will start to smell amazing, a rich, dark chocolate aroma that’s just heavenly.
- Cool and Frost: Let the Black Velvet Cupcakes cool in the muffin tin for about 5 minutes before transferring them to a wire rack to cool completely. This is crucial before frosting! If you try to frost warm cupcakes, the frosting will melt and slide right off—I’ve made that mistake too many times. While they cool, whip up your cream cheese frosting until it’s light and fluffy. Once the cupcakes are fully cool, pipe or spread the frosting on top. They’ll look so elegant and spooky, ready for their close-up!
- Make the Cream Cheese Frosting: In a large bowl, using an electric mixer, beat the softened cream cheese and butter together until smooth and creamy, about 2-3 minutes. Gradually add the sifted powdered sugar, one cup at a time, beating on low speed until combined, then increase to medium-high until fluffy. Add the vanilla extract and heavy cream, beating until the frosting is light, airy, and spreadable. If it’s too thick, add more cream a teaspoon at a time; too thin, add more powdered sugar. This frosting is the perfect creamy complement to the Black Velvet Cupcakes!


