

Honestly, I remember the first time I tried to make Baked Caesar Chicken with Creamy Parmesan Sauce. It was a Tuesday, one of those ridiculously busy ones where the laundry was piled higher than my ambition, and dinner felt like an impossible dream. I had this half-eaten bottle of Caesar dressing in the fridge, some chicken breasts looking sad, and thought, “What if?” The kitchen turned into a delightful, chaotic mess, but the smell that started wafting through the house? Pure magic! This dish isn’t just food, it’s a hug on a plate, a little bit of comfort that says, “You got this, even if the socks don’t match.”
I still laugh thinking about that first attempt. I was so excited, I poured the creamy Parmesan sauce over the chicken and promptly forgot to add any seasoning! Oops! My husband took a bite and politely asked, “Honey, is this… chicken soup?” We had a good laugh, added a sprinkle of salt and pepper, and it was salvaged. That’s real kitchen life, isn’t it? Not always perfect, but always an adventure, especially with this Baked Caesar Chicken.

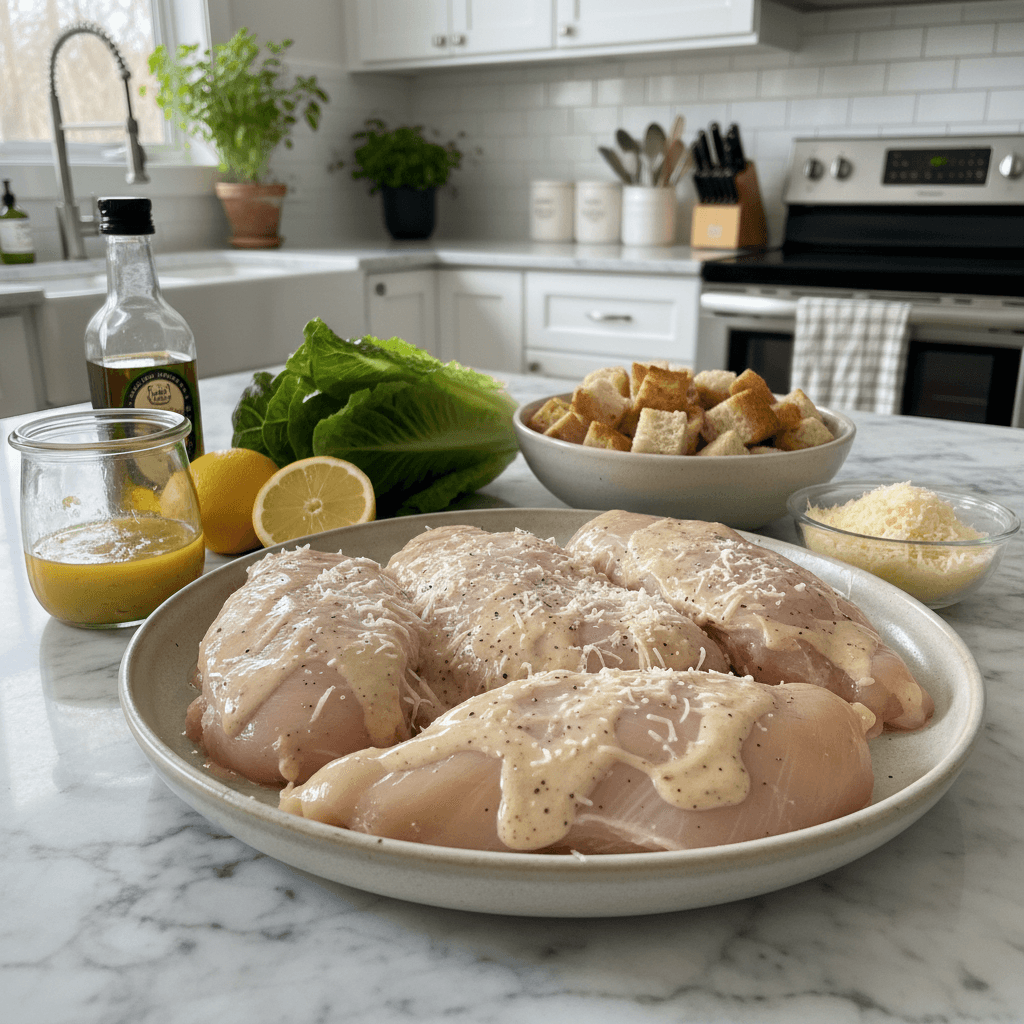
Ingredients for Baked Caesar Chicken
- Boneless, Skinless Chicken Breasts: I always go for thicker cuts here, not those thin-sliced ones. They just hold up better to the baking and stay juicy. Don’t use dry, tough chicken, please!
- Creamy Caesar Dressing: This is the star of our Baked Caesar Chicken with Creamy Parmesan Sauce. A good quality, thick dressing makes all the difference. I tried a light version once, and it just wasn’t the same. Learn from my mistakes!
- Freshly Grated Parmesan Cheese: Honestly, please don’t use the pre-shredded stuff in a can for this creamy sauce. The fresh stuff melts beautifully and gives you that incredible nutty, salty flavor. More parmesan? Always.
- Heavy Cream: This is what gives our creamy Parmesan sauce its luscious texture. Don’t skimp here, no half-and-half, just don’t. I had a disaster once trying to make it “lighter” and the sauce totally broke.
- Garlic Powder & Onion Powder: These are my secret weapons for a quick flavor boost without mincing fresh garlic. They just melt into the sauce, giving it depth without any harshness.
- Black Pepper & Red Pepper Flakes: A good crack of black pepper is essential. The red pepper flakes are optional, but I love that little tiny kick they give to the creamy sauce. It’s not spicy, just a little warmth.
How to Make Baked Caesar Chicken with Creamy Parmesan Sauce
- Prep Your Chicken:
- First things first, get those chicken breasts ready. I usually pat them super dry with a paper towel this honestly helps them get a better sear later, or at least a nicer texture from the oven. If they’re really thick, I might give them a little pound with a meat mallet (hello, stress relief!) to even them out. This helps them cook through more uniformly, preventing that dry edge, you know? I always forget to do this and end up with one side a little less juicy.
- Whip Up the Creamy Parmesan Sauce:
- Now for the good stuff! In a medium bowl, combine your creamy Caesar dressing, a good handful of freshly grated Parmesan, the heavy cream, garlic powder, onion powder, and a generous crack of black pepper, maybe some red pepper flakes if you’re feeling a little adventurous. Whisk it all together until it’s smooth and smells absolutely divine. This is where the magic happens for your Baked Caesar Chicken. Don’t be afraid to taste it and adjust I always add a little more Parmesan, oops!
- Coat and Arrange:
- Pour about half of that glorious creamy Parmesan sauce into a baking dish. Then, nestle your prepped chicken breasts right on top. Make sure they’re not too crowded, they need their space to bake evenly. Spoon the remaining sauce generously over each piece of chicken. You want every inch coated in that creamy goodness! I always make sure to get some of that good Parmesan on top of each breast, too. It’s what makes this Baked Caesar Chicken so special.
- Bake Until Golden:
- Pop that dish into your preheated oven at 375°F (190°C) and let it bake for about 20-25 minutes. The exact time will depend on the thickness of your chicken. You’re looking for the chicken to be cooked through and opaque, with an internal temperature of 165°F (74°C). The sauce around the edges will start to bubble and get all golden. Don’t overcook it, or your Baked Caesar Chicken will be dry!
- Broil for a Crispy Top (Optional but Recommended!):
- For that irresistible golden-brown, slightly crispy top, I like to switch my oven to broil for the last 2-3 minutes. Keep a very close eye on it, though! Parmesan can go from perfectly golden to burnt in a blink. I learned that the hard way, once almost setting off the smoke alarm. It just adds that extra layer of texture to your Baked Caesar Chicken with Creamy Parmesan Sauce.
- Rest and Serve Your Baked Caesar Chicken:
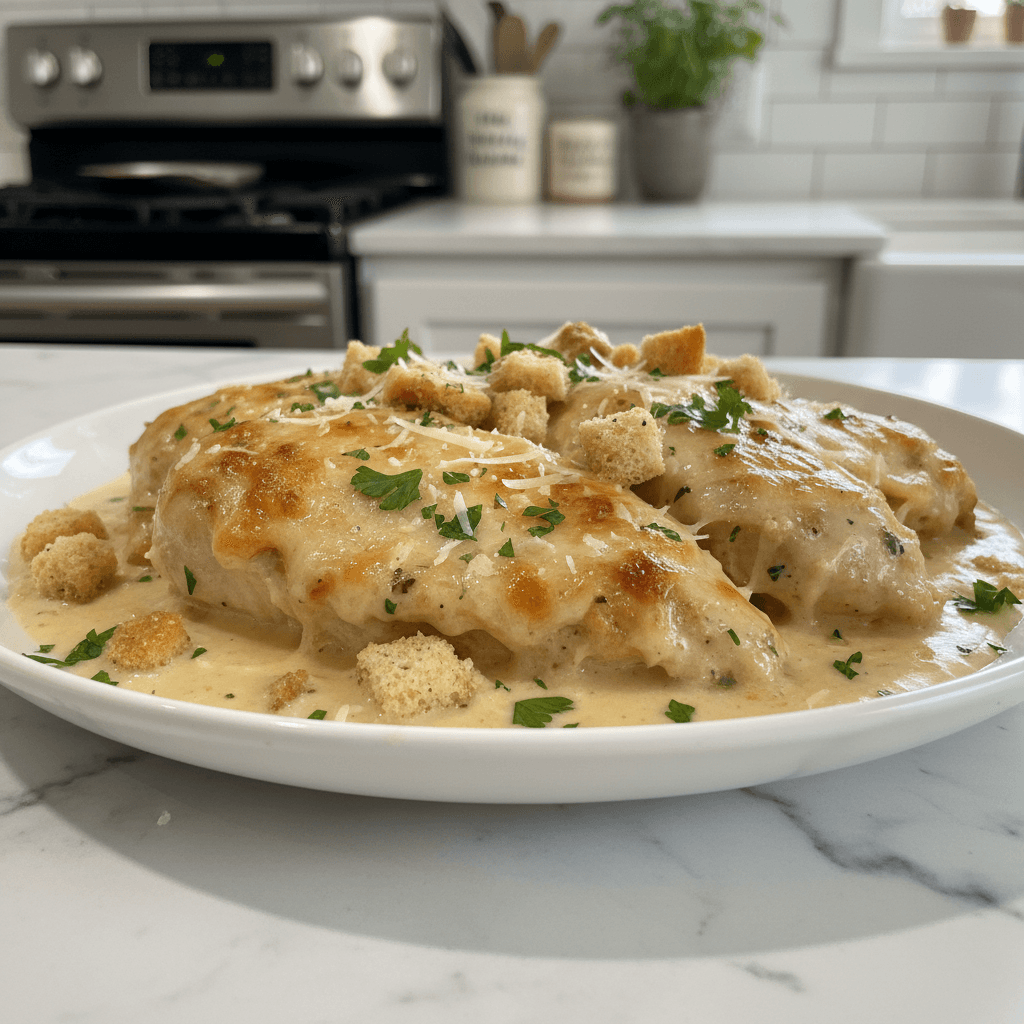
- Once it’s out of the oven, resist the urge to cut into it immediately! Tent the baking dish loosely with foil and let the Baked Caesar Chicken rest for 5-10 minutes. This lets the juices redistribute, keeping the chicken super tender and moist. Trust me, it’s worth the wait! Garnish with fresh parsley, maybe a lemon wedge, and get ready to dig into your amazing creation.
There was this one time I was so proud of my Baked Caesar Chicken, I forgot to put out serving spoons. We ended up using forks to scoop out the sauce, which was hilarious and a little messy, but totally us. It’s these small, imperfect moments that make cooking so much fun and this recipe a true staple in our home. It’s comforting, it’s easy, and it always brings smiles.
Baked Caesar Chicken: Storage Tips You Need
Okay, so you’ve got leftover Baked Caesar Chicken with Creamy Parmesan Sauce lucky you! This dish actually holds up pretty well in the fridge. Just make sure it’s completely cooled before transferring it to an airtight container. I usually store it in the same dish I baked it in, covered tightly with foil or plastic wrap. It’ll keep for about 3-4 days. When reheating, I usually pop it back in the oven at a lower temperature (around 300°F/150°C) until warmed through. Microwaving it once made the sauce separate and get a little greasy, so I don’t recommend that lol. If the sauce seems a little thick, a splash of milk or chicken broth can bring it back to life.
Ingredient Swaps for Baked Caesar Chicken with Creamy Parmesan Sauce
Life happens, and sometimes you don’t have exactly what the recipe calls for. I get it! For the chicken, boneless, skinless thighs work beautifully here, they stay even juicier, though they might need a few extra minutes to cook. No Caesar dressing? I’ve tried mixing mayo, a squeeze of lemon, a dash of Worcestershire, garlic powder, and a sprinkle of Parmesan once, and it worked… kinda. It wasn’t quite the same, but it was a decent stand-in. For the Parmesan, if you only have the pre-shredded stuff, it’ll work, but just know the creamy Parmesan sauce won’t be quite as smooth. You can also experiment with a little Dijon mustard in the sauce for an extra zing, I’ve done that and it was surprisingly good!
Serving Your Baked Caesar Chicken
This Baked Caesar Chicken with Creamy Parmesan Sauce is so versatile! For me, a big green salad with a light vinaigrette is a must to cut through the richness. A side of roasted asparagus or steamed green beans also works wonderfully. And honestly, some crusty bread for soaking up every last bit of that creamy Parmesan sauce? Non-negotiable! For drinks, a crisp white wine like a Sauvignon Blanc or even just some sparkling water with lemon is lovely. This dish and a good rom-com on a Friday night? Yes please. It’s hearty enough for a family dinner, but feels special for a relaxed evening in.
Cultural Backstory of Caesar Chicken
While Caesar salad has a pretty clear origin story (shout out to Tijuana!), turning it into a baked chicken dish with a creamy Parmesan sauce is definitely a modern American comfort food innovation. It’s that beautiful fusion of classic flavors with a weeknight-friendly technique. For me, this dish is less about ancient roots and more about creating new traditions in my own kitchen. It’s about taking something familiar and making it uniquely ours, adapting it for busy lives and hungry families. It became special to me because it’s a dish that always brings everyone to the table, no matter how chaotic the day has been.
And there you have it, my friends! This Baked Caesar Chicken with Creamy Parmesan Sauce truly is a gem. It came out so beautifully golden and smelled absolutely incredible, filling the kitchen with such warmth. It’s those simple, satisfying dinners that really make a house feel like a home, don’t you think? I hope you give this one a try and maybe even have your own little kitchen adventure with it. Let me know how your version turns out!
Frequently Asked Questions About Baked Caesar Chicken
- → Can I use chicken thighs for Baked Caesar Chicken?
Absolutely! I’ve used boneless, skinless chicken thighs many times for this. They tend to stay even juicier than breasts, which is a big win! Just be aware they might need an extra 5-10 minutes of baking time, so always check that internal temperature.
- → What if I don’t have fresh Parmesan for this creamy sauce?
While fresh Parmesan makes the creamy Parmesan sauce truly exceptional, if you’re in a pinch, the pre-shredded kind will work. Just know it might not melt quite as smoothly, and the flavor won’t be as robust. I tried it once, and it was okay, but not the same!
- → How do I keep the Baked Caesar Chicken from drying out?
The key is not to overcook it! Use a meat thermometer to ensure it reaches 165°F (74°C) and then take it out. Also, pounding thicker breasts to an even thickness helps. And that creamy Parmesan sauce helps keep it moist, too!
- → How long does Baked Caesar Chicken with Creamy Parmesan Sauce last in the fridge?
When stored in an airtight container, your delicious leftovers will last for about 3-4 days in the refrigerator. I always make extra for lunch the next day, though sometimes I forget to grab it before someone else does!
- → Can I add veggies to my Baked Caesar Chicken?
Oh, definitely! I often throw in some broccoli florets, asparagus spears, or even sliced bell peppers right into the baking dish during the last 15 minutes of cooking. They get coated in that amazing creamy Parmesan sauce, too. It’s a great way to make it a one-pan meal!
Creamy Parmesan Baked Caesar Chicken: A Weeknight Favorite
- Prep Time: 15 Minutes
- Cook Time: 25 Minutes
- Total Time: 40 Minutes
- Yield: 4 Servings 1x
- Category: Dinner
Description
Tender Baked Caesar Chicken with Creamy Parmesan Sauce is a family favorite. Easy, flavorful, and perfect for dinner any night.
Ingredients
- Main Players:
- 4 boneless, skinless chicken breasts (about 1.5–2 lbs)
- 1 cup creamy Caesar dressing
- 1/2 cup freshly grated Parmesan cheese, plus more for garnish
- 1/4 cup heavy cream
- Flavor Boosters:
- 1 tsp garlic powder
- 1/2 tsp onion powder
- 1/2 tsp black pepper
- 1/4 tsp red pepper flakes (optional)
- Fresh Finish:
- 2 tbsp fresh parsley, chopped, for garnish
- Lemon wedges, for serving (optional)
Instructions
- Prep Your Chicken:: First things first, get those chicken breasts ready. I usually pat them super dry with a paper towel – this honestly helps them get a better sear later, or at least a nicer texture from the oven. If they’re really thick, I might give them a little pound with a meat mallet (hello, stress relief!) to even them out. This helps them cook through more uniformly, preventing that dry edge, you know? I always forget to do this and end up with one side a little less juicy.
- Whip Up the Creamy Parmesan Sauce:: Now for the good stuff! In a medium bowl, combine your creamy Caesar dressing, a good handful of freshly grated Parmesan, the heavy cream, garlic powder, onion powder, and a generous crack of black pepper, maybe some red pepper flakes if you’re feeling a little adventurous. Whisk it all together until it’s smooth and smells absolutely divine. This is where the magic happens for your Baked Caesar Chicken. Don’t be afraid to taste it and adjust – I always add a little more Parmesan, oops!
- Coat and Arrange:: Pour about half of that glorious creamy Parmesan sauce into a baking dish. Then, nestle your prepped chicken breasts right on top. Make sure they’re not too crowded; they need their space to bake evenly. Spoon the remaining sauce generously over each piece of chicken. You want every inch coated in that creamy goodness! I always make sure to get some of that good Parmesan on top of each breast, too. It’s what makes this Baked Caesar Chicken so special.
- Bake Until Golden:: Pop that dish into your preheated oven at 375°F (190°C) and let it bake for about 20-25 minutes. The exact time will depend on the thickness of your chicken. You’re looking for the chicken to be cooked through and opaque, with an internal temperature of 165°F (74°C). The sauce around the edges will start to bubble and get all golden. Don’t overcook it, or your Baked Caesar Chicken will be dry!
- Broil for a Crispy Top (Optional but Recommended!):: For that irresistible golden-brown, slightly crispy top, I like to switch my oven to broil for the last 2-3 minutes. Keep a very close eye on it, though! Parmesan can go from perfectly golden to burnt in a blink. I learned that the hard way, once almost setting off the smoke alarm. It just adds that extra layer of texture to your Baked Caesar Chicken with Creamy Parmesan Sauce.
- Rest and Serve Your Baked Caesar Chicken:: Once it’s out of the oven, resist the urge to cut into it immediately! Tent the baking dish loosely with foil and let the Baked Caesar Chicken rest for 5-10 minutes. This lets the juices redistribute, keeping the chicken super tender and moist. Trust me, it’s worth the wait! Garnish with fresh parsley, maybe a lemon wedge, and get ready to dig into your amazing creation.


