
Introduction
Growing up, Easter was a time of vibrant colors and sweet surprises. One of my favorite traditions was making a dazzling Easter Jell-O Pie with my family. The cheerful layers of Jell-O create a playful dessert that captures the essence of springtime. Whether you’re juggling work calls or soccer practice, this recipe for Easter Jell-O Pie is your new best friend. It’s not only a visual treat but also a nice way to celebrate the season with loved ones.
This dessert is as easy to whip up as it is to enjoy, making it perfect for busy days when you want to impress without the stress. Imagine the smiles on your family’s faces as they dig into the colorful layers, each spoonful bursting with fruity flavor. The Easter Jell-O Pie is more than just a dessert; it’s a celebration on a plate, brightening up any gathering and bringing everyone together. So, let’s dive into this colorful springtime delight that will surely become a staple in your holiday traditions!

Why You’ll Love Easter Jell-O Pie: A Colorful Springtime Delight
Growing up, Easter meant vibrant colors and sweet treats that made our hearts sing. The star of the show was always the Easter Jell-O Pie, a nice dessert that not only dazzled our eyes but delighted our taste buds. Whether you’re juggling work calls or soccer practice, this recipe is your new best friend. It’s a quick, no-bake solution that brings the playful spirit of spring to your table, making it perfect for family gatherings or holiday dinners.
This Easter Jell-O Pie is like a cozy blanket for your taste buds, wrapping you in layers of flavor and nostalgia. Imagine the soft, creamy texture of the filling combined with the refreshing fruity layers—it’s an experience you won’t forget! Not only does it save time, but it also allows you to get creative with the flavors and colors, making it a fun activity for the kids. No more 6 PM panic; dinner’s ready faster than a microwave meal, and everyone will be asking for seconds.
So, if you’re looking for a festive dessert that captures the essence of spring while being easy to whip up, the Easter Jell-O Pie is just what you need. It’s a colorful celebration on a plate, perfect for brightening up any gathering. Get ready to impress your family and friends with this sweet treat that is as pleasing to the eye as it is to the palate!
Ingredients For Easter Jell-O Pie: A Colorful Springtime Delight
As the flowers begin to bloom and the sun shines a little brighter, I find myself yearning for good taste that reflect the joy of spring. Easter Jell-O Pie is not just a dessert; it’s a celebration on a plate, bursting with colors and textures that can bring anyone’s spirits up, whether you’re preparing for a festive gathering or simply indulging in a sweet treat at home. With just a few simple ingredients, this recipe transforms ordinary moments into nice memories.
To whip up this nice Easter Jell-O Pie, you’ll need a handful of vibrant ingredients that make it both easy and fun to create:
- 1 cup boiling water: This helps dissolve the Jell-O, setting the stage for a colorful masterpiece.
- 1 package (3 oz) of flavored Jell-O: Choose your favorite flavors like strawberry, lime, or blue raspberry for that springtime flair.
- 1 cup cold water: This cools down the mixture and helps set the Jell-O perfectly.
- 1 cup whipped topping: For that creamy layer, adding a light and fluffy texture to your pie.
- 1 pre-made graham cracker crust: This crispy base gives your pie a nice crunch.
- Fresh fruit (optional): Think sliced strawberries or blueberries to enhance both flavor and visual appeal.
If you’re feeling adventurous, consider these fun swaps to customize your Easter Jell-O Pie. For instance, if you want a twist, use a chocolate cookie crust instead of graham cracker—your secret’s safe with me! Or, if fresh fruit isn’t available, a handful of marshmallows can add a nice surprise to each slice. Whether you stick to the classic or mix it up, this pie is sure to impress!
How To Make Easter Jell-O Pie: A Colorful Springtime Delight
As the days grow warmer and flowers start to bloom, nothing says “spring” quite like a vibrant Easter Jell-O Pie. I remember the first time I made it for my family; the joy on their faces as they took their first bites was priceless. This Easter Jell-O Pie is not only a feast for the eyes but also a nice burst of fruity flavor. Whether you’re juggling work calls or soccer practice, this recipe is your new best friend, bringing a touch of whimsy to your spring celebrations.
- Gather Your Ingredients: Start with your favorite graham cracker crust. It’s the perfect canvas for your colorful layers. If you’re feeling adventurous, you can even make your own from scratch using crushed graham crackers, sugar, and melted butter.
- Layering the Flavors: Begin by preparing your first layer of Jell-O according to the package instructions. Choose vibrant colors like strawberry or cherry to evoke the spirit of Easter. Allow it to set partially in the fridge—this will create a lovely, wobbly base for the next layer.
- Whip Up the Cream Cheese Mixture: In a mixing bowl, combine softened cream cheese, powdered sugar, and whipped topping until smooth. This creamy layer is like a fluffy cloud, adding a luscious texture to your pie.
- Spread and Layer: Once your first Jell-O layer is set, carefully spread the cream cheese mixture on top. Use a spatula to create a smooth surface, ensuring every bite will be delightfully creamy.
- Prepare the Next Jell-O Layer: Choose another flavor of Jell-O—perhaps lemon or lime for a burst of citrus. Prepare it just like the first layer, allowing it to cool slightly before pouring it over the cream cheese mixture. This colorful contrast will make your pie visually stunning.
- Let It Chill: After adding the final layer, let the pie chill in the refrigerator for at least four hours, or overnight if you can wait. This ensures all the layers mix together beautifully, creating a masterpiece that’s as delicious as it is pretty.
Once it’s set, slice into this Easter Jell-O Pie and watch as the bright colors dance on your plate. Each layer offers a different taste experience, making it a nice centerpiece for your spring gatherings. So, gather your loved ones and enjoy in this colorful springtime delight that is sure to bring smiles all around!
Expert Tips and Tricks
When it comes to perfecting your Easter Jell-O Pie, a few expert tips can make all the difference. Whether you’re juggling work calls or soccer practice, these tricks will help you create a stunning dessert that impresses everyone. Let’s dive into some gems that will improve your pie-making game!
- Choose Quality Ingredients: Start with the best Jell-O flavors and fresh whipped cream. The quality of these key components directly influences the final taste. Remember, vibrant colors and rich flavors are what make this Easter Jell-O Pie a showstopper!
- Layering Techniques: For a beautiful presentation, layer your Jell-O mixtures slowly and carefully. Use a spoon to gently pour each layer over the back to prevent them from mixing. This creates those stunning, defined layers that are visually appealing.
- Chill Time Is Crucial: Allow each layer to set completely before adding the next. This not only ensures a clean separation but also enhances the texture. So, be patient—let the pie chill in the fridge for at least 30 minutes after each layer.
- Get Creative with Toppings: Don’t shy away from customizing your Jell-O Pie. Fresh fruit, edible flowers, or even a sprinkle of colorful sprinkles can add a nice touch. These toppings not only enhance the look but also add unexpected flavors!
- Mix Up the Flavors: While classic flavors are great, feel free to experiment! Combine different Jell-O flavors for a unique blend that tantalizes the palate. For example, a mix of strawberry and lime can create a refreshing twist.
- Use a Springform Pan: For easy removal and a professional finish, consider using a springform pan. It allows for clean edges and makes serving a breeze, which is especially handy when you want to impress your guests.
- Keep It Cool: If you’re making this dessert ahead of time, store it in the refrigerator until you’re ready to serve. This keeps the pie fresh and maintains its nice texture, ensuring it’s as good as new when it’s time for dessert.
- Enjoy the Process: Lastly, remember to have fun while making your Easter Jell-O Pie! Involve the kids, let them help with layering or decorating. This not only creates lasting memories but also brings joy to the kitchen.
By following these expert tips, you will create an Easter Jell-O Pie that’s not just a dessert but a centerpiece for your celebration. Happy pie-making!
Equipment Needed
When I first decided to make this Easter Jell-O Pie, I was surprised at how simple it was to gather everything I needed. Whether you’re juggling work calls or soccer practice, this recipe is your new best friend, and having the right equipment makes the process even smoother. Below, I’ve outlined the essential tools that will help you create this nice dessert, ensuring that your kitchen adventure is as enjoyable as the final treat.
- Mixing Bowls: A set of mixing bowls in various sizes is crucial for combining your Jell-O flavors and whipped cream. Look for sturdy options that won’t tip over during your mixing frenzy.
- Measuring Cups and Spoons: Accurate measurements are key to achieving the good balance of flavors in your Easter Jell-O Pie. A set of measuring cups and spoons will help you portion out your ingredients with confidence.
- Whisk: A good whisk is essential for blending the Jell-O powder and water smoothly. It also works wonders for incorporating whipped cream into your mixture.
- 9-inch Pie Dish: To showcase your colorful creation, you’ll need a 9-inch pie dish. Opt for glass or ceramic for a beautiful presentation that will impress your guests.
- Rubber Spatula: A rubber spatula is your best friend when it comes to folding in whipped cream. It ensures you keep that light and airy texture that makes this pie so nice.
- Refrigerator: While not a tool in the traditional sense, your refrigerator will play a critical role in setting the Jell-O layers perfectly. Make sure you have enough space to chill your pie.
- Knife: A sharp knife will be necessary for slicing through your beautifully layered pie, allowing you to serve perfect portions that highlight the vibrant colors.
With these essential tools at your disposal, you’ll be well-equipped to whip up your Easter Jell-O Pie. This colorful dessert is not only a feast for the eyes but also a breeze to create with the right equipment.
Variations and Substitutions
When it comes to making your Easter Jell-O Pie: A Colorful Springtime Delight, the possibilities are as endless as your creativity. Whether you’re juggling work calls or soccer practice, this recipe is your new best friend because it adapts to your needs. Here’s how you can customize it, ensuring that every bite is just right for you and your family.
- Dietary-Friendly Tweaks: If you’re looking for a dairy-free option, simply swap cream for coconut milk. This creamy alternative adds a hint of tropical flavor that your dairy-free crew will cheer for. It’s a win-win!
- Vegetarian Options: Not a meat lover? You can easily substitute chicken with hearty lentils or chickpeas. These legumes not only provide protein but also add a nice texture to your Easter Jell-O Pie: A Colorful Springtime Delight.
- Seasonal Twists: Embrace the flavors of the season! In the fall, add roasted squash to your dish—it’s like Thanksgiving in a bowl. Fresh asparagus in spring can bring a crispness that dances on your palate.
- Herb Variations: Fresh herbs can completely change the vibe of your Easter Jell-O Pie: A Colorful Springtime Delight. Swap basil for fresh dill or parsley for a different spin. Each herb brings its own personality, adding brightness and freshness.
- Spice it Up: If you’re feeling adventurous, throw in some red pepper flakes or a dash of cayenne pepper for a kick. A little heat can transform your dish into a flavor explosion!
- Gluten-Free Adjustments: For a gluten-free version, choose gluten-free pasta or grains. Quinoa or brown rice can be a fantastic base that keeps the heartiness without the gluten.
- Nut-Free Substitutes: If nuts aren’t your thing, replace them with seeds like sunflower or pumpkin seeds. They add a satisfying crunch without the worry of allergies.
With these variations and substitutions, your Easter Jell-O Pie: A Colorful Springtime Delight can be tailored to suit any palate or dietary need. Enjoy the freedom to experiment, and don’t hesitate to make this dish your own!
Serving and Storage Suggestions
Once you’ve mastered this delicious Easter Jell-O Pie: A Colorful Springtime Delight, it’s time to think about how to serve and store it like a pro! Whether you’re hosting a dinner party or enjoying a cozy night in, these tips will enhance your experience and keep your leftovers fresh.
- Serve it hot: Serve your Easter Jell-O Pie: A Colorful Springtime Delight immediately for maximum flavor. A sprinkle of fresh herbs or a drizzle of olive oil adds a gourmet touch that will impress your guests.
- Pair with sides: Complement your Easter Jell-O Pie: A Colorful Springtime Delight with a side salad or steamed vegetables. It’s like a perfect duet on your plate, bringing out the best flavors in each dish.
- Leftovers are gold: If you have any leftovers, store them in an airtight container in the refrigerator. They’ll keep for up to three days, allowing you to enjoy a quick meal later in the week.
- Freezing for later: For longer storage, your Easter Jell-O Pie: A Colorful Springtime Delight can be frozen! Portion it into freezer-safe bags or containers, and label them with the date. Future you will appreciate the easy meal option on a busy night.
- Reheating tips: When reheating, do so gently on the stove or in the microwave. Add a splash of water or broth to keep it moist, ensuring that your Easter Jell-O Pie: A Colorful Springtime Delight tastes just as good as when it was first made.
- Garnish before serving: Just before serving, consider adding a fresh garnish like chopped parsley or a squeeze of lemon. It brightens the dish and makes it visually appealing, transforming simple into stunning.
- Creative serving: Get creative with how you present your Easter Jell-O Pie: A Colorful Springtime Delight. Serve it in individual bowls for a cozy feel or on a large platter for a family-style feast. It’s all about the vibe!
With these serving and storage suggestions, your Easter Jell-O Pie: A Colorful Springtime Delight will shine both at the table and in your fridge. Enjoy every bite, and don’t forget to share with family and friends!
Conclusion
At the end of the day, this recipe isn’t just dinner—it’s sanity saved. Whether you’re juggling work calls or soccer practice, Easter Jell-O Pie: A Colorful Springtime Delight steps in as a reliable ally in your kitchen. With its nice blend of flavors, it transforms a hectic evening into a comforting meal that feels like a warm hug.
Moreover, Easter Jell-O Pie: A Colorful Springtime Delight is versatile enough to adapt to your family’s preferences and dietary needs. If you need to swap ingredients or throw in seasonal favorites, this dish welcomes creativity with open arms. Imagine a simple weeknight meal turning into a gourmet experience with just a few tweaks!
So, go ahead and embrace the ease of Easter Jell-O Pie: A Colorful Springtime Delight. Not only does it save time, but it also brings joy and connection to your dinner table. As you gather with loved ones, savor each bite and relish the moments created over this nice dish. Your taste buds—and your schedule—will thank you!
Print
Easter Jell-O Pie: A Colorful Springtime Delight
Description
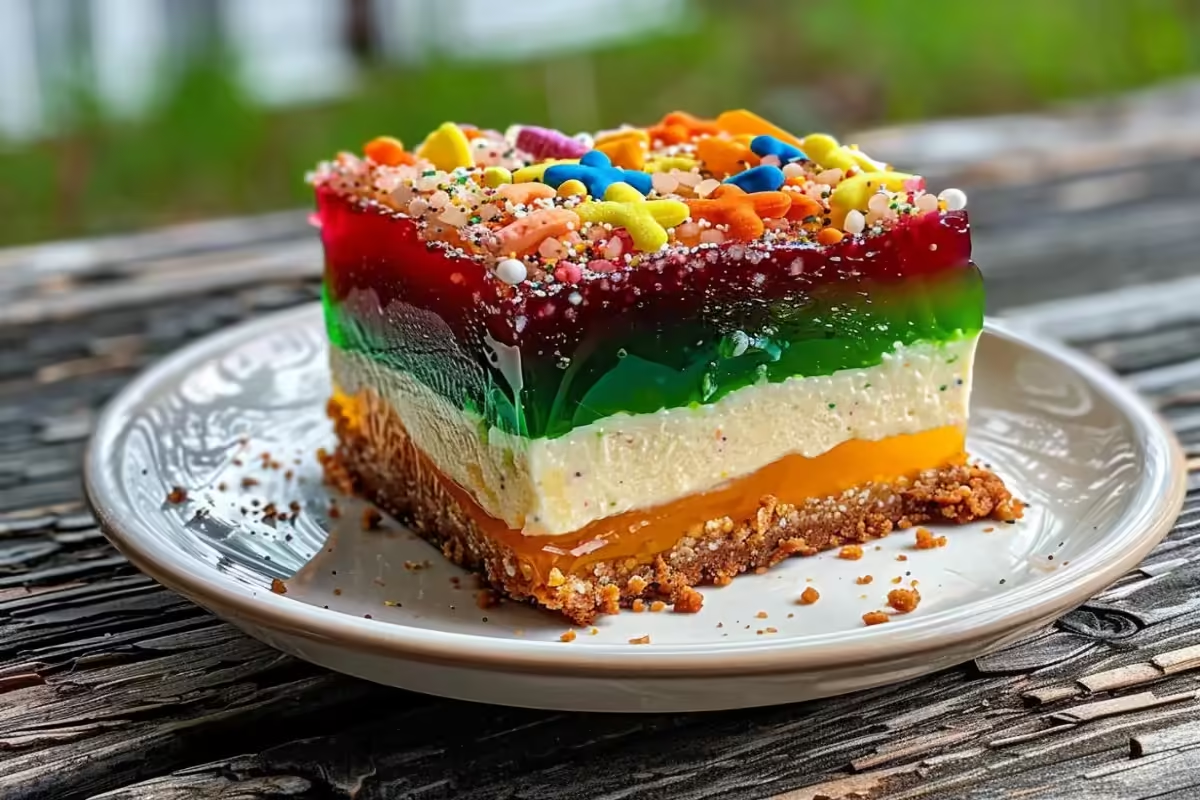
A vibrant and refreshing pie made with layers of fruity Jell-O and a creamy filling, perfect for Easter celebrations.
Ingredients
- 1 cup boiling water
- 1 package (3 oz) Jell-O gelatin (your choice of colors)
- 1 cup cold water
- 1 cup whipped topping
- 1/2 cup cream cheese, softened
- 1 pre-made graham cracker pie crust
Instructions
- In a bowl, dissolve the Jell-O in boiling water, stirring until fully dissolved.
- Add cold water to the mixture and stir well. Pour half of the Jell-O mixture into the pie crust and refrigerate until set, about 1 hour.
- In another bowl, beat together the softened cream cheese and whipped topping until smooth.
- Spread the cream cheese mixture over the set Jell-O layer in the pie crust.
- Pour the remaining Jell-O mixture over the cream cheese layer and refrigerate until fully set, about 2 hours.
- Once set, slice and serve chilled.
Notes
- Feel free to use different flavors of Jell-O for a variety of colors.
- For an extra touch, decorate with fresh fruit on top before serving.
- This pie can be made a day in advance for convenience.
Nutrition
- Serving Size: 1 slice
- Calories: 200
- Sugar: 20g
- Sodium: 150mg
- Fat: 8g
- Saturated Fat: 4g
- Unsaturated Fat: 2g
- Trans Fat: 0g
- Carbohydrates: 30g
- Fiber: 0g
- Protein: 2g
- Cholesterol: 20mg


