
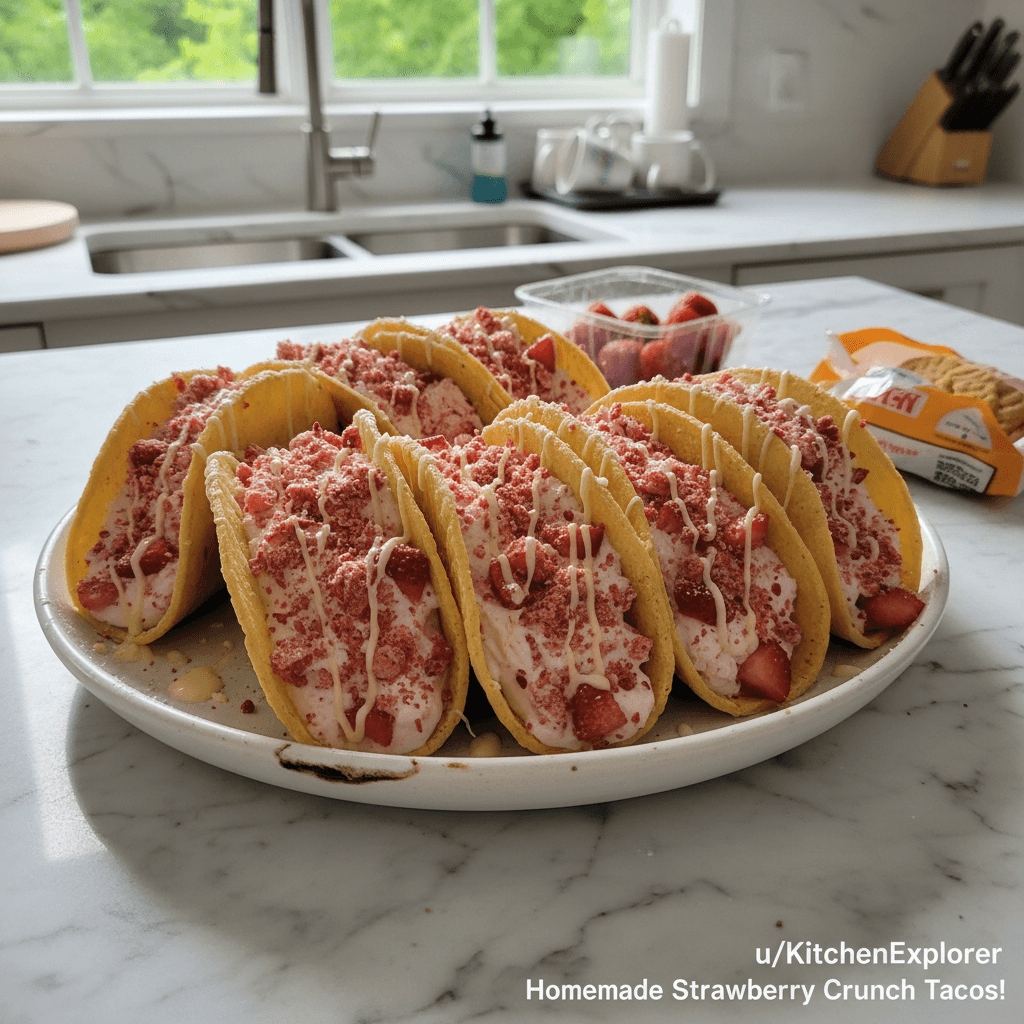
Honestly, I remember being a kid, chasing down the ice cream truck, always begging for those strawberry crunch bars. That crumbly, sweet, strawberry magic? Pure bliss! Years later, standing in my kitchen amidst a flour cloud (oops, baking day!), the idea just clicked: what if I could capture that nostalgic strawberry crunch vibe in something totally unexpected? That’s how these Strawberry Crunch Cheesecake Tacos came to life. It started as a messy experiment, a ‘let’s just see what happens’ kind of day, and ended up being a new family favorite. There’s something so comforting about the familiar taste, but in a fun, new package.
My first go at making these Strawberry Crunch Cheesecake Tacos was a bit of a disaster, to be real. I tried to mold the mini tortillas right out of the package, and they just cracked and crumbled. My kitchen looked like a tortilla graveyard! I was laughing, a bit frustrated, but knew I was on to something. It just needed a little more finesse, a touch of Mama Tessa’s patience, and maybe fewer flying tortilla bits.

Ingredients for Strawberry Crunch Cheesecake Tacos
- Cream Cheese: Use full-fat, softened cream cheese, please! Don’t even think about the low-fat stuff, it just won’t give you that dreamy, rich cheesecake texture. I usually grab Philadelphia, it’s just reliable.
- Powdered Sugar: This is for sweetness and that smooth, no-grain texture in the cheesecake filling. I tried granulated once, and it felt gritty never again!
Heavy Cream: Whipped into soft peaks, this makes the cheesecake light and airy, like a cloud. I’ve tried using milk before, and it just doesn’t hold up, the filling gets too runny.
Vanilla Extract: A good quality vanilla makes all the difference here, adding that classic warmth. I once ran out and used almond extract, and it was… different. Not bad, but not the same comforting vibe.
Golden Oreos or Nilla Wafers: These are the base for our crunch topping. I prefer Golden Oreos for a slightly richer flavor, but Nilla Wafers work beautifully too. I tried using regular chocolate Oreos once, and it totally changed the strawberry aesthetic!
- Freeze-Dried Strawberries: These give us that intense, natural strawberry flavor and vibrant color in the crunch. I used fresh strawberries in the crunch once, and they made everything soggy. Big oops!
- Unsalted Butter: This binds our crunch topping together, giving it that perfect crumbly texture. I always use unsalted so I can control the saltiness myself.
- Mini Flour Tortillas: Our taco shells! These need to be pliable so they can be shaped. I swear by warming them up a bit first to prevent cracking, a lesson learned the hard way.
- White Chocolate Candy Melts: For coating the shells. This creates a barrier and gives the crunch something to stick to. I’ve tried regular white chocolate bars, but candy melts are just easier to work with.
- Fresh Strawberries: For garnish! Sliced or diced, they add a burst of freshness and a pretty pop of color to your finished Strawberry Crunch Cheesecake Tacos.
Instructions for Strawberry Crunch Cheesecake Tacos
- Step 1: Get That Strawberry Crunch Ready
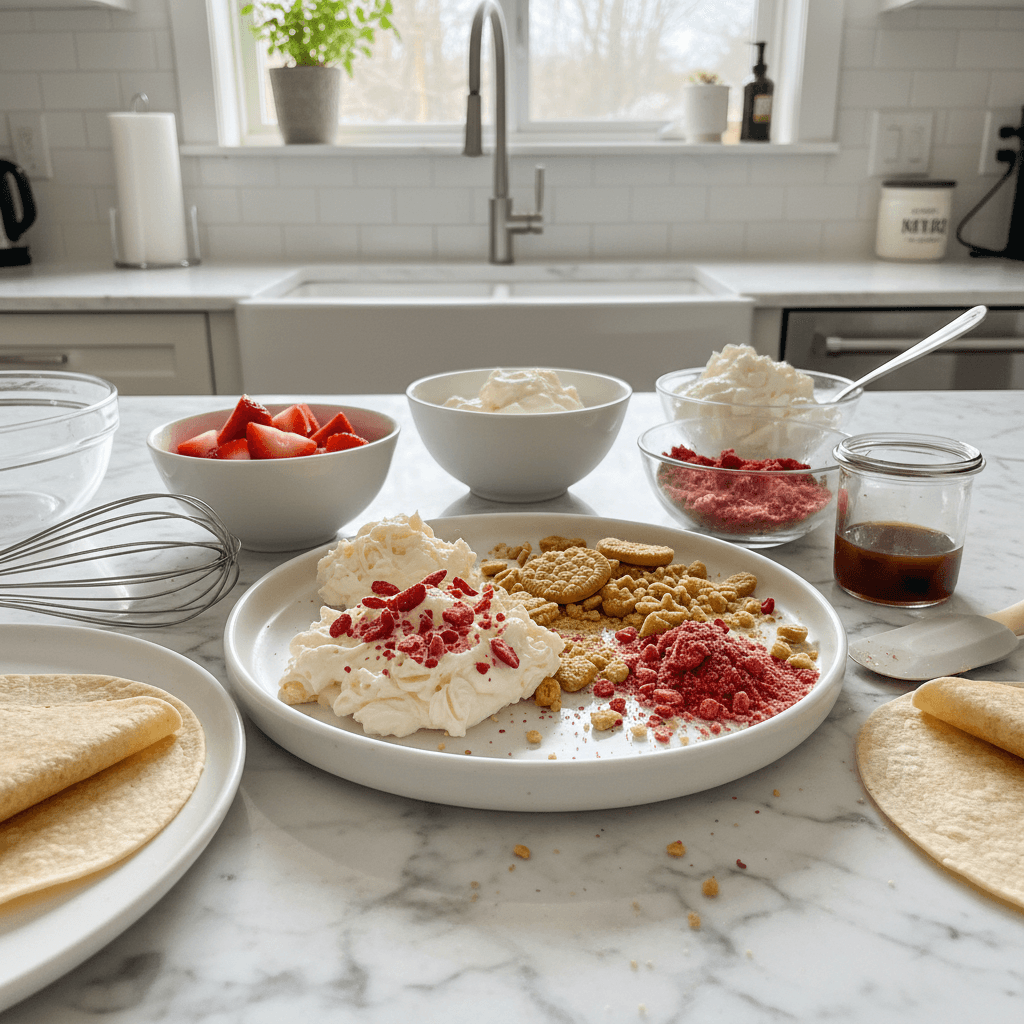
- First things first, let’s make that glorious strawberry crunch. Grab your food processor, toss in the Golden Oreos (or Nilla Wafers) and the freeze-dried strawberries. Pulse ’em until you have fine crumbs. Then, melt your unsalted butter and drizzle it over the crumbs, pulsing again until it’s all combined and smells like a sweet, buttery dream. This is where the magic starts, hon! I always make a little extra, because honestly, it’s just that good for snacking, or you know, a little extra sprinkle on your morning yogurt.
- Step 2: Whip Up the Creamy Cheesecake Filling
- Now for the heart of our Strawberry Crunch Cheesecake Tacos! In a large bowl, beat your softened full-fat cream cheese until it’s super smooth no lumps allowed! Gradually add the powdered sugar and vanilla extract, mixing until everything is beautifully combined and creamy. In a separate, chilled bowl, whip your heavy cream until it forms soft peaks. Then, gently fold that whipped cream into the cream cheese mixture. Be gentle, we want to keep all that beautiful airiness! This is where I almost always accidentally overmix if I’m not careful, so take it slow.
- Step 3: Shape and Crisp Your Taco Shells
- This step is crucial for perfect Strawberry Crunch Cheesecake Tacos! Slightly warm your mini flour tortillas (a few seconds in the microwave works wonders) to make them pliable. Drape each warm tortilla over two rungs of an oven rack to create that taco shape. Bake them in a preheated oven (around 350°F or 175°C) for about 8-10 minutes, or until they’re lightly golden and crispy. Keep an eye on them, because they can go from perfect to burnt in a flash! I’ve had a few too many crunchy, but sadly charred, shells in my time, oops!
- Step 4: Coat Those Crispy Shells with Crunch
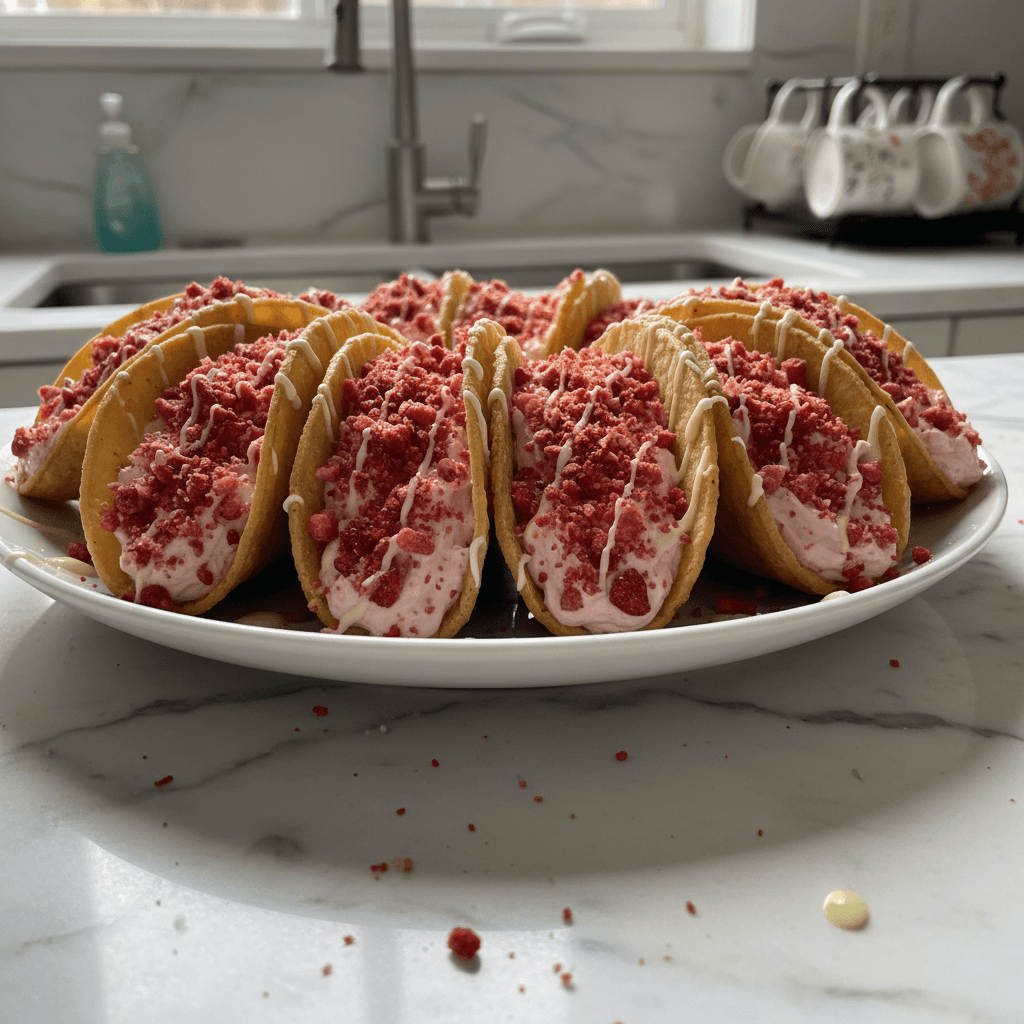
- Once your taco shells are cooled and crispy, it’s time for the fun part! Melt your white chocolate candy melts according to package directions. Dip the top edge of each taco shell into the melted white chocolate, letting any excess drip off. Immediately, while the chocolate is still wet, dip the coated edge into your strawberry crunch mixture, pressing gently to make sure it sticks. Place them on a parchment-lined baking sheet to set. This step can get a little messy, but trust me, it’s worth every sticky finger!
- Step 5: Fill Your Strawberry Crunch Cheesecake Tacos
- Now for the grand finale of our Strawberry Crunch Cheesecake Tacos! Spoon or, even better, pipe your cheesecake filling into each prepared taco shell. A piping bag with a wide tip makes this super easy and much neater, but a spoon works just fine if you’re feeling rustic. Fill them generously, but not so much that they’re overflowing. I always get a little too excited and overfill the first one, leading to a delightful, but messy, taste test!
- Step 6: Garnish and Chill to Perfection
- Once filled, arrange your Strawberry Crunch Cheesecake Tacos on a serving platter. Garnish each one with a few slices of fresh strawberry for that extra pop of color and freshness. Now, the hardest part: pop them in the fridge for at least 30 minutes to let the cheesecake filling firm up and all those flavors meld together. Trust me, the chill time is essential for the best texture and flavor. When they come out, they look absolutely irresistible, all vibrant and ready to be devoured!
Making these Strawberry Crunch Cheesecake Tacos always brings a happy kind of chaos to my kitchen. The kids love helping with the crunch topping, which usually means half of it ends up in their mouths or on the floor, but it’s all part of the fun. There’s something so sweet about seeing their faces light up, not just from the sugar, but from the joy of creating something delicious together. It’s those little moments, amidst the flour dust and sticky fingers, that make cooking so special for me.
Storage Tips for Strawberry Crunch Cheesecake Tacos
These Strawberry Crunch Cheesecake Tacos are best enjoyed fresh, when the shells are crispiest and the filling is perfectly set. However, if you have leftovers (which, let’s be real, is rare around here!), you can store them in an airtight container in the refrigerator for up to 2-3 days. I find that the shells do start to soften a bit after the first day, especially if they’re already filled, but they’re still pretty delightful. I once tried to freeze them, thinking it would be a brilliant idea, but the texture wasn’t quite right after thawing the cheesecake got a little watery, and the shells were just too soft. So, stick to the fridge! If you want to prep ahead, you can make the crunch topping and the cheesecake filling a day in advance and store them separately. Then, just assemble and crisp the shells right before serving for the freshest experience.
Ingredient Substitutions for Strawberry Crunch Cheesecake Tacos
Life happens, and sometimes you just don’t have exactly what the recipe calls for, right? For the crunch topping, I’ve tried using crushed shortbread cookies or even plain graham crackers instead of Oreos, and they both work pretty well, giving a slightly different but still delicious base. If you can’t find freeze-dried strawberries, a little strawberry Jell-O powder mixed into the crumbs can give you that color and flavor, though the texture won’t be quite the same. For the taco shells, if mini tortillas aren’t available, you can use regular-sized ones and cut them in half after crisping, or even use stroopwafels for a super unique twist, though the shaping might be a bit different. I’ve also experimented with different fruit flavors for the crunch think freeze-dried raspberries or blueberries for a fun twist on these Strawberry Crunch Cheesecake Tacos!
Serving Suggestions for Strawberry Crunch Cheesecake Tacos
These Strawberry Crunch Cheesecake Tacos are pretty much a party in themselves, but a few little touches can make them even more special. I love serving them with a tall glass of cold milk, because honestly, what goes better with a nostalgic dessert? For a more adult crowd, a light, sparkling rosé or even a glass of chilled prosecco complements the sweetness beautifully. Sometimes, for an extra special treat, I’ll drizzle a little extra white chocolate over the top or add a dollop of whipped cream and a mint sprig for a fancy touch. They’re also fantastic alongside a simple fruit salad, balancing the richness of the cheesecake. These are just perfect for a casual movie night, a backyard BBQ, or just when you need a little pick-me-up on a Tuesday!
The Backstory of These Strawberry Crunch Cheesecake Tacos
The concept of a dessert taco, to me, is all about taking something familiar and giving it a playful, unexpected twist. While the savory taco has deep roots in Mexican culture, these sweet versions are a modern, often Americanized, invention, born from a love of playful food combinations. My personal journey to these Strawberry Crunch Cheesecake Tacos really started with that childhood love for strawberry crunch ice cream bars. I wanted to capture that specific flavor profile the creamy, the fruity, the crunchy and combine it with the fun, handheld experience of a taco. It’s about creating new traditions, new memories, and bringing a little bit of that joyful, carefree childhood feeling into adulthood, one delicious, crunchy bite at a time. It’s my way of blending nostalgia with a bit of culinary adventure!
Honestly, every time I make these Strawberry Crunch Cheesecake Tacos, it brings a smile to my face. From the slightly messy creation process to the first satisfying, crunchy bite, it’s just a truly happy dessert. The way the creamy cheesecake meets that sweet, tangy strawberry crunch, all cradled in a crispy white chocolate shell it’s just delightful. I hope you give them a try and maybe even create your own kitchen stories with them. Don’t forget to tell me how your batch turns out!
Frequently Asked Questions About Strawberry Crunch Cheesecake Tacos
- → Can I make these Strawberry Crunch Cheesecake Tacos ahead of time?
You can definitely prep the crunch topping and cheesecake filling a day in advance. Store them separately in the fridge. For the best crispy shells, I’d recommend baking and coating them closer to serving time, then assembling everything fresh. That way, you get the absolute best texture!
- → What if I don’t have mini tortillas for the Strawberry Crunch Cheesecake Tacos?
No worries! You can use regular-sized flour tortillas. Just warm them, shape them over oven racks, and once cooled, you can carefully cut them in half to make two smaller taco shells. It works pretty well, just a bit more delicate to handle!
- → How can I prevent the taco shells from cracking when shaping them?
The trick is to warm your tortillas slightly before shaping! A few seconds in the microwave or a quick pass over a gas burner makes them much more pliable. I used to skip this, and my kitchen looked like a tortilla battlefield!
- → Can I use fresh strawberries in the strawberry crunch topping?
I wouldn’t recommend it for the crunch topping itself. Fresh strawberries have too much moisture and will make your crunch soggy very quickly. Freeze-dried is the way to go for that intense flavor and crisp texture. Save fresh ones for garnish!
- → Are there other crunch flavor variations I could try for these cheesecake tacos?
Absolutely! Get creative! I’ve played around with crushed chocolate cookies and a little cocoa powder for a chocolate crunch, or even vanilla wafers with a touch of lemon zest for a bright, citrusy crunch. The possibilities are endless, honestly!
Crispy Strawberry Crunch Cheesecake Tacos Recipe
- Prep Time: 30 Minutes
- Cook Time: 10 Minutes
- Total Time: 40 Minutes
- Yield: 12 Servings 1x
- Category: Dessert
Description
Whip up these delightful Strawberry Crunch Cheesecake Tacos! Crunchy shells, creamy cheesecake, and a sweet strawberry topping. A fun dessert for any day.
Ingredients
- Cheesecake Filling:
- 16 oz (2 blocks) full-fat cream cheese, softened
- 1 cup powdered sugar
- 1 teaspoon vanilla extract
- 1 cup heavy cream, chilled
- Strawberry Crunch Topping:
- 12 Golden Oreos or 2 cups Nilla Wafers
- 1 oz (about 1 cup) freeze-dried strawberries
- 1/4 cup unsalted butter, melted
- Taco Shells & Assembly:
- 12 mini flour tortillas
- 1 cup white chocolate candy melts
- Garnish:
- 1/2 cup fresh strawberries, sliced
Instructions
- Step 1: Get That Strawberry Crunch Ready: First things first, let’s make that glorious strawberry crunch. Grab your food processor, toss in the Golden Oreos (or Nilla Wafers) and the freeze-dried strawberries. Pulse ’em until you have fine crumbs. Then, melt your unsalted butter and drizzle it over the crumbs, pulsing again until it’s all combined and smells like a sweet, buttery dream. This is where the magic starts, hon! I always make a little extra, because honestly, it’s just that good for snacking, or you know, a little extra sprinkle on your morning yogurt.
- Step 2: Whip Up the Creamy Cheesecake Filling: Now for the heart of our Strawberry Crunch Cheesecake Tacos! In a large bowl, beat your softened full-fat cream cheese until it’s super smooth—no lumps allowed! Gradually add the powdered sugar and vanilla extract, mixing until everything is beautifully combined and creamy. In a separate, chilled bowl, whip your heavy cream until it forms soft peaks. Then, gently fold that whipped cream into the cream cheese mixture. Be gentle, we want to keep all that beautiful airiness! This is where I almost always accidentally overmix if I’m not careful, so take it slow.
- Step 3: Shape and Crisp Your Taco Shells: This step is crucial for perfect Strawberry Crunch Cheesecake Tacos! Slightly warm your mini flour tortillas (a few seconds in the microwave works wonders) to make them pliable. Drape each warm tortilla over two rungs of an oven rack to create that taco shape. Bake them in a preheated oven (around 350°F or 175°C) for about 8-10 minutes, or until they’re lightly golden and crispy. Keep an eye on them, because they can go from perfect to burnt in a flash! I’ve had a few too many crunchy, but sadly charred, shells in my time, oops!
- Step 4: Coat Those Crispy Shells with Crunch: Once your taco shells are cooled and crispy, it’s time for the fun part! Melt your white chocolate candy melts according to package directions. Dip the top edge of each taco shell into the melted white chocolate, letting any excess drip off. Immediately, while the chocolate is still wet, dip the coated edge into your strawberry crunch mixture, pressing gently to make sure it sticks. Place them on a parchment-lined baking sheet to set. This step can get a little messy, but trust me, it’s worth every sticky finger!
- Step 5: Fill Your Strawberry Crunch Cheesecake Tacos: Now for the grand finale of our Strawberry Crunch Cheesecake Tacos! Spoon or, even better, pipe your cheesecake filling into each prepared taco shell. A piping bag with a wide tip makes this super easy and much neater, but a spoon works just fine if you’re feeling rustic. Fill them generously, but not so much that they’re overflowing. I always get a little too excited and overfill the first one, leading to a delightful, but messy, taste test!
- Step 6: Garnish and Chill to Perfection: Once filled, arrange your Strawberry Crunch Cheesecake Tacos on a serving platter. Garnish each one with a few slices of fresh strawberry for that extra pop of color and freshness. Now, the hardest part: pop them in the fridge for at least 30 minutes to let the cheesecake filling firm up and all those flavors meld together. Trust me, the chill time is essential for the best texture and flavor. When they come out, they look absolutely irresistible, all vibrant and ready to be devoured!


