
Honestly, there are days I just want something fancy without all the fuss. You know the feeling? I remember trying to make a full-sized crème brûlée cheesecake for a dinner party once a complete kitchen disaster, hon. The water bath overflowed, the crust was soggy, and don’t even get me started on the torching! It was then, amidst the chaos and a slightly burnt sugar smell, that the idea for these Mini Crème Brûlée Cheesecakes sparked. Combining the creamy richness of cheesecake with that iconic crackly sugar top in a bite-sized package? Yes, please! These little beauties became my go-to for impressing without the stress, and they always bring a smile.
Oh, the first time I torched these little guys, I was so focused on getting that perfect golden crust that I forgot about the kitchen towel draped a little too close to the flame. Oops! A tiny singe, a quick pat, and a good laugh later, the mini crème brûlée cheesecakes were saved. It’s all part of the fun, right? My kitchen usually has a story to tell after baking these, but the end result is always worth it, I promise.

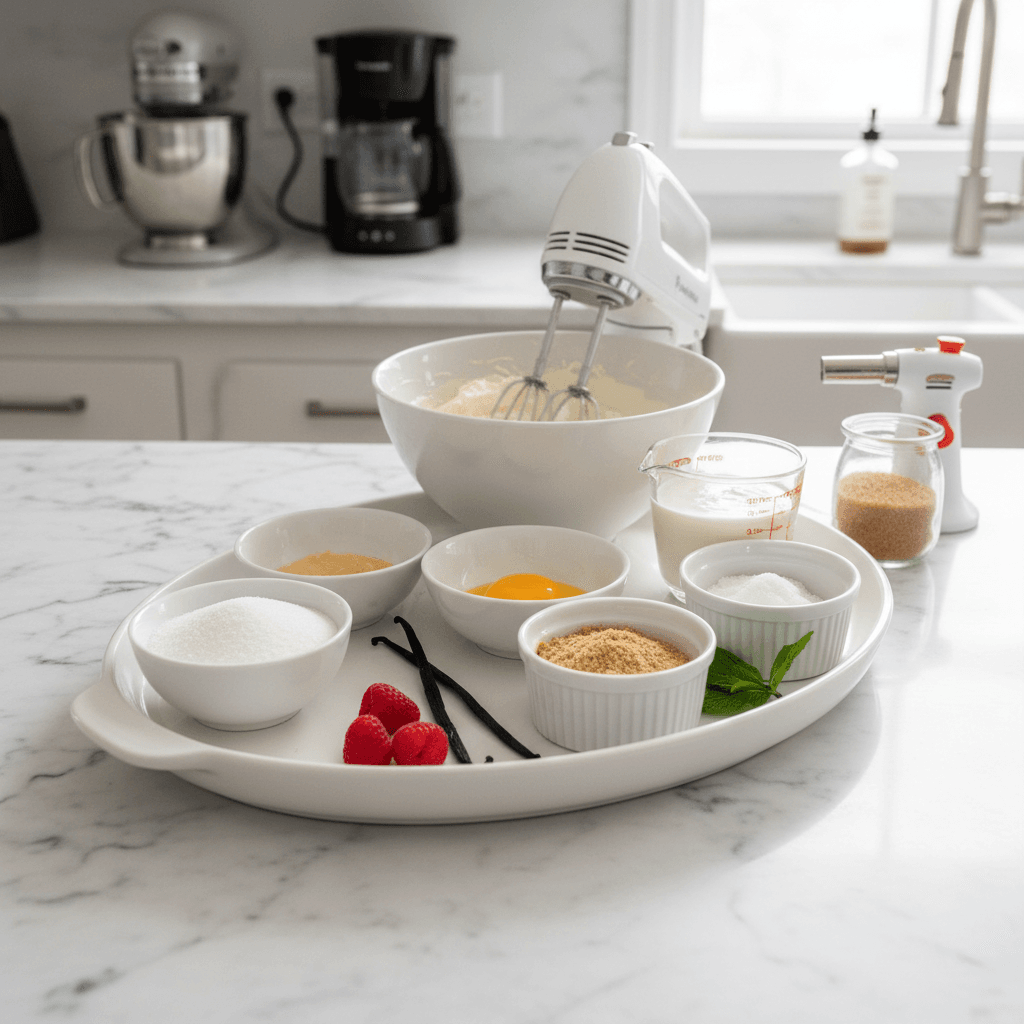
Ingredients for Your Mini Crème Brûlée Cheesecakes
Crust Essentials
- Graham Cracker Crumbs: The foundation! I swear by finely crushed crumbs, it makes for a much more cohesive crust. Don’t use those chunky ones, you’ll regret it.
- Melted Unsalted Butter: This binds it all together. I once tried to use less butter, thinking I was being “healthy” the crust just fell apart. Don’t be like past me, use the butter!
- Granulated Sugar: Just a touch to sweeten the crust. I’ve tried brown sugar here too, and it works, but I prefer the classic sweetness of white sugar for these mini crème brûlée cheesecakes.
Creamy Cheesecake Filling
- Full-Fat Cream Cheese: Non-negotiable, folks! Softened to room temperature, or you’ll have lumpy cheesecake, and nobody wants that. I always use a good quality block cream cheese, never the spreadable kind.
- Granulated Sugar: For that sweet, classic cheesecake flavor.
- Large Eggs: Room temperature, always! They incorporate better and give a smoother filling. I once used cold eggs and the batter looked… curdled. Lesson learned!
- Heavy Cream: Adds to the richness and silky texture. Don’t substitute with milk, it just won’t be the same creamy dream.
- Vanilla Extract: Use good quality vanilla, honestly, it makes a huge difference in the overall flavor of these mini crème brûlée cheesecakes.
- Lemon Zest (Optional): My little secret! A tiny bit of fresh lemon zest brightens everything up and cuts through the richness. It’s subtle, but it adds a lovely depth.
Brûlée Topping & Garnish
- Granulated Sugar: This is for the magic! The sugar you’ll torch to create that signature crunchy top. I find regular granulated sugar works best for the brûlée.
- Fresh Berries (Optional): A pop of color and freshness. Raspberries or blueberries are my favorites, a little tartness against the sweet.
Crafting Your Mini Crème Brûlée Cheesecakes: The Steps
- Step 1: Prep the Crust
- First things first, let’s get those muffin tins ready! Line a 12-cup muffin tin with paper liners. Then, in a medium bowl, combine your graham cracker crumbs, a tablespoon of sugar, and that glorious melted butter. Mix it all up until it looks like wet sand. Now, scoop about a tablespoon of the mixture into the bottom of each liner and press it down firmly. I use the bottom of a shot glass for this, it works wonders! Pop that into the fridge while you get the filling ready. This pre-chilling helps prevent a soggy crust, a mistake I made way too many times.
- Step 2: Mix the Creamy Filling
- In a large bowl, using an electric mixer, beat your softened cream cheese and sugar together until it’s super smooth and creamy, no lumps allowed! This is where you want to scrape down the sides of the bowl a few times. Next, add your room temperature eggs, one at a time, mixing just until combined after each. Don’t overmix here, or your mini crème brûlée cheesecakes might crack during baking, and we don’t want sad cracks! Stir in the heavy cream, vanilla extract, and that optional lemon zest. The batter should look silky and beautiful.
- Step 3: Bake ‘Em Gently
- Pour your cheesecake filling evenly over the chilled crusts in the muffin tin. Now, here’s a tip I learned the hard way: place your muffin tin into a larger roasting pan. Carefully pour hot water into the roasting pan, coming about halfway up the sides of the muffin tin. This water bath creates a steamy environment, which helps the mini crème brûlée cheesecakes bake evenly and prevents cracking. Bake in a preheated oven at 325°F (160°C) for about 20-25 minutes, or until the edges are set but the centers still have a slight wobble. They’ll firm up as they cool, trust me!
- Step 4: The All-Important Chill
- Once baked, carefully remove the muffin tin from the water bath and let the cheesecakes cool completely on a wire rack. This usually takes about an hour. After they’ve cooled to room temperature, transfer the entire muffin tin to the refrigerator and let those beauties chill for at least 4 hours, or even better, overnight. Honestly, this chilling time is crucial! It allows the flavors to meld and the cheesecakes to firm up properly. If you skip this, they won’t hold their shape, and that’s just a tragic outcome for your mini crème brûlée cheesecakes.
- Step 5: Sugar Top Magic
- When you’re ready to serve, carefully remove the mini crème brûlée cheesecakes from their liners. Place them on a heatproof surface or individual serving plates. Sprinkle about 1-2 teaspoons of granulated sugar evenly over the top of each cheesecake. You want a thin, even layer that completely covers the surface. Don’t go too thick, or it’ll be hard to get that perfect brûlée. I usually give the plate a little shake to distribute the sugar evenly. This step is where the anticipation builds, you can practically smell the caramel before it even happens!
- Step 6: Torch to Perfection
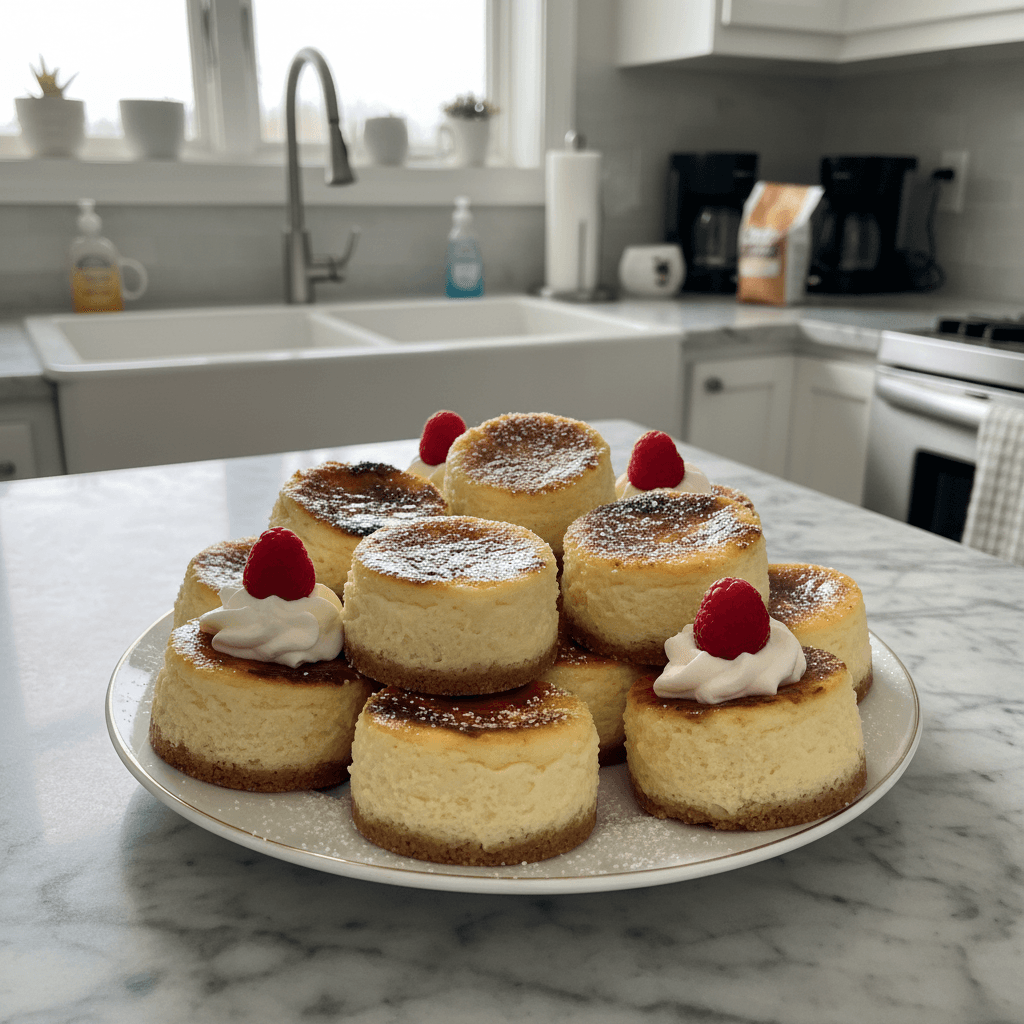
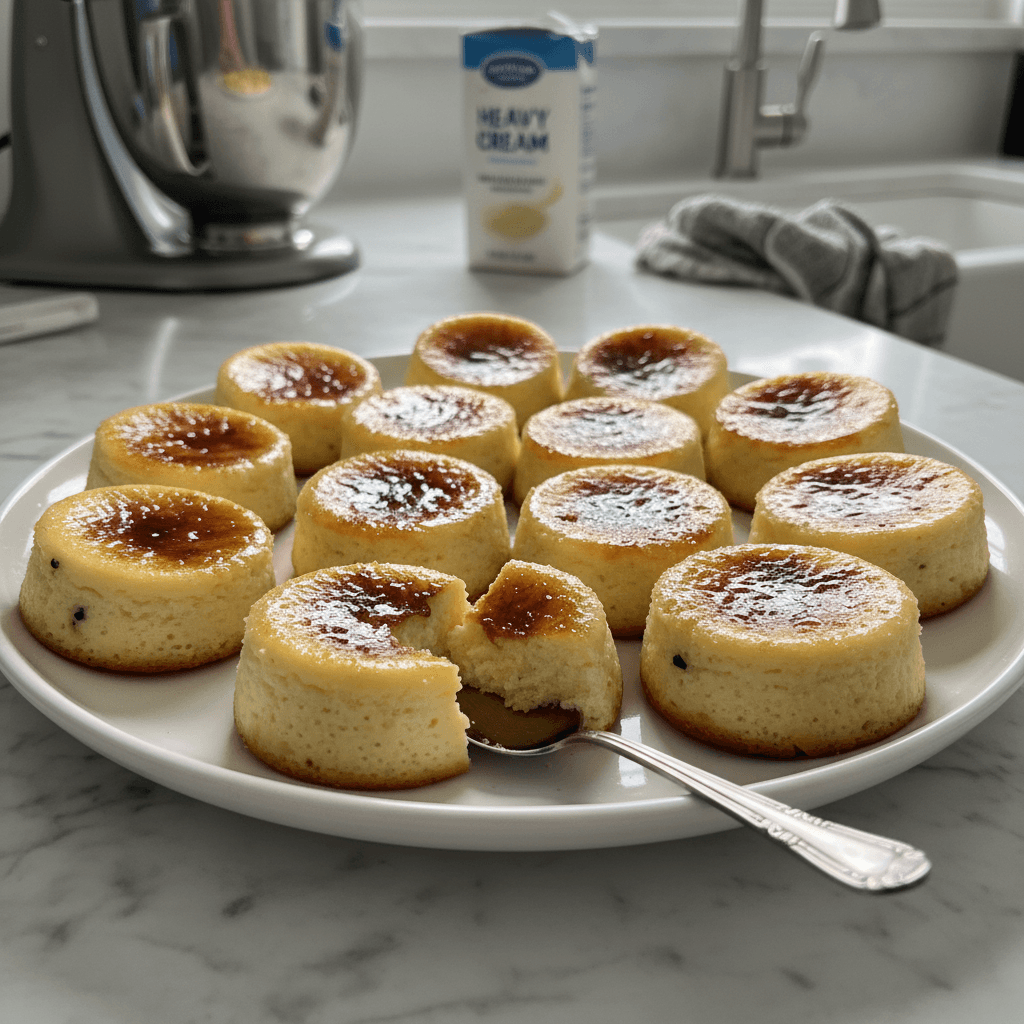
- Now for the fun part the torching! Using a kitchen torch, carefully heat the sugar on top of each cheesecake in a circular motion until it melts and turns into a beautiful, amber-colored, crackly crust. Be patient and keep the flame moving to avoid burning. I’ve definitely burnt a few in my time, leading to a bitter taste oops! Once torched, let the sugar cool for a minute or two, it will harden into that signature brittle layer. Serve your gorgeous mini crème brûlée cheesecakes immediately with fresh berries, if you like. That satisfying crack when you tap it is the best sound!
There’s something incredibly satisfying about the moment you hear that sugar crust crack with the tap of a spoon. It always takes me back to the first time I nailed it, feeling like a pastry chef in my own chaotic kitchen. These mini crème brûlée cheesecakes are more than just a dessert, they’re a little bit of joy, a small triumph, and a testament to good things coming in small packages.
Mini Crème Brûlée Cheesecakes: Storage Secrets
So, you’ve made a batch of these glorious Mini Crème Brûlée Cheesecakes and have a few left over? Lucky you! Store them in an airtight container in the refrigerator for up to 3-4 days. Now, here’s the crucial bit: only torch the sugar right before serving. If you torch them and then store them, the caramelized sugar will absorb moisture from the cheesecake and become sticky and soft, losing that delightful crunch. I once torched a whole batch for a party the night before, thinking I was being smart, and woke up to sad, soggy tops. Don’t make my mistake! If you want to prep ahead, bake the cheesecakes, chill them, and then add the sugar and torch just moments before guests arrive. They hold up beautifully un-torched in the fridge.
Ingredient Substitutions for Your Mini Crème Brûlée Cheesecakes
Life happens, and sometimes you don’t have exactly what the recipe calls for. I get it! For the crust, if you don’t have graham crackers, digestive biscuits work wonderfully. I’ve even used crushed vanilla wafers in a pinch, and it worked… kinda, but graham crackers are my true love here. If you’re out of vanilla extract, almond extract can be a fun, albeit different, swap, but use it sparingly as it’s quite potent. I tried an orange extract once for a citrus twist, and it was actually quite good! For the brûlée topping, if you only have brown sugar, you can use it, but it melts differently and can be a bit harder to get that super crisp, clear crackle. Stick to granulated if you can for these Mini Crème Brûlée Cheesecakes.
Serving Suggestions for Mini Crème Brûlée Cheesecakes
These Mini Crème Brûlée Cheesecakes are pretty spectacular on their own, but a few little touches can make them extra special. I love serving them with a small handful of fresh raspberries or blueberries, their tartness is a beautiful contrast to the sweet, creamy cheesecake. A dollop of lightly sweetened whipped cream on the side never hurts either, adding another layer of creamy goodness. For drinks, a rich cup of coffee, a glass of sparkling wine, or even a sweet dessert wine would be delightful. For a cozy evening in, I’ve served these with a classic rom-com playing in the background a truly perfect pairing for a little self-care!
The Sweet Story Behind Mini Crème Brûlée Cheesecakes
The concept of crème brûlée is steeped in French elegance, a dessert of rich custard topped with a contrasting layer of hardened caramelized sugar. Cheesecake, on the other hand, has a much broader, and arguably more humble, history, becoming a beloved staple in American diners and kitchens. My personal journey to these Mini Crème Brûlée Cheesecakes started with a desire to bring a bit of that French sophistication into a more approachable, comforting form. It was about taking the best of both worlds the smooth, tangy creaminess of a New York-style cheesecake and the theatrical, crunchy joy of a brûlée and shrinking them down into perfectly shareable, or hoard-able, portions. It’s a fusion that feels both classic and wonderfully new, a true kitchen adventure.
Honestly, these Mini Crème Brûlée Cheesecakes have become a firm favorite in my kitchen. They’re a little bit of luxury, a lot of comfort, and always a hit. The joy of that first crack, the creamy interior, the sweet memory of making them it just makes me happy. I hope they bring as much delight to your table as they do to mine. Don’t forget to share your own kitchen adventures with these beauties!
Frequently Asked Questions About Mini Crème Brûlée Cheesecakes
- → Can I make these Mini Crème Brûlée Cheesecakes ahead of time?
Absolutely! You can bake the cheesecakes up to 2 days in advance and store them in the fridge. Just remember to add the sugar and torch them right before you plan to serve. This keeps that brûlée topping perfectly crisp, a lesson I learned after a sad, soggy batch.
- → What if I don’t have a kitchen torch for my Mini Crème Brûlée Cheesecakes?
No torch, no problem! You can get a similar effect by placing the sugared cheesecakes under a preheated broiler. Watch them like a hawk, though, as sugar burns fast! Just a minute or two, rotating as needed, until golden and bubbly. It works, honestly.
- → Why did my Mini Crème Brûlée Cheesecakes crack on top?
Cracking usually happens from overmixing the batter (introducing too much air) or baking at too high a temperature, causing them to bake too quickly. Using room temperature ingredients and a water bath really helps prevent this, I promise!
- → How long do Mini Crème Brûlée Cheesecakes last in the fridge?
Un-torched, they’ll last beautifully for 3-4 days in an airtight container in the refrigerator. Once torched, it’s best to enjoy them within an hour or two for that ideal crunchy top, because the sugar will soften over time.
- → Can I make a different flavor of Mini Crème Brûlée Cheesecakes?
Definitely! You can add a tablespoon of cocoa powder to the filling for chocolate mini crème brûlée cheesecakes, or a bit of espresso powder. I’ve even tried a hint of orange zest in the filling which was lovely. Experiment and have fun!

Creamy Mini Crème Brûlée Cheesecakes: Decadent Bites
- Prep Time: 30 Minutes
- Cook Time: 25 Minutes
- Total Time: 4 Hours 55 Minutes
- Yield: 12 Servings 1x
- Category: Dessert
Description
Mini Crème Brûlée Cheesecakes offer a decadent twist on classic dessert. Get my easy recipe for these creamy, crunchy treats, perfect for any occasion.
Ingredients
- Crust Essentials:
- 1 ½ cups (170g) graham cracker crumbs (about 10–12 full sheets)
- ¼ cup (50g) granulated sugar
- 6 tablespoons (85g) unsalted butter, melted
- Creamy Cheesecake Filling:
- 2 (8-ounce) blocks full-fat cream cheese, softened to room temperature
- ½ cup (100g) granulated sugar
- 2 large eggs, room temperature
- ¼ cup (60ml) heavy cream
- 1 teaspoon vanilla extract
- ½ teaspoon fresh lemon zest (optional)
- Brûlée Topping & Garnish:
- ½ cup (100g) granulated sugar, for torching
- Fresh berries, for garnish (optional)
Instructions
- Prep the Crust: First things first, let’s get those muffin tins ready! Line a 12-cup muffin tin with paper liners. Then, in a medium bowl, combine your graham cracker crumbs, a tablespoon of sugar, and that glorious melted butter. Mix it all up until it looks like wet sand. Now, scoop about a tablespoon of the mixture into the bottom of each liner and press it down firmly. I use the bottom of a shot glass for this, it works wonders! Pop that into the fridge while you get the filling ready. This pre-chilling helps prevent a soggy crust, a mistake I made way too many times.
- Mix the Creamy Filling: In a large bowl, using an electric mixer, beat your softened cream cheese and sugar together until it’s super smooth and creamy, no lumps allowed! This is where you want to scrape down the sides of the bowl a few times. Next, add your room temperature eggs, one at a time, mixing just until combined after each. Don’t overmix here, or your mini crème brûlée cheesecakes might crack during baking, and we don’t want sad cracks! Stir in the heavy cream, vanilla extract, and that optional lemon zest. The batter should look silky and beautiful.
- Bake ‘Em Gently: Pour your cheesecake filling evenly over the chilled crusts in the muffin tin. Now, here’s a tip I learned the hard way: place your muffin tin into a larger roasting pan. Carefully pour hot water into the roasting pan, coming about halfway up the sides of the muffin tin. This water bath creates a steamy environment, which helps the mini crème brûlée cheesecakes bake evenly and prevents cracking. Bake in a preheated oven at 325°F (160°C) for about 20-25 minutes, or until the edges are set but the centers still have a slight wobble. They’ll firm up as they cool, trust me!
- The All-Important Chill: Once baked, carefully remove the muffin tin from the water bath and let the cheesecakes cool completely on a wire rack. This usually takes about an hour. After they’ve cooled to room temperature, transfer the entire muffin tin to the refrigerator and let those beauties chill for at least 4 hours, or even better, overnight. Honestly, this chilling time is crucial! It allows the flavors to meld and the cheesecakes to firm up properly. If you skip this, they won’t hold their shape, and that’s just a tragic outcome for your mini crème brûlée cheesecakes.
- Sugar Top Magic: When you’re ready to serve, carefully remove the mini crème brûlée cheesecakes from their liners. Place them on a heatproof surface or individual serving plates. Sprinkle about 1-2 teaspoons of granulated sugar evenly over the top of each cheesecake. You want a thin, even layer that completely covers the surface. Don’t go too thick, or it’ll be hard to get that perfect brûlée. I usually give the plate a little shake to distribute the sugar evenly. This step is where the anticipation builds, you can practically smell the caramel before it even happens!
- Torch to Perfection: Now for the fun part – the torching! Using a kitchen torch, carefully heat the sugar on top of each cheesecake in a circular motion until it melts and turns into a beautiful, amber-colored, crackly crust. Be patient and keep the flame moving to avoid burning. I’ve definitely burnt a few in my time, leading to a bitter taste – oops! Once torched, let the sugar cool for a minute or two; it will harden into that signature brittle layer. Serve your gorgeous mini crème brûlée cheesecakes immediately with fresh berries, if you like. That satisfying *crack* when you tap it is the best sound!


