
Oh, Peanut Butter Blossoms. Just the name takes me back. I remember being maybe seven, standing on a wobbly kitchen stool, ‘helping’ my grandma bake these. Mostly, I was just trying to sneak chocolate kisses before they made it onto the cookies, honestly. The smell of warm peanut butter and melting chocolate is just… childhood, isn’t it? These aren’t just cookies, they’re little pockets of pure comfort, a sweet hug from the past. Every time I bake them, I get a little messy, a little nostalgic, and always end up with a few extra kisses in my pocket.
Last Christmas, I was making a huge batch of Peanut Butter Blossoms for a cookie exchange. In my haste, I grabbed the wrong flour bag self-rising instead of all-purpose! My cookies puffed up like little mountains, then deflated into sad, flat disks. Oops. Had to start over, but hey, at least the second batch was perfect, and I learned to double-check my labels, especially when the kitchen’s a whirlwind.

Ingredients for Classic Peanut Butter Blossoms
- Creamy Peanut Butter: Okay, listen up: creamy, not natural. We want that classic, smooth texture, not the oily separation you get with natural stuff. I’ve tried both, and honestly, the creamy just works here. Don’t fight me on this one!
- Unsalted Butter: Room temp, please! I’ve made the mistake of using cold butter, and it’s a lumpy, frustrating mess. Just let it sit out for an hour, it makes a world of difference for that soft, tender crumb.
Granulated Sugar & Brown Sugar: The combo is key for chewiness and that lovely caramel note. Don’t skimp on either. I once thought ‘less sugar’ would be healthier, and guess what? Less delicious. Some things are just meant to be sweet.
Large Egg: Just one! I cracked two in once by accident, thinking ‘more binder, better cookies,’ but they ended up a bit too dense, like tiny hockey pucks. Live and learn, right?
All-Purpose Flour: The backbone of our cookie! Sifting? Nah, I don’t always bother, to be real. Just make sure it’s not packed too tight when you measure, or your cookies will be dry. Been there, done that.
- Baking Soda: This gives our Peanut Butter Blossoms that little lift and helps them spread just right. I once ran out and tried baking powder they were okay, but not quite the same classic texture. Stick to soda for these!
- Salt: A tiny pinch to balance all that sweetness. Honestly, it’s crucial. I forget it sometimes and the cookies just taste… flat. Don’t skip the salt!
- Vanilla Extract: Oh, vanilla! It just ties everything together. Use the good stuff if you can, it really makes a difference. I’m a bit heavy-handed with it, oops, but I like that extra warmth.
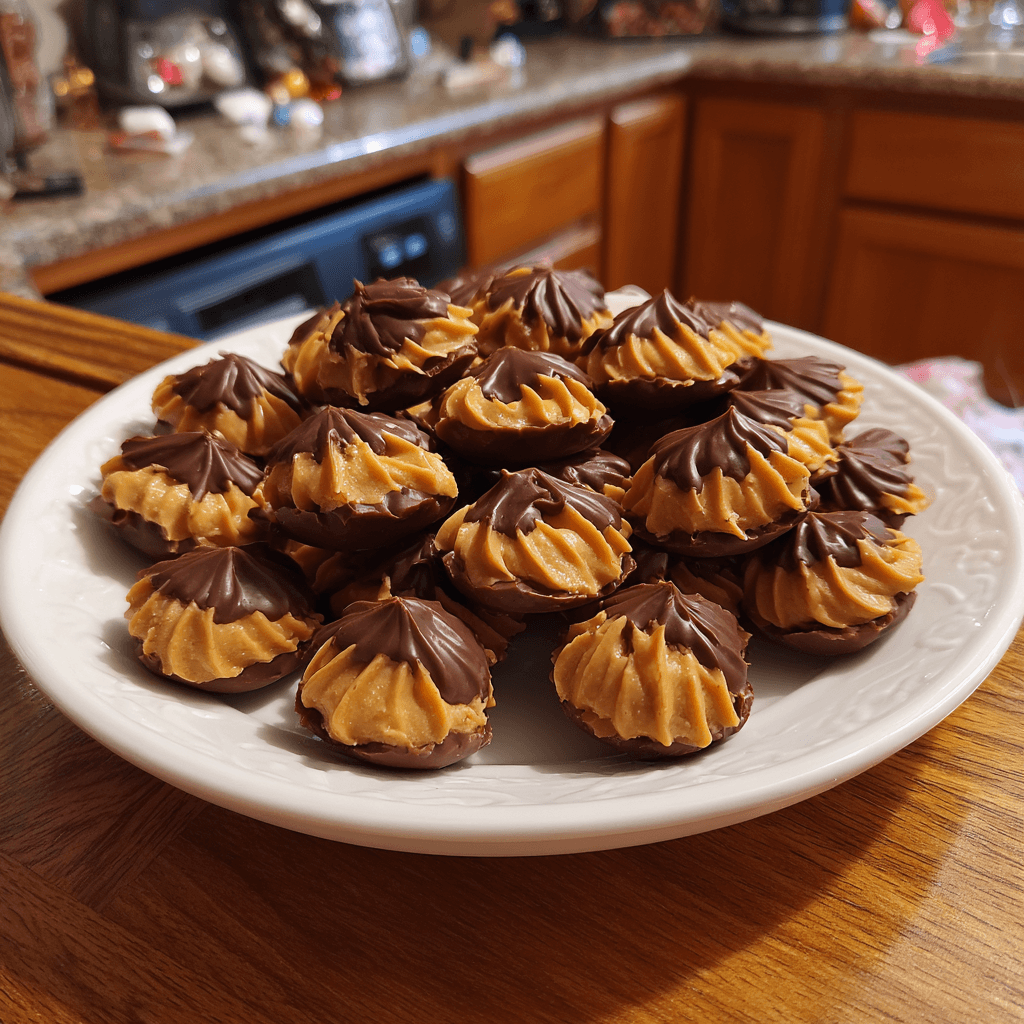
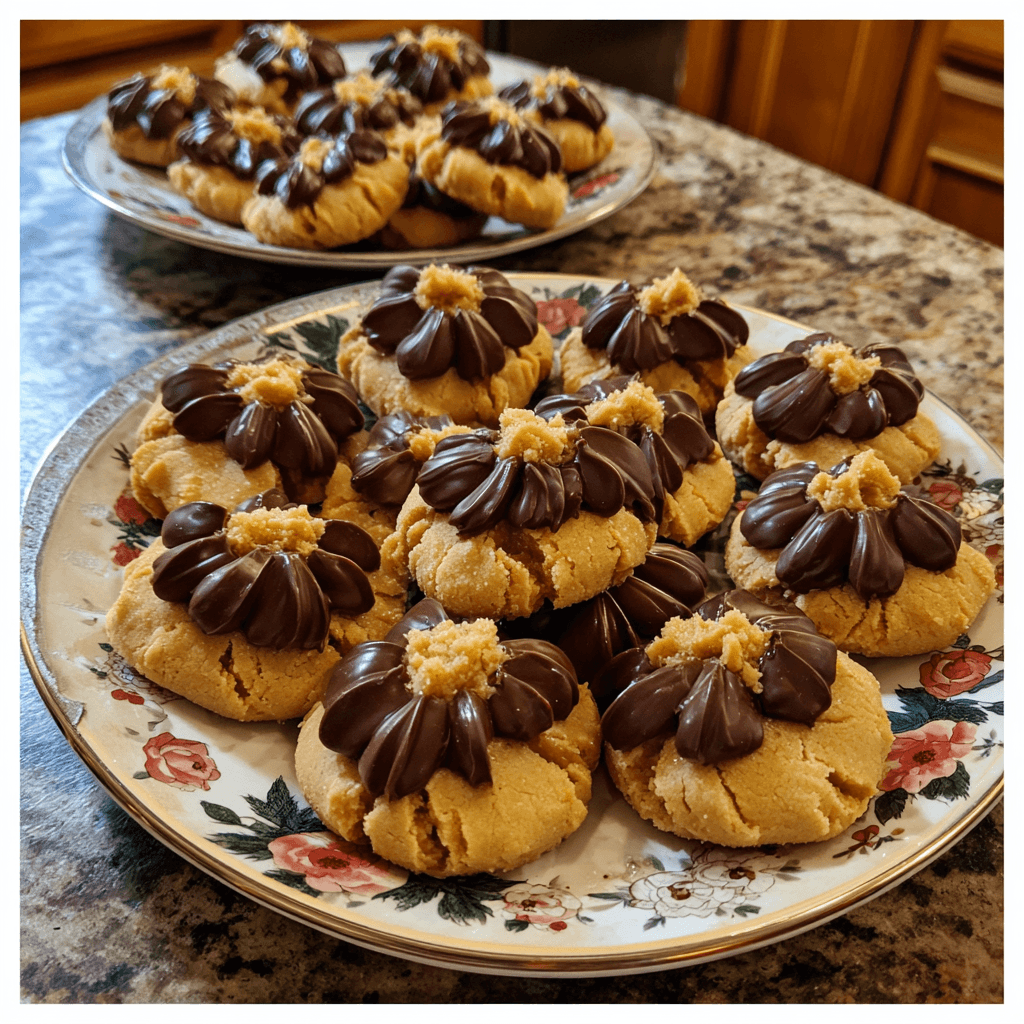
- Hershey’s Kisses: The star of the show! Milk chocolate, always. I mean, you could use other chocolates, but there’s something so iconic about that little Hershey’s Kiss melting into a warm Peanut Butter Blossom. I usually buy an extra bag because, let’s be real, some disappear during prep.
Baking Classic Peanut Butter Blossoms: My Steps
- Creaming the Goods:
- First things first, get that butter and sugars happy together. In a big bowl, I cream the softened butter, granulated sugar, and brown sugar until it’s light and fluffy, like a cloud. This takes about 2-3 minutes with an electric mixer, honestly. I always get sugar dust on my countertop, but hey, it’s part of the process, right? You’ll see it transform into this pale, whipped mixture, and that’s when you know you’re on the right track.
- Adding the Wet Stuff:
- Next, beat in that lovely creamy peanut butter until it’s fully combined and smells absolutely divine. Then, crack in your egg and a splash of vanilla extract. Mix just until everything is blended, don’t go crazy here. Overmixing at this stage can lead to tough cookies, and we definitely don’t want that! I always pause to scrape down the sides of the bowl because nobody wants unmixed bits.
- Dry Ingredients Join the Party:
- In a separate, smaller bowl, whisk together your all-purpose flour, baking soda, and salt. I usually just use a fork for this, no fancy sifter needed unless I’m feeling extra. Gradually add this dry mixture to your wet ingredients, mixing on low speed until just combined. As soon as you see no more streaks of flour, stop! My biggest mistake used to be overmixing, turning delicious dough into a crumbly mess.
- Roll ‘Em Up:
- Time for the fun part! Grab a small scoop or use your hands to roll the dough into 1-inch balls. I like to make them fairly uniform, but honestly, a little variation adds character. Roll each ball in granulated sugar until it’s fully coated. My kids love helping with this step, though it usually means more sugar on the floor than on the cookies, oops! Place them about 2 inches apart on an ungreased baking sheet.
- Bake ‘Em Golden:
- Pop those beauties into a preheated oven at 375°F (190°C) for about 8-10 minutes. You’re looking for edges that are lightly golden and centers that still look a little soft. Don’t overbake them, trust me, they’ll firm up as they cool, and we want that chewy softness! I usually set a timer for 8 minutes, then peek. Sometimes my oven runs hot, so I’ve learned to adjust.
- The Kiss Moment:
- As soon as the Peanut Butter Blossoms come out of the oven, immediately press a Hershey’s Kiss into the center of each warm cookie. The chocolate will get all melty and gooey, which is exactly what we want! Let them cool on the baking sheet for a few minutes before transferring them to a wire rack to cool completely. Patience is hard here, I know, but it’s worth it for that perfect set.
There’s something so satisfying about seeing a fresh batch of these cookies cooling on the rack. Even if my kitchen looks like a flour bomb went off and I’ve got chocolate smudges on my apron, the smell alone makes it all worth it. It’s that little moment of sweet, messy joy that keeps me coming back to this recipe, time and time again.
Peanut Butter Blossoms Storage Tips
Okay, so you’ve got leftover Peanut Butter Blossoms (if that’s even a thing in your house, honestly). Store these little gems in an airtight container at room temperature for up to a week. I’ve tried freezing them baked, and they hold up pretty well for a month or so just let them thaw on the counter. Reheating in the microwave? I did that once and the chocolate kiss kinda melted into a puddle and the cookie got a bit tough, so don’t do that lol. Best enjoyed at room temp or slightly warmed in a low oven if you’re feeling fancy, but they’re still great cold with coffee.
Peanut Butter Blossoms Ingredient Substitutions
Life happens, and sometimes you’re missing an ingredient for your Peanut Butter Blossoms. No problem! If you don’t have granulated sugar for rolling, try a mix of powdered sugar and a tiny bit of cinnamon, I tried this once when I was desperate, and it worked… kinda, gave them a different vibe. For the peanut butter, almond butter works in a pinch, but the flavor profile is definitely different, I found it a bit less classic. If you’re out of baking soda, you might get away with baking powder (use about 3x the amount), but the texture won’t be quite as soft and chewy. And for the Hershey’s Kisses, mini peanut butter cups or even chocolate chunks pressed into the warm cookies are totally fair game if you’re feeling adventurous!
Serving Your Peanut Butter Blossoms
These Peanut Butter Blossoms are honestly perfect on their own, maybe with a tall glass of cold milk that’s my go-to. But if you’re feeling a bit extra, I love serving them with a scoop of vanilla bean ice cream for a warm-cold dessert situation. They also make an appearance at almost every potluck or holiday gathering I host, they’re just that kind of crowd-pleaser. Honestly, a plate of these alongside a strong cup of coffee or a cozy chai tea on a rainy afternoon? Yes please. They just scream comfort, no matter the occasion.
Cultural Backstory of Peanut Butter Blossoms
Peanut Butter Blossoms have this lovely, almost universal nostalgic vibe, don’t they? They actually originated in the 1950s, a true American classic! The story goes that a woman named Freda Smith submitted the recipe to a Pillsbury Bake-Off contest in 1957, and it took off from there. For me, they connect me straight to my grandma’s kitchen, her humming as she baked, and the joy of simple, homemade treats. It’s more than just a recipe, it’s a little piece of culinary history that’s been passed down through generations, bringing smiles and sticky fingers to kitchens everywhere, including mine.
So there you have it, my take on these delightful cookies. Every batch of Peanut Butter Blossoms feels like a little trip down memory lane, full of warmth and sweet nostalgia. I hope they bring as much joy and deliciousness to your kitchen as they do to mine. Don’t be shy, bake a batch and tell me how they turn out!

Frequently Asked Questions About Peanut Butter Blossoms
- → Why do my Peanut Butter Blossoms spread too much?
Oh, I’ve been there! Usually, it’s because your butter was too soft or the dough wasn’t chilled enough. Sometimes, honestly, my oven just runs hot. Try chilling the dough for 15-20 minutes before rolling, it really helps!
- → Can I use natural peanut butter for these cookies?
I’ve tried that, and honestly, the texture isn’t quite the same. Natural peanut butter tends to be oilier and can make the cookies a bit crumbly. For that classic, soft texture, I really recommend creamy, processed peanut butter.
- → My Hershey’s Kisses keep melting off the cookies! What happened?
Oops! That usually means you waited too long to press them in, or the cookies cooled too much. You gotta be quick, like, right out of the oven! Also, make sure the kisses are room temperature, not straight from the fridge.
- → How long do Peanut Butter Blossoms stay fresh?
In an airtight container at room temp, they’re good for about 5-7 days. Honestly, they rarely last that long in my house! They tend to get softer and chewier after a day, which I actually love.
- → Can I add other mix-ins to the dough?
Absolutely! I’ve experimented with mini chocolate chips or even a sprinkle of chopped peanuts in the dough once. It gives them a bit more crunch and chocolatey goodness. Just don’t go overboard, or they might not hold their shape as well.

Classic Peanut Butter Blossoms with a Chocolate Kiss
- Prep Time: 15 Minutes
- Cook Time: 10 Minutes
- Total Time: 25 Minutes
- Yield: 36 Servings 1x
- Category: AllRecipes
Description
Bake classic Peanut Butter Blossoms! These soft, chewy cookies with a chocolate kiss are a nostalgic treat. My simple recipe brings back sweet memories.
Ingredients
- Cookie Base Essentials:
- 1/2 cup (1 stick) unsalted butter, softened
- 1/2 cup creamy peanut butter (not natural, trust me!)
- 1/2 cup granulated sugar (plus more for rolling)
- 1/2 cup packed light brown sugar
- Flavor & Structure:
- 1 large egg
- 1 teaspoon vanilla extract
- 1 3/4 cups all-purpose flour
- 1 teaspoon baking soda
- 1/2 teaspoon salt
- The Chocolate Kiss:
- About 36 Hershey’s Kisses, unwrapped
Instructions
- Creaming the Goods:: First things first, get that butter and sugars happy together. In a big bowl, I cream the softened butter, granulated sugar, and brown sugar until it’s light and fluffy, like a cloud. This takes about 2-3 minutes with an electric mixer, honestly. I always get sugar dust on my countertop, but hey, it’s part of the process, right? You’ll see it transform into this pale, whipped mixture, and that’s when you know you’re on the right track.
- Adding the Wet Stuff:: Next, beat in that lovely creamy peanut butter until it’s fully combined and smells absolutely divine. Then, crack in your egg and a splash of vanilla extract. Mix just until everything is blended; don’t go crazy here. Overmixing at this stage can lead to tough cookies, and we definitely don’t want that! I always pause to scrape down the sides of the bowl because nobody wants unmixed bits.
- Dry Ingredients Join the Party:: In a separate, smaller bowl, whisk together your all-purpose flour, baking soda, and salt. I usually just use a fork for this, no fancy sifter needed unless I’m feeling extra. Gradually add this dry mixture to your wet ingredients, mixing on low speed until just combined. As soon as you see no more streaks of flour, stop! My biggest mistake used to be overmixing, turning delicious dough into a crumbly mess.
- Roll ‘Em Up:: Time for the fun part! Grab a small scoop or use your hands to roll the dough into 1-inch balls. I like to make them fairly uniform, but honestly, a little variation adds character. Roll each ball in granulated sugar until it’s fully coated. My kids love helping with this step, though it usually means more sugar on the floor than on the cookies, oops! Place them about 2 inches apart on an ungreased baking sheet.
- Bake ‘Em Golden:: Pop those beauties into a preheated oven at 375°F (190°C) for about 8-10 minutes. You’re looking for edges that are lightly golden and centers that still look a little soft. Don’t overbake them; trust me, they’ll firm up as they cool, and we want that chewy softness! I usually set a timer for 8 minutes, then peek. Sometimes my oven runs hot, so I’ve learned to adjust.
- The Kiss Moment:: As soon as the Peanut Butter Blossoms come out of the oven, immediately press a Hershey’s Kiss into the center of each warm cookie. The chocolate will get all melty and gooey, which is exactly what we want! Let them cool on the baking sheet for a few minutes before transferring them to a wire rack to cool completely. Patience is hard here, I know, but it’s worth it for that perfect set.


