
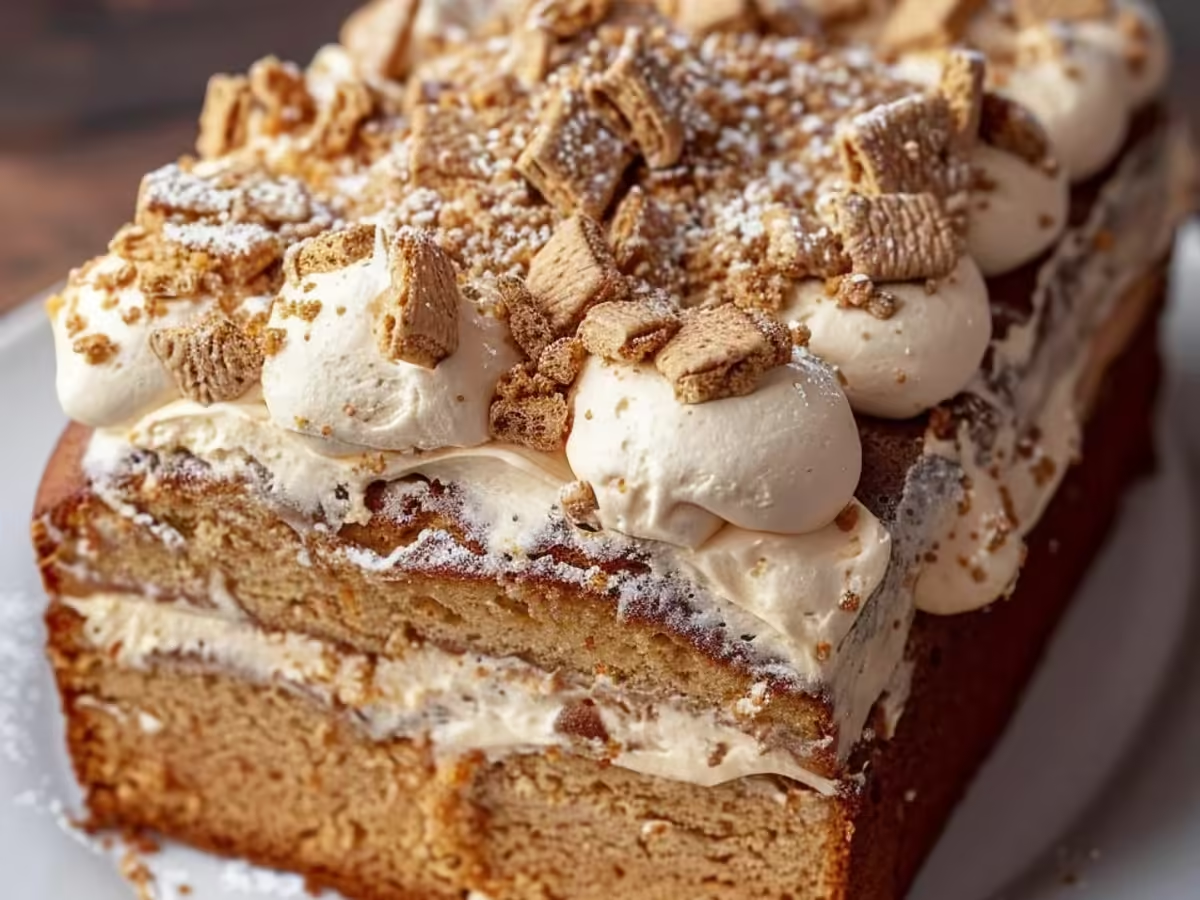
Honestly, there’s just something about s’mores, right? That perfect trifecta of crunchy graham cracker, melty chocolate, and toasted marshmallow… it takes me right back to summer nights around a flickering fire, usually with sticky fingers and a huge grin. I remember trying to make s’mores indoors once as a kid, using a fork over the gas stove, and nearly setting off the smoke alarm! Total chaos, but so worth it. That memory is probably why I became obsessed with bringing that magic inside, leading me down the path to this glorious S’mores Layer Cake. It’s a bit of a project, I won’t lie, but the payoff? Oh, honey, it’s a showstopper. Fluffy chocolate cake, a buttery graham cracker crust, rich chocolate ganache, and a towering swirl of toasted marshmallow frosting. Every bite is pure nostalgia, without the smoke in your eyes. This S’mores Layer Cake just feels like a hug from your favorite summer memory.
I remember the first time I made this S’mores Layer Cake for a family gathering. I was so proud of my perfectly toasted marshmallow peaks. Then, my nephew, bless his heart, tried to blow out the candles and accidentally launched a giant glob of frosting onto my aunt’s pristine white blouse. Oops! We all had a good laugh, and she was a good sport, but it reminded me that baking, especially something this fun, is meant to be a little messy, a little chaotic, and always full of love.

Ingredients
For the Moist Chocolate Cake Layers
- All-Purpose Flour: This is our base, giving the cake structure. Honestly, don’t use self-rising here, we need control over the leavening.
- Granulated Sugar: Sweetness, of course, but it also helps keep the cake moist. I’ve tried cutting it back once, and the cake just wasn’t as tender, so stick to the amount, trust me.
Unsweetened Cocoa Powder: The deeper the better! I swear by Dutch-processed for that rich, dark chocolate flavor. I tried natural cocoa once, and it tasted… fine, but not the deep chocolatey hug I was going for.
Baking Soda & Baking Powder: Our leavening agents. They work together to give us that lovely lift. Forgetting one makes for a flat cake, a mistake I’ve made more times than I care to admit.
Salt: Don’t skip this! It balances the sweetness and really brings out the chocolate flavor. It’s like the unsung hero of baking, honestly.
- Buttermilk: This is key for a tender, moist crumb. The acidity reacts with the baking soda. If you don’t have it, a milk + lemon juice/vinegar hack works, but buttermilk just hits different.
- Vegetable Oil: For moisture and tenderness. I use oil instead of butter in this cake because it keeps the cake super moist for days, which is a big win in my book.
- Large Eggs: Binders and structure. Make sure they’re at room temperature, it helps them emulsify better into the batter. I once tried cold eggs, and the batter looked a bit curdled oops!
- Vanilla Extract: Pure vanilla is non-negotiable for me. It enhances all the other flavors. Don’t skimp on this!
- Hot Water or Coffee: This really blooms the cocoa powder, deepening the chocolate flavor. Coffee, even decaf, makes the chocolate taste more chocolatey, but water works just fine if you’re not a coffee fan.
For the Crunchy Graham Cracker Crust
- Graham Cracker Crumbs: The star of the show for that classic s’mores crunch! I usually just crush a sleeve of crackers myself, it feels more authentic than pre-made crumbs, plus you get those little rustic bits.
- Granulated Sugar: Just a touch for extra sweetness in the crust.
Unsalted Butter, Melted: Binds the crumbs together. Make sure it’s fully melted, but not scorching hot, or your crumbs will get greasy instead of perfectly crisp.
For the Gooey Marshmallow Frosting
- Egg Whites: The base for our fluffy meringue. Use fresh, large egg whites, and make sure your bowl and whisk are squeaky clean any trace of grease can ruin your meringue!
- Granulated Sugar: Sweetens and stabilizes the meringue. It dissolves into the egg whites as they warm, creating a stable, glossy frosting.
Cream of Tartar: A little bit of magic that helps stabilize the egg whites, giving you that beautiful, sturdy marshmallow fluff. I forgot it once, and my frosting was a bit too soft and weeping.
Vanilla Extract: A crucial flavor enhancer for the marshmallow.
For the Rich Chocolate Ganache & Topping
- Semi-Sweet Chocolate Chips: For the ganache drizzle. Use good quality chocolate here, it really makes a difference in flavor and how smoothly it melts.
- Heavy Cream: Melts with the chocolate to create that luscious ganache.
Mini Marshmallows: For toasting on top! I love the mini ones because they get perfectly golden brown without taking forever.
Graham Cracker Squares: For garnish, because you can never have too much graham cracker.
Crafting Your S’mores Layer Cake
- Prep the Cake Pans & Oven:
- First things first, let’s get those cake pans ready. I always grease and flour two 8-inch round cake pans, then line the bottoms with parchment paper. This prevents sticking, a lesson I learned the hard way when a beautiful cake decided to stay stubbornly glued to the bottom of the pan major oops moment! Preheat your oven to 350°F (175°C). While the oven warms up, I usually gather all my ingredients, because there’s nothing worse than realizing you’re out of baking soda mid-mix!
- Mix the Dry Ingredients for the S’mores Layer Cake:
- In a large bowl, whisk together your flour, sugar, cocoa powder, baking soda, baking powder, and salt. Give it a good whisk, making sure there are no lumps of cocoa powder. This step, honestly, is where I usually get a little cloud of flour on my shirt, but it’s all part of the baking charm, right? Ensuring everything is well combined now means you won’t overmix later, which can lead to a tough cake. I’ve been there, trust me, a tough cake is a sad cake.
- Combine Wet Ingredients & Add to Dry:
- In a separate medium bowl, whisk together the buttermilk, oil, eggs, and vanilla extract until they’re just combined. Now, pour the wet ingredients into the dry ingredients and mix on low speed until just combined. Don’t overmix here! Then, slowly add the hot water or coffee, mixing until the batter is smooth and runny. It might look thin, but that’s exactly how it should be. The smell of this chocolate batter is just divine, a promise of the S’mores Layer Cake goodness to come.
- Bake the Chocolate Cake Layers:
- Divide the batter evenly between your two prepared cake pans. Pop them into the preheated oven and bake for about 30-35 minutes, or until a wooden skewer inserted into the center comes out clean. My oven runs a little hot, so I always start checking around the 28-minute mark. Once they’re done, let them cool in the pans for about 10-15 minutes before inverting them onto a wire rack to cool completely. Patience is key here, trying to frost a warm cake is a recipe for disaster, I’ve learned that one the hard way!
- Prepare the Graham Cracker Crust for the S’mores Layer Cake:
- While your cakes are cooling, let’s make that glorious graham cracker crust. In a medium bowl, combine the graham cracker crumbs, granulated sugar, and melted butter. Mix it all together until it resembles wet sand. Press this mixture firmly into a third 8-inch round cake pan (or a springform pan if you have one, it makes removal easier). Bake it for 8-10 minutes, just until it’s slightly golden and fragrant. Let it cool completely. This crust adds that essential S’mores Layer Cake crunch and flavor, you won’t want to skip it.
- Whip up the Marshmallow Frosting:
- For the marshmallow frosting, combine egg whites, sugar, and cream of tartar in a heatproof bowl set over a saucepan of simmering water (don’t let the bowl touch the water!). Whisk constantly until the sugar dissolves and the mixture reaches 160°F (71°C) on a candy thermometer. Remove from heat and beat with an electric mixer on high speed until stiff, glossy peaks form, about 7-10 minutes. Stir in the vanilla. This is where your S’mores Layer Cake truly comes to life! It should be thick, shiny, and smell just like toasted marshmallows. Honestly, I always sneak a little taste at this point!
- Assemble Your S’mores Layer Cake:
- Once everything is cool, it’s assembly time! Place one chocolate cake layer on your serving plate. Carefully top with the cooled graham cracker crust. Then, spread a generous layer of marshmallow frosting over the crust. Place the second chocolate cake layer on top. Cover the entire cake with the remaining marshmallow frosting, making beautiful swirls. This is the fun part, don’t worry about it being too perfect, a little rustic charm is wonderful! I usually use an offset spatula to create those lovely peaks. Your S’mores Layer Cake is almost ready for its close-up!
- Garnish and Torch:
- Melt your chocolate chips and heavy cream for the ganache. Drizzle it over the top of the cake, letting it drip down the sides. Then, arrange mini marshmallows and graham cracker squares on top. Now for the best part: grab your kitchen torch and carefully toast the marshmallows until they’re golden brown and slightly gooey. Oh, the smell! It’s pure campfire magic. Honestly, this step makes the S’mores Layer Cake an absolute showstopper. Be careful not to burn them, a light toast is what we’re after. And there you have it, your masterpiece!
There was this one time, while trying to torch the marshmallows, my kitchen torch ran out of butane mid-toasting! I ended up using the broiler, which, let me tell you, requires hawk-like attention. I almost burned the entire top of the S’mores Layer Cake, but I pulled it out just in time, with a few extra-dark spots that honestly just added character. It was a chaotic moment, but that cake still tasted like a dream, proving that sometimes, even with a little kitchen mishap, the love put into it shines through.
S’mores Layer Cake Storage Tips
This S’mores Layer Cake is definitely best enjoyed the day it’s made, especially with that toasted marshmallow frosting. However, if you have leftovers (and that’s a big “if” in my house!), you can store it. I usually cover any cut edges with plastic wrap to prevent the cake from drying out, then loosely cover the whole thing with a cake dome or foil. Keep it in the fridge for up to 3 days. I tried leaving a slice on the counter once, and the marshmallow frosting got a bit too soft and sticky for my liking oops! The chocolate cake actually stays surprisingly moist, but the graham cracker crust will soften over time, which is just part of its charm, I think. You can also freeze individual slices, well-wrapped, for up to a month. Just let them thaw in the fridge before serving.

S’mores Layer Cake Ingredient Substitutions
Life happens, and sometimes you don’t have exactly what the recipe calls for. For the chocolate cake, if you don’t have buttermilk, you can make your own by adding 1 tablespoon of white vinegar or lemon juice to a measuring cup, then filling it up to 1 cup with regular milk. Let it sit for 5-10 minutes until it curdles a bit. It works, kinda, but the true buttermilk just gives a better texture. For the graham cracker crust, I’ve tried using digestive biscuits once, and it was a pleasant surprise! A slightly different flavor, but still delicious. As for the marshmallow frosting, if the idea of making Italian meringue feels a bit daunting, you could technically use store-bought marshmallow fluff, but it won’t have the same light, airy texture or the beautiful toasted peaks. I tried that once for a quick fix, and while it tasted good, it wasn’t the same showstopper S’mores Layer Cake effect.
Serving Your S’mores Layer Cake
This S’mores Layer Cake is a dessert that stands alone, honestly, it’s a whole experience! But if you want to elevate it even further, a scoop of really good vanilla bean ice cream on the side is just divine. The cool creaminess against the rich cake and toasted marshmallow? Chef’s kiss! I also love serving it with a steaming mug of hot cocoa on a chilly evening, really leaning into that cozy campfire vibe. For a summer party, a tall glass of iced coffee or even a light, fruity sparkling water cuts through the richness beautifully. It’s the kind of dessert that begs to be shared, so gather your favorite people, put on some good tunes, and enjoy every sticky, sweet bite. This S’mores Layer Cake is truly a celebration in itself.
The S’mores Layer Cake Backstory
The original s’more, that iconic campfire treat, dates back to the early 20th century, with the first recorded recipe appearing in a Girl Scout handbook in 1927, called “Some More.” It’s a classic American comfort food, deeply tied to camping, childhood, and simple joys. For me, this S’mores Layer Cake is a grown-up, more sophisticated nod to those cherished memories. It takes the familiar flavors and textures and elevates them into something truly special, something you can enjoy without needing a bonfire. It embodies that feeling of bringing the outdoors in, transforming a rustic treat into an elegant, yet still incredibly fun, dessert. It’s my way of keeping those warm, fuzzy campfire feelings alive, no matter the season. This S’mores Layer Cake truly captures that nostalgic spirit.
Honestly, every time I pull this S’mores Layer Cake out of the fridge, I get a little giddy. It’s more than just a dessert, it’s a memory-maker, a conversation starter, and a true labor of love. The rich chocolate, the crunchy graham, the sweet toasted marshmallow it all just works. I really hope you give this one a try and bring a little bit of campfire magic into your home. Don’t be afraid to get a little messy, that’s half the fun! I can’t wait to hear how your S’mores Layer Cake turns out!

Frequently Asked Questions
- → Can I make the S’mores Layer Cake ahead of time?
Absolutely! You can bake the cake layers and make the graham cracker crust a day or two in advance. Just wrap the cooled layers tightly and store them at room temp. The marshmallow frosting is best made right before assembly for peak fluffiness.
- → What if I don’t have a kitchen torch for the S’mores Layer Cake?
No torch? No problem! You can carefully toast the mini marshmallows under your oven’s broiler. Place the cake on a baking sheet and broil for a minute or two, watching constantly they brown super fast! I’ve nearly burnt a cake doing this, so be vigilant!
- → My marshmallow frosting isn’t getting stiff, what happened?
Oh, I’ve been there! Usually, it means your bowl or whisk had a tiny bit of grease, or the egg white mixture wasn’t heated enough. Make sure everything is squeaky clean and hit that 160°F (71°C) mark for stable peaks. Don’t give up on your S’mores Layer Cake!
- → How do I get clean slices of S’mores Layer Cake?
For neat slices, chill the S’mores Layer Cake in the fridge for at least 30 minutes after frosting. Then, use a sharp, warm knife (run it under hot water and wipe it dry between slices). It helps a ton, especially with that sticky marshmallow!
- → Can I add other mix-ins to the S’mores Layer Cake?
Totally! I’ve seen people add chocolate chips to the cake batter or even crushed nuts to the graham cracker crust for extra texture. Get creative! Just remember, the core S’mores Layer Cake flavors are chocolate, marshmallow, and graham cracker, so don’t stray too far.
Rich S’mores Layer Cake: A Campfire Treat Indoors
- Prep Time: 45 Minutes
- Cook Time: 45 Minutes
- Total Time: 1 Hour 30 Minutes
- Yield: 12 Servings 1x
- Category: AllRecipes
Description
S’mores Layer Cake brings campfire magic inside! Imagine fluffy chocolate cake, gooey marshmallow, and crunchy graham cracker. A sweet, nostalgic treat for any occasion.
Ingredients
- For the Moist Chocolate Cake Layers:
- 2 cups (240g) all-purpose flour
- 2 cups (400g) granulated sugar
- ¾ cup (65g) unsweetened cocoa powder (Dutch-processed recommended)
- 2 tsp baking soda
- 1 tsp baking powder
- 1 tsp salt
- 1 cup (240ml) buttermilk
- ½ cup (120ml) vegetable oil
- 2 large eggs, room temperature
- 1 tsp vanilla extract
- 1 cup (240ml) hot water or hot coffee
- For the Crunchy Graham Cracker Crust:
- 1 ½ cups (180g) graham cracker crumbs
- ¼ cup (50g) granulated sugar
- ½ cup (113g) unsalted butter, melted
- For the Gooey Marshmallow Frosting:
- 4 large egg whites
- 1 ¼ cups (250g) granulated sugar
- ½ tsp cream of tartar
- 1 tsp vanilla extract
- For the Rich Chocolate Ganache & Topping:
- ½ cup (85g) semi-sweet chocolate chips
- ¼ cup (60ml) heavy cream
- 1 cup mini marshmallows
- 6–8 graham cracker squares, for garnish
Instructions
- Prep the Cake Pans & Oven:: First things first, let’s get those cake pans ready. I always grease and flour two 8-inch round cake pans, then line the bottoms with parchment paper. This prevents sticking, a lesson I learned the hard way when a beautiful cake decided to stay stubbornly glued to the bottom of the pan—major oops moment! Preheat your oven to 350°F (175°C). While the oven warms up, I usually gather all my ingredients, because there’s nothing worse than realizing you’re out of baking soda mid-mix!
- Mix the Dry Ingredients for the S’mores Layer Cake:: In a large bowl, whisk together your flour, sugar, cocoa powder, baking soda, baking powder, and salt. Give it a good whisk, making sure there are no lumps of cocoa powder. This step, honestly, is where I usually get a little cloud of flour on my shirt, but it’s all part of the baking charm, right? Ensuring everything is well combined now means you won’t overmix later, which can lead to a tough cake. I’ve been there, trust me, a tough cake is a sad cake.
- Combine Wet Ingredients & Add to Dry:: In a separate medium bowl, whisk together the buttermilk, oil, eggs, and vanilla extract until they’re just combined. Now, pour the wet ingredients into the dry ingredients and mix on low speed until just combined. Don’t overmix here! Then, slowly add the hot water or coffee, mixing until the batter is smooth and runny. It might look thin, but that’s exactly how it should be. The smell of this chocolate batter is just divine, a promise of the S’mores Layer Cake goodness to come.
- Bake the Chocolate Cake Layers:: Divide the batter evenly between your two prepared cake pans. Pop them into the preheated oven and bake for about 30-35 minutes, or until a wooden skewer inserted into the center comes out clean. My oven runs a little hot, so I always start checking around the 28-minute mark. Once they’re done, let them cool in the pans for about 10-15 minutes before inverting them onto a wire rack to cool completely. Patience is key here; trying to frost a warm cake is a recipe for disaster, I’ve learned that one the hard way!
- Prepare the Graham Cracker Crust for the S’mores Layer Cake:: While your cakes are cooling, let’s make that glorious graham cracker crust. In a medium bowl, combine the graham cracker crumbs, granulated sugar, and melted butter. Mix it all together until it resembles wet sand. Press this mixture firmly into a third 8-inch round cake pan (or a springform pan if you have one, it makes removal easier). Bake it for 8-10 minutes, just until it’s slightly golden and fragrant. Let it cool completely. This crust adds that essential S’mores Layer Cake crunch and flavor, you won’t want to skip it.
- Whip up the Marshmallow Frosting:: For the marshmallow frosting, combine egg whites, sugar, and cream of tartar in a heatproof bowl set over a saucepan of simmering water (don’t let the bowl touch the water!). Whisk constantly until the sugar dissolves and the mixture reaches 160°F (71°C) on a candy thermometer. Remove from heat and beat with an electric mixer on high speed until stiff, glossy peaks form, about 7-10 minutes. Stir in the vanilla. This is where your S’mores Layer Cake truly comes to life! It should be thick, shiny, and smell just like toasted marshmallows. Honestly, I always sneak a little taste at this point!
- Assemble Your S’mores Layer Cake:: Once everything is cool, it’s assembly time! Place one chocolate cake layer on your serving plate. Carefully top with the cooled graham cracker crust. Then, spread a generous layer of marshmallow frosting over the crust. Place the second chocolate cake layer on top. Cover the entire cake with the remaining marshmallow frosting, making beautiful swirls. This is the fun part, don’t worry about it being too perfect, a little rustic charm is wonderful! I usually use an offset spatula to create those lovely peaks. Your S’mores Layer Cake is almost ready for its close-up!
- Garnish and Torch:: Melt your chocolate chips and heavy cream for the ganache. Drizzle it over the top of the cake, letting it drip down the sides. Then, arrange mini marshmallows and graham cracker squares on top. Now for the best part: grab your kitchen torch and carefully toast the marshmallows until they’re golden brown and slightly gooey. Oh, the smell! It’s pure campfire magic. Honestly, this step makes the S’mores Layer Cake an absolute showstopper. Be careful not to burn them, a light toast is what we’re after. And there you have it, your masterpiece!


