
I remember the first time I attempted a whole turkey. It was Thanksgiving, and honestly, it felt like wrestling a small bear. The dry breast, the undercooked dark meat it was a mess, bless its heart. Then a friend, bless her soul, mentioned ‘spatchcocking.’ I thought it sounded like a fancy dance move! But to be real, it utterly changed my turkey game. This simple spatchcock turkey method for beginners isn’t just about cooking, it’s about reclaiming your holiday sanity and getting that ridiculously crispy skin and juicy meat you’ve always dreamed of. No more dry bird, I promise.
My first spatchcock attempt? Oh, it involved a lot of flapping and a pair of kitchen shears that weren’t quite up to the task. I ended up calling my husband in, saying, ‘Honey, I think I’m losing a fight with a bird here!’ He eventually helped me get that backbone out. It wasn’t pretty, but the result? A golden, tender turkey that actually cooked evenly. A little messy, but totally worth the kitchen chaos for this simple spatchcock turkey method for beginners.

Ingredients for Your Simple Spatchcock Turkey
- Whole Turkey (12-14 lbs): This is your star, hon. Fresh is always best, but a thawed frozen one works just fine. Just make sure it’s completely thawed, or you’ll be waiting forever. I once tried to rush it and ended up with a partly frozen bird oops!
- Unsalted Butter (1/2 cup, softened): Don’t skimp on this! It’s what helps get that skin impossibly crisp and adds so much richness. I tried olive oil once, and it was… fine, but butter just hits different.
Fresh Rosemary (2 tbsp, chopped): The smell of fresh rosemary with turkey? Chef’s kiss. Dried works if you’re in a pinch, but honestly, the fresh stuff makes all the difference.
Fresh Thyme (2 tbsp, chopped): Another aromatic superstar. These herbs together just scream “holiday,” or “fancy Sunday dinner,” depending on your mood.
Garlic (6 cloves, minced): You know me, I go heavy on the garlic. Six cloves is a good start, if you want more, go for it! I’ve never regretted extra garlic, have you?
- Kosher Salt (2 tbsp): Essential for flavor and drawing out moisture for that crispy skin. Don’t use regular table salt, the granules are too fine, and you might over-salt. I learned that the hard way, trust me.
- Black Pepper (1 tbsp, freshly ground): Freshly ground always, darling. It just has more zing than pre-ground.
Instructions for This Simple Spatchcock Turkey Method
- Step 1: Prep the Bird for the Simple Spatchcock Turkey Method for Beginners:
- First things first, get that turkey out of its packaging. Remove the giblets and neck from the cavity don’t forget the ones tucked into the neck flap, I always do! Pat the turkey really dry with paper towels, inside and out. This is a crucial step for crispy skin, honestly. If it’s damp, it’ll steam instead of roast, and nobody wants rubbery skin. It’s a bit of a messy job, but worth it for the simple spatchcock turkey method for beginners.
- Step 2: The Spatchcock Maneuver:
- Now for the main event! Place the turkey breast-side down on a large cutting board. Using sturdy kitchen shears, cut along both sides of the backbone, from the tail to the neck. It’ll take some muscle, so don’t be shy! Once the backbone is removed, flip the turkey over. Press down firmly on the breastbone until you hear a crack and the turkey lies flat. This simple spatchcock turkey method for beginners ensures even cooking, I didn’t expect that the first time!
- Step 3: Seasoning Up the Spatchcock Turkey:
- In a small bowl, mix together your softened butter, chopped rosemary, thyme, minced garlic, kosher salt, and black pepper. Now, get your hands in there! Gently separate the skin from the breast and thigh meat, being careful not to tear it. Rub about half of the butter mixture directly onto the meat under the skin. Then, slather the remaining butter mixture all over the outside of the turkey, really getting into all the nooks and crannies. You want flavor everywhere!
- Step 4: Get Ready to Roast:
- Preheat your oven to a blazing 425°F (220°C). Place a wire rack inside a large rimmed baking sheet. This setup is key for air circulation, which helps with that glorious crispy skin. Carefully transfer your butter-slathered, spatchcocked turkey onto the wire rack, skin-side up. Make sure it’s centered and has plenty of space around it. The oven will smell amazing as soon as you open it, trust me on this!
- Step 5: Roasting Your Simple Spatchcock Turkey:
- Pop that beautiful bird into the hot oven. Roast for 30 minutes at 425°F to get a head start on that golden-brown skin. Then, reduce the oven temperature to 350°F (175°C) and continue roasting for another 60-90 minutes, or until a meat thermometer inserted into the thickest part of the thigh (avoiding the bone) reads 165°F (74°C). If the skin starts getting too dark, loosely tent it with foil. I once forgot to check and had some very… rustic dark spots, oops!
- Step 6: Rest and Carve:
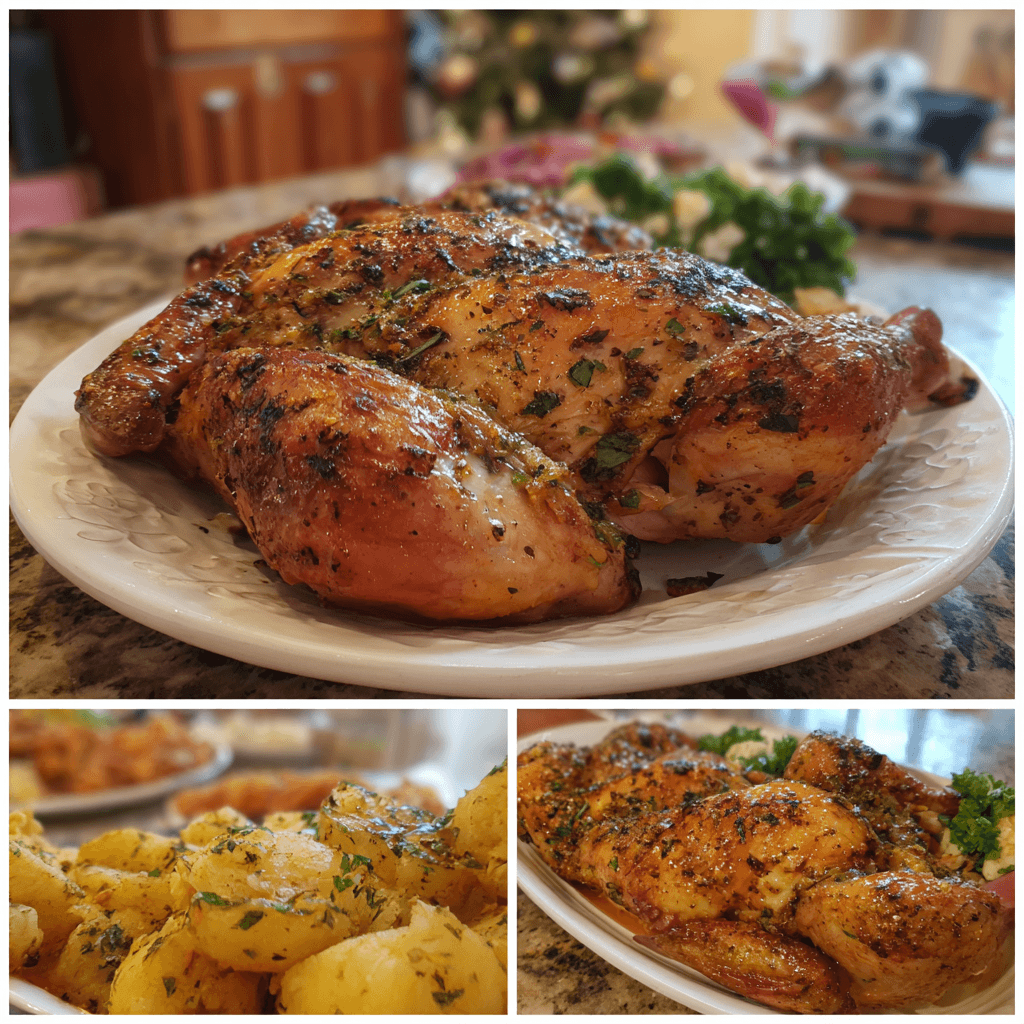
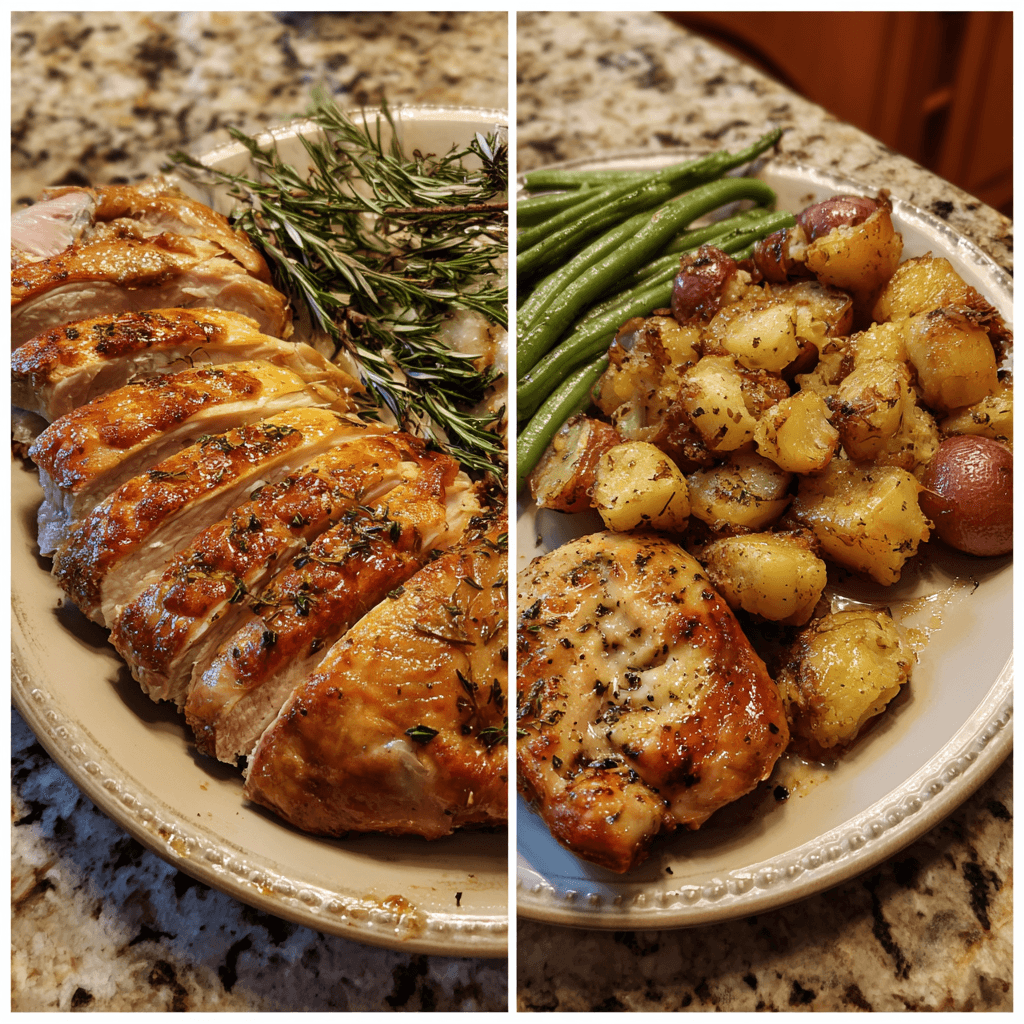
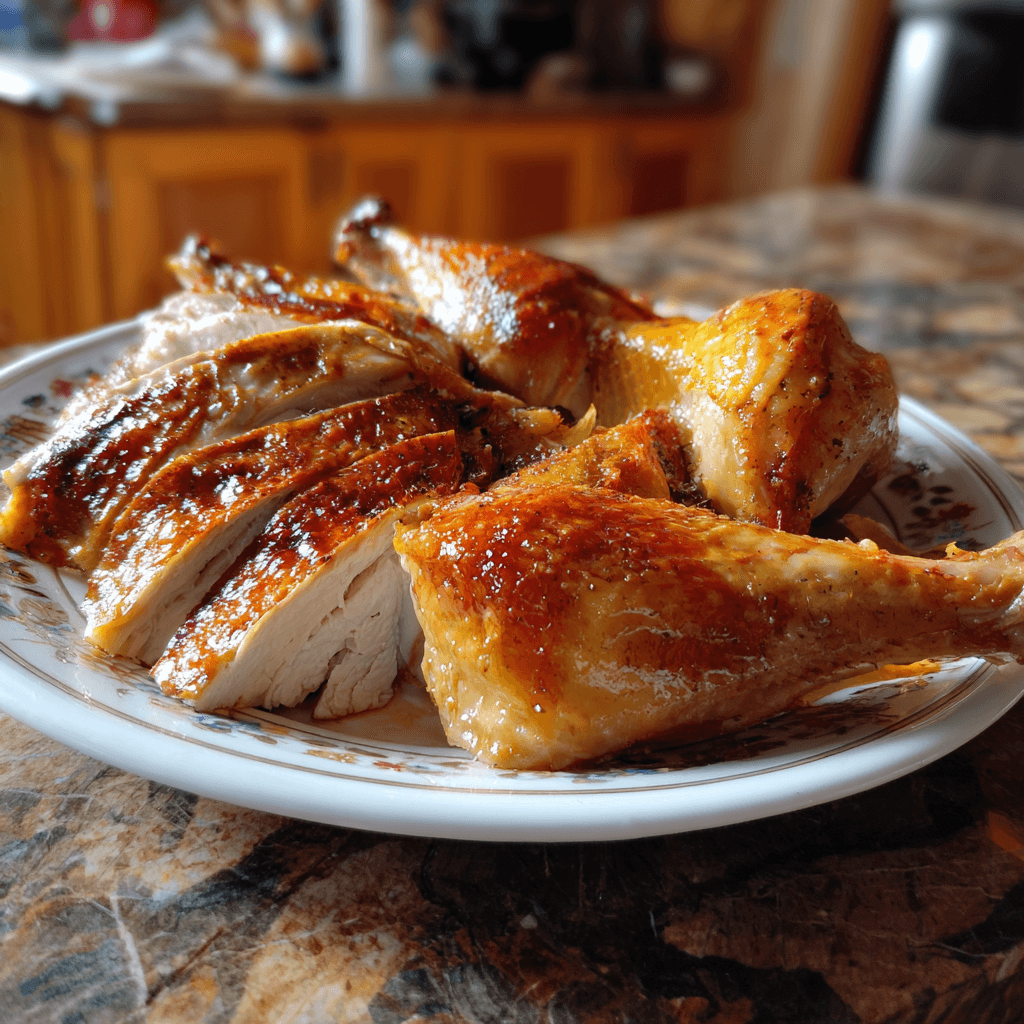
- Once your turkey hits 165°F, pull it out of the oven. This is the hardest part, honestly: letting it rest! Loosely tent the turkey with foil and let it sit for at least 20-30 minutes before carving. This resting period is so important, it allows the juices to redistribute throughout the meat, giving you that unbelievably tender, juicy result. If you cut too soon, all those delicious juices will just run out onto your cutting board. Then, carve away and admire your perfectly cooked simple spatchcock turkey method for beginners!
There was this one time, mid-roast, I realized I’d totally forgotten to put the herbs under the skin. I freaked out a little, but then just piled them on top. It still tasted fantastic, just a different kind of fantastic! It taught me that even when things aren’t ‘perfect,’ the simple spatchcock turkey method for beginners still delivers. Kitchen chaos happens, and that’s okay, hon.
Storage Tips for Your Spatchcock Turkey
Leftover turkey is a gift, honestly. Once your spatchcock turkey has cooled completely, carve any remaining meat off the bone. Store it in airtight containers in the fridge for up to 3-4 days. I usually portion it out for quick lunches. Don’t leave it out on the counter too long, a mistake I made once resulting in… well, let’s just say a very early morning. You can freeze cooked turkey too, tightly wrapped, for up to 2-3 months. Just thaw it gently in the fridge overnight before reheating. Reheating in a little broth keeps it from drying out, which is a trick I swear by after too many dry microwave attempts.
Simple Spatchcock Turkey Ingredient Substitutions
Life happens, and sometimes you don’t have exactly what the recipe calls for. For the herbs, if you don’t have fresh rosemary and thyme, you can use 1 teaspoon each of dried versions, but honestly, the fresh makes a big difference. I’ve tried other herbs too, like sage or even a bit of marjoram, and they work, kinda, but rosemary and thyme are my absolute favorites for this simple spatchcock turkey. If you’re out of butter, a good quality olive oil can work for rubbing on the skin, but you just won’t get quite the same richness or crispness. For the garlic, garlic powder is okay in a pinch, about 1 teaspoon for every 3 fresh cloves, but fresh is always superior for that vibrant flavor.
Serving Your Simple Spatchcock Turkey
This simple spatchcock turkey method for beginners isn’t just for holidays, it’s a star any day you want a really special meal. I love serving it with my creamy mashed potatoes (extra butter, obviously), some roasted green beans with almonds, and a big bowl of my grandma’s cranberry sauce. For drinks, a crisp white wine like a Sauvignon Blanc or even a light-bodied Pinot Noir pairs wonderfully. And for dessert? Something light, like an apple crisp or pumpkin pie, depending on the season. Honestly, this turkey and a good movie on a chilly evening? Pure bliss. It’s comforting and satisfying, just what you need.
Simple Spatchcock Turkey: A Personal Backstory
While spatchcocking itself isn’t tied to one specific culture, the technique of butterflying poultry has been around for ages across various cuisines, mainly to ensure even cooking and faster roasting. For me, discovering this simple spatchcock turkey method for beginners was less about ancient traditions and more about a modern kitchen revelation. It transformed my relationship with cooking a whole bird. Before, turkey was this daunting, once-a-year event. Now, it feels approachable, almost like a weeknight roast chicken, just bigger! It’s become a personal tradition to make it, even outside of holidays, because it’s just that good and surprisingly easy once you get the hang of it.
Honestly, this simple spatchcock turkey method for beginners has been a game-changer in my kitchen. It took away all the stress of dry, unevenly cooked turkey and replaced it with pure, juicy deliciousness. When I pull that golden bird out of the oven, smelling incredible, I feel a little wave of accomplishment. I really hope you give it a try and discover how easy and rewarding it can be! Let me know how your turkey adventure goes!
Frequently Asked Questions About Simple Spatchcock Turkey
- → How do I know my simple spatchcock turkey is fully thawed?
Oh, I’ve been there! The best way is to check the cavity, there shouldn’t be any ice crystals. Thaw in the fridge for several days (about 24 hours per 4-5 pounds). A partially frozen bird will cook unevenly, and nobody wants that on dinner night, trust me.
- → Can I use different herbs for this simple spatchcock turkey?
Absolutely! While rosemary and thyme are my go-to, I’ve experimented with sage and even a hint of oregano. Just be mindful of proportions. Stick to fresh if you can, but dried works in a pinch. It’s your kitchen, your rules, hon!
- → What if I don’t have a wire rack for roasting?
You can still make this simple spatchcock turkey! Just place the turkey directly on the baking sheet. It might not get quite as crispy on the bottom, but it’ll still be delicious. You could also make a bed of chopped veggies like carrots and celery to lift it slightly.
- → How long does it take to spatchcock a turkey?
Honestly, once you get the hang of it, spatchcocking usually takes me about 5-10 minutes. The first time might take a bit longer, especially if your shears are being stubborn like mine were! Don’t rush it, getting that backbone out cleanly is the main goal.
- → Can I brine my turkey before using this simple spatchcock turkey method for beginners?
Yes, you totally can! I often do a dry brine overnight for extra juicy meat. Just make sure to pat it super dry after brining and before applying the butter mixture. A wet brine would work too, but again, drying is key for crispy skin with this simple spatchcock turkey.
Simple Spatchcock Turkey: Crispy & Juicy
- Prep Time: 20 Minutes
- Cook Time: 90-120 Minutes
- Total Time: 2 Hours 30 Minutes
- Yield: 8-10 Servings 1x
- Category: Mediterranean Diet Recipes
Description
Simple Spatchcock Turkey Method for Beginners ensures crispy skin and juicy meat every time. Say goodbye to dry turkey with this easy approach!
Ingredients
- Main Attraction:
- 1 whole turkey (12–14 lbs), thawed if frozen
- Flavor Boosters:
- 1/2 cup unsalted butter, softened
- 2 tbsp fresh rosemary, chopped
- 2 tbsp fresh thyme, chopped
- 6 cloves garlic, minced
- Seasoning Essentials:
- 2 tbsp Kosher salt
- 1 tbsp freshly ground black pepper
Instructions
- Prep the Bird for the Simple Spatchcock Turkey Method for Beginners: First things first, get that turkey out of its packaging. Remove the giblets and neck from the cavity—don’t forget the ones tucked into the neck flap, I always do! Pat the turkey *really* dry with paper towels, inside and out. This is a crucial step for crispy skin, honestly. If it’s damp, it’ll steam instead of roast, and nobody wants rubbery skin. It’s a bit of a messy job, but worth it for the simple spatchcock turkey method for beginners.
- The Spatchcock Maneuver: Now for the main event! Place the turkey breast-side down on a large cutting board. Using sturdy kitchen shears, cut along both sides of the backbone, from the tail to the neck. It’ll take some muscle, so don’t be shy! Once the backbone is removed, flip the turkey over. Press down firmly on the breastbone until you hear a crack and the turkey lies flat. This simple spatchcock turkey method for beginners ensures even cooking, I didn’t expect that the first time!
- Seasoning Up the Spatchcock Turkey: In a small bowl, mix together your softened butter, chopped rosemary, thyme, minced garlic, kosher salt, and black pepper. Now, get your hands in there! Gently separate the skin from the breast and thigh meat, being careful not to tear it. Rub about half of the butter mixture directly onto the meat under the skin. Then, slather the remaining butter mixture all over the outside of the turkey, really getting into all the nooks and crannies. You want flavor everywhere!
- Get Ready to Roast: Preheat your oven to a blazing 425°F (220°C). Place a wire rack inside a large rimmed baking sheet. This setup is key for air circulation, which helps with that glorious crispy skin. Carefully transfer your butter-slathered, spatchcocked turkey onto the wire rack, skin-side up. Make sure it’s centered and has plenty of space around it. The oven will smell amazing as soon as you open it, trust me on this!
- Roasting Your Simple Spatchcock Turkey: Pop that beautiful bird into the hot oven. Roast for 30 minutes at 425°F to get a head start on that golden-brown skin. Then, reduce the oven temperature to 350°F (175°C) and continue roasting for another 60-90 minutes, or until a meat thermometer inserted into the thickest part of the thigh (avoiding the bone) reads 165°F (74°C). If the skin starts getting too dark, loosely tent it with foil. I once forgot to check and had some very… *rustic* dark spots, oops!
- Rest and Carve: Once your turkey hits 165°F, pull it out of the oven. This is the hardest part, honestly: letting it rest! Loosely tent the turkey with foil and let it sit for at least 20-30 minutes before carving. This resting period is *so* important; it allows the juices to redistribute throughout the meat, giving you that unbelievably tender, juicy result. If you cut too soon, all those delicious juices will just run out onto your cutting board. Then, carve away and admire your perfectly cooked simple spatchcock turkey method for beginners!


