

Honestly, I remember the first time I stumbled upon the idea for these Apple Crisp Mini Cheesecakes. It was a chaotic Sunday afternoon, leaves swirling outside, and I was trying to bake something “fall-ish” but also, you know, not a giant pie. My kitchen, bless its heart, looked like a flour bomb had gone off. I had apples for a crisp, cream cheese for… well, just because, and a sudden spark hit. What if? What if I combined them? The smell of cinnamon and baking apples instantly takes me back to that glorious mess. This dish, to me, is pure comfort, a little hug in every bite, and it’s a total game-changer for when you want something special without the fuss of a whole cheesecake.
I swear, the first time I made these Apple Crisp Mini Cheesecakes, I almost forgot the crust. Almost! Picture me, halfway through, pulling the pan out and realizing I’d just baked plain cheesecake batter. My face was priceless. Luckily, I caught it, scraped it all back into the bowl, and started over. A little extra effort, sure, but it was worth it. That’s just how my kitchen rolls sometimes, a little chaos, a lot of love.

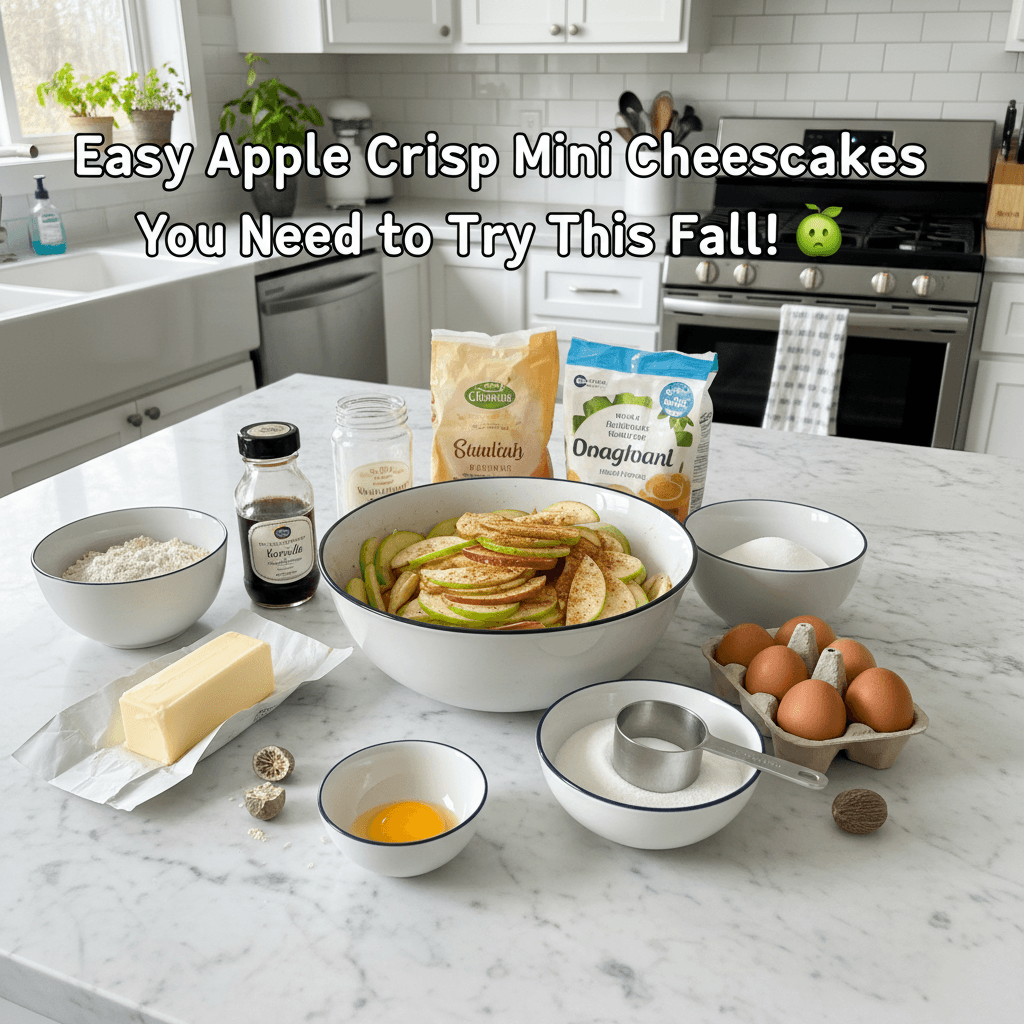
Ingredients for Apple Crisp Mini Cheesecakes
For the Cheesecake Base:
- Graham Cracker Crumbs: These are the backbone of our crust, hon. Don’t skimp on a good quality crumb, it makes all the difference for that buttery, sturdy base.
- Melted Butter: The glue, the flavor, the magic! I’ve tried using less, thinking I’m being “healthier,” but honestly, the crust just falls apart. Use the good stuff.
- Granulated Sugar: Just a touch for the crust, and then for the filling. It balances the tang of the cream cheese. I once confused it with powdered sugar, and that was a sticky, lumpy mess, oops!
- Cream Cheese: Full-fat, room temperature, please! This is non-negotiable for that rich, creamy texture. I tried low-fat once, and it just wasn’t the same. It was… sad. Philadelphia brand is my go-to.
- Egg: Binds everything together. Make sure it’s at room temperature too, it mixes smoother. I’ve had cold eggs curdle the batter before, not pretty.
- Vanilla Extract: A splash of warmth. Real vanilla, not imitation. You can really taste the difference, trust me.
For the Apple Crisp Topping:
- Apples: Granny Smith or Honeycrisp are my favorites for this, they hold their shape and give a nice tartness. Peel, core, and dice them into small, even pieces so they cook evenly.
- Brown Sugar: Adds that deep, caramelly sweetness to the apples. Dark brown sugar gives a richer flavor, but light works too.
- Ground Cinnamon: This is where the fall magic truly happens! A generous amount, I say. Sometimes I even add a tiny pinch of nutmeg.
- All-Purpose Flour: Helps thicken the apple mixture and the crisp topping. I’ve used gluten-free flour before, and it worked surprisingly well, just a heads-up.
- Rolled Oats: The star of the crisp topping! Don’t use instant oats, they get mushy. Old-fashioned rolled oats give that perfect chew and crunch.
- Cold Butter (diced): Essential for the crisp topping. Keeping it cold helps create those delightful, crumbly clusters. I once used melted butter, and it just became a paste. Learn from my mistakes!
Making Your Apple Crisp Mini Cheesecakes
- Prep the Crusts:
- Okay, first things first, preheat your oven to 325°F (160°C). Line a 12-cup muffin tin with paper liners. Now, in a medium bowl, combine your graham cracker crumbs, melted butter, and that little bit of sugar. Stir it all together until it looks like wet sand. This is where I always make sure it’s really well combined, because a crumbly crust is a sad crust. Press about a tablespoon of this mixture firmly into the bottom of each liner. I use the back of a spoon, or sometimes even a small shot glass, to get it nice and compact. Pop that tray in the fridge while you get the filling ready.
- Whip Up the Cheesecake Filling:
- In a large bowl, grab your room temperature cream cheese. Beat it with an electric mixer on medium speed until it’s super smooth and fluffy, no lumps allowed! This step is crucial for a silky cheesecake. Then, gradually add the sugar, beating until it’s fully incorporated. Scrape down the sides of the bowl often, because those sneaky bits of cream cheese love to hide. Add the egg and vanilla extract, beating just until combined. Don’t overmix once the egg is in, or you might get cracks later, and nobody wants a cracked cheesecake, right?
- Fill ‘Em Up:
- Pull your chilled muffin tin out of the fridge. Divide the cheesecake filling evenly among the 12 crusts. I usually eyeball it, but if you’re feeling precise, a small ice cream scoop works wonders here. You want them about two-thirds full, leaving a little room for our glorious apple topping. Tap the muffin tin gently on the counter a few times to release any air bubbles. This helps create that smooth, dense cheesecake texture we’re after. See? We’re getting somewhere!
- Bake the Cheesecakes:
- Carefully transfer the muffin tin to your preheated oven. Bake for about 18-22 minutes, or until the edges are just set but the centers still have a slight wobble when you gently shake the pan. This is key! Overbaking will make them dry, and we’re aiming for creamy heaven. Once they’re done, turn off the oven, crack the door slightly, and let them cool in there for about 15 minutes. This slow cool-down helps prevent those dreaded cracks. I once pulled them out too fast, and boom, instant Grand Canyon effect, oops!
- Make the Apple Topping:
- While your cheesecakes are cooling, let’s get those apples ready! In a medium saucepan, combine your diced apples, brown sugar, and cinnamon. Cook over medium heat, stirring occasionally, until the apples start to soften, about 5-7 minutes. You want them tender but still with a little bite. Stir in the flour and cook for another minute until the mixture thickens slightly. The smell at this point? Honestly, it’s pure autumn bliss. Set this aside to cool a bit.
- Create the Crisp Topping:
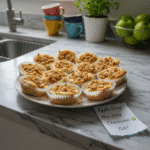
- In a small bowl, combine the rolled oats, brown sugar, and a pinch more cinnamon. Cut in the cold, diced butter using your fingers or a pastry blender until the mixture resembles coarse crumbs. You want some little butter clumps in there, that’s what gives us that lovely crispiness! Once your cheesecakes are completely cool, spoon a generous dollop of the apple mixture over each, then sprinkle with the crisp topping. You can serve them like this, or for extra crunch, pop them back in the oven for 5-7 minutes at 350°F (175°C) until the topping is golden. Pure deliciousness, I tell ya.
There was this one time, I was so proud of these Apple Crisp Mini Cheesecakes, I decided to take them to a potluck. But I forgot to chill them properly, and they were a little too soft. Still tasted amazing, but the presentation was… rustic, let’s say. My friend just laughed and said, “Nina, your food always tastes like sunshine, even when it looks like a happy accident.” And honestly, that’s my kitchen philosophy. It’s about the joy, not always the perfection.
Storing Apple Crisp Mini Cheesecakes
Okay, so storing these Apple Crisp Mini Cheesecakes is pretty straightforward, but I’ve got some personal tips. Once they’re completely cooled (and I mean completely, otherwise you’ll get condensation and a soggy topping), pop them into an airtight container. They’ll keep beautifully in the fridge for up to 3-4 days. I’ve tried freezing them before, without the crisp topping, and that worked okay just thaw them in the fridge overnight and add a fresh crisp topping before serving. I once left a batch out on the counter overnight, thinking “oh, they’ll be fine,” and let me tell you, that was a mistake. The cheesecake got a little funky, and the crisp topping lost all its crunch. So, fridge is your friend here. They’re actually quite lovely chilled, especially on a warmer fall day.

Ingredient Substitutions for Apple Crisp Mini Cheesecakes
I’ve definitely experimented with substitutions for these Apple Crisp Mini Cheesecakes, sometimes out of necessity, sometimes just for fun. For the graham cracker crust, I’ve used crushed shortbread cookies or even ginger snaps when I wanted an extra spice kick it worked, kinda, but the ginger snaps were a bit strong. If you don’t have Granny Smith apples, Honeycrisp or Fuji work great, they hold their shape well. I once tried a softer apple, and it just turned to mush, so learn from my unfortunate experience! For the crisp topping, if you’re out of oats, you can increase the flour and butter for a more streusel-like topping, but you lose that lovely chew. I’ve also swapped out half the brown sugar for maple syrup in the apple filling, and that was a delicious, more subtle sweetness. Don’t be afraid to play around a little, but stick close to the core ingredients for the best results.
Apple Crisp Mini Cheesecakes Serving Ideas
These Apple Crisp Mini Cheesecakes are pretty perfect on their own, but I have some favorite ways to serve them that just elevate the whole experience. A tiny dollop of freshly whipped cream on top? Yes please! Or a drizzle of warm salted caramel sauce? Oh my goodness, that’s a game-changer. Sometimes I’ll even sprinkle a few candied pecans on top for extra crunch and a nutty flavor. They’re fantastic after a comforting fall dinner, like a roasted chicken or a hearty stew. And honestly, I’ve been known to have one with my morning coffee don’t judge! They’re also adorable for a fall gathering or a holiday dessert table. Pair them with a warm mug of spiced cider or a robust cup of tea. It’s the kind of dessert that feels fancy but is secretly so easy.
Cultural Backstory of Apple Crisp Mini Cheesecakes
While Apple Crisp Mini Cheesecakes don’t have a centuries-old cultural backstory like some dishes, they represent a beautiful fusion of two beloved American desserts: the classic apple crisp and the rich, creamy cheesecake. Apple crisp, a humble and comforting dessert, gained popularity during World War II when rationing made pie crust ingredients scarce. It’s a testament to ingenuity and making the most of what you have. Cheesecake, with its European roots, found its way to America and evolved into the creamy, decadent New York-style dessert we know today. My own connection to this dish is purely personal it’s about taking those familiar, comforting flavors and giving them a fresh, easy twist. It’s about bringing together the crispness of fall apples with the indulgence of cheesecake, creating something new that still feels like home. It’s my little ode to simple comforts and kitchen creativity.
Honestly, these Apple Crisp Mini Cheesecakes have become a fall staple in my kitchen. They’re a little bit of sweet indulgence, a little bit of crunchy comfort, and a whole lot of delicious. Every time I make them, I’m reminded of that first messy, joyful attempt. I hope they bring as much warmth and happiness to your table as they do to mine. Don’t be shy, give them a try, and tell me how your kitchen chaos turns out!
Frequently Asked Questions About Apple Crisp Mini Cheesecakes
- → Can I make these Apple Crisp Mini Cheesecakes gluten-free?
Yes, you absolutely can! I’ve had success using gluten-free graham cracker crumbs for the base and a gluten-free all-purpose flour blend for the apple and crisp toppings. The texture holds up surprisingly well, so don’t hesitate to try it!
- → What if I don’t have a muffin tin for Apple Crisp Mini Cheesecakes?
You could try making a larger cheesecake in a springform pan, but you’d need to adjust baking times and the crust amount. For mini versions, a muffin tin is truly best. I once tried baking them in ramekins, and they were a nightmare to get out, so I don’t recommend that!
- → My cheesecake centers cracked! What happened?
Oh, the dreaded crack! It usually happens from overbaking or cooling them too quickly. Make sure to bake just until the edges are set and the center still wobbles a bit, then let them cool slowly in the turned-off oven with the door ajar. I’ve been there, it happens!
- → How long do these Apple Crisp Mini Cheesecakes last in the fridge?
They’ll keep well in an airtight container in the refrigerator for about 3-4 days. The crisp topping might soften a little over time, but the flavors will still be fantastic. I usually eat them too fast for them to last much longer, honestly!
- → Can I use other fruits besides apples in the topping?
Absolutely! I’ve tried peaches and even mixed berries before, and they were lovely. Just make sure to adjust the cooking time for the fruit depending on how soft it is. It’s fun to experiment, though apples are my personal favorite for this dish!
Apple Crisp Mini Cheesecakes: Fall’s Sweetest Bites
- Prep Time: 30 Minutes
- Cook Time: 30 Minutes
- Total Time: 1 Hour 30 Minutes
- Yield: 12 Servings 1x
- Category: Home
Description
Easy Apple Crisp Mini Cheesecakes bring fall flavors to your table. Creamy cheesecake meets crisp apple topping in delightful mini desserts. Simple to make!
Ingredients
- For the Cheesecake Base:
- 1 ½ cups graham cracker crumbs
- ¼ cup granulated sugar
- 6 tablespoons unsalted butter, melted
- 2 (8-ounce) packages full-fat cream cheese, softened to room temperature
- ½ cup granulated sugar
- 1 large egg, room temperature
- 1 teaspoon vanilla extract
- For the Apple Crisp Topping:
- 2 medium Granny Smith or Honeycrisp apples, peeled, cored, and diced (about 2 cups)
- ¼ cup packed light brown sugar
- 1 teaspoon ground cinnamon
- 1 tablespoon all-purpose flour
- ½ cup old-fashioned rolled oats
- ¼ cup packed light brown sugar
- ¼ teaspoon ground cinnamon
- 3 tablespoons cold unsalted butter, diced
- Finishing Touches (Optional):
- Whipped cream
- Caramel sauce
- Candied pecans
Instructions
- Prep the Crusts:: Okay, first things first, preheat your oven to 325°F (160°C). Line a 12-cup muffin tin with paper liners. Now, in a medium bowl, combine your graham cracker crumbs, melted butter, and that little bit of sugar. Stir it all together until it looks like wet sand. This is where I always make sure it’s really well combined, because a crumbly crust is a sad crust. Press about a tablespoon of this mixture firmly into the bottom of each liner. I use the back of a spoon, or sometimes even a small shot glass, to get it nice and compact. Pop that tray in the fridge while you get the filling ready.
- Whip Up the Cheesecake Filling:: In a large bowl, grab your room temperature cream cheese. Beat it with an electric mixer on medium speed until it’s super smooth and fluffy, no lumps allowed! This step is crucial for a silky cheesecake. Then, gradually add the sugar, beating until it’s fully incorporated. Scrape down the sides of the bowl often, because those sneaky bits of cream cheese love to hide. Add the egg and vanilla extract, beating just until combined. Don’t overmix once the egg is in, or you might get cracks later, and nobody wants a cracked cheesecake, right?
- Fill ‘Em Up:: Pull your chilled muffin tin out of the fridge. Divide the cheesecake filling evenly among the 12 crusts. I usually eyeball it, but if you’re feeling precise, a small ice cream scoop works wonders here. You want them about two-thirds full, leaving a little room for our glorious apple topping. Tap the muffin tin gently on the counter a few times to release any air bubbles. This helps create that smooth, dense cheesecake texture we’re after. See? We’re getting somewhere!
- Bake the Cheesecakes:: Carefully transfer the muffin tin to your preheated oven. Bake for about 18-22 minutes, or until the edges are just set but the centers still have a slight wobble when you gently shake the pan. This is key! Overbaking will make them dry, and we’re aiming for creamy heaven. Once they’re done, turn off the oven, crack the door slightly, and let them cool in there for about 15 minutes. This slow cool-down helps prevent those dreaded cracks. I once pulled them out too fast, and boom, instant Grand Canyon effect, oops!
- Make the Apple Topping:: While your cheesecakes are cooling, let’s get those apples ready! In a medium saucepan, combine your diced apples, brown sugar, and cinnamon. Cook over medium heat, stirring occasionally, until the apples start to soften, about 5-7 minutes. You want them tender but still with a little bite. Stir in the flour and cook for another minute until the mixture thickens slightly. The smell at this point? Honestly, it’s pure autumn bliss. Set this aside to cool a bit.
- Create the Crisp Topping:: In a small bowl, combine the rolled oats, brown sugar, and a pinch more cinnamon. Cut in the cold, diced butter using your fingers or a pastry blender until the mixture resembles coarse crumbs. You want some little butter clumps in there, that’s what gives us that lovely crispiness! Once your cheesecakes are completely cool, spoon a generous dollop of the apple mixture over each, then sprinkle with the crisp topping. You can serve them like this, or for extra crunch, pop them back in the oven for 5-7 minutes at 350°F (175°C) until the topping is golden. Pure deliciousness, I tell ya.


