
My first attempt at making scones was… a bit of a crumbly mess, honestly. I remember flour everywhere, butter that wasn’t quite cold enough, and a general sense of ‘what am I even doing?!’ But the idea of combining crisp fall apples with gooey salted caramel, nestled into a buttery scone? That vision kept me going. These Salted Caramel Apple Scones became my mission, a quest for that perfect balance of sweet, tangy, and just a touch of salty magic. They smell like autumn wrapped in a hug, a little slice of comfort even when the kitchen’s a disaster zone.
Oh, the chaos! One time, I was so excited to get these into the oven, I completely forgot to add the baking powder. The result? Flat, sad, apple-caramel hockey pucks. I just stared at them, then laughed, because sometimes that’s just how baking goes, right? It was a good reminder that even when things go sideways, there’s always a lesson, and usually, a good story. Plus, it made me appreciate the fluffy, tall scones even more!

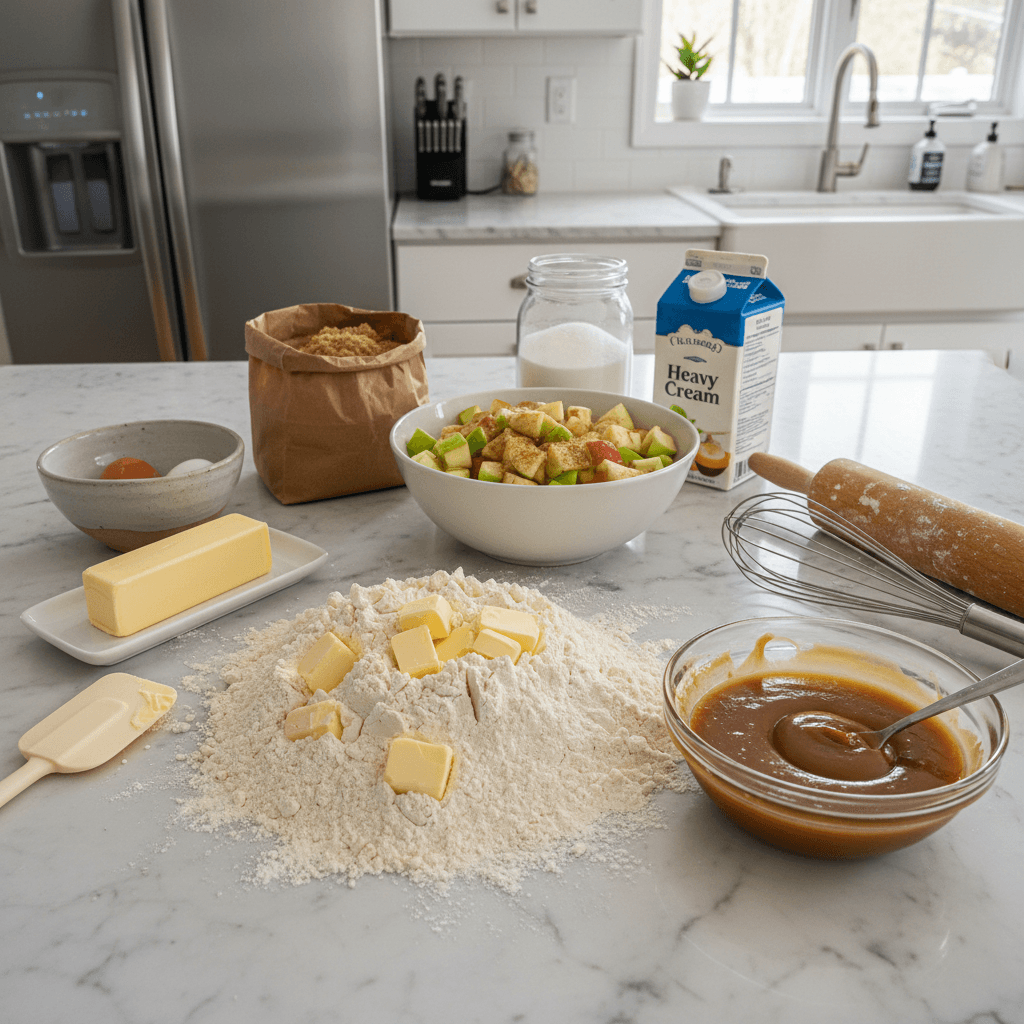
Ingredients
- All-Purpose Flour: This is the backbone, the sturdy foundation for our flaky friends. Don’t skimp on measuring, hon, too much or too little can really mess with the texture. I once just ‘eyeballed’ it and ended up with something closer to a biscuit, not in a good way.
- Granulated Sugar: Just enough to sweeten the dough without overpowering the apples and caramel. I’ve tried using less, thinking I was being ‘healthy,’ but honestly, it just tasted… sad. A little sweetness makes the flavors sing!
Baking Powder: Our lift-off secret! This is what makes your scones light and fluffy. Don’t use old, expired stuff it’s a rookie mistake I learned the hard way when my scones refused to rise. Fresh is best for that airy texture.
Cold Unsalted Butter: The real MVP. Cold, cold, COLD butter is what creates those glorious flaky layers. I always cut it into cubes and pop it back in the freezer for 10 minutes before I start. Trust me, warm butter equals tough scones, and we don’t want that!
Large Apple (like Gala or Honeycrisp), peeled, cored, and finely diced: These bring the sweet-tart crunch! I love Gala for its consistent texture, but honestly, any crisp apple works. I tried a softer apple once, and it turned to mush in the oven, which was a textural oopsie!
- Salted Caramel Sauce: The star of the show, the reason we’re all here! Use a good quality store-bought one or, if you’re feeling ambitious, make your own. I usually have a jar from my local market stashed away for emergencies. That sweet-salty swirl is everything.
- Ground Cinnamon: A warm hug for the apples. It just makes everything smell and taste like autumn. I’m a bit heavy-handed with cinnamon, to be real, because it always feels right.
- Buttermilk: The tangy liquid that brings it all together. The acidity helps activate the baking powder and tenderizes the dough. If you don’t have buttermilk, I’ve had decent luck with milk + a splash of lemon juice or vinegar, letting it sit for 5 minutes. Kinda works, not quite the same.
- Egg (for egg wash): Gives our scones that beautiful golden shine. Just a quick whisk and brush, it makes them look so professional, even if your kitchen looks like a flour bomb went off.
- Flaky Sea Salt (for sprinkling): That final touch! It enhances the caramel and adds a little sparkle. I always keep a jar by the stove, it’s a small detail that makes a big difference.
Instructions
- Mix Dry Ingredients:
- Grab a big bowl, the biggest one you have, because things are about to get messy in the best way! Whisk together your flour, sugar, baking powder, and a pinch of salt. Make sure it’s all nicely combined, you don’t want pockets of just baking powder in there. I always give it a good, enthusiastic whisk, like I’m trying to solve a kitchen mystery. This step feels simple, but it sets the stage for everything, honestly. It should look like a soft, fluffy cloud of dry goodness.
- Cut in the Cold Butter:
- Now for the butter! My secret (and sometimes my nemesis) is really cold butter. Cut it into small cubes and add it to the dry ingredients. Use a pastry blender, your fingertips, or even a food processor if you’re feeling fancy. You’re aiming for pea-sized crumbs, with some larger, bean-sized bits still visible. Don’t overwork it, though! I once kept going, thinking ‘smaller is better,’ and ended up with a greasy mess instead of flaky layers. Your hands should barely touch the butter to keep it cold.
- Add Apples & Caramel:
- Toss in your finely diced apples and the ground cinnamon. Give it a gentle mix to distribute them. Then, drizzle in about half of your salted caramel sauce. Use your hands to lightly, gently work the caramel and apples into the flour-butter mixture. You want to see streaks of caramel, not a fully incorporated dough. This is where the magic happens, the smell of apple and cinnamon starts to emerge, making my kitchen feel so warm and inviting!
- Pour in Buttermilk:
- Make a well in the center of your dry mixture and pour in the cold buttermilk. Now, with a spatula or your hands (my preferred method, mess be darned!), gently mix until just combined. The dough will be shaggy and a bit sticky, and that’s exactly what you want! Resist the urge to knead it like bread, overmixing develops gluten, and we’re after tender, crumbly scones, not tough ones. This is where I have to remind myself to step away sometimes!
- Shape the Scones:
- Turn the shaggy dough out onto a lightly floured surface. Gently pat it into a round disc, about 1-inch thick. Don’t press too hard, we want to keep those butter pockets intact. Using a sharp knife or a bench scraper, cut the disc into 8 wedges, like a pizza. This is my favorite part because you start to see the individual scones taking shape, and sometimes a little bit of caramel peeks out, which is a happy accident.
- Bake & Finish:
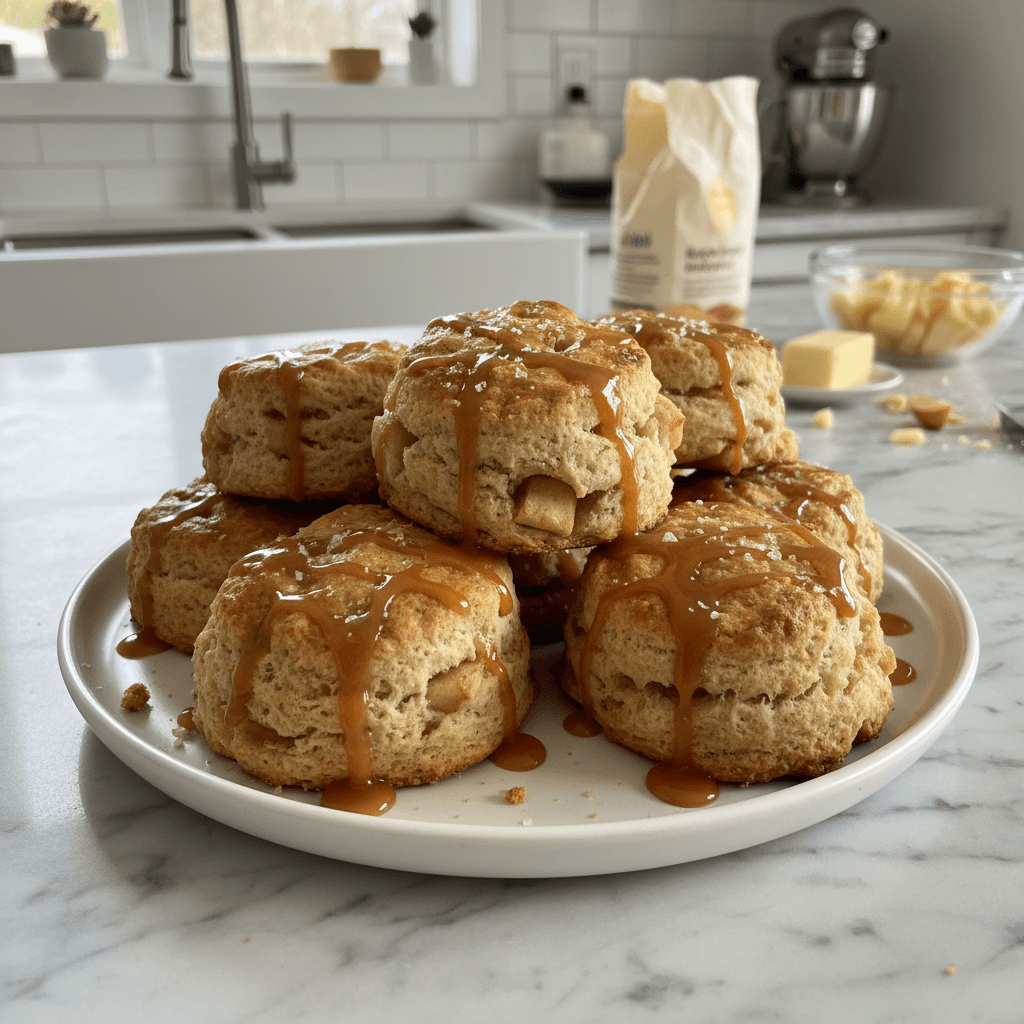
- Carefully transfer your wedges to a baking sheet lined with parchment paper. Brush the tops with your egg wash and sprinkle with flaky sea salt. Pop them into a preheated oven (check the recipe card for temperature!). Bake until golden brown and puffed, about 18-22 minutes. They’ll smell incredible! Once out, let them cool a bit on a wire rack, then drizzle with the remaining salted caramel sauce. The smell is honestly intoxicating, a mix of buttery pastry, sweet apples, and that rich caramel. Pure bliss!
There’s just something about pulling a tray of these Salted Caramel Apple Scones from the oven. The kitchen fills with this amazing aroma of cinnamon, apple, and warm butter, and for a moment, all the little kitchen mishaps just melt away. It’s that feeling of creating something delicious with your own hands, even if there’s a flour cloud still clinging to your hair. Pure happiness, I tell ya.

Salted Caramel Apple Scones: Storage Tips
Keeping your Salted Caramel Apple Scones fresh is key, especially if you’re not planning to devour them all in one sitting (which, let’s be real, is hard!). I’ve learned from experience that they’re best on the day they’re baked, hands down. But if you have leftovers, pop them into an airtight container at room temperature for up to 2 days. I once tried keeping them uncovered, and they became rock-hard by morning a sad discovery, indeed. If you want to extend their life, freezing is your friend! Wrap individual cooled scones tightly in plastic wrap, then place them in a freezer-safe bag for up to a month. To reheat, just pop a frozen scone in a preheated oven (around 300°F/150°C) for about 10-15 minutes until warmed through. Microwaving can make them a bit soggy, so I avoid that if I can help it.
Salted Caramel Apple Scones: Ingredient Substitutions
Life happens, and sometimes you don’t have exactly what the recipe calls for, right? Don’t have gala apples for your Salted Caramel Apple Scones? No worries! Granny Smith or Honeycrisp work beautifully too, just adjust the sweetness of your caramel if using a tarter apple. I’ve even thrown in some diced pears when apples were scarce, and it worked… kinda, a softer texture but still tasty. If buttermilk isn’t in your fridge, you can make a quick substitute by adding 1 tablespoon of lemon juice or white vinegar to a measuring cup, then filling the rest with regular milk to make 1 cup. Let it sit for 5 minutes until it curdles a bit. It’s not exactly the same, but it gets the job done in a pinch! For the caramel, if you’re out, a drizzle of maple syrup or a simple glaze would still be lovely, just a different vibe.
Salted Caramel Apple Scones: Serving Suggestions
These Salted Caramel Apple Scones are practically begging for a steaming cup of coffee, or a strong black tea on a crisp morning. Honestly, that’s my go-to pairing. But don’t stop there! I love them warmed slightly with a dollop of clotted cream (if I’m feeling fancy) or even a scoop of vanilla bean ice cream for a dessert-like experience. Imagine, a warm scone, melting ice cream, and that gooey caramel? Yes please! They’re also fantastic alongside a fruit salad for a lighter brunch. Sometimes, I just grab one and head out to the porch swing, and that’s a serving suggestion in itself, a moment of quiet bliss.
Cultural Backstory
Scones, in their simplest form, have been a staple in British and Scottish baking for centuries, often enjoyed with clotted cream and jam as part of a traditional afternoon tea. My own journey with scones started not in a fancy tearoom, but in my grandmother’s kitchen, where she made a simple, plain version that she swore by. This particular recipe for Salted Caramel Apple Scones is my playful twist on that classic, marrying the humble scone with flavors that scream American autumn. It’s a blend of old-world comfort and new-world indulgence, a nod to tradition while embracing my love for all things sweet, salty, and apple-y. It’s how I bring a piece of baking history into my own modern kitchen, with a dash of my personality baked right in.
So, there you have it, my current obsession: Salted Caramel Apple Scones. They’re not always perfect, sometimes a little lopsided, but they’re always made with a whole lot of heart. This recipe brings so much joy to my kitchen, and I hope it does for yours too. Give them a whirl, embrace the flour dust, and maybe share your own kitchen chaos stories with me!
Frequently Asked Questions
- → My Salted Caramel Apple Scones sometimes come out dry. What gives?
Oh, I totally get that! Usually, dry scones mean you either added too much flour or overmixed the dough. Remember, just mix until it’s barely combined. I once added an extra splash of buttermilk by accident, and they were moist as can be, so don’t be afraid to adjust slightly!
- → Can I use a different kind of apple for these scones?
Absolutely! I’ve experimented a lot. While Gala or Honeycrisp are my favorites for their texture, Fuji or even a tart Granny Smith would be delicious. Just make sure it’s a firm apple that holds its shape. I tried a softer Red Delicious once, and it just kind of disappeared!
- → What’s the trick to getting really flaky scones?
The secret, my friend, is COLD butter and not overworking the dough. Keep that butter as cold as possible, and handle the dough as little as you can. I even pop my bowl in the freezer for 10 minutes mid-process sometimes. Trust me, it makes all the difference!
- → How long do these Salted Caramel Apple Scones last?
Honestly, they’re best eaten the day they’re baked, warm from the oven! But if you have leftovers (lucky you!), store them in an airtight container at room temp for up to 2 days. I’ve frozen them too, and they reheat beautifully in the oven.
- → Can I skip the caramel drizzle on top?
You can, but why would you want to?! Kidding! Yes, you can skip it if you prefer. The scones will still be delicious with the caramel baked inside. But that extra drizzle just makes them feel extra special, like a little caramel hug.
Salted Caramel Apple Scones: Buttery, Sweet, & Tangy
- Prep Time: 20 Minutes
- Cook Time: 20 Minutes
- Total Time: 40 Minutes
- Yield: 8 Servings 1x
- Category: AllRecipes
Description
Salted Caramel Apple Scones are my favorite fall bake! Flaky, tender, bursting with sweet apples and gooey caramel. A truly comforting treat for any morning.
Ingredients
- Scone Base:
- 2 cups (240g) all-purpose flour
- 1/4 cup (50g) granulated sugar
- 1 tablespoon baking powder
- 1/2 teaspoon salt
- 1/2 cup (113g) cold unsalted butter, cubed
- 1/2 cup (120ml) cold buttermilk
- Apple & Caramel Core:
- 1 large apple (Gala or Honeycrisp), peeled, cored, finely diced
- 1/2 teaspoon ground cinnamon
- 1/2 cup (120ml) salted caramel sauce, divided
- Finishing Touches:
- 1 large egg, beaten (for egg wash)
- 1/2 teaspoon flaky sea salt (for sprinkling)
- Optional Swirl:
- Extra salted caramel sauce, for drizzling (optional)
Instructions
- Mix Dry Ingredients:: Grab a big bowl, the biggest one you have, because things are about to get messy in the best way! Whisk together your flour, sugar, baking powder, and a pinch of salt. Make sure it’s all nicely combined; you don’t want pockets of just baking powder in there. I always give it a good, enthusiastic whisk, like I’m trying to solve a kitchen mystery. This step feels simple, but it sets the stage for everything, honestly. It should look like a soft, fluffy cloud of dry goodness.
- Cut in the Cold Butter:: Now for the butter! My secret (and sometimes my nemesis) is really cold butter. Cut it into small cubes and add it to the dry ingredients. Use a pastry blender, your fingertips, or even a food processor if you’re feeling fancy. You’re aiming for pea-sized crumbs, with some larger, bean-sized bits still visible. Don’t overwork it, though! I once kept going, thinking ‘smaller is better,’ and ended up with a greasy mess instead of flaky layers. Your hands should barely touch the butter to keep it cold.
- Add Apples & Caramel:: Toss in your finely diced apples and the ground cinnamon. Give it a gentle mix to distribute them. Then, drizzle in about half of your salted caramel sauce. Use your hands to lightly, *gently* work the caramel and apples into the flour-butter mixture. You want to see streaks of caramel, not a fully incorporated dough. This is where the magic happens, the smell of apple and cinnamon starts to emerge, making my kitchen feel so warm and inviting!
- Pour in Buttermilk:: Make a well in the center of your dry mixture and pour in the cold buttermilk. Now, with a spatula or your hands (my preferred method, mess be darned!), gently mix until just combined. The dough will be shaggy and a bit sticky, and that’s exactly what you want! Resist the urge to knead it like bread; overmixing develops gluten, and we’re after tender, crumbly scones, not tough ones. This is where I have to remind myself to step away sometimes!
- Shape the Scones:: Turn the shaggy dough out onto a lightly floured surface. Gently pat it into a round disc, about 1-inch thick. Don’t press too hard, we want to keep those butter pockets intact. Using a sharp knife or a bench scraper, cut the disc into 8 wedges, like a pizza. This is my favorite part because you start to see the individual scones taking shape, and sometimes a little bit of caramel peeks out, which is a happy accident.
- Bake & Finish:: Carefully transfer your wedges to a baking sheet lined with parchment paper. Brush the tops with your egg wash and sprinkle with flaky sea salt. Pop them into a preheated oven (check the recipe card for temperature!). Bake until golden brown and puffed, about 18-22 minutes. They’ll smell incredible! Once out, let them cool a bit on a wire rack, then drizzle with the remaining salted caramel sauce. The smell is honestly intoxicating, a mix of buttery pastry, sweet apples, and that rich caramel. Pure bliss!


