

Honestly, I still remember the first time I made these. It was a chaotic Halloween night, years ago, and I had promised the kids something ‘spooky’ for dinner. My brain was fried from costume wrangling, and then I saw a photo of these little guys. A lightbulb moment, for real! I grabbed some crescent roll dough, a pack of hot dogs, and just went for it. The kitchen was a bit of a floury mess, and some of my first ‘mummies’ looked more like abstract art, but the kids? They absolutely adored them. That’s why these Halloween Sausage Mummy Wraps hold such a special place in my heart, they’re pure, unadulterated spooky fun, and they remind me that sometimes, the simplest ideas are the best.
I remember one year, I got a little too ambitious with the cheese slices, thinking ‘more cheese, more better,’ right? Well, some of my little mummies ended up looking less like bandages and more like they’d melted into a cheesy, golden puddle. Still tasty, mind you, but definitely a lesson in moderation! Or the time I forgot the mustard eyes until after they were cooled, and trying to get them to stick was a whole other saga. Just part of the kitchen adventure, I guess!

Halloween Sausage Mummy Wraps Ingredients
Mummy Essentials
- Hot Dogs or Cocktail Sausages: Use your favorite brand here, hon. I usually go for all-beef hot dogs because they hold up well and have a great flavor, but cocktail sausages are adorable for mini mummies!
- Refrigerated Crescent Roll Dough: Don’t even think about making your own pastry for this, unless you’re feeling really ambitious. The store-bought kind is a lifesaver and works perfectly for these Halloween Sausage Mummy Wraps.
Cheese Slices (optional): Cheddar or Colby Jack work wonderfully. I tried a fancy Swiss once, and it just didn’t melt right. A little slice tucked in before wrapping makes them extra gooey and special.
Flavor Boosters
Dijon Mustard: A little bit brushed on the sausage before wrapping adds a lovely tang and depth. I swear by a good quality Dijon, it makes all the difference.
Spooky Eyes
Yellow Mustard or Ketchup: For those crucial little mummy eyes! A tiny dot is all you need. I’ve used edible candy eyes before, and they’re super cute, but a squeeze bottle of mustard is easier for real-life kitchen chaos.
- Extra Ketchup and Mustard: For dipping, of course! You can also try a spicy mayo if you’re feeling adventurous, but the classics are always a hit.
Dipping Fun
Crafting Your Halloween Sausage Mummy Wraps
- Prep Your Sausages:
- Okay, first things first, get your hot dogs or cocktail sausages ready. If you’re using full-sized hot dogs, I usually cut them in half or even thirds, depending on how many bites I want. For cocktail sausages, they’re perfect as is! Pat them dry with a paper towel, this helps the dough stick better, trust me. I always forget this step and then wonder why my bandages are slipping! Don’t be like me, hon.
- Unroll and Slice the Dough:
- Next, carefully unroll your crescent roll dough onto a clean surface. Now, this is where it gets fun! You want to slice the dough into thin strips, about 1/4 to 1/2 inch wide. I usually use a pizza cutter for this because it’s so much faster and neater than a knife. I tried tearing it once, and it looked like a monster had attacked my dough oops! Just aim for roughly even strips, no need for perfection here.
- Mustard & Cheese Magic:
- Alright, grab your hot dogs. If you’re using cheese, now’s the time to wrap a thin strip of cheese around each hot dog. Then, brush a thin layer of Dijon mustard onto the sausage. Not too much, just a little whisper of flavor. The smell of that mustard always gets me excited for the finished product! This step really elevates the flavor of your Halloween Sausage Mummy Wraps, trust me!
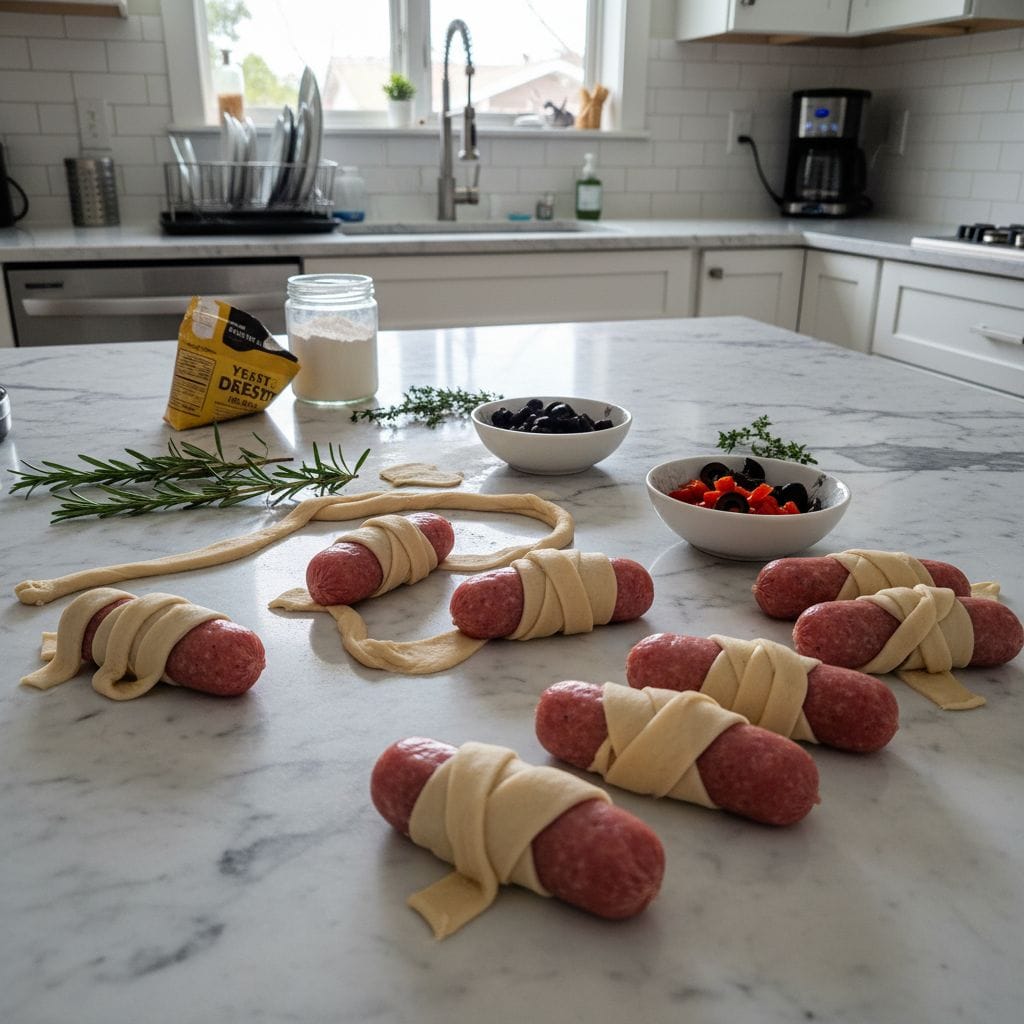
- Wrap Your Mummies:
- Time to make them look like mummies! Take a strip of crescent roll dough and start wrapping it around a hot dog, leaving a small gap at one end for the ‘face.’ Overlap the dough slightly, spiraling it down the length of the sausage. Don’t pull too tightly, or it’ll stretch and break. I’ve done that so many times, and then my mummy looks like it’s missing an arm! Just keep it relaxed and natural.
- Bake to Golden Perfection:
- Once all your little mummies are wrapped, place them on a baking sheet lined with parchment paper. Make sure they have a little space between them so they can bake evenly. Pop them into a preheated oven, usually around 375°F (190°C), and bake for about 12-15 minutes, or until the crescent dough is golden brown and puffed up. The smell filling your kitchen is just delightful at this point, honestly!
- Add the Spooky Eyes:
- Carefully remove your Halloween Sausage Mummy Wraps from the oven. Let them cool for just a minute or two they’ll be super hot! Then, using a toothpick or a fine-tipped squeeze bottle, dab two tiny dots of yellow mustard or ketchup for the mummy eyes. This is the best part, seeing their little personalities emerge! Serve them warm and watch them disappear!
There’s something so satisfying about pulling these golden, puffy mummies out of the oven. I’ve lost count of how many times I’ve burned my tongue sneaking one right off the tray because I just couldn’t wait! The kids always get a kick out of adding the little mustard eyes, and honestly, that’s what makes these Halloween Sausage Mummy Wraps truly special for me the shared laughter and the simple joy of making something fun together.
Storage Tips
Okay, so these Halloween Sausage Mummy Wraps are definitely best eaten warm, fresh out of the oven. That’s when the crescent dough is at its puffiest and the sausage is perfectly juicy. But, if you do have leftovers (and that’s a big ‘if’ in my house!), they’ll keep pretty well. Just pop them into an airtight container and stash them in the fridge for up to 2-3 days. I tried microwaving them once, and the dough got a little soft and chewy, not ideal. My personal tip? Reheat them in a toaster oven or even a regular oven at about 300°F (150°C) for 5-10 minutes. It helps crisp up that dough again, making them much more enjoyable. They’re still good cold for a quick snack, but don’t expect that fresh-baked magic!

Ingredient Substitutions
I’ve experimented with a few swaps for these Halloween Sausage Mummy Wraps, mostly out of necessity when I was missing an ingredient! For the hot dogs, turkey or chicken sausages work just fine, though they might be a little less juicy. I’ve even used mini breakfast sausages for a really tiny, adorable version, which were a huge hit at a brunch. If you don’t have crescent roll dough, puff pastry works surprisingly well! Just roll it out a bit thinner and cut strips. It gives a flakier texture, which is a nice change. I tried using pie crust once, and it was… well, it worked, kinda, but it wasn’t the same. For the cheese, any melty cheese like mozzarella or Monterey Jack would be lovely. Feel free to get creative with your Halloween Sausage Mummy Wraps, that’s part of the fun!
Halloween Sausage Mummy Wraps Serving Ideas
These Halloween Sausage Mummy Wraps are fantastic on their own, especially with a little bowl of ketchup and mustard for dipping. But if you’re making a whole festive spread, I’ve got some ideas! For a full meal, they pair wonderfully with a big bowl of hearty chili or a simple green salad with a zesty vinaigrette. For a party, consider serving them alongside some ‘spiderweb’ deviled eggs or a spooky veggie platter with a ‘graveyard’ dip. And for drinks? A warm apple cider or a fun, fizzy ‘witch’s brew’ punch would be perfect. Honestly, these and a classic Halloween movie marathon? Yes please, that’s my ideal spooky night in. They’re so versatile and just scream ‘Halloween fun!’
Cultural Backstory
When we talk about Halloween Sausage Mummy Wraps, we’re not diving into ancient culinary traditions or obscure historical texts. This is a wonderfully modern, American-born tradition, a testament to the creativity of home cooks wanting to make holidays special without a ton of fuss. It’s a playful twist on the classic ‘pigs in a blanket,’ reimagined for the spooky season. The idea likely blossomed in the late 20th century as crescent roll dough became a pantry staple and families looked for easy, kid-friendly ways to celebrate Halloween. For me, it connects to that feeling of simple, homemade joy during the holidays, a reminder that some of the best traditions are the ones we create ourselves, right in our own kitchens.
So there you have it, my take on these adorable Halloween Sausage Mummy Wraps. They’re such a simple way to bring a little extra cheer and spookiness to your Halloween festivities. Every time I make them, I’m transported back to those early, messy kitchen adventures, and honestly, they always turn out so much better now! I hope you give them a try and create some wonderful memories of your own. Don’t forget to share your mummy creations with me I’d love to see them!
Frequently Asked Questions
- → Can I make these Halloween Sausage Mummy Wraps ahead of time?
Yes, you totally can! You can wrap the hot dogs in the crescent dough and store them in the fridge for up to 24 hours before baking. Just cover them loosely so the dough doesn’t dry out. It’s a lifesaver for party prep!
- → What kind of hot dogs work best for these mummy wraps?
Honestly, any hot dog you love will work! I usually go for all-beef for the best flavor, but turkey dogs or even mini cocktail sausages are great too. I’ve found thicker sausages are a bit harder to wrap smoothly.
- → My crescent dough keeps tearing when I wrap it, what am I doing wrong?
Oh, I’ve been there! You might be pulling the dough too tight. Try to be gentle, and don’t stretch it too much. Also, make sure the dough isn’t too cold, letting it sit out for 5-10 minutes can make it more pliable.
- → How should I store leftover Halloween Sausage Mummy Wraps?
Just pop any leftovers into an airtight container and keep them in the fridge for 2-3 days. Reheating them in a toaster oven or regular oven is best to get that crispiness back. Microwaving them makes them a bit soft, which is okay, but not ideal!
- → Can I add other fillings to my Halloween Sausage Mummy Wraps?
Absolutely! I’ve tucked in tiny slices of jalapeño or a sprinkle of shredded cheese with the hot dog before wrapping. Just don’t overfill, or your mummies might burst their bandages in the oven a funny disaster I’ve experienced!

Spooky Halloween Sausage Mummy Wraps: Easy Fun!
- Prep Time: 15 Minutes
- Cook Time: 15 Minutes
- Total Time: 30 Minutes
- Yield: 12 Servings 1x
- Category: Dessert
Description
Spooky Halloween Sausage Mummy Wraps are a festive, easy treat for parties or family fun. Learn how to make these adorable, savory bites with a personal touch!
Ingredients
- Mummy Essentials:
- 1 (8-ounce) package refrigerated crescent roll dough
- 8–12 hot dogs or cocktail sausages
- 4–6 slices cheese (cheddar, colby jack), cut into thin strips (optional)
- Flavor Boosters:
- 1–2 teaspoons Dijon mustard (for brushing on sausages)
- Spooky Eyes:
- Yellow mustard or ketchup (for decorating eyes)
- Dipping Fun:
- Ketchup, for serving
- Mustard, for serving
Instructions
- Prep Your Sausages:: Okay, first things first, get your hot dogs or cocktail sausages ready. If you’re using full-sized hot dogs, I usually cut them in half or even thirds, depending on how many bites I want. For cocktail sausages, they’re perfect as is! Pat them dry with a paper towel; this helps the dough stick better, trust me. I always forget this step and then wonder why my bandages are slipping! Don’t be like me, hon.
- Unroll and Slice the Dough:: Next, carefully unroll your crescent roll dough onto a clean surface. Now, this is where it gets fun! You want to slice the dough into thin strips, about 1/4 to 1/2 inch wide. I usually use a pizza cutter for this because it’s so much faster and neater than a knife. I tried tearing it once, and it looked like a monster had attacked my dough – oops! Just aim for roughly even strips, no need for perfection here.
- Mustard & Cheese Magic:: Alright, grab your hot dogs. If you’re using cheese, now’s the time to wrap a thin strip of cheese around each hot dog. Then, brush a thin layer of Dijon mustard onto the sausage. Not too much, just a little whisper of flavor. The smell of that mustard always gets me excited for the finished product! This step really elevates the flavor of your Halloween Sausage Mummy Wraps, trust me!
- Wrap Your Mummies:: Time to make them look like mummies! Take a strip of crescent roll dough and start wrapping it around a hot dog, leaving a small gap at one end for the ‘face.’ Overlap the dough slightly, spiraling it down the length of the sausage. Don’t pull too tightly, or it’ll stretch and break. I’ve done that so many times, and then my mummy looks like it’s missing an arm! Just keep it relaxed and natural.
- Bake to Golden Perfection:: Once all your little mummies are wrapped, place them on a baking sheet lined with parchment paper. Make sure they have a little space between them so they can bake evenly. Pop them into a preheated oven, usually around 375°F (190°C), and bake for about 12-15 minutes, or until the crescent dough is golden brown and puffed up. The smell filling your kitchen is just delightful at this point, honestly!
- Add the Spooky Eyes:: Carefully remove your Halloween Sausage Mummy Wraps from the oven. Let them cool for just a minute or two – they’ll be super hot! Then, using a toothpick or a fine-tipped squeeze bottle, dab two tiny dots of yellow mustard or ketchup for the mummy eyes. This is the best part, seeing their little personalities emerge! Serve them warm and watch them disappear!


