
Introduction
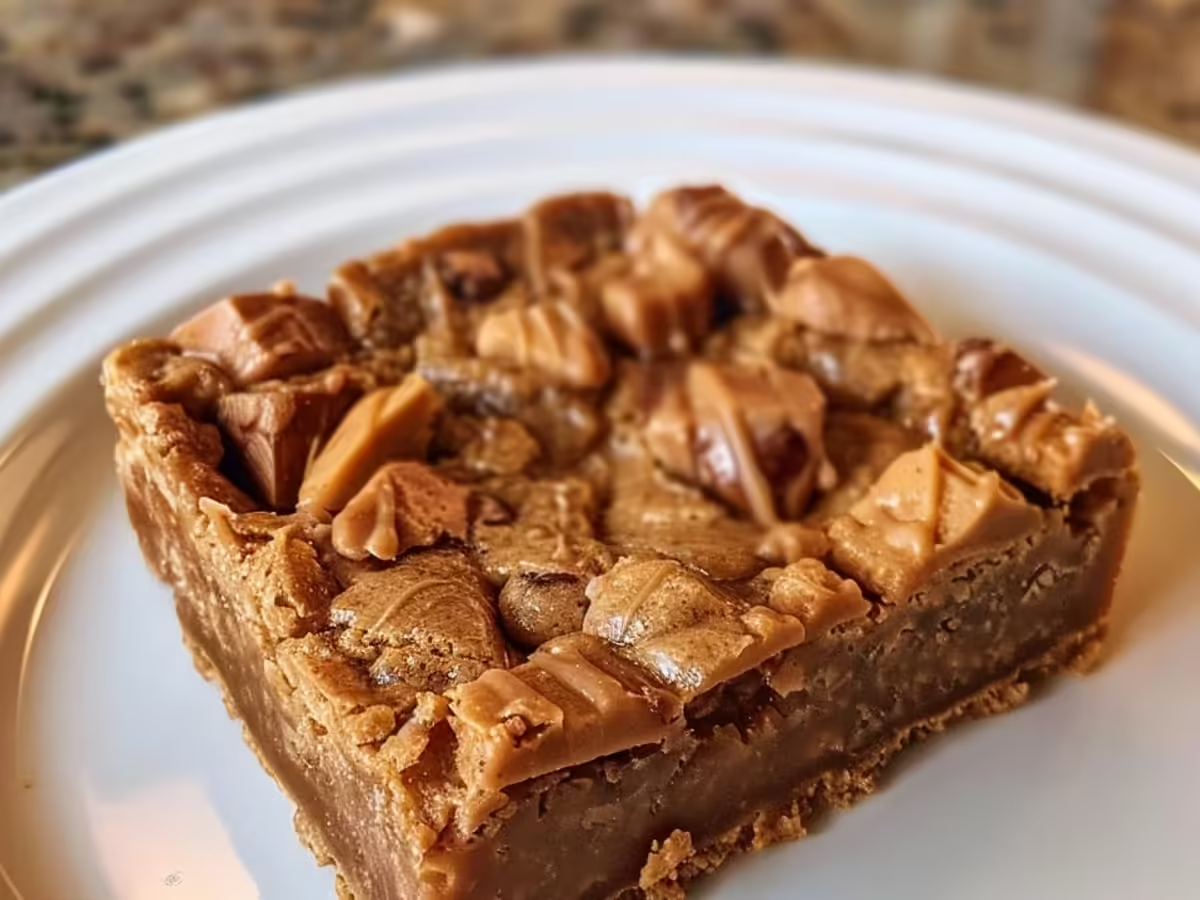
Growing up, my weekends were often filled with the sweet aroma of freshly baked treats wafting through the house. One of my all-time favorites was my mom’s Peanut Butter Dream Bars. Those blissful squares combined the rich, nutty flavor of peanut butter with a buttery crust, creating a dessert that was as comforting as a warm hug. Whether you’re juggling work calls or soccer practice, this Peanut Butter Dream Bars recipe is your new best friend. It’s quick to prepare and even quicker to disappear, ensuring you can enjoy in a little sweetness amidst your busy life.
Imagine biting into a creamy layer of peanut butter goodness, the crunch of a graham cracker crust providing the perfect contrast. This nice dessert not only satisfies your sweet tooth but also brings back nostalgic memories of childhood kitchen adventures. Plus, it’s a crowd-pleaser—perfect for family gatherings or simply treating yourself after a long day. So, roll up your sleeves and get ready to create a batch of Peanut Butter Dream Bars that will have everyone asking for seconds!

Why You’ll Love Peanut Butter Dream Bars
Imagine a treat that feels like a hug after a long day. That’s exactly what Peanut Butter Dream Bars deliver! This nice dessert combines the rich, creamy texture of peanut butter with a crumbly, buttery base, resulting in a heavenly experience for your taste buds. Whether you’re juggling work calls or soccer practice, this recipe is your new best friend. Not only do these bars come together in a flash, but they also satisfy your sweet cravings without any fuss.
This dish is like a cozy blanket for your taste buds, wrapping you in warmth and nostalgia. No more 6 PM panic—dinner’s ready faster than a microwave meal. Plus, you can easily whip up a batch for a last-minute gathering or a cozy night in. Not only does it save time, but it also packs a punch of flavor that will have everyone asking for seconds. The combination of sweet and salty in these Peanut Butter Dream Bars creates a balance that’s simply irresistible. You’ll find yourself dreaming about them long after the last bite!
In a world full of complicated desserts, Peanut Butter Dream Bars stand out as a straightforward yet indulgent option. They’re made with simple ingredients that you probably already have on hand, making this recipe as approachable as it is delicious. So, whether you’re treating yourself or sharing with friends, these bars are sure to become a staple in your dessert repertoire!
Ingredients For Peanut Butter Dream Bars
When it comes to whipping up a batch of Peanut Butter Dream Bars, the right ingredients are key to achieving that creamy, sweet, and slightly salty enjoyment that will have you reaching for seconds. Whether you’re juggling work calls or soccer practice, this recipe is your new best friend. It requires just a handful of simple ingredients, making it easy to assemble and irresistible to enjoy.
For the base of these Peanut Butter Dream Bars, you’ll need:
- 1 cup of graham cracker crumbs – These add a crunchy texture that complements the smooth peanut butter.
- ½ cup of unsweetened cocoa powder – This brings a rich chocolate flavor that balances the sweetness.
- ½ cup of melted butter – For binding everything together and adding a luxurious mouthfeel.
- 1 cup of creamy peanut butter – The star of the show, delivering that smooth, nutty goodness we all crave.
- 1 cup of powdered sugar – To sweeten the deal, making each bite a nice treat.
- ½ cup of chocolate chips – For an extra layer of indulgence, because who doesn’t love chocolate?
Feel free to get creative! Not a fan of graham crackers? You can swap them for crushed cookies, like Oreos, for a fun twist. Want a little crunch? Toss in some chopped nuts—peanuts or walnuts work wonders. If you’re feeling adventurous, drizzle some caramel on top before serving; it’s like a sweet hug for your taste buds! Your secret’s safe with me!
These Peanut Butter Dream Bars are not just a treat; they’re a canvas for your culinary creativity. So, gather your ingredients and get ready to dive into a dessert that’s as nice to make as it is to eat!
How To Make Peanut Butter Dream Bars
There’s something magical about the combination of peanut butter and chocolate that transports me back to my childhood. When I first discovered how easy it was to create Peanut Butter Dream Bars, I felt like a culinary wizard. Whether you’re juggling work calls or soccer practice, this recipe is your new best friend. With a few simple steps, you can have a nice treat that satisfies your sweet tooth and brings a smile to everyone’s face.
- Gather Your Ingredients: Start by collecting all your ingredients. You’ll need peanut butter, graham cracker crumbs, sweetened condensed milk, and chocolate chips. This step ensures you have everything at your fingertips, making the process smooth and stress-free.
- Measuring Ingredients: It’s important to measure accurately. I recommend using a kitchen scale for the graham cracker crumbs and chocolate chips for consistency. Trust me; it makes a world of difference in the final product!
- Mixing the Base: In a large mixing bowl, blend together the peanut butter and sweetened condensed milk until it’s smooth and creamy. This mixture is your heavenly base that will hold everything together.
- Adding the Crumbs: Fold in the graham cracker crumbs gently. You want to maintain that beautiful texture while ensuring everything is well combined. The aroma of peanut butter will fill your kitchen, making it hard to resist sneaking a taste!
- Melting the Chocolate: In a microwave-safe bowl, melt the chocolate chips in 30-second intervals, stirring between each. Let the chocolate melt slowly; it should be silky and smooth. This step is crucial—nobody likes burnt chocolate!
- Pouring and Spreading: Once melted, pour the chocolate over the peanut butter layer, spreading it evenly with a spatula. This glossy layer is like the cherry on top of your dream bars; it brings everything together beautifully.
Finally, refrigerate the bars until they’re set, usually about 2 hours. Once they’re chilled, slice them into squares and serve. With each bite, you’ll experience the creamy peanut butter mingling with the rich chocolate—truly a dessert worth dreaming about!
Expert Tips and Tricks
- Prep Ahead: To make your experience smoother, consider prepping the ingredients for your Peanut Butter Dream Bars the night before. This way, you can jump straight into mixing and baking after a long day.
- Choose Quality Ingredients: For the best flavor, use natural peanut butter without added sugars or oils. It will make a significant difference in the taste of your Peanut Butter Dream Bars, giving them a rich, nutty flavor.
- Experiment with Sweetness: Not everyone enjoys the same level of sweetness. If you prefer a less sugary treat, reduce the amount of sugar in the base or topping. Remember, you can always add a drizzle of honey or maple syrup before serving for that good balance.
- Texture Matters: For a nice crunch, consider folding in some chopped nuts or chocolate chips into the mixture before baking. This adds an unexpected texture to your Peanut Butter Dream Bars that will delight your taste buds.
- Let Them Cool: After baking, allow the bars to cool completely in the pan. This step is crucial as it helps them firm up and makes cutting them into squares a breeze. Patience is key!
- Perfect Storage: Store leftover bars in an airtight container at room temperature for up to a week. You can also freeze them for later—just wrap them tightly in plastic wrap and pop them into a freezer bag. Future you will thank present you!
- Serve with Flare: improve your Peanut Butter Dream Bars by serving them with a scoop of vanilla ice cream or a dollop of whipped cream. It’s like a party for your taste buds, and perfect for special occasions!
- Customize to Your Taste: Feel free to play around with different flavors. Swapping out peanut butter for almond butter or adding a sprinkle of cinnamon can create a whole new dessert experience.
Equipment Needed
Making Peanut Butter Dream Bars is as much about the right tools as it is about the ingredients. Whether you’re juggling work calls or soccer practice, having the proper equipment will streamline your process and improve your results. Trust me, these bars deserve every bit of attention! With the right tools, you’ll be on your way to a sweet treat that feels like a hug in dessert form.
- Mixing Bowl: A large mixing bowl is essential for combining all the ingredients seamlessly. Choose one that’s sturdy and easy to handle, as you’ll be mixing some sticky goodness!
- Measuring Cups and Spoons: Precision is key in baking, so grab a set of measuring cups and spoons. They’ll ensure you get the good balance of peanut butter and sugar for those dreamy bars.
- Spatula: A flexible spatula will help you scrape down the sides of the bowl and mix everything together. Plus, it’s perfect for spreading the mixture evenly in your baking dish.
- Baking Dish: A 9×9-inch baking dish is ideal for this recipe. It allows the bars to cook evenly and gives them that perfect chewy texture.
- Parchment Paper: Lining your baking dish with parchment paper makes for easy removal of the bars. No one wants to waste their delicious creation stuck to the pan!
- Knife or Pizza Cutter: Once your Peanut Butter Dream Bars have cooled, a sharp knife or a pizza cutter will help you slice them into perfect squares. Enjoy the clean cuts for a beautiful presentation!
- Cooling Rack: A cooling rack helps your bars cool evenly, preventing sogginess at the bottom. It’s a small yet crucial step for achieving that perfect texture.
With these essential tools at your side, you’ll be well-prepared to create incredible Peanut Butter Dream Bars that will make your taste buds dance. So gather your equipment, and get ready for a sweet adventure!
Variations and Substitutions
Whether you’re cooking for dietary needs or just craving a twist on the traditional, there are plenty of ways to make your Peanut Butter Dream Bars uniquely yours. This section highlights creative variations and easy substitutions that ensure everyone at the table can enjoy this nice dish.
- Dietary-Friendly Tweaks: If you’re making Peanut Butter Dream Bars for a vegan crowd, swap out cream or dairy for coconut milk or cashew cream. Not only does it work wonders, but it also adds a subtle sweetness.
- Gluten-Free Options: For a gluten-free version, replace regular pasta with zoodles or gluten-free grains. Your taste buds won’t even notice the difference!
- Protein Substitutions: Not a fan of tofu? Try chicken or shrimp instead—your secret’s safe with me! These proteins bring their own unique flavors and textures to the table.
- Seasonal Twists: Embrace the flavors of the season! In fall, add roasted squash for a touch of sweetness that’s like Thanksgiving in a bowl. During summer, fresh tomatoes and zucchini can brighten up the dish.
- Herbs and Spices: Experiment with fresh herbs like cilantro or dill to refresh the taste. A sprinkle of smoked paprika can also improve the dish, offering a warm, smoky note.
- Cheese Alternatives: If cheese is off the table, nutritional yeast comes to the rescue! It delivers a cheesy flavor without the dairy, making it perfect for plant-based eaters.
- Flavor Boosters: Want to spice things up? Add a dash of hot sauce or red pepper flakes to kick your Peanut Butter Dream Bars into high gear. It’s an easy way to add warmth and excitement!
By exploring these variations and substitutions, you’ll find that Peanut Butter Dream Bars can be a versatile dish that caters to everyone’s preferences. Enjoy experimenting and making it your own!
Serving and Storage Suggestions
Once you’ve prepared your delicious Peanut Butter Dream Bars, it’s time to think about how to serve and store it for maximum enjoyment. Whether you’re hosting a dinner party or prepping meals for the week, these tips will enhance your experience. Serving this dish is not just about the plate; it’s about the whole experience!
- Serving Size: Aim for generous portions that satisfy without overwhelming. A typical serving of Peanut Butter Dream Bars is about one to one-and-a-half cups, depending on your guests’ appetites.
- Garnishes: improve your dish with fresh herbs or a sprinkle of cheese. A few basil leaves or a dusting of Parmesan can turn your Peanut Butter Dream Bars into a great dish.
- Pairings: Consider serving it alongside a fresh salad or crusty garlic bread. Just like a perfect duet, the combination enhances the flavors and makes for a complete meal.
- Storage: If you have leftovers (lucky you!), store them in an airtight container in the fridge. Your Peanut Butter Dream Bars will stay fresh for up to three days.
- Freezing: For longer storage, freeze your dish in individual portions. This way, future dinners are as easy as reheating a comforting bowl of goodness!
- Reheating: When it’s time to enjoy leftovers, reheat gently on the stovetop or in the microwave. Add a splash of broth or a drizzle of olive oil to keep it moist and flavorful.
Following these serving and storage suggestions will ensure that your Peanut Butter Dream Bars remains delicious and enjoyable days after its initial creation. It’s like having a little taste of home whenever you need it!
Conclusion
At the end of the day, Peanut Butter Dream Bars isn’t just another meal; it’s a lifesaver that transforms your evenings from chaotic to calm. Whether you’re juggling work calls or soccer practice, this dish becomes your new best friend, ready to nourish and satisfy. With its good taste and comforting textures, it’s like a warm hug after a long day.
Moreover, the versatility of Peanut Butter Dream Bars allows you to make it your own. Feel free to experiment with seasonal ingredients or dietary-friendly swaps that match your family’s preferences. Each time you prepare this dish, you create an opportunity to infuse your kitchen with nice aromas and create lasting memories around the dinner table.
So, next time you’re faced with the question of “What’s for dinner?” remember that Peanut Butter Dream Bars is waiting to save the day. It’s not just about feeding your family; it’s about sharing love, laughter, and the simple joy of good food. Dive into this recipe and relish the nice experience it brings to your culinary repertoire. Happy cooking!
Print
Peanut Butter Dream Bars
Description
Delicious and creamy peanut butter bars with a crumbly base and topped with a rich chocolate layer.
Ingredients
- 1 cup peanut butter
- 1/2 cup unsalted butter, melted
- 1 cup granulated sugar
- 1 cup brown sugar, packed
- 2 cups graham cracker crumbs
- 1 cup powdered sugar
- 1 cup semi-sweet chocolate chips
- 1/4 cup heavy cream
Instructions
- Preheat the oven to 350°F (175°C).
- In a large bowl, mix peanut butter, melted butter, granulated sugar, and brown sugar until well combined.
- Add the graham cracker crumbs and mix until the mixture is evenly moistened.
- Press the mixture into the bottom of a greased 9×13 inch baking dish.
- In another bowl, mix powdered sugar with melted chocolate chips and heavy cream until smooth.
- Spread the chocolate mixture over the peanut butter layer in the baking dish.
- Refrigerate for at least 2 hours until set.
- Cut into bars and serve cold.
Notes
- For a richer flavor, use dark chocolate chips.
- Store leftovers in an airtight container in the refrigerator.
- Make sure the bars are completely set before cutting them.
Nutrition
- Serving Size: 1 bar
- Calories: 200
- Sugar: 15g
- Sodium: 100mg
- Fat: 10g
- Saturated Fat: 4g
- Unsaturated Fat: 5g
- Trans Fat: 0g
- Carbohydrates: 25g
- Fiber: 1g
- Protein: 4g
- Cholesterol: 10mg


