
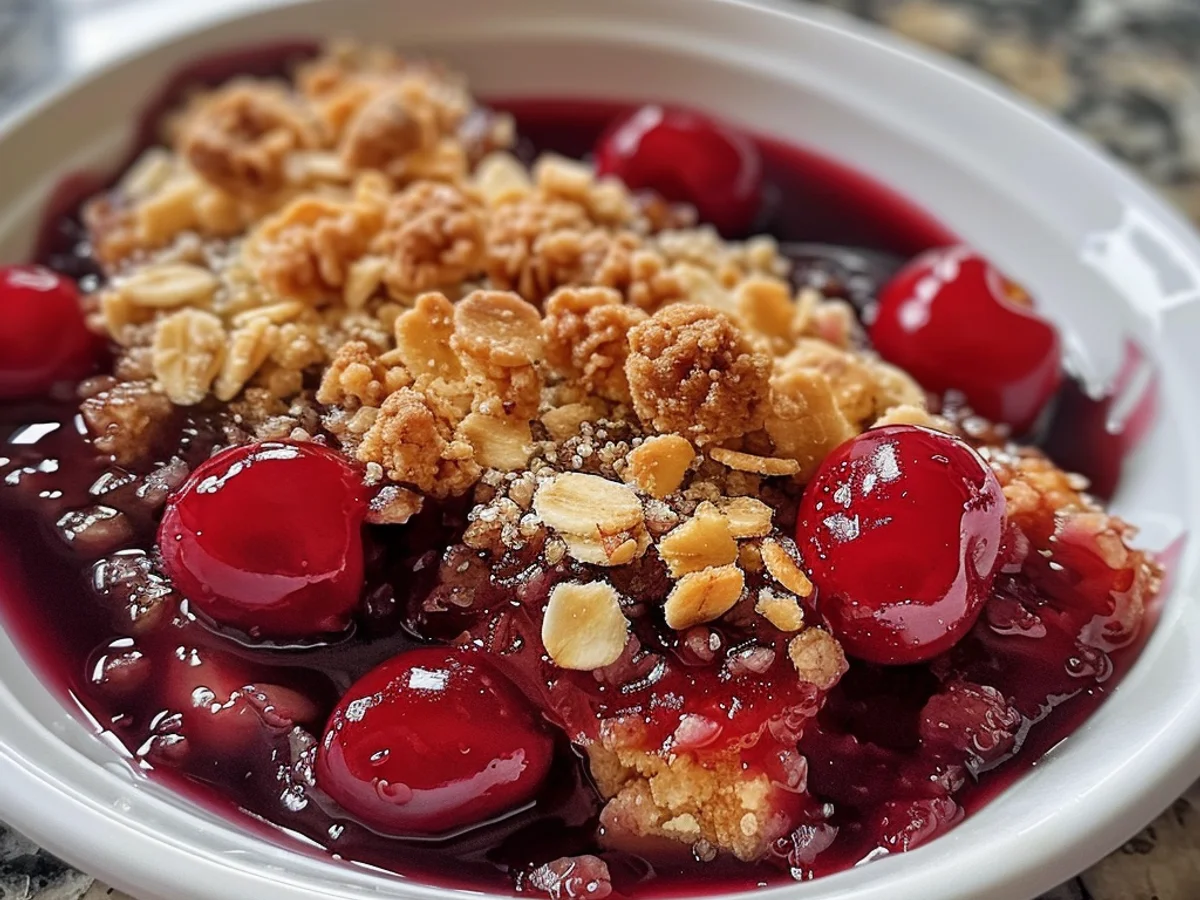
Introduction to Easy Homemade Cherry Crumble
There’s something special about a warm dessert that brings back sweet memories. I still remember the first time I made Easy Homemade Cherry Crumble with my grandmother. We sat in her cozy kitchen, the air filled with the sweet scent of fresh cherries and buttery crumble. Whether you’re juggling work calls or soccer practice, this recipe is your new best friend. It’s simple yet satisfying, excellent for those evenings when you want to impress without the fuss. This cherry crumble is a delightful way to celebrate summer’s bounty and make everyone feel at home. Get ready to enjoy in a classic dessert that’s as easy to make as it is tasty!
Why You’ll Love This Easy Homemade Cherry Crumble
Picture this: a busy weeknight when the clock seems to tick faster than usual. Whether you’re juggling work calls or soccer practice, this Easy Homemade Cherry Crumble is your new best friend. It’s like a cozy blanket for your taste buds, wrapping you in warmth and sweetness with every bite. No more 6 PM panic-dinner’s ready faster than a microwave meal, and it tastes a million times better!

Not only does it save time, but it also brings a delightful burst of flavor that will have your family asking for seconds. The juicy cherries are perfectly complemented by a crumbly topping that’s just the right amount of crunchy and sweet. Plus, this dish is easily adaptable, making it a versatile option for any occasion. You’ll love how it transforms simple ingredients into a comforting dessert that feels like a warm hug. So, gather your cherries and get ready to whip up this crowd-pleaser!
Ingredients for Easy Homemade Cherry Crumble
When it comes to making Easy Homemade Cherry Crumble, the ingredients are simple yet essential for creating that excellent balance of sweet and tart. You can whip this up with ingredients you might already have in your pantry, making it a go-to recipe when you’re pressed for time. Whether you’re juggling work calls or soccer practice, this recipe is your new best friend.
To start, you’ll need fresh cherries. Their juicy sweetness is the star of this dish, bringing a vibrant flavor that just can’t be substituted. Next, grab some granulated sugar to enhance that natural cherry sweetness. You’ll also need all-purpose flour for the crumble topping-this will give it that delightful texture.
Don’t forget the oats! They add a hearty bite to the crumble, creating a lovely contrast to the softness of the cherries. For richness, opt for unsalted butter; it melds beautifully with the other ingredients, making the crumble irresistibly buttery. Finally, a sprinkle of cinnamon brings warmth and depth to the dish, elevating it to comfort food status.
If you want to switch things up a bit, consider adding a handful of nuts, like chopped almonds or walnuts, for an extra crunch. Not a fan of cherries? You can easily substitute them with blueberries, peaches, or even apples-your secret’s safe with me! For a touch of brightness, a splash of vanilla extract can work wonders, making your Easy Homemade Cherry Crumble even more aromatic.
Keep in mind, you can make this dish your own by adjusting the sweetness. If you prefer, maple syrup can take the place of sugar for a unique twist. With these ingredients in hand, you’re well on your way to crafting a dessert that feels like a warm hug on a plate.
How to Make Easy Homemade Cherry Crumble
Making Easy Homemade Cherry Crumble is a delightful journey that transforms simple ingredients into a cozy dessert. Whether you’re juggling work calls or soccer practice, this recipe is your new best friend. With its sweet cherries and crispy topping, this dish is a showstopper that requires minimal fuss. Let’s dive into the steps that will have your kitchen smelling heavenly in no time!
- Step 1: Prepare Your Cherry Filling
Start by washing your fresh cherries under cold water. Remove the stems and pits-this can be a bit tedious, but it’s worth it for that juicy filling! If you’re using frozen cherries, no worries! Just let them thaw and drain excess moisture. In a bowl, combine the cherries with sugar, a hint of lemon juice, and a sprinkle of cornstarch. This mixture will create a luscious filling that bubbles up beautifully in the oven. - Step 2: Create the Crumble Topping
In a separate bowl, mix together rolled oats, flour, brown sugar, and a pinch of salt. Use your fingers to work in cold butter until the mixture resembles coarse crumbs. This is where the magic happens-the butter gives the crumble its delightful texture! You can also add chopped nuts or spices like cinnamon for extra flavor. Remember, the goal is a crumbly yet cohesive mixture. - Step 3: Assemble Your Crumble
Preheat your oven to 350°F (175°C). Grease a baking dish-an 8-inch square works perfectly. Pour the cherry filling into the dish, spreading it evenly. Next, sprinkle the crumble topping generously over the cherries. Don’t worry about covering every inch; some cherries peeking through adds to the visual appeal! - Step 4: Bake to Perfection
Place your dish in the preheated oven and bake for about 30-35 minutes. You’ll know it’s ready when the topping turns golden brown and the cherry juices are bubbling around the edges. The aroma will fill your home, enticing everyone nearby! - Step 5: Serve and Enjoy
Once out of the oven, let the Easy Homemade Cherry Crumble cool slightly-it’s tempting to dig in right away, but a few minutes will help everything set. Serve it warm with a scoop of vanilla ice cream or a dollop of whipped cream for a truly indulgent experience. Enjoy each bite as the sweet cherries and crunchy topping dance on your palate!
There you have it! With these simple steps, you’ll be able to whip up a tasty Easy Homemade Cherry Crumble that’s sure to impress. Enjoy the process and the delightful results!
Tips for Success
Success in the kitchen often hinges on a few key tips, especially when preparing a delightful dish like Easy Homemade Cherry Crumble. Whether you’re a novice or a seasoned chef, these simple strategies will elevate your crumble to new heights.
- Pro tip: Allow your cherry crumble to rest for 10-15 minutes after baking. This patience pays off by letting the juices settle, making for a more enjoyable slice.
- Underseason? A pinch of salt can be a game changer! It enhances the flavors of the cherries and the crumble topping.
- Texture matters: For a crunchy topping, ensure your butter is cold and cut it into the flour until it resembles coarse crumbs.
- Fresh vs. frozen: While fresh cherries shine, frozen cherries work well too. Just remember to drain excess liquid for a excellent bake.
- Flavor boost: Add a splash of vanilla extract or almond extract to the cherry filling for an aromatic twist.
- Serving suggestion: Pair your warm cherry crumble with a scoop of vanilla ice cream. The contrast of temperatures is heavenly!
With these tips in mind, your Easy Homemade Cherry Crumble will not only be tasty but also a crowd-pleaser. Enjoy creating this comforting dessert!
Equipment Needed
Creating the excellent Easy Homemade Cherry Crumble doesn’t require a chef’s arsenal; a few essential tools will do the trick. Whether you’re an experienced baker or a novice in the kitchen, having the right equipment can make all the difference in your crumble-making adventure. Here’s what you’ll need:
- Mixing Bowl: A large mixing bowl is excellent for combining your cherry filling and crumble topping. A glass or stainless steel bowl works well.
- Measuring Cups and Spoons: Precise measurements are key. Use standard measuring cups for dry ingredients and liquid measuring cups for accuracy.
- Pastry Cutter or Fork: Use a pastry cutter or a fork to mix the crumble ingredients together until they resemble coarse crumbs. No need for fancy gadgets here!
- Baking Dish: A 9×9 inch baking dish is ideal for this recipe, but a pie plate can also work in a pinch.
- Oven Mitts: Don’t forget these! You’ll want to protect your hands when pulling that warm cherry crumble out of the oven.
- Serving Spoon: A sturdy serving spoon makes it easy to dish up that tasty cherry crumble once it’s out of the oven.
With these essential tools in hand, you’ll be ready to whip up a delightful Easy Homemade Cherry Crumble that will impress your family and friends. Happy baking!
Variations
When it comes to Easy Homemade Cherry Crumble, the beauty lies in its versatility. Whether you’re looking to cater to dietary needs or just want to mix things up, there are plenty of creative variations to explore. Here are some flavorful twists to elevate your cherry crumble experience:
- Dietary-Friendly Tweaks: For a dairy-free version, swap out traditional butter for coconut oil or vegan butter. Your dairy-free friends will thank you!
- Gluten-Free Option: Use almond flour or a gluten-free all-purpose blend instead of regular flour. This ensures everyone can enjoy a slice of the crumble without worry.
- Fruit Fusion: Mix fresh cherries with other seasonal fruits like peaches or blueberries. This adds a delightful twist and a burst of color to your Easy Homemade Cherry Crumble.
- Nutty Crunch: For an added texture, include chopped nuts such as walnuts or pecans in the crumble topping. It enhances the flavor and provides a satisfying crunch.
- Spice It Up: Add a pinch of cinnamon or nutmeg to the fruit filling for a warming spice that transforms the flavor profile completely. It’s like a cozy hug for your taste buds!
- Sweetness Swap: If you prefer a healthier option, consider using maple syrup or honey instead of brown sugar in the topping. This not only reduces refined sugar but adds a unique depth of flavor.
- Seasonal Twists: Embrace the seasons by adding roasted squash or apples in the fall. It’s like Thanksgiving in a bowl, with flavors that celebrate the harvest!
With these variations, your Easy Homemade Cherry Crumble can be a dish that evolves with your tastes and dietary needs, ensuring that it never gets old! Enjoy the freedom to experiment and make it your own.
Serving Suggestions
When it comes to enjoying your Easy Homemade Cherry Crumble, the right accompaniments can elevate your dessert experience to new heights. Whether you’re hosting a dinner party or indulging in a cozy night in, these serving suggestions will help you make the most of this delightful dish.
- Serve Warm: Enjoy your cherry crumble warm from the oven, allowing the juicy cherries to burst with flavor and the topping to retain its delightful crunch.
- Top with Ice Cream: A scoop of vanilla or almond ice cream melts beautifully over the warm crumble, creating a luscious contrast that’s hard to resist.
- Drizzle with Cream: Pouring a bit of heavy cream or a dollop of whipped cream adds a creamy richness that complements the tart cherries perfectly.
- Pair with Coffee or Tea: A robust cup of coffee or a fragrant herbal tea rounds out the meal, making for a comforting dessert experience.
- Add Fresh Mint: Garnishing with fresh mint leaves not only looks beautiful but also adds a refreshing touch that balances the sweetness of the crumble.
These serving suggestions will help you create memorable moments around the table with your Easy Homemade Cherry Crumble, turning it into a star centerpiece for any occasion.
Print
Easy Homemade Cherry Crumble: A enjoyable Treat Awaits!
- Prep Time: 15 minutes
- Cook Time: 35 minutes
- Total Time: 50 minutes
- Yield: 8 servings 1x
- Category: Dessert
- Cuisine: American
Description
A simple and delicious recipe for homemade cherry crumble with a buttery oat topping.
Ingredients
- 4 cups fresh cherries, pitted
- 1 cup granulated sugar
- 1 tablespoon cornstarch
- 1 tablespoon lemon juice
- 1 cup rolled oats
- 1 cup all-purpose flour
- 1/2 cup brown sugar
- 1/2 cup unsalted butter, melted
- 1 teaspoon ground cinnamon
Instructions
- Preheat the oven to 350°F (175°C).
- In a mixing bowl, combine cherries, granulated sugar, cornstarch, and lemon juice. Pour this mixture into a greased baking dish.
- In another bowl, mix together rolled oats, flour, brown sugar, melted butter, and cinnamon until crumbly.
- Spread the oat mixture evenly over the cherry filling.
- Bake in the preheated oven for 30-35 minutes, or until the topping is golden brown and the cherries are bubbling.
- Remove from the oven and let cool slightly before serving.
Notes
- Serve warm with vanilla ice cream for an extra treat.
- Feel free to substitute other fruits like blueberries or peaches.
- Can be prepared a day in advance and baked before serving.
Nutrition
- Serving Size: 1 serving
- Calories: 250
- Sugar: 20g
- Sodium: 150mg
- Fat: 10g
- Saturated Fat: 5g
- Carbohydrates: 38g
- Fiber: 3g
- Protein: 3g
- Cholesterol: 15mg


